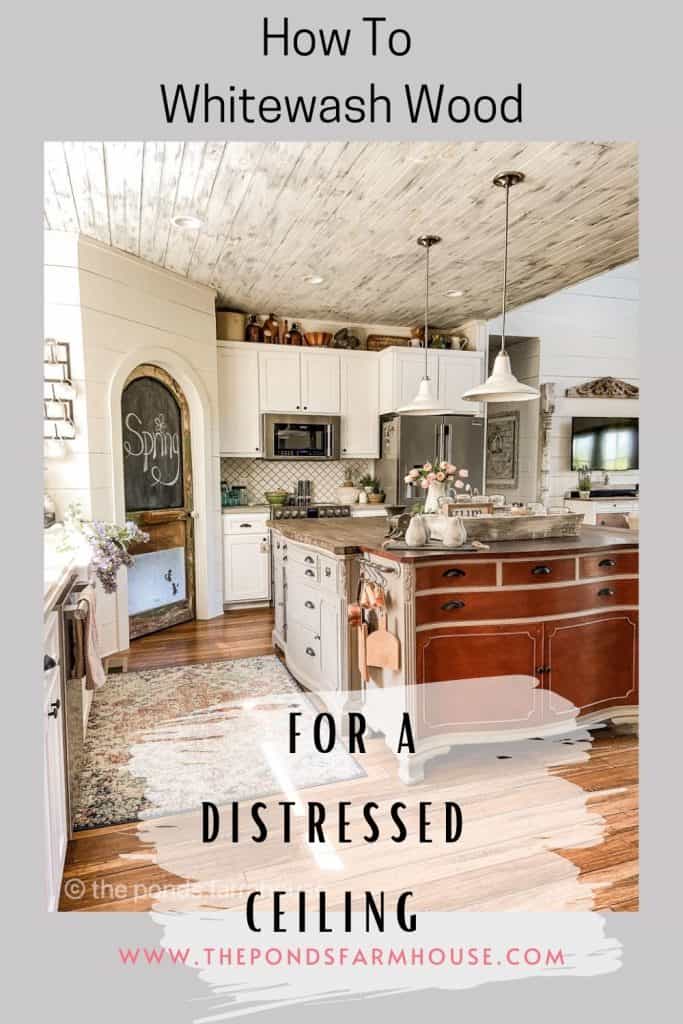
How To Whitewash Wood For A Distressed Rustic Chic Style
Hey Friends, you know I love old chippy paint and wooden pieces that have a vintage feel. However, many of my projects involve working with new wood. The tongue-and-groove wood ceiling in our new farmhouse was a challenge. I wanted a distressed rustic whitewash appearance to contrast with the pure white shiplap walls. I developed this two-step DIY whitewashed wood tutorial to achieve the appearance of old, distressed wood when working with new lumber. When you follow these instructions, the paint will appear to have worn off slowly over time. This technique can also be used for any new wood project to achieve an aged, distressed appearance. I’ll share some additional projects we have since whitewashed.
(Posts on The Ponds Farmhouse may contain affiliate links. As an Amazon Associate, I earn from qualifying purchases. See the full disclosure details here.)

How To Whitewash New Wood For An Aged Appearance
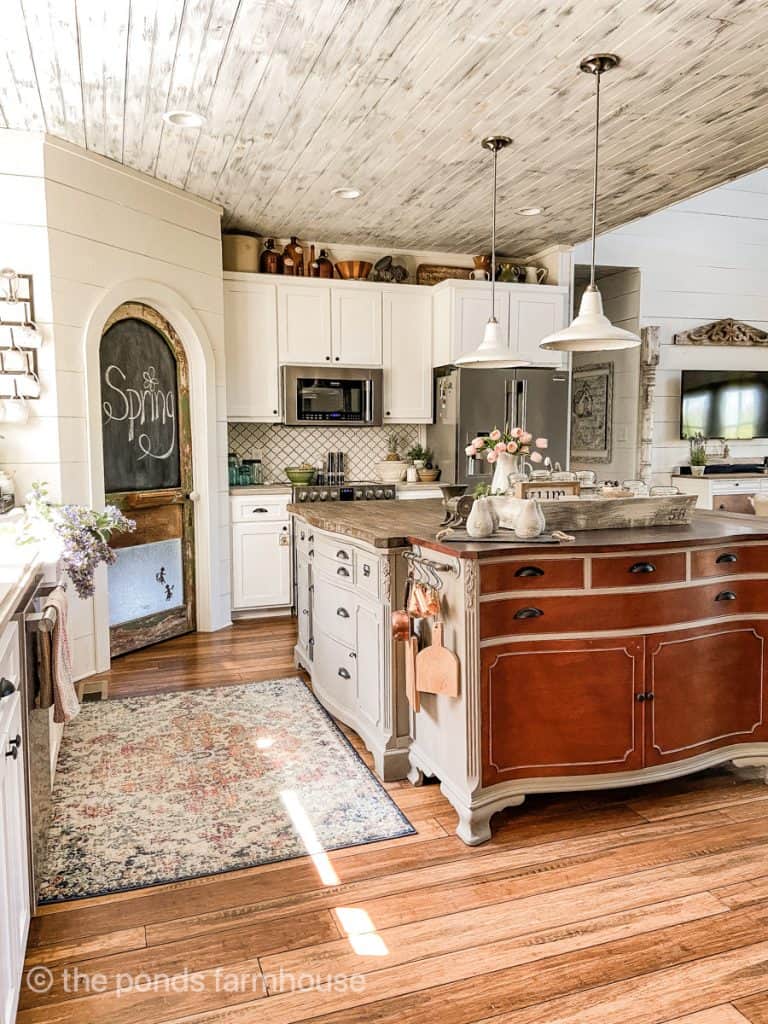
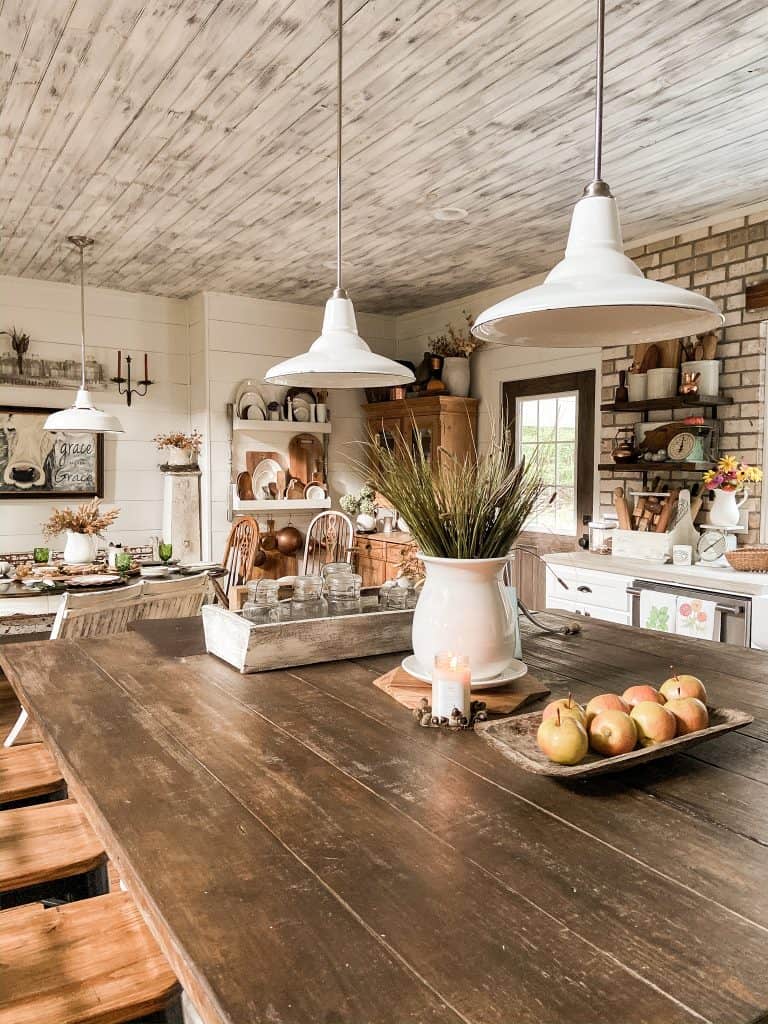
One of the most asked questions about our farmhouse is, “How did we get our kitchen ceiling to look like reclaimed wood?” Here’s the answer.
First, I recommend creating a sample board to determine your desired appearance. If you want to start with something other than the ceiling, a sample board or two will help you get your technique down pat.
Use a piece of the same wood as your project or ceiling. Then, allow your sample to dry completely before determining if you’ve achieved the desired look.
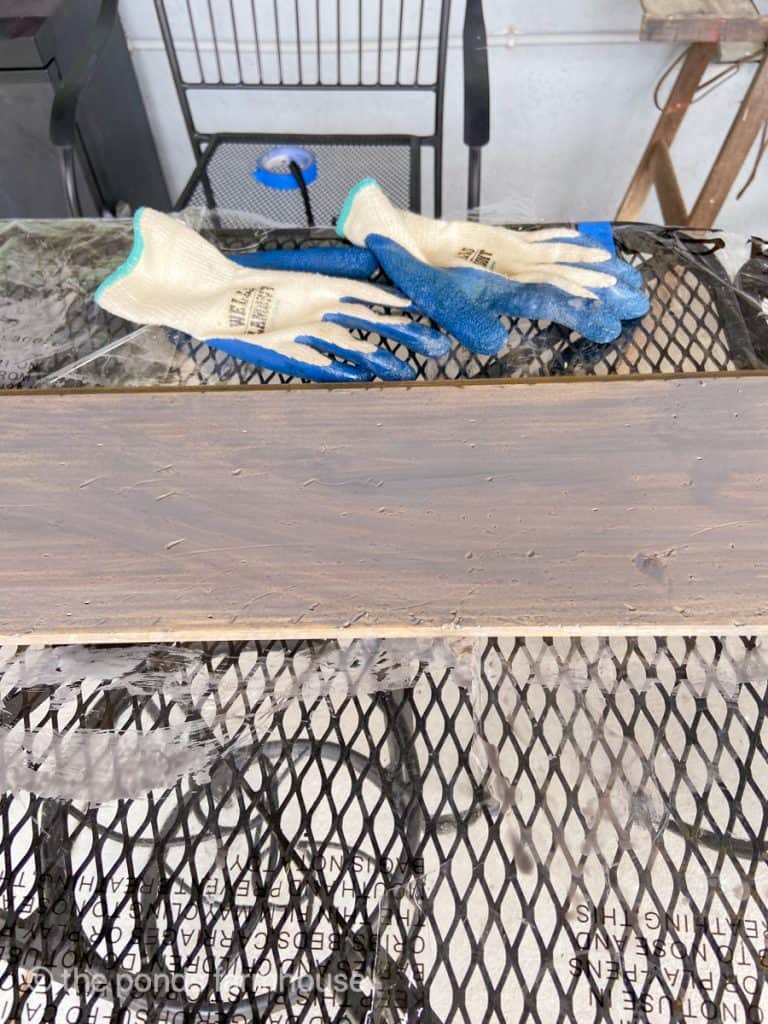
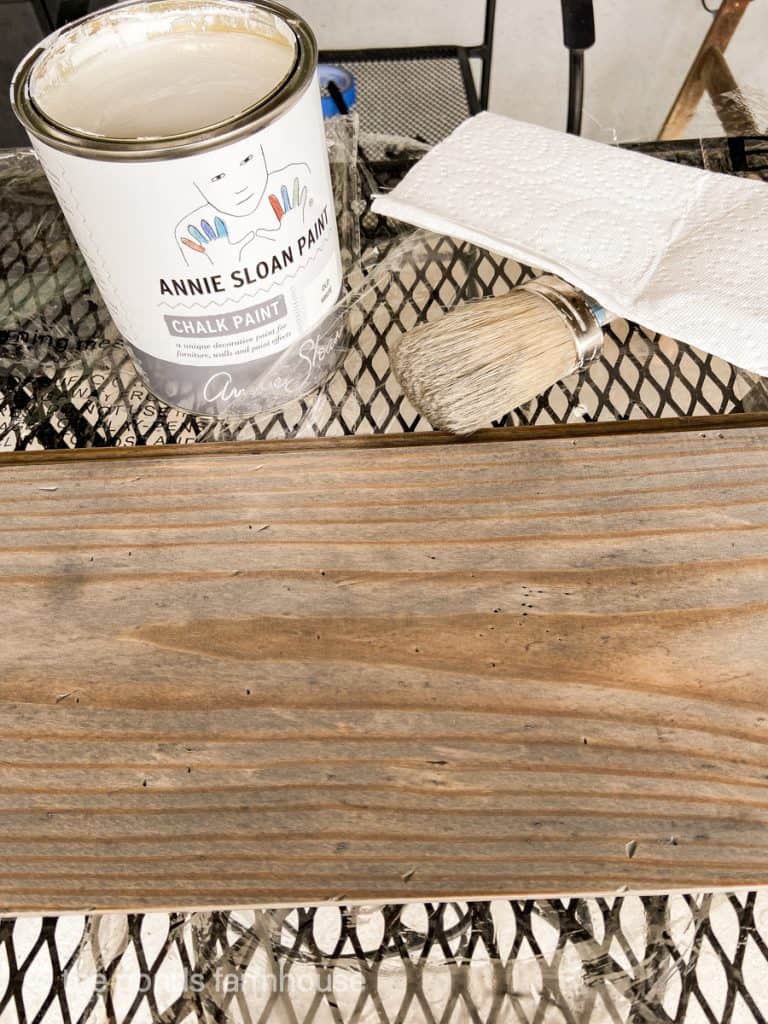
Materials Needed to Whitewash Wood
The ceilings in the farmhouse are made of new pine wood beaded board, which will look slightly pinkish with a thin coat of white paint. Therefore, begin with a gray stain to achieve a distressed, whitewashed look. This will give the new wood an aged rustic chic look.
- Classic Grey Stain
- White Paint Color of your choice – I used Benjamin Moore White Dove
- Rags are used to apply stain and wipe excess paint.
- Paint Brush
- Protective Gloves
This technique works well with any new wood project, such as this Easy Made Farmhouse Table Riser.
Insider Tip: Hindsight
First, here’s something we should have done differently. Hindsight is 20/20, or so I’m told.
We decided on this technique after the pine wood ceilings were installed. This technique would have been easier and more cost-effective if the boards had been stained before they were 20 feet in the air.
How to Whitewash Wood?
Today, I’m sharing a sample board, just like the one I shared with my painting contractor, to show how the whitewashed ceiling should look. Fortunately, he was willing to duplicate this technique on the ceiling.
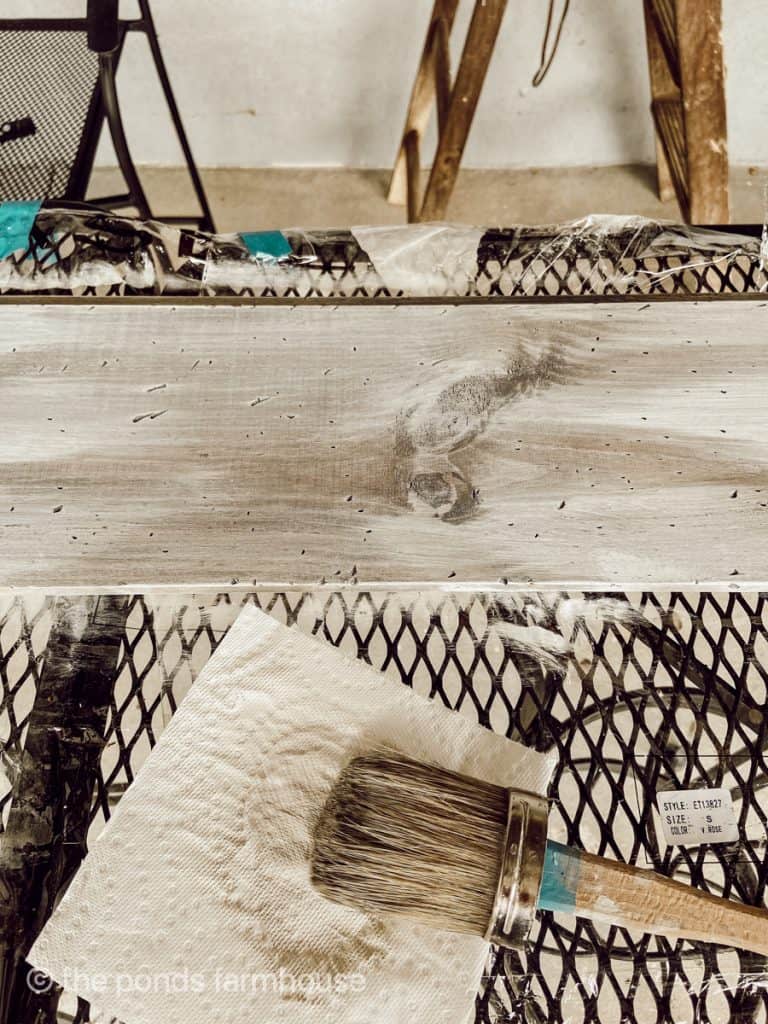
How To Make New Pine Wood Look Old – Sample Board
To make new pine wood look old, begin with the gray penetrating stain. Using a soft cloth, gently wash the stain over the entire surface of the wood, following the grain as you apply it.
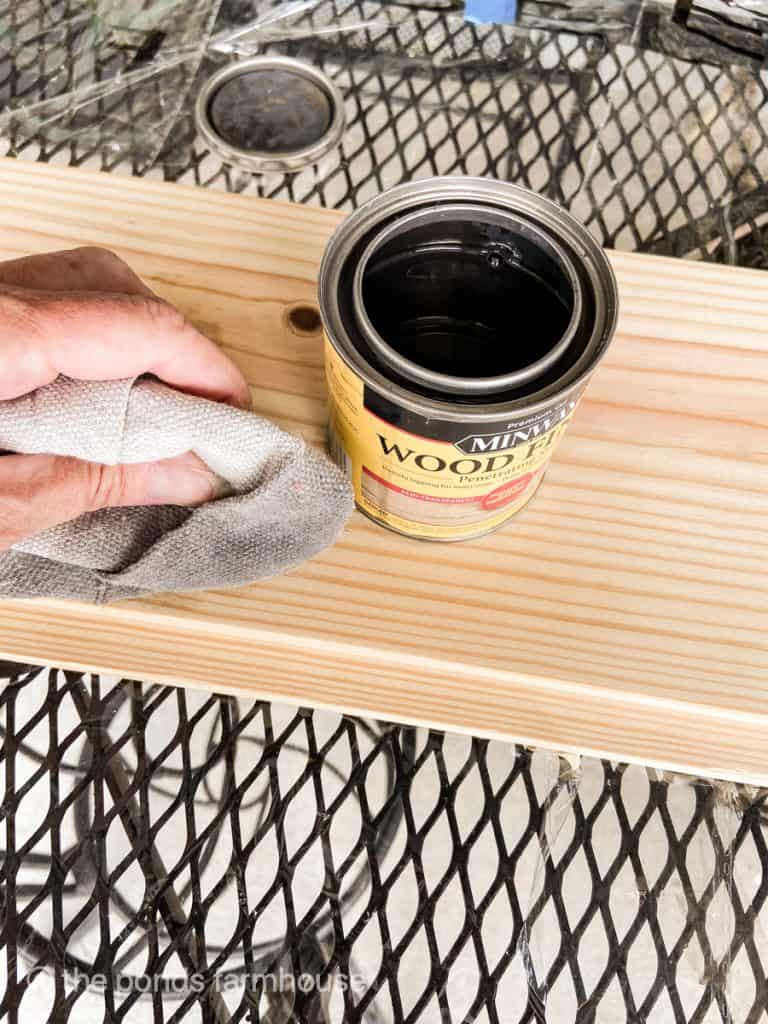
Once dry, the gray stain will make the wood appear aged or old.
If you whitewash a new pine board without adding stain, the wood will have a pinkish or pickled appearance instead of gray.
How To Whitewash Pine Wood?
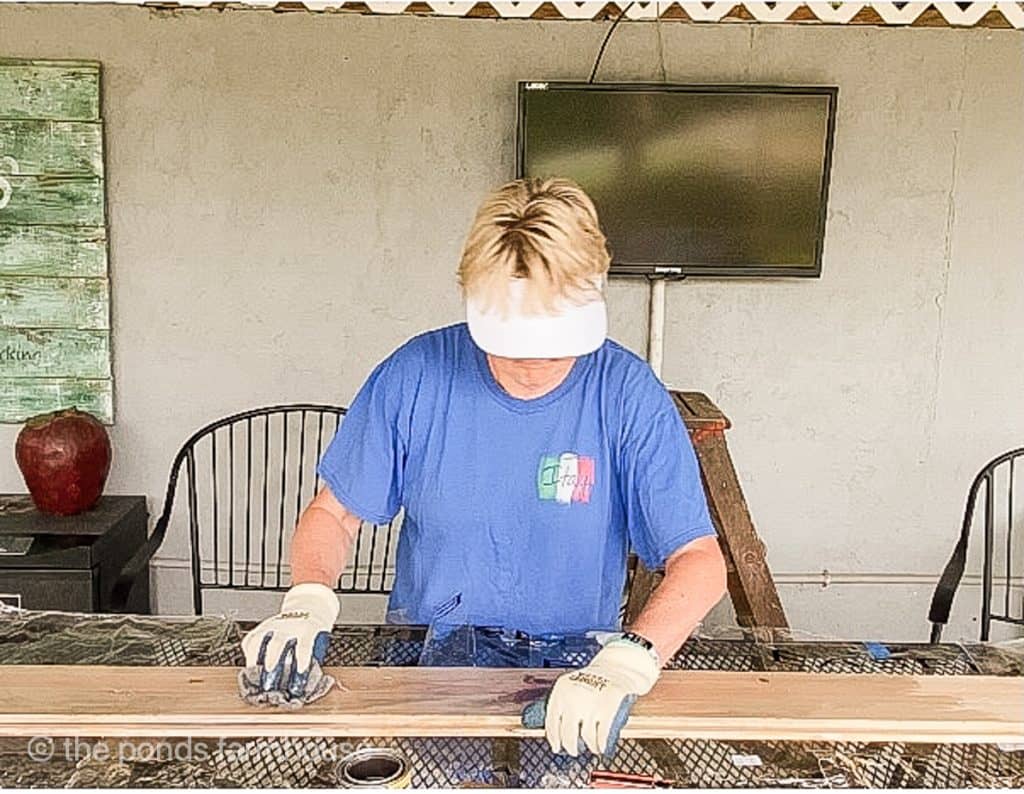
Next, it’s time to add whitewash to your stained pine wood.
To achieve a distressed, whitewashed appearance, you must wipe the excess paint from your brush before applying it to your wood. This dry brush technique leaves a thin coat of paint over the surface.
Insider note: For this example, I used chalk paint instead of investing in interior latex paint for my ceiling. For the record, the ceiling paint was White Dove by Benjamin Moore, the same color used on the shiplap walls.
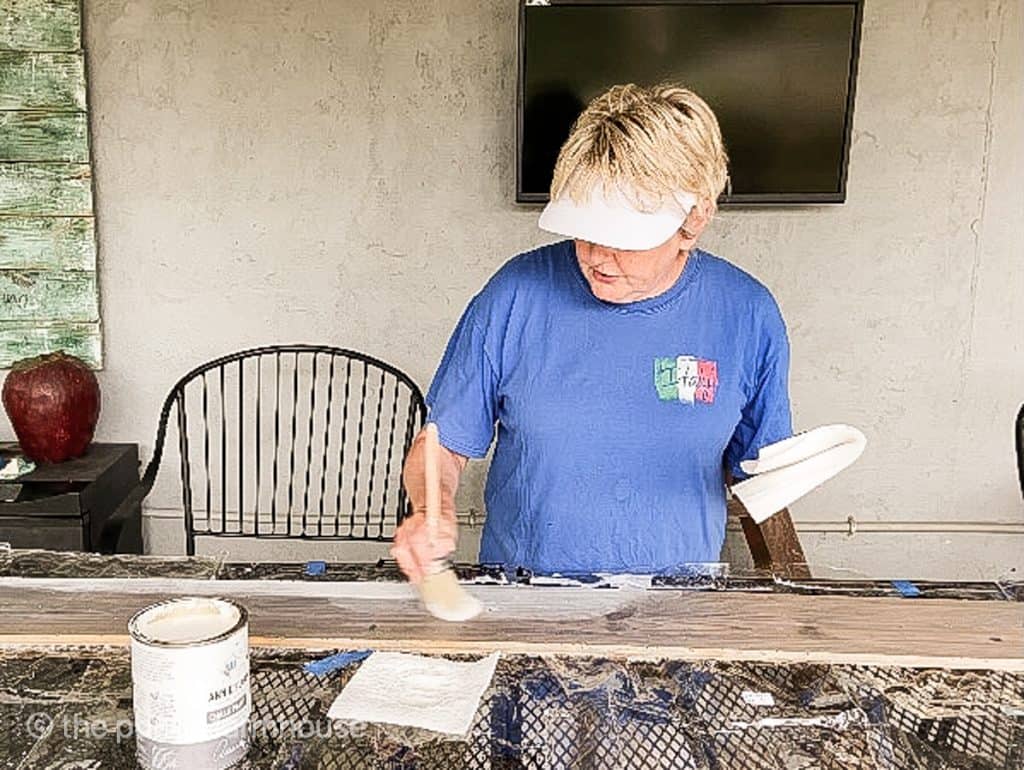
Begin by applying a small amount of white paint to your brush. Then, remove excess paint from the brush using a rag, cloth, or paper towel. Next, lightly swipe the paintbrush over the surface of the wood without completely covering the wood and the stain.
Once again, follow the grain of the wood while applying the paint. You should see random areas of exposed stain, and the paint should appear worn and faded with age.
Below is the sample board for whitewashing pine wood. You want to achieve this look.
This is the same technique used for our Address Sign above the front doors.

To learn more about using chalk paint, see the How to Use Chalk Paint Tutorial.
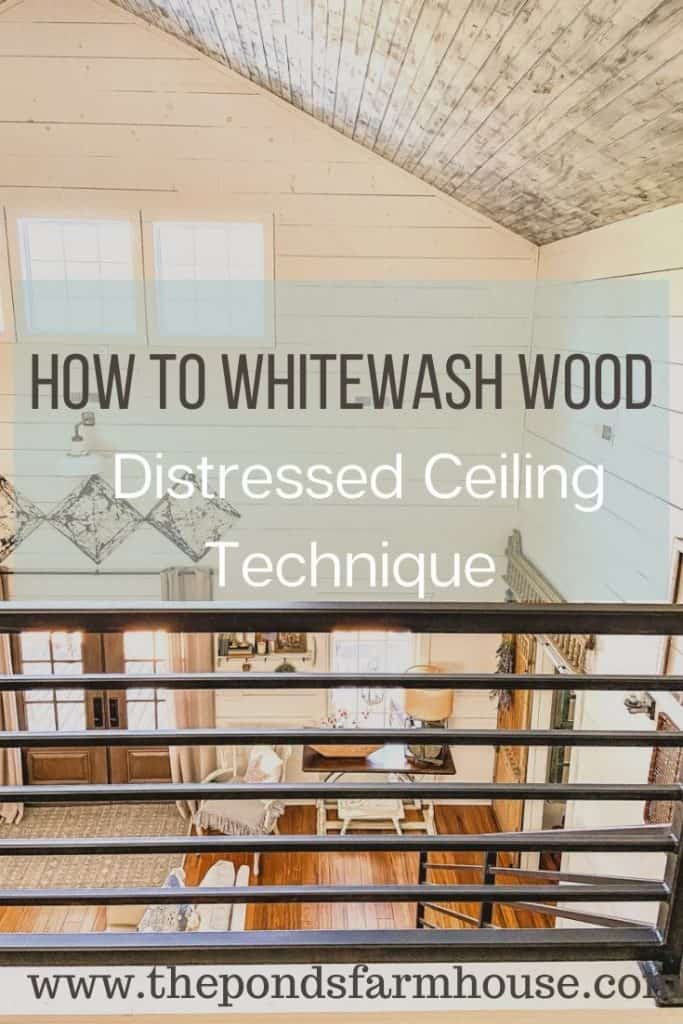
Whitewash Technique on the Wood Ceiling
Here is a good view of the whitewash-on-wood technique underneath the stairs.

To ensure that the paint colors work well together, we used the same White Dove paint as was used on the shiplap walls.

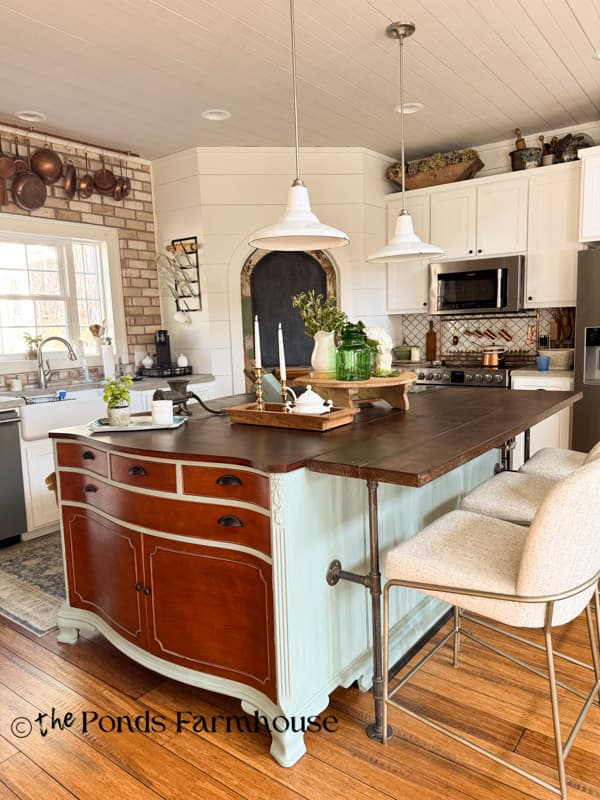
In addition, the DIY Island countertop was aged to look like old barn wood using a similar technique.
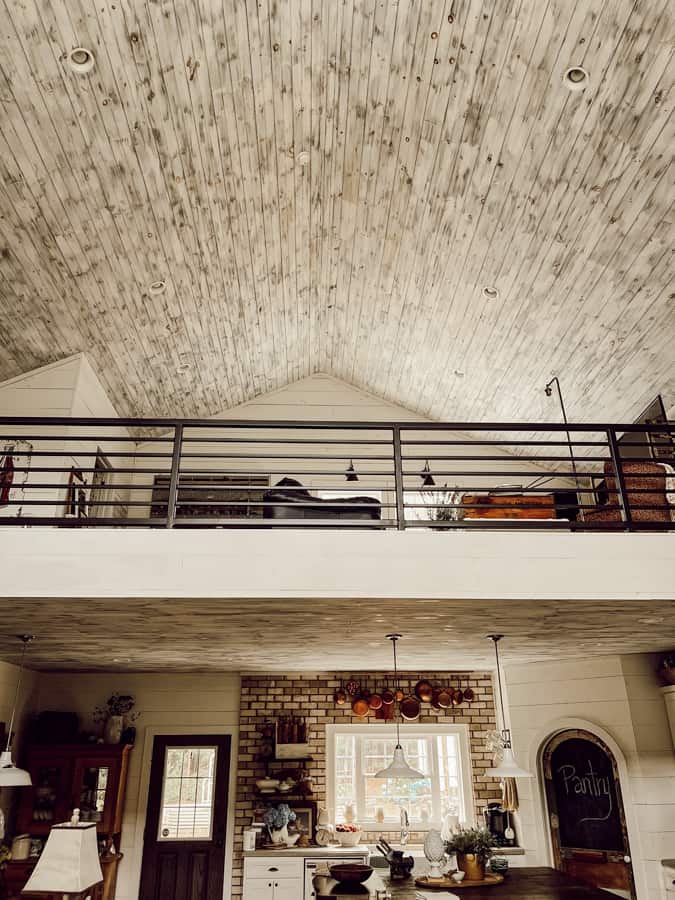
In addition to the kitchen ceiling, the vaulted ceiling in the living room and loft also received the kitchen ceiling idea and technique.
As you can see, the high ceilings are a focal point of the farmhouse. I was so thankful for a painter willing to attempt my crazy idea while standing on a 20-foot scaffold.
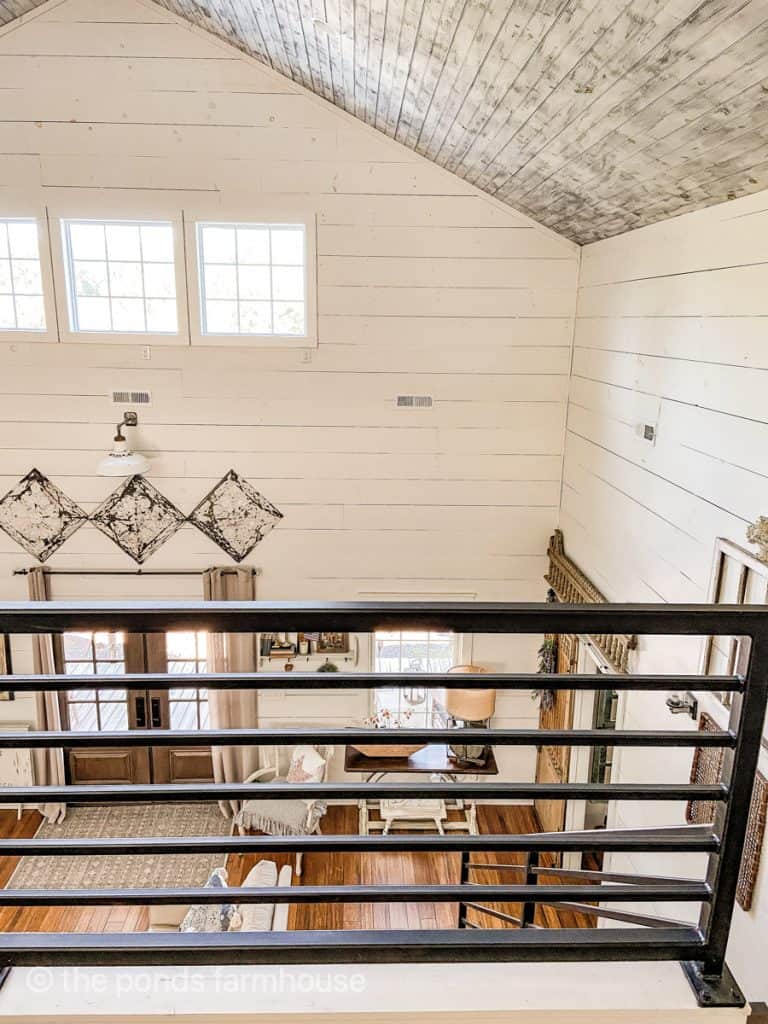
To see a tour of the loft area, check out – Best Modern Farmhouse Tips & Tour.
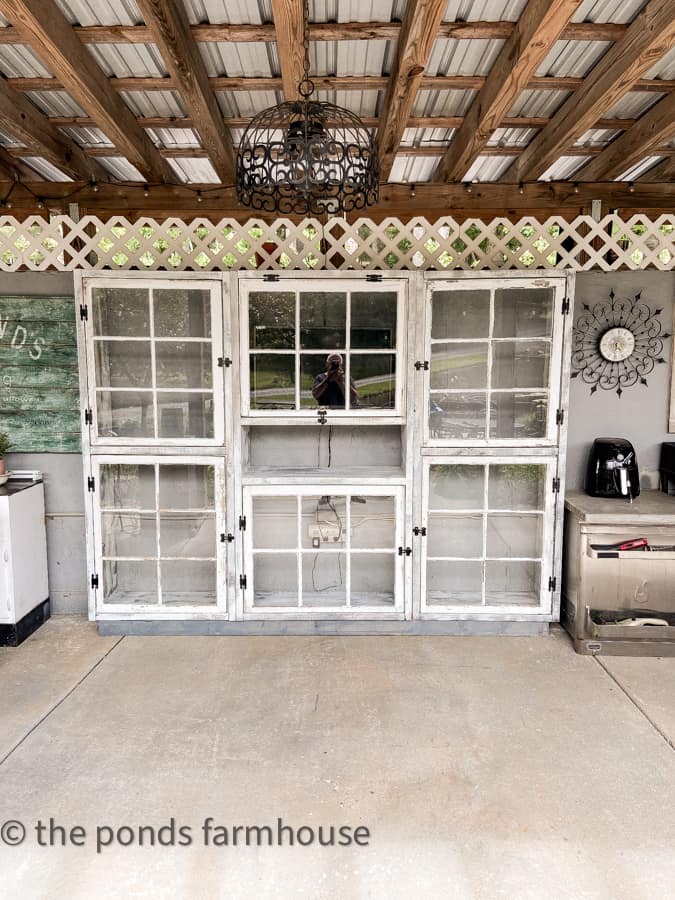
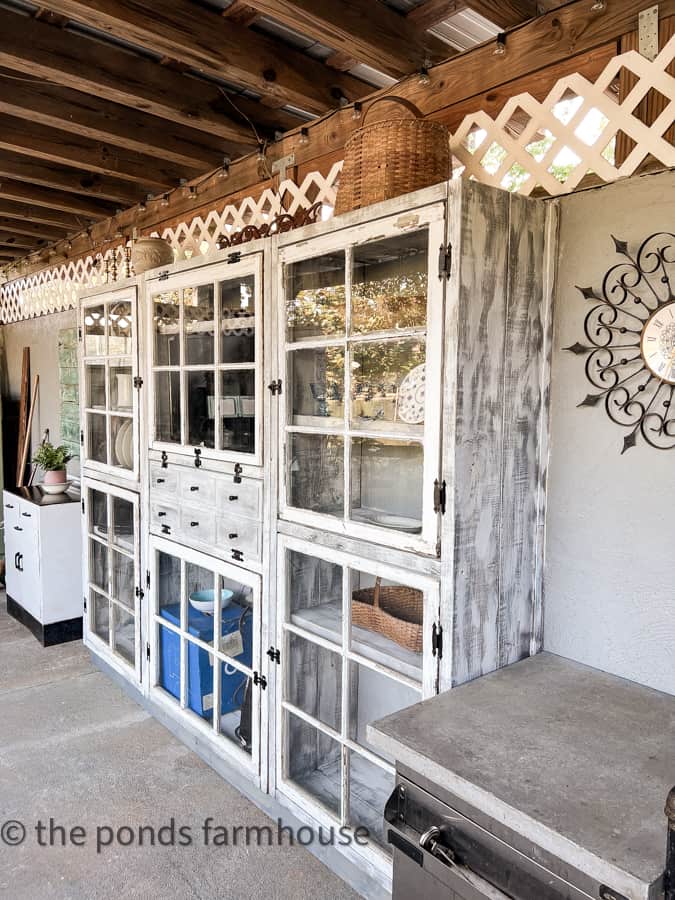
Whitewash Outdoor Kitchen Cabinet
When we decided to build a cabinet for our outdoor kitchen, we used reclaimed old windows and new pine lumber. To achieve the shabby-chic look we wanted, we used the same whitewashing technique.

Thank you so much for stopping by today. I look forward to sharing my next adventure with you.

Pin It To Remember It
Did you find some great ideas you’d like to save for future reference? Hover over the images you’d like to save and pin to your favorite Pinterest Boards when you see the PIN button.


Wow, so much work Rachel but totally worth it! These ceilings are amazing. Thank you for the tip on choosing the right color stain and chalk paint vs latex paint too. I love the way these came together. They’re really beautiful! Hope you’re having the best weekend, CoCo
CoCo,
I really appreciate you for stopping by and commenting. I hope you have the best day.
Thanks for sharing all of this great information Rachel. Beautiful!
Kim,
Thanks so much for stopping by.
Rachel, I can’t even imagine doing this work overhead 20 feet in the air! You must have felt like Michelangeo! It is certainly beautiful and looks so natural. What a great tutorial and so fun to see pictures of your gorgeous kitchen.
Mary,
Thanks so much. I really appreciate this.
Wow, I need to try this! Thanks for the great tutorial! Your work is fantastic.
Cindy,
You are so sweet. Thanks so much.
What a cool technique! Love how it looks!
Stacy,
Thanks so much. I appreciate your support.
I LOVE it! Your home is gorgeous. I’m in love with your kitchen. 💕 You always have such beautiful ideas.
Mandy,
Thanks so much. I’m so glad you liked this.
Hello! Thanks for the tutorial. I’m confused, however. It appears you used Annie Sloane chalk paint to white wash the ceiling but also talk about using the White Dove paint. So did you use both on the white washed ceiling? And if you used the chalk paint, did you wax it to seal it? I’m looking to white wash the wood we’re going to use on our 17′ x 19′ room’s vaulted ceiling but there’s no way we can wax all of that. Thanks so much for your response!
Julie,
I’m sorry for the confusion. I’ll go back and make sure to clarify the post. I used White Dove from Benjamin Moore on the ceiling. When I’ve done the same technique for small projects, I’ve used the Annie Sloan Chalk Paint in Old White. You would not want to attempt a project of this size with Chalk Paint. The White Dove works perfectly for what we were trying to achieve.
Thanks so much for bringing this to may attention. I hope this helps.
@Rachel, I did a white wash on an outdoor ceiling and now mold is. Appearing in places. Should I have put on some poly afterwards
Keith,
I’ve not done this technique outside, however when painting exteriors I always purchase a mold resistant paint. That may not guarantee that mold will not appear. You may want to talk someone who has experience with exterior paint.
I painted ceilings at my last house and it was sooo much work. I will definitely hire it out if I ever have to again.
Yes, I’m glad my painter was willing.
I am getting ready to attempt this process. I love the distressed look. It will be for my added on room with vaulted ceilings. I have purchased the gray stain and I already had the white chalk paint.
Thanks so much for sharing this.
Janet,
Oh, I’m so glad you liked this idea. Please let me know how it all turns out. Thank you for following along and have a blessed day.