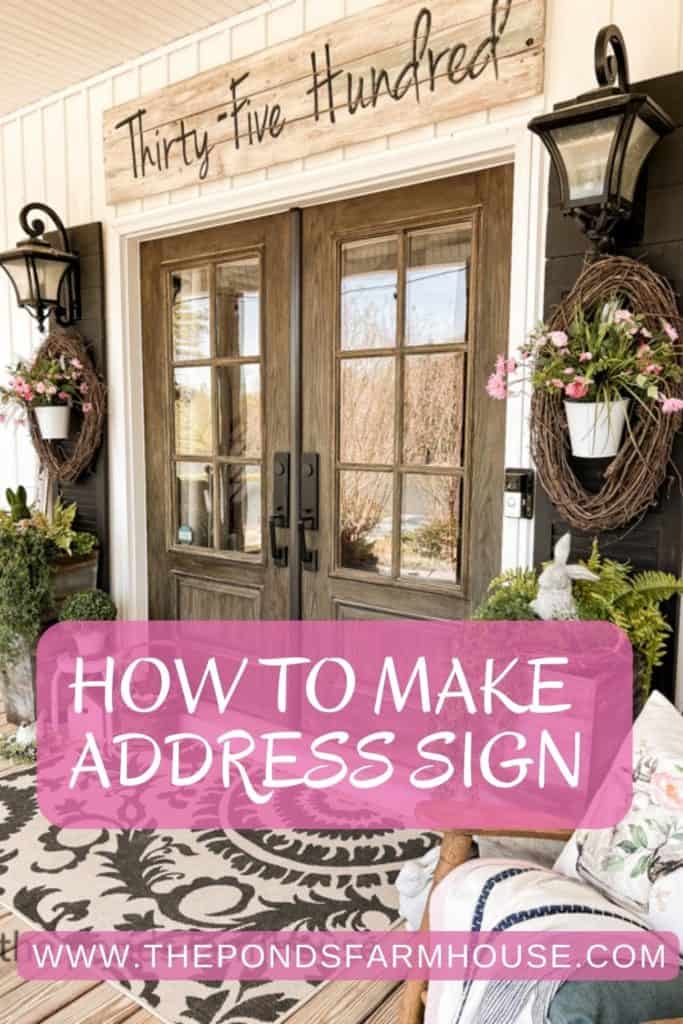
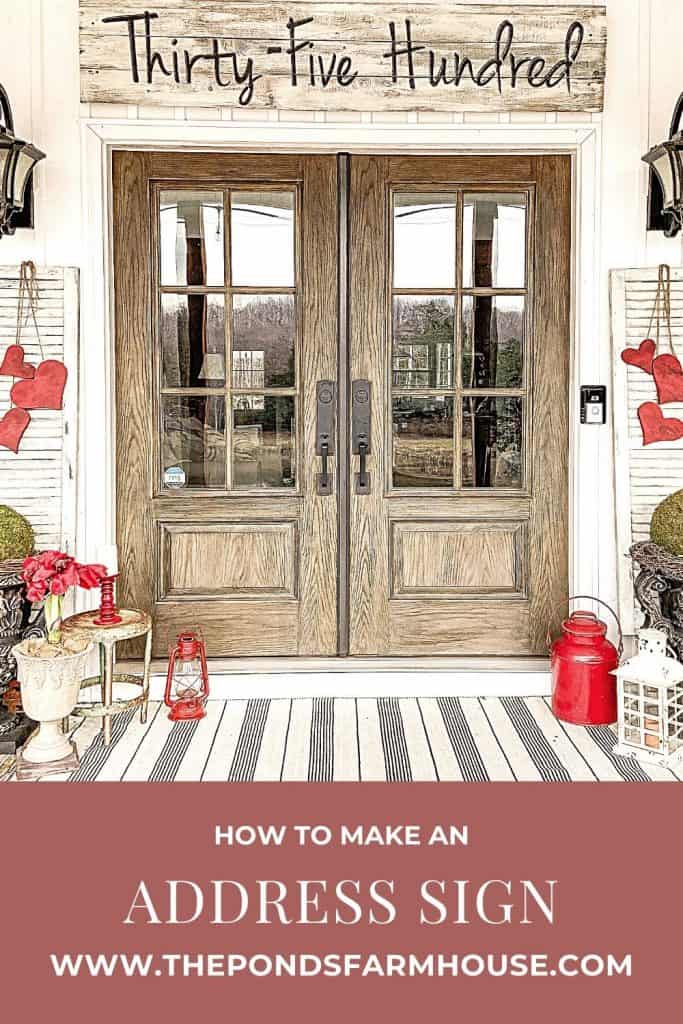
Unique DIY Address Sign Tutorial for Your Home
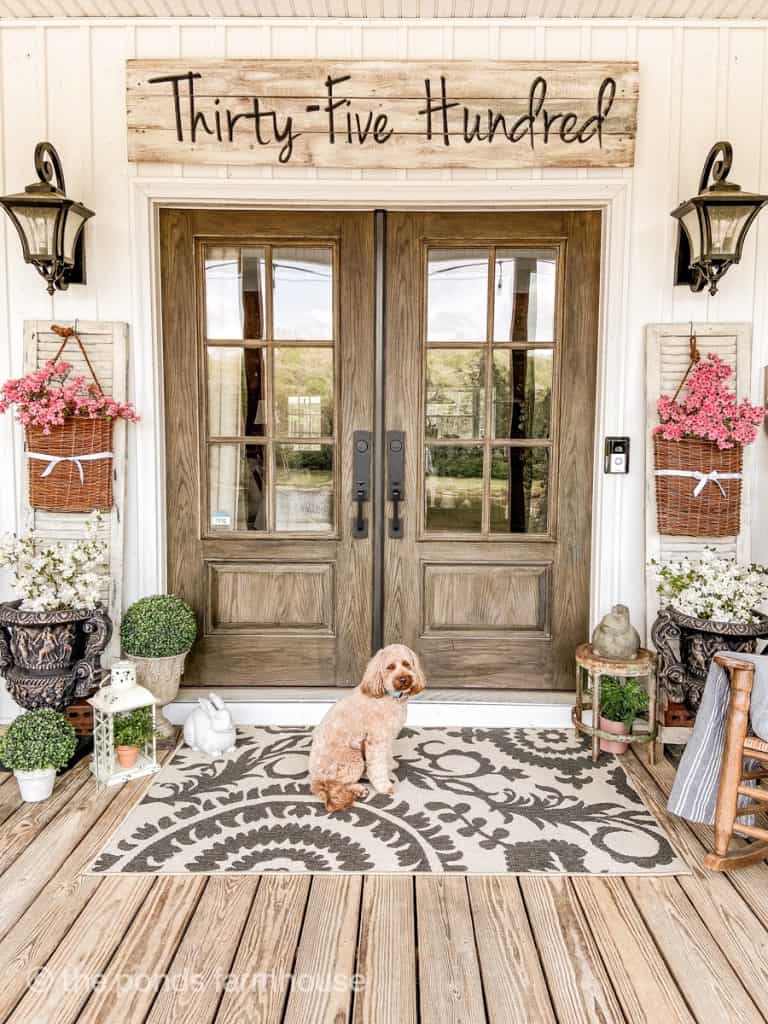
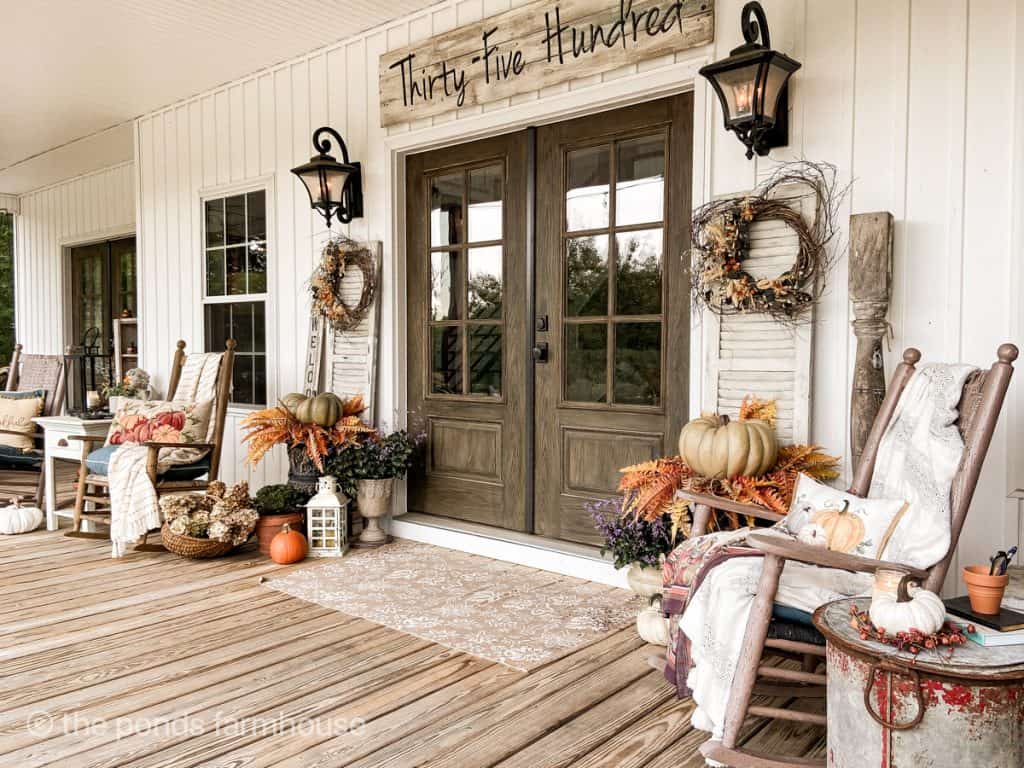
One of our favorite DIY projects is the unique house address sign that we made for our front porch. It creates a stunning focal point above the front doors. If you’d like to create a DIY address sign for your home, I’ve prepared a step-by-step guide with clear instructions to help you make a custom sign similar to the one on our front porch. The tutorial includes instructions on how to create the letters, how to attach the boards, and how to achieve a reclaimed wood appearance for house address signs. So gather your supplies and let’s get started.

We were fortunate to have some reclaimed shiplap boards available for use in our sign. However, we are recreating this same technique for a custom house address sign using a reclaimed wood technique with new wood.
(Posts on The Ponds Farmhouse may contain affiliate links. As an Amazon Associate, I earn from qualifying purchases. See the full disclosure details here.)
How To Plan For A DIY Address Sign
First, determine where you plan to use your DIY address sign. If you are placing the custom house address sign above your front door, decide how long you want the sign to be. Additionally, consider the distance between the door frame and the porch ceiling.
We wanted our sign to cover the top of our French doors, and therefore, we cut our shiplap boards to 73 inches in length.
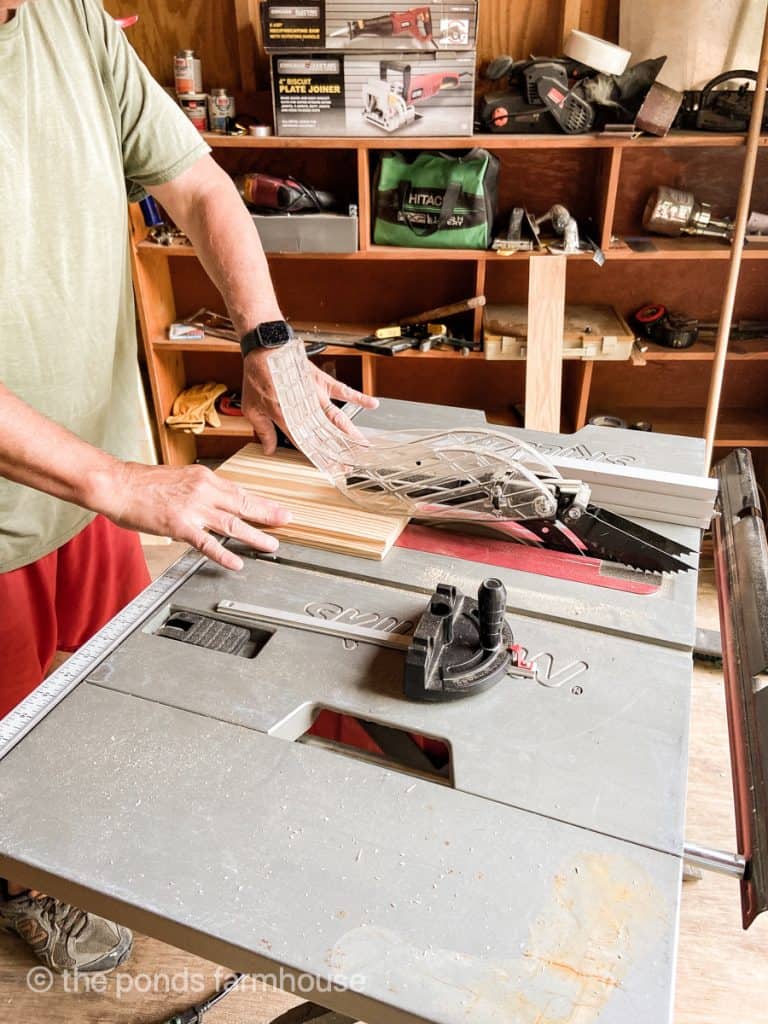
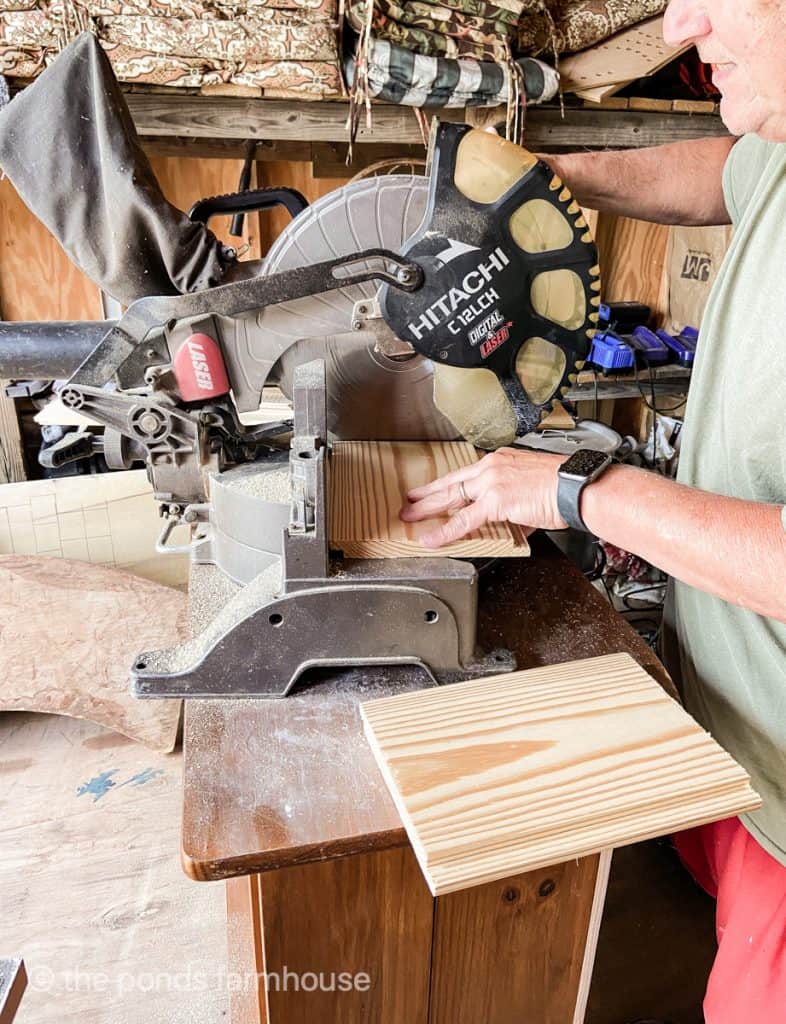
To make the custom house address sign, we purchased two 8″ by 8′ shiplap boards and cut them to length using a miter saw.
This home address sign needs to be 60″ long and 15 inches tall. Therefore, we cut the excess wood into narrow strips using a table saw. These scrap pieces are the perfect size to attach the two long boards from the backside, creating the correct height for the sign.
If you don’t have any scrap wood, you will need to purchase additional wood or mending brackets to hold the boards together from the back side.
How To Make A Home Address Sign
Now let’s construct the home address sign. Begin by attaching the two boards using the scrap wood, which was cut from the excess length of the sign boards.
Turn the two boards with the backside up and align them evenly with the inside edges touching. Then attach the wood strips with screws to hold the boards together. Be sure to use screws of the proper length to avoid the screw protruding through the front of the sign.
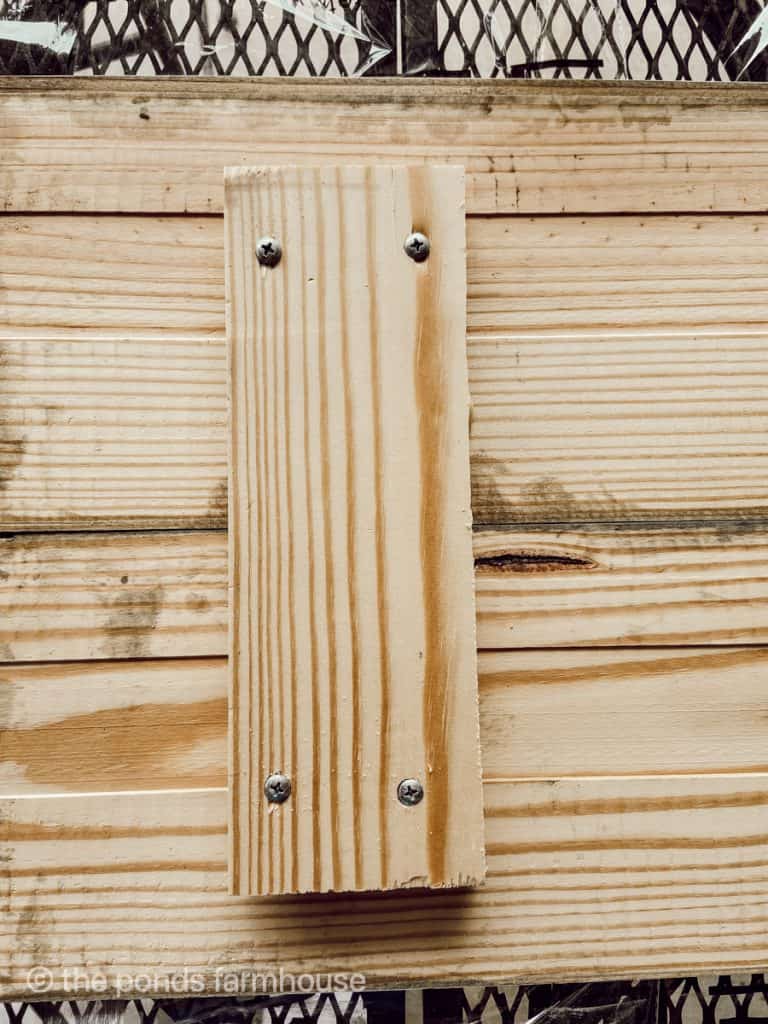
If your DIY Address Sign is similar in size to this one, I recommend placing a minimum of 3 attachments to the back of your sign. The wood attachments will not be visible once your sign is hung.

How To Distress Your Custom House Address Signs New Wood
If you don’t have reclaimed wood to make your house address signs, you can still achieve a distressed, reclaimed wood appearance with this technique.
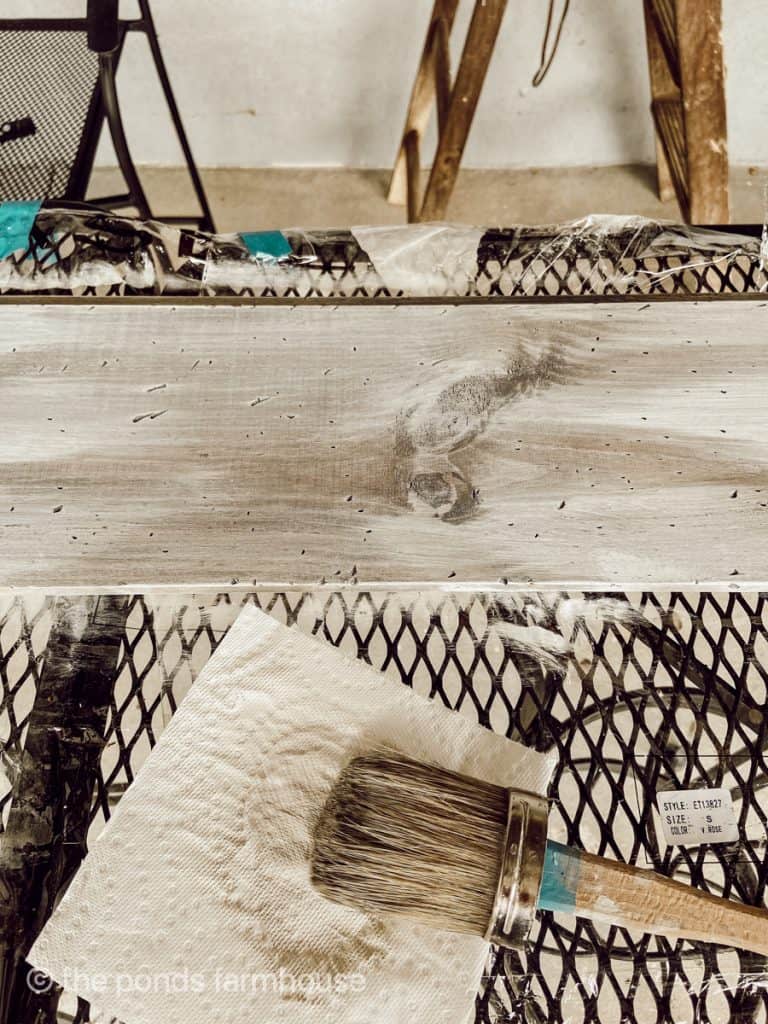
The first step to aging your new wood house address sign is to add some dings and dents to the wood.
This can be achieved with various tools, including hammers, screwdrivers, chains, nails, screws, etc. Anything that you can beat the boards with.
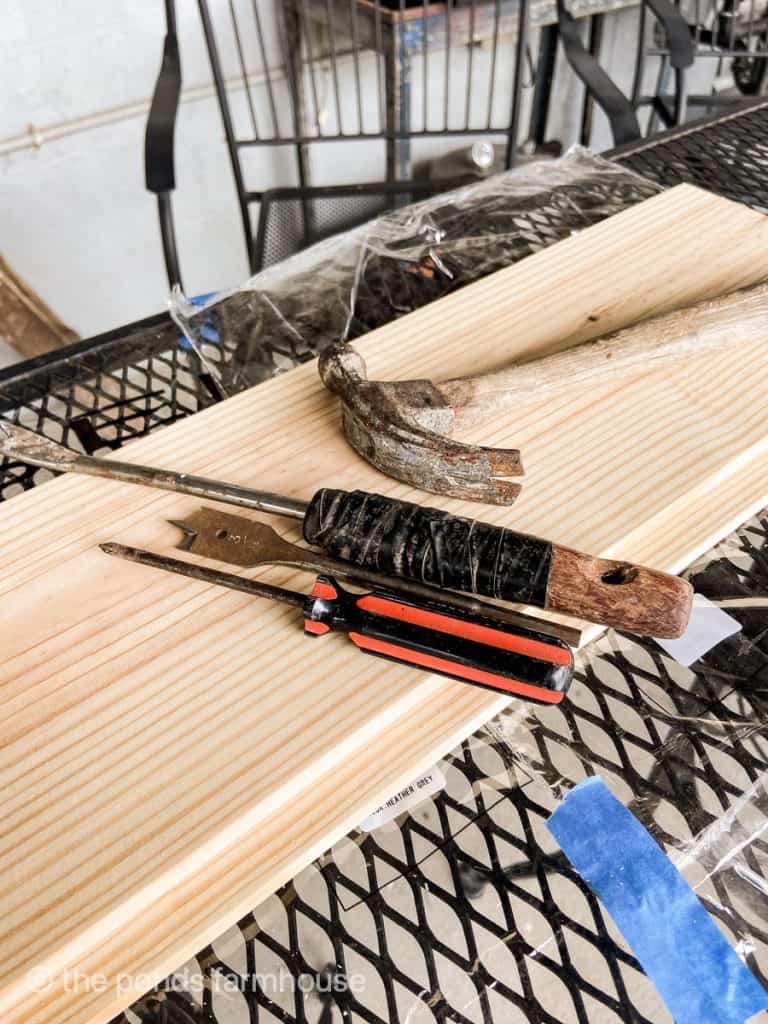
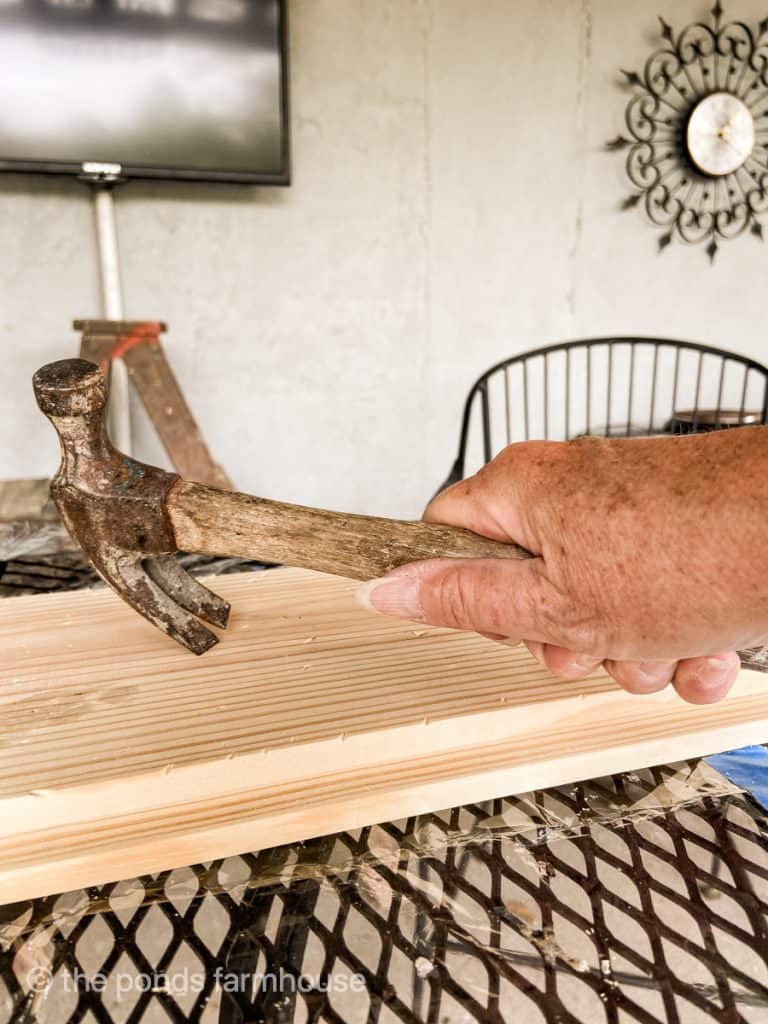
Begin by placing your sign right side up on a solid surface and begin hammering away. This is also a great stress reliever. LOL.
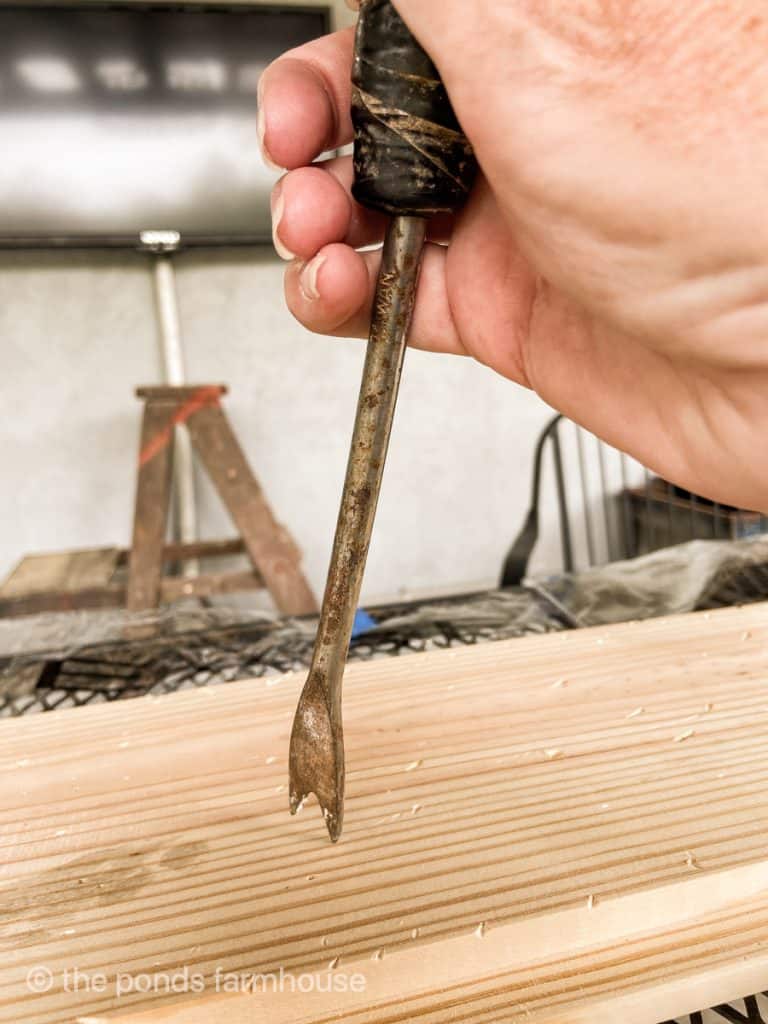
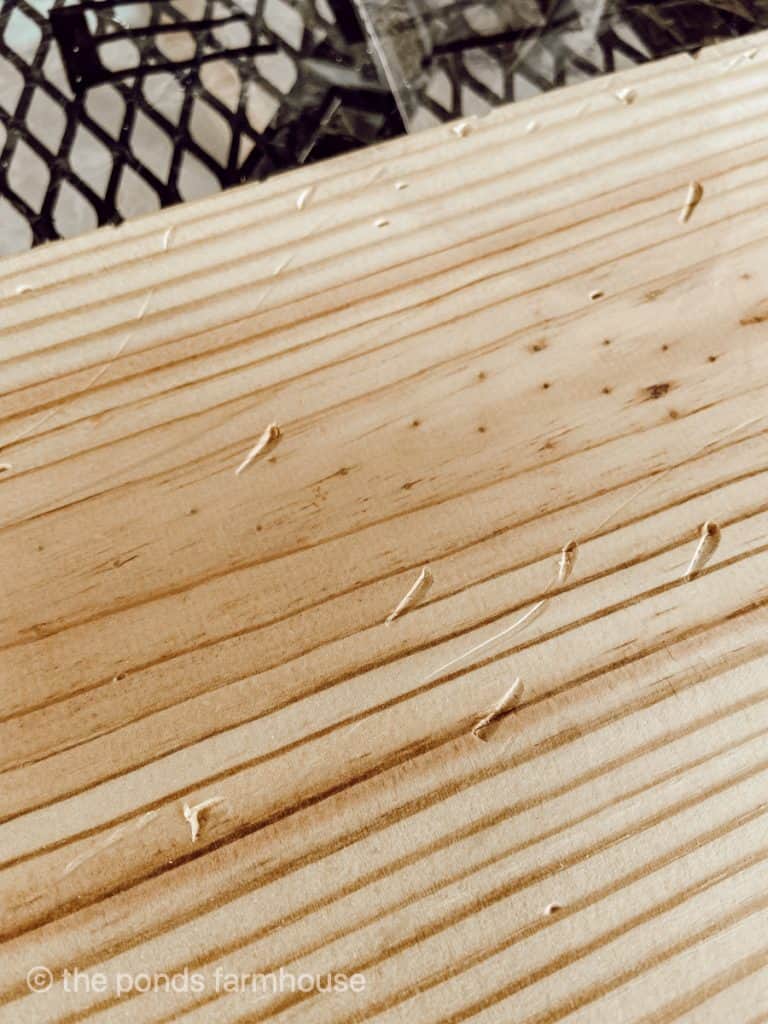
You can add as many distress marks as you desire to the new wood.
How To Whitewash New Wood
After distressing, you will want to whitewash your new wooden sign.
To achieve an aged appearance, you will need to stain the wood before applying the whitewash. This will require a gray penetrating stain and your choice of white paint.
See complete details on How to Whitewash Wood.
For the address sign, I used this Classic Gray Minwax Stain and White Chalk Paint.
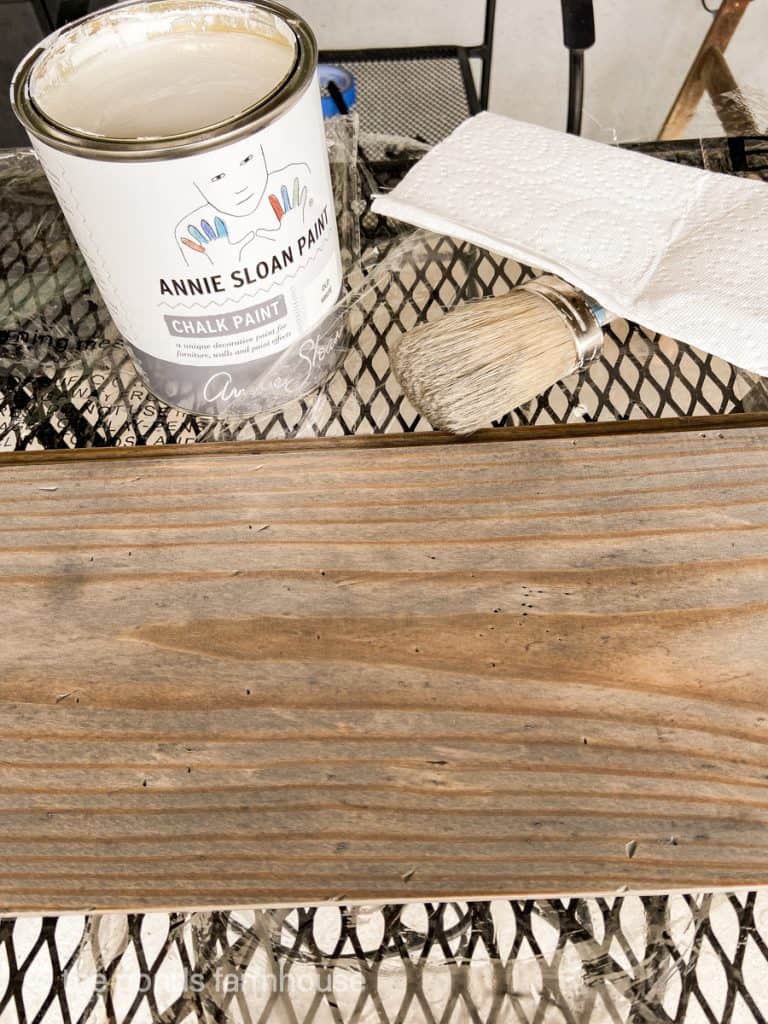
Minwax Classic Gray Stain – White Chalk Paint – Rust-Oleum Mat Sealer
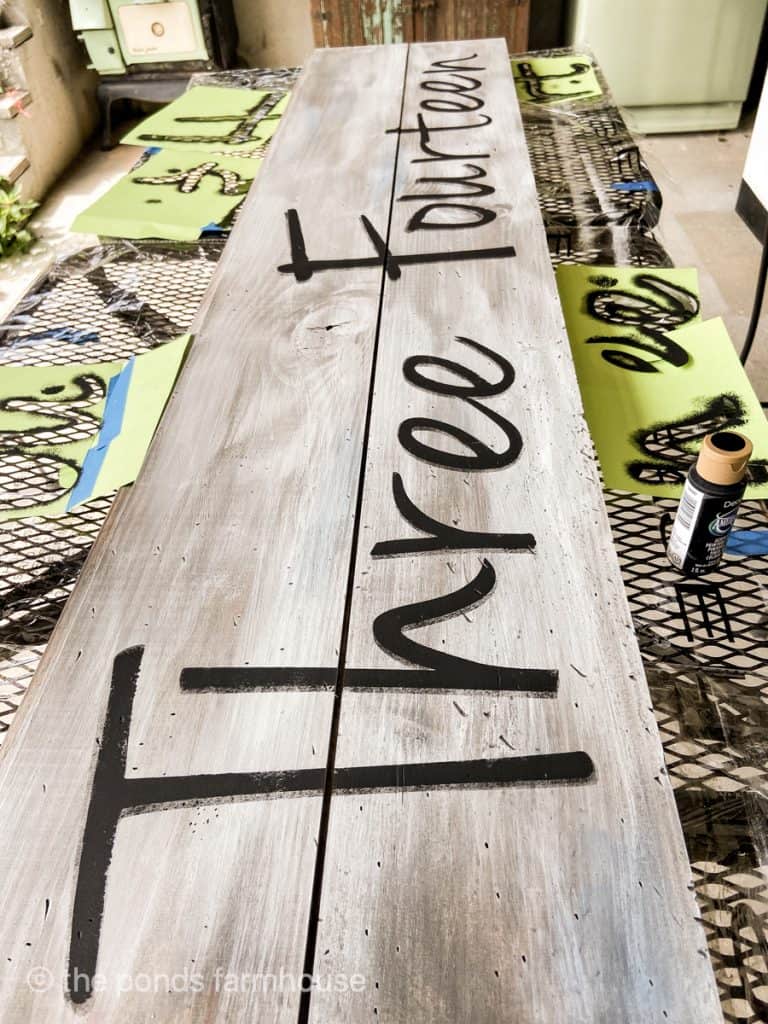
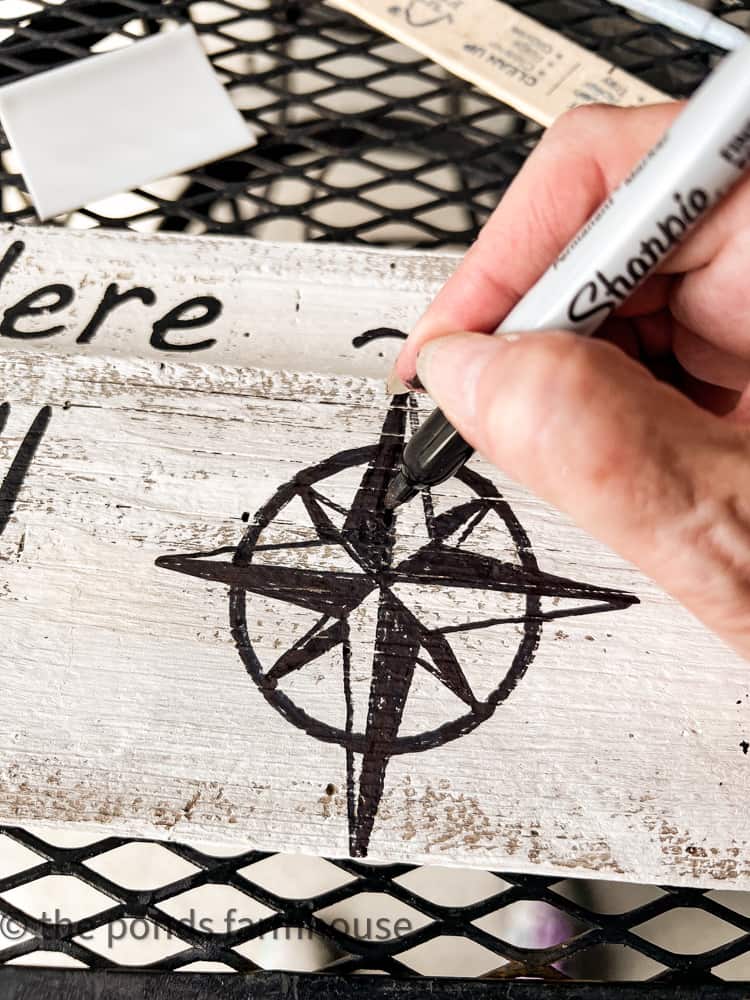
How to Add A Custom House Address To Your Sign
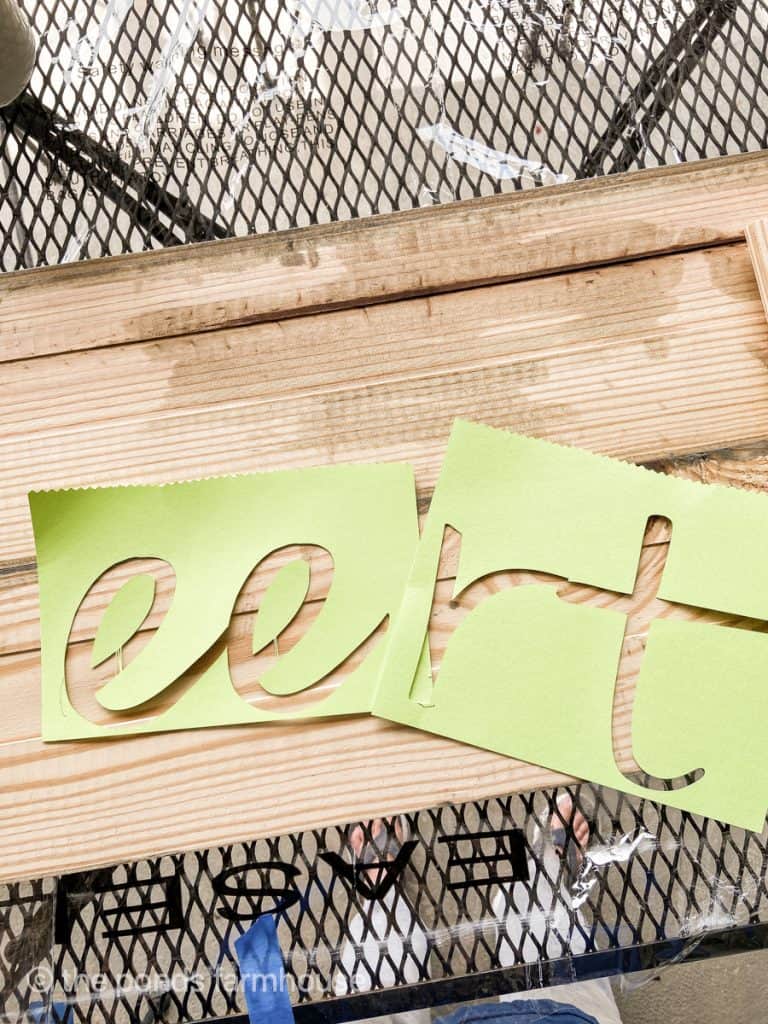
There are several options for adding the custom house address to the signs.
You can purchase wooden letters, self-adhesive vinyl letters, stencil letters, or make your custom letters.
Once the paint is dry, you are ready to add your signage.
For this step, I used letters that I created with a Silhouette Cameo. I used card stock to cut each individual letter, and the taller letters are approximately 11 inches tall.
If you don’t have a Silhouette Cameo or Cricut Maker, you can purchase precut stencils to complete your project.
You will probably want to purchase uppercase stencils and lowercase to achieve the look you desire.
Here are some resource links: Silhouette Cameo – Cricut Maker – Upper Case Stencils – Lower Case Stencils
How To Align Letters for a Home Address Sign
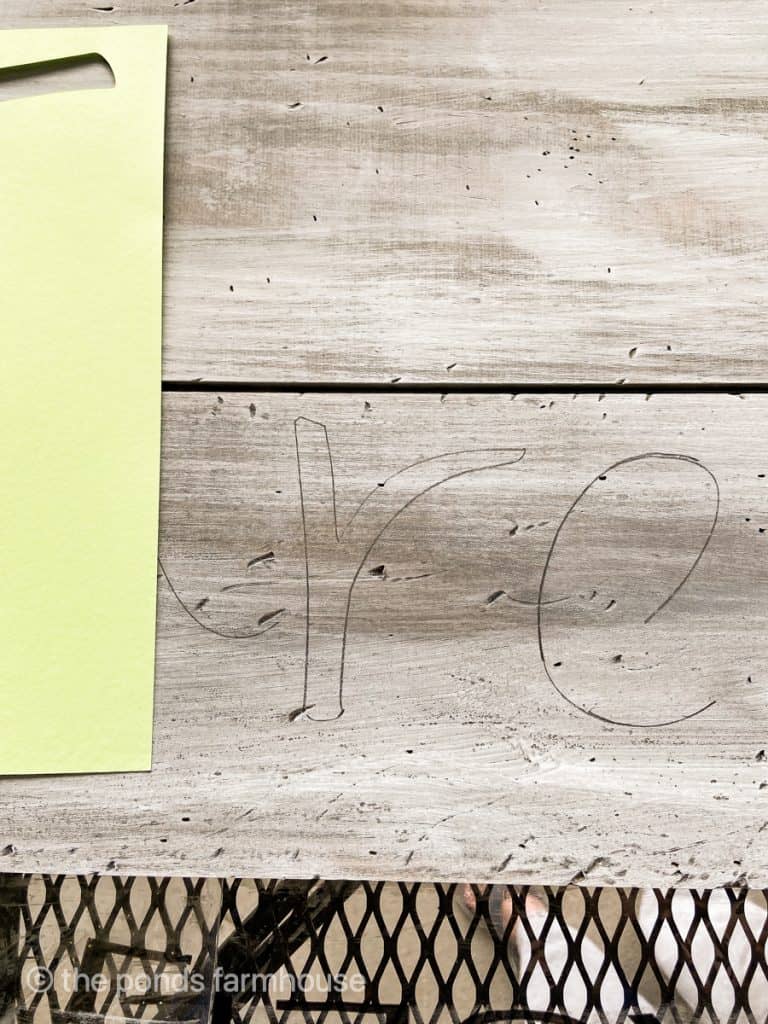
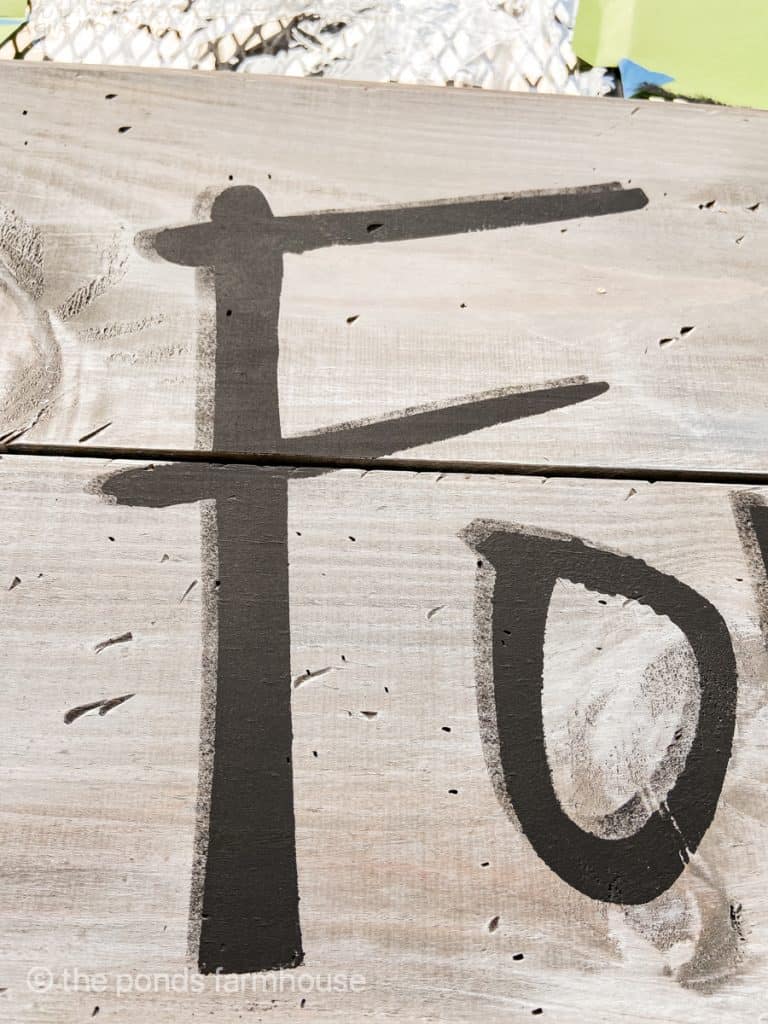
To ensure that your letters are arranged and fit properly on your sign, I recommend tracing the letters with a pencil before applying any paint.
You want to ensure that the placement is visually appealing. It’s very difficult to correct after you begin stenciling with paint.
You don’t have to trace the entire letter, just enough to ensure proper placement of the stencil.
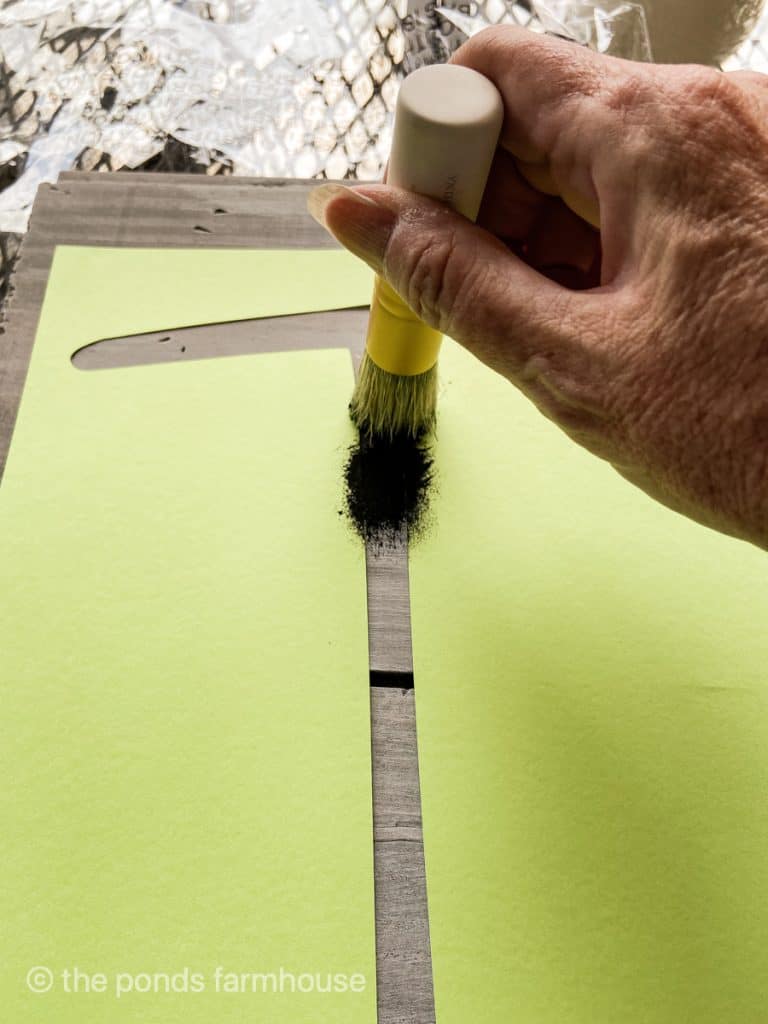
How To Stencil The Custom House Address Sign
Begin by aligning the first stencil and securing it in place with painter’s tape.
Using a stencil brush, add a small amount of paint and blot any excess from the brush. In a downward motion, apply the paint to your stencil.
Note: Since the stencils may overlap to ensure correct placement, allow for drying time before proceeding to the next letter.
Stencil Resources : Stencil Brush Set – Painter’s Tape – Black Craft Paint
How To Make An Address Sign
Equipment
- Miter Saw
- Table Saw
- Paint Brush
- Stencil Brush
- Silhouette Cameo (optional)
Materials
- 2 – 8 x8 Pine Boards
- White Paint
- Grey Stain
- Black Craft Paint
- Clear Spray Sealer
- Wood Screws
- Stencil or Stencil Materials
- Heavy Duty Hangers
Instructions
- Cut boards to desired length
- Use leftover wood to attach boards together on the backside with wood screws
- Stain boards with grey stain for an aged appearance
- Use a whitewash technique with white paint
- Create stencil with home address or use purchased stencils
- Trace the letters on the board before painting with a pencil to assure even placement.
- Using black craft paint and stencil brush, stencil the letter.
- Allow to dry
- Spray with a clear sealer to prevent peeling and fading.
Notes
Creative Address Sign: Optional Step
Additionally, you can enhance your signage by incorporating a shadow effect. This is an optional step that I would like to add.
Once the original stenciled paint is dry, place your stencil back over each letter slightly to the left and upward of the original placement. Using a very dry brush of your original paint color, lightly stencil again. This creates a shadow behind the heavier paint.
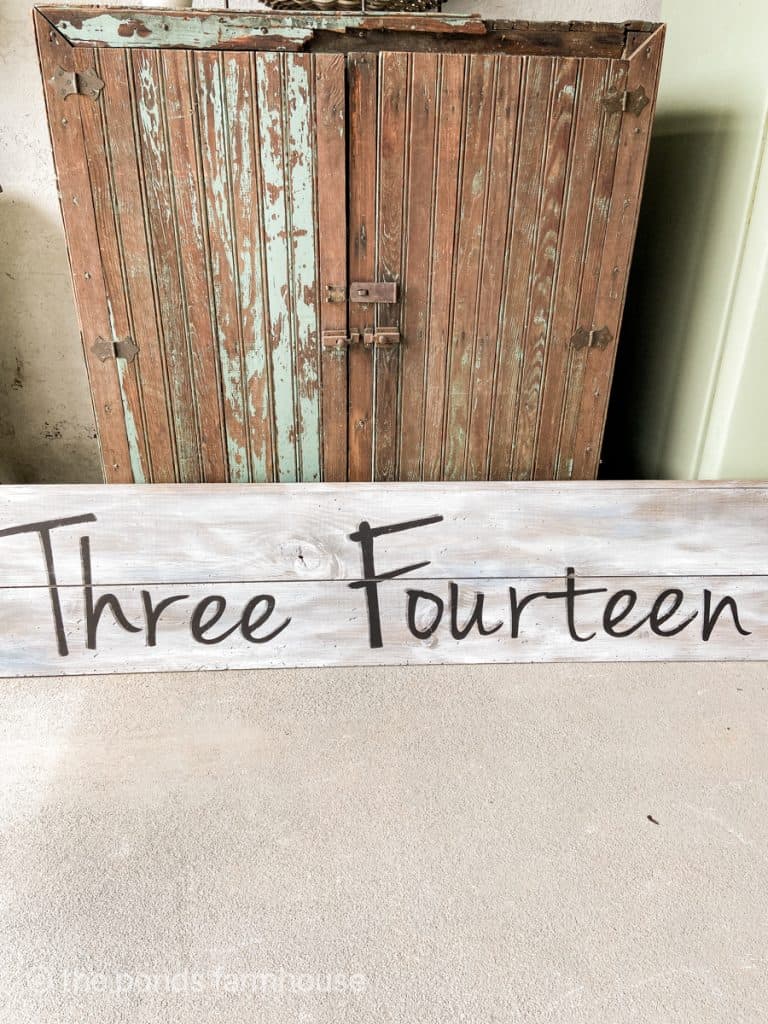
Now, the signage is complete. Allow to dry, and then coat with a fine mist of Rust-Oleum Mat Sealer. If your sign will be exposed to rain or snow, you will want to seal the entire surface of the sign. Spray both the front and back with at least two coats of protective sealer.
House Address Sign Options
First, I wanted to duplicate my original reclaimed wood sign as closely as possible, so I added a couple of swipes of blue paint to the white paint. If you choose to do this, be sure to use a very dry brush technique.
Additionally, the signage can be created using vinyl letters or wooden letters to produce a unique home address sign.
Secure The DIY Address Sign For Safety
Because the sign is above our front doors, we screwed the sign to the wall at a couple of different support studs. We didn’t want it to fall on someone accidentally.
Ensure that your sign is securely in place to avoid any possible injuries.
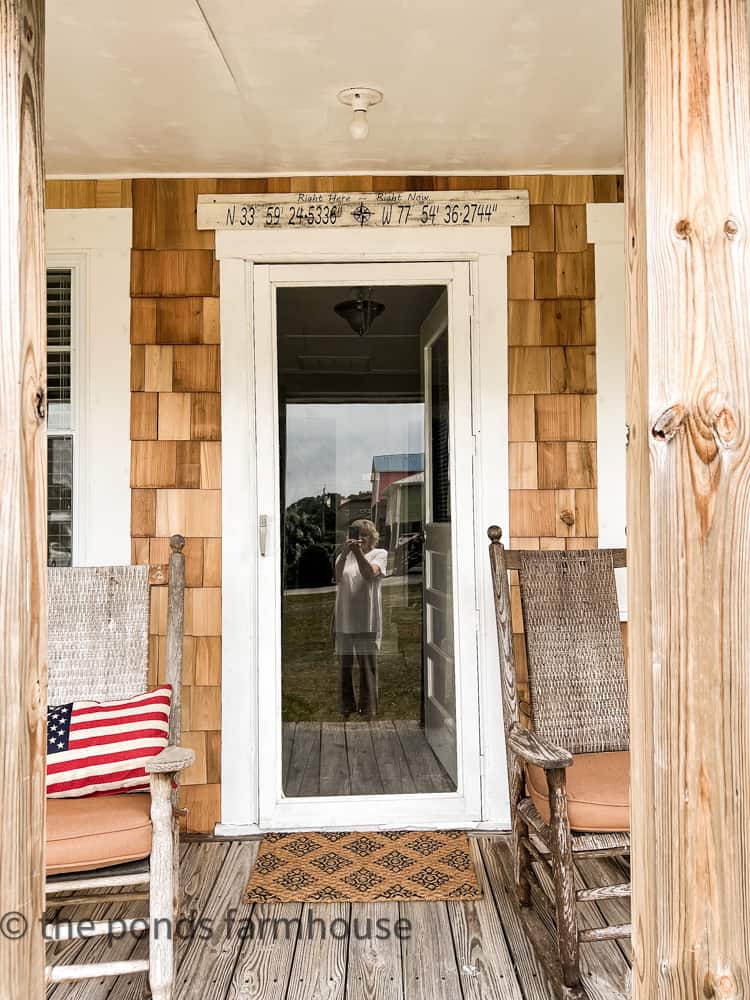
Additionally, you may prefer a coordinate address sign for your house, similar to the one I created for our beach cottage.
Seasonal Front Porch Inspiration
- Fall Porch Tour
- Best Front Porch Ideas for Spring & Summer
- Farmhouse Christmas Porch Ideas
- 7 Must-Have Country Porch DIY Ideas
- 10 Creative Ideas for Ideal Porch Sitting
- Farmhouse Porch Christmas Tour
- Creative Farmhouse Wreath and Christmas Decor Ideas
- Best Ideas for Decorating a Fall Porch
Additionally, refer to ‘How to Use Chalk Paint’ for more helpful painting tips. I hope this answers any questions you have about making a house address sign.
Thanks so much for stopping by today. I look forward to sharing my next adventure with you.

Pin It To Remember It
Did you find some great ideas you’d like to save for future reference? Hover over the images you’d like to save and pin to your favorite Pinterest Boards when you see the PIN button.


What a great idea Rachel! I love that sign and would love to make one! pinned!
Stacy,
I really appreciate this.
Thank you for sharing how to do the address sign! I love it and it’s so unique!
Have a good day!
Margie,
Thanks so much.
I love love this!! ThankYou for sharing how to make your beautiful address sign! It looks perfect on your gorgeous porch!
Cindy,
I really appreciate this. Thanks for your encouragement.
Thanks for sharing the diy for your sign, love yours.
Marlene,
Thanks so much.
How tall were your letters?
Lisa,
They are 11 inches at the tallest.
This is such a cool sign and would make a fabulous gift too, Rachel! I love the farmhouse charm it gives your front porch. It’s totally fantastic! Hugs, CoCo
Wow I love this sign so much Rachel! It looks so classy above the doors on your porch. Thanks so much for sharing this at Farmhouse Friday – we’re featuring you at tomorrow’s party!
Michelle,
Thanks so much sweetie. How exciting.
Can I just say, I totally want one of these signs! Adding another one of your many DIY’s to my list of things to do! Love it. Pinned
Cindy,
Thanks so much for your support.
Your address sign turned out perfect!
Hugs,
Kippi
I really appreciate this Kippi! thanks for stopping by.
This is the best inspiration Rachel! I want to make one.
Kim,
You should do that. Thanks.
Beautiful work Rachel! I love your ideas. Your home is lovely ❤
Hey J,
Thanks so much for stopping by. I appreciate your comments.
Do you recall the font you used for the lettering?
Cyndi,
I don’t, it was on my old computer and it died on mye.