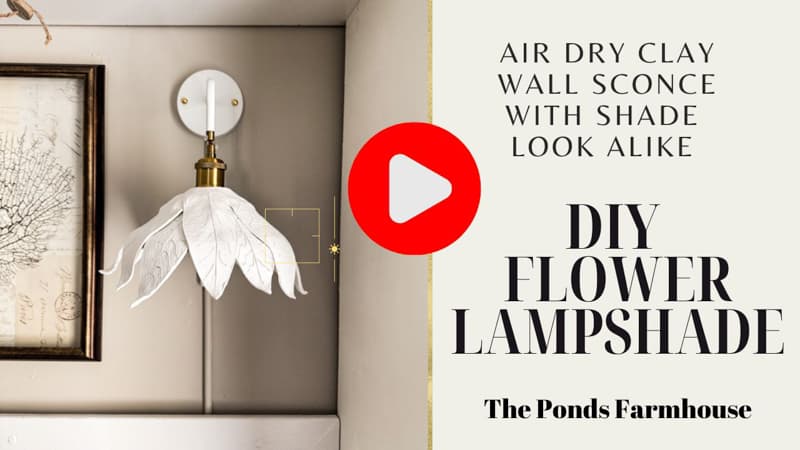
Budget DIY Flower Lampshade for Wall Sconces With Air Dry Clay
Have you ever found your perfect home decor accessory only to realize it cost way more than your budget allows? If so, then you will want to see this tutorial. This copycat DIY Lampshade is inexpensive and easy to make with air-dry clay. It was inspired by a $450.00 wall sconce that I wanted for our beach cottage. It was not only out of my budget, but I needed two wall sconces. Although I’ve never done this before, I decided to attempt to make a look-alike lampshade using air-dry clay. The good news is it only cost me $65.00 to make two flower lampshade wall sconces, and I love how they turned out. I think you will agree.
I was crushed when I discovered the cost of these scones, so I searched for them online. However, I did find them for slightly less, $396.00. LOL! That was still way out of my budget. Over $800 for two wall sconces wasn’t going to happen at my house. So, I began to search for an alternative to get the look for less, and I think you will love this tutorial. Here’s how you can make your own flower lampshade, including all the items I used to create the look-alike.
(Posts on The Ponds Farmhouse may contain affiliate links. As an Amazon Associate, I earn from qualifying purchases. See the full disclosure details here.)
How To Make A DIY Lampshade That Looks Like A Flower?
The inspiration wall sconce is made of metal, and I knew that I couldn’t duplicate the same metal design. Therefore, I decided to make the flower petals using air-dry clay. I knew I would need a wall sconce to attach the DIY lampshade. So, first, I found a set of inexpensive wall sconces that I felt would work for the project. The pair only cost $34.00, and the air clay was $14.00. Even though I’d never tried anything of this nature, I felt I could risk 48.00 to give it a try.
The inspiration lampshade is shaped like a flower bud, so I shaped the flower using a bowl before adding it to the new wall sconce lampshade.
First, here are the supplies I used.
Supplies
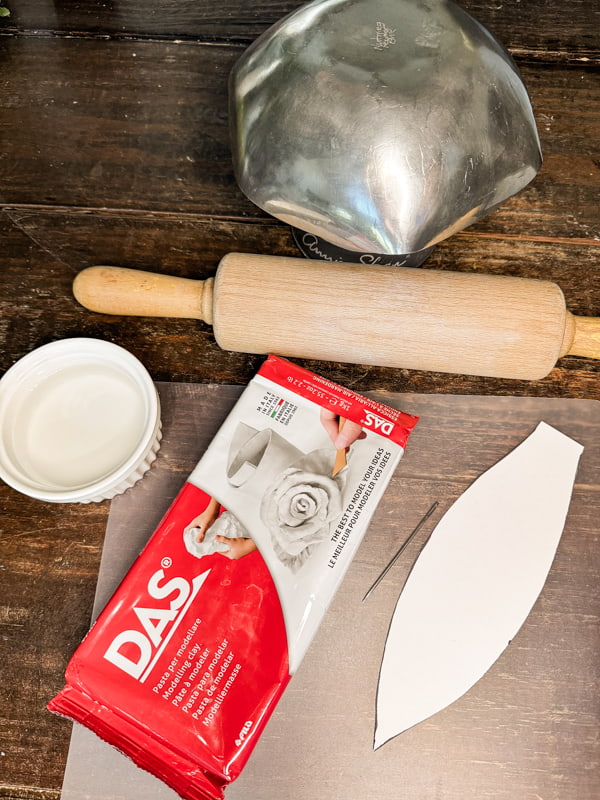
- 2 – Air Dry Clay Blocks (It only took slightly more than one block to make two shades)
- Set of two plug-in Wall Sconces
- Chalky Classic White Spray Paint
- Mod Podge Hard Coat
- Rolling Pin
- Create a template for your petals
- A large needle, knife, or other item to cut the clay
- Bowl to form petals
- Cooking Spray & Paper Towel
- Smooth Plastic Cutting Board (optional)
- Wall Cord Cover (optional)
- Plaster of Paris (optional)
How To Make The Flower Lampshade Petals
Begin by determining the size of the petals using the purchased wall sconce lampshades as a guide. Then, make a template from card stock.
First, I cut several petals out of copy paper and taped them to the shade to determine if the template size was appropriate. This also determined how many petals would be needed to create the look I desired.
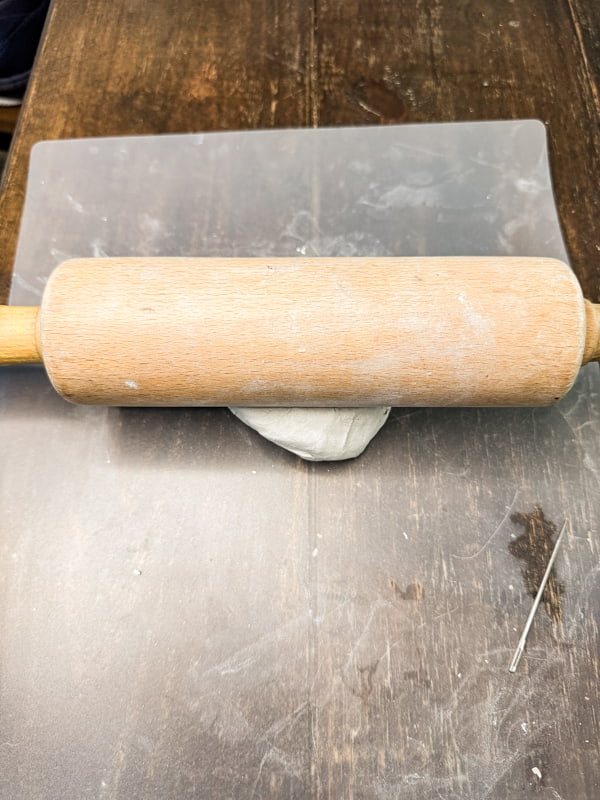
After determining the template, begin kneading the clay to soften it. Then, use a rolling pin to smooth it. Be sure to remove any bubbles and roll until you have an even thickness of clay. Ensure you work on a smooth surface like a plastic cutting board, glass, or tile.
How To Cut The Petals
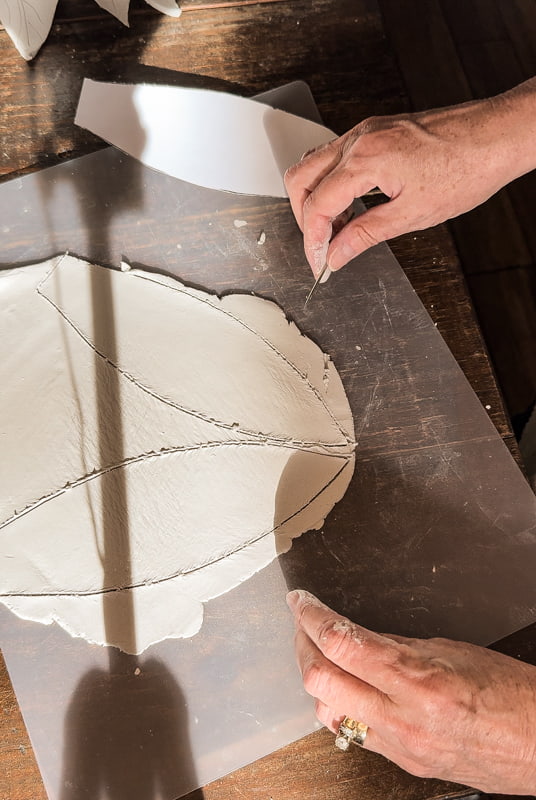
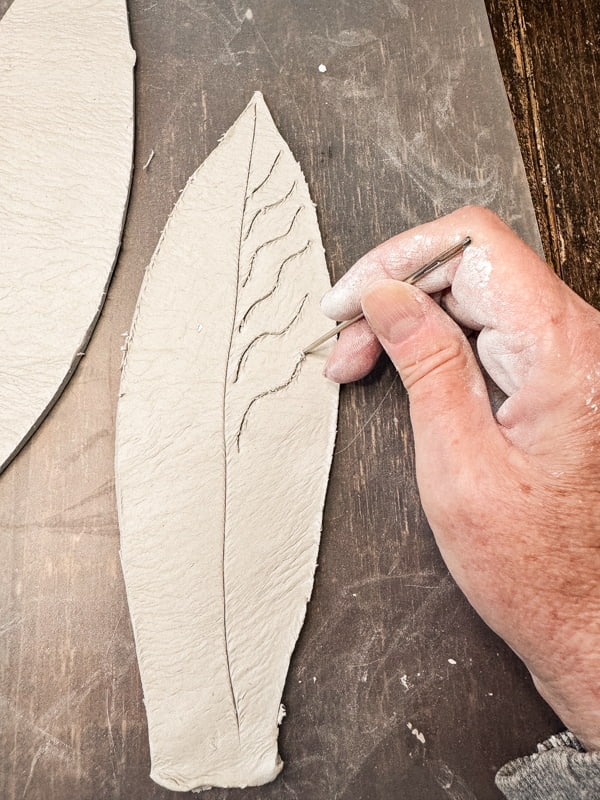
Next, lay the template on the rolled-out clay and trace around the edges with a needle or knife to cut the clay. I used an oversized needle, and it worked great.
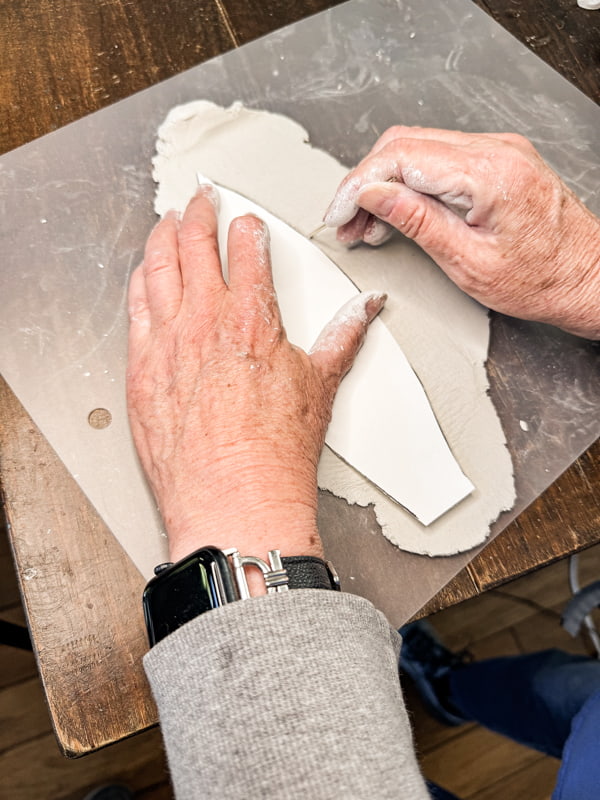
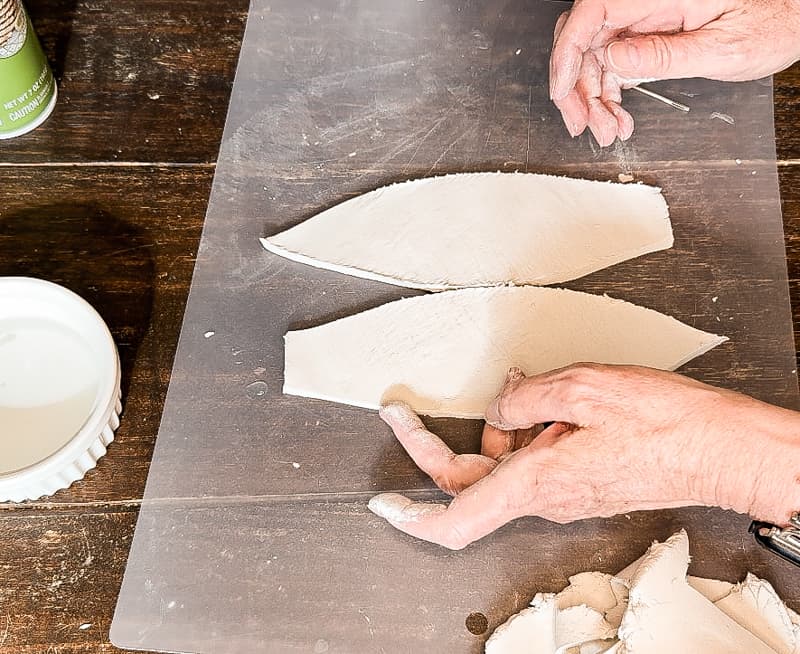
Remove the excess clay and dip your finger into water to smooth any rough edges around the petals.
Use the needle to add any decorative design to the top of the petals. Use light pressure to scratch the clay surface to create the design. Be careful not to cut too deep.
Continue to smooth any imperfections by adding water to your finger and rubbing over the rough areas.
Insider Tip
Be cautious when adding water. The water can weaken the clay, so only use as much as necessary. If your piece is damaged, you should roll it back out again and start over instead of repairing it with water.
Prepare Bowl To Add Petals
Look for a bowl that is approximately the size of your purchased lampshades. You want the bottom to be as smooth as possible.
Place the bowl on a pedestal to raise it off your table. This could be a paint can, jar, or anything that will secure it from tipping over. In addition, be sure it’s tall enough to allow for the petal length.
Before adding any of the clay flower petals, rub a small amount of cooking spray onto the bottom of the bowl. Don’t spray the bowl, but instead, spray the paper towel. Once you’ve rubbed the paper towel over the bowl, use a dry towel to remove any excess. You only want enough to keep the clay from sticking as it dries.

How To Make A Flower DIY Lampshade
Once the bowl is prepared and secure, add the air-dried clay petals. Allow the petals’ tips to hang evenly from the edge of the bowl, and press the other end of the petal firmly onto the bottom of the bowl. Allow the clay to spread out until thin.
Place one layer around the bowl with a gap between the petals. Then, come back with a second round, filling in the gaps. Continue to press the clay at the center of the bowl.
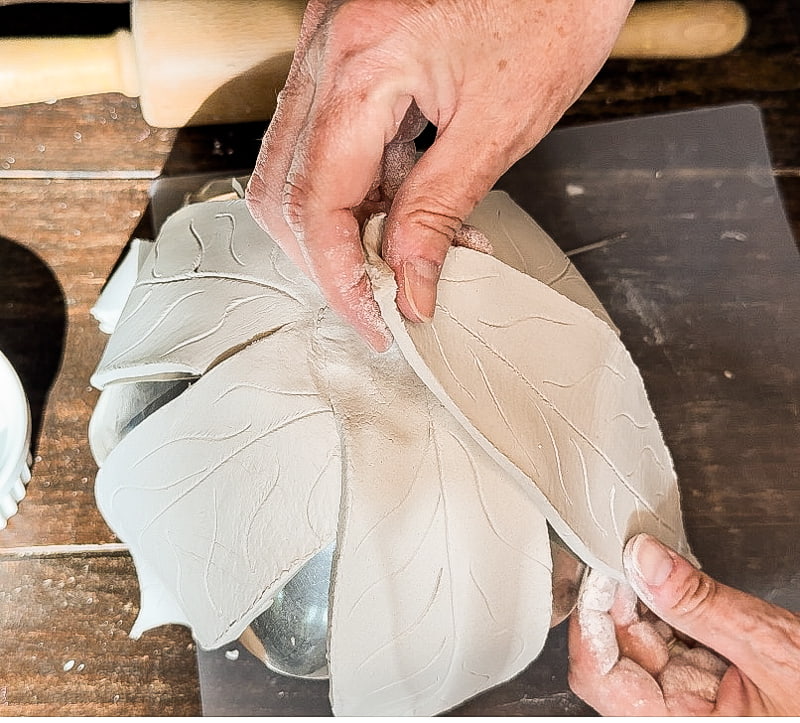
As you build your layers of petals, remove excess clay from the center. Continue to press and smooth as you go along, which will secure the petals together. Gently press areas where the petals overlap without damaging the design or shape.
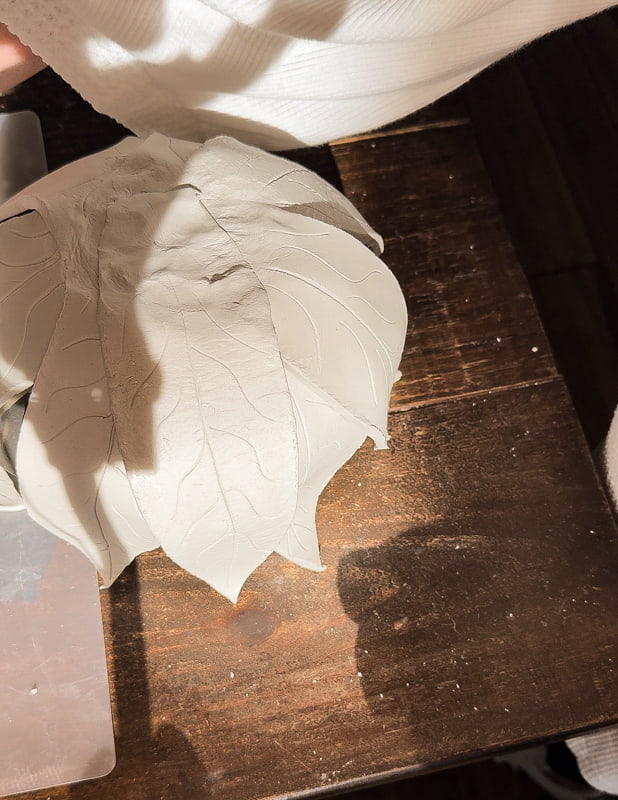
Allow the tips of the petals to curl slightly.
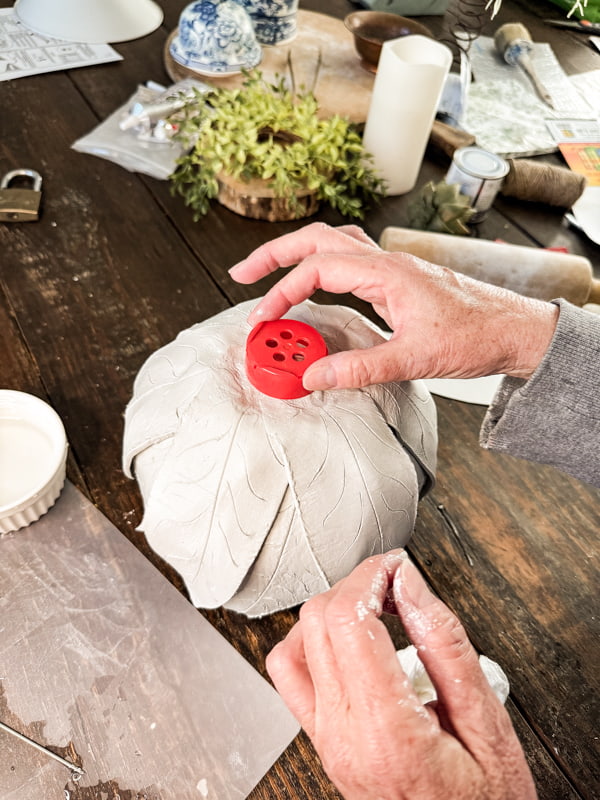
Once you have all the petals attached and the center is approximately the same depth as the petals, you can cut your light socket hole.
Find a round item the same size as the hole in your purchase lampshade. I used a spice jar lid, and it worked perfectly. Press into the clay at the exact center of the bowl and remove the center clay. If it looks too thick, you can press some more and cut it again. Use water on your fingertips to smooth the edges.
Insider Tip
To be safe, you should take the light socket that will be inside this hole and test the size. You want it to be a large enough opening to fit the socket inside but not larger around than the nut used to secure the lampshade to the socket. Be careful not to get clay on the threaded socket. If you do, be sure to clean immediately.
Transfer The DIY Lampshade To The Purchased Lampshade
Now, it’s time to set the project aside to allow drying. Be sure to keep it in a cool, dry place and out of the sun. You don’t want it to dry too fast.
DO NOT LET IT DRY COMPLETELY!
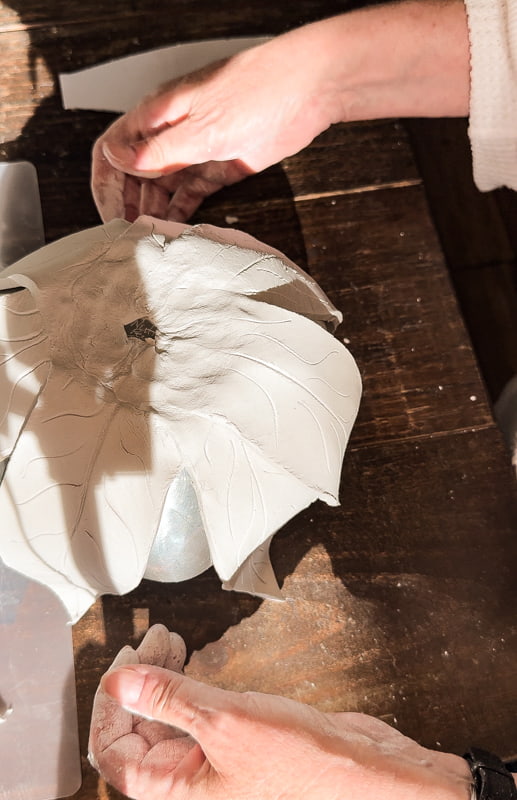
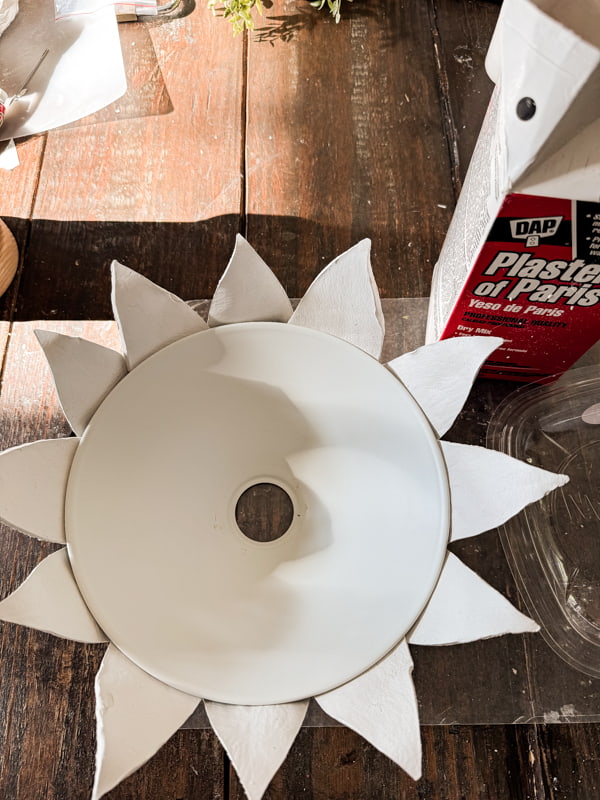
After a few hours, transfer the DIY lampshade to the purchased shade. At this point, you want the clay to be semi-pliable.
NOTE: THIS PART IS TRICKY! You may need an extra set of hands to make the transfer. Place the purchased lampshade on a pedestal just as you did the bowl. Carefully remove the clay lampshade from the bowl and place it over the prepared lampshade.
Align the center socket holes of both lampshades. Press the clay around the hole to ensure even coverage.
Set the shade aside in a cool, dry place to dry thoroughly. I didn’t touch the DIY lampshade for 72 hours.
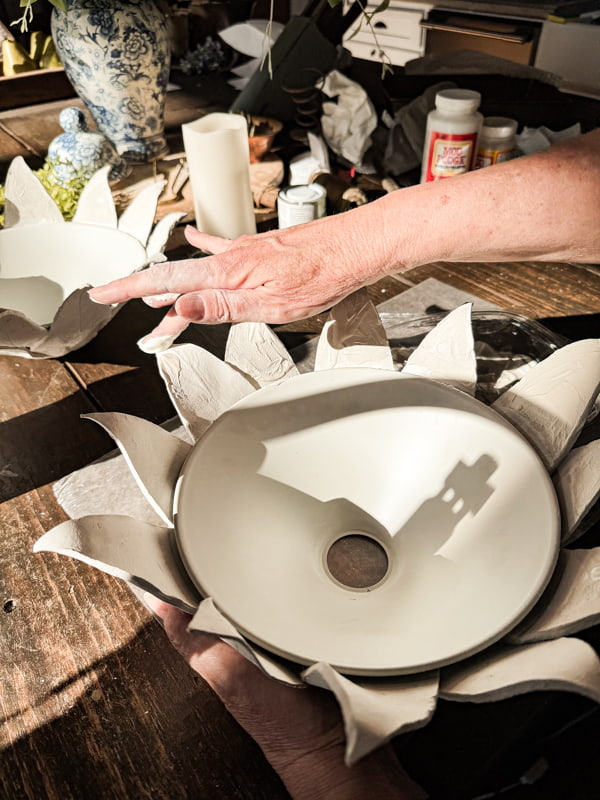
Below is what the shade looks like from the inside.
Add Plaster of Paris (optional)
After the lampshade is dry, you can decide whether to add the plaster of Paris for added strength.
Some of my petal tips felt fragile, so I decided to add a small amount of plaster. I mixed a small portion and applied it to the tips of the thinner petals with my finger. I also had one fragile area around the top of one petal and added the plaster there. (See warning below)
Then, I let the plaster dry before proceeding.
Insider Tip: Warning
I recommend keeping your air-dry clay lampshade on a pedestal with the petals facing down or wrapping something around the petals if you turn it upside down. This is how one of my petals almost broke away from the others. I was able to secure it with the plaster of Paris, but I wanted to add this warning to prevent you from having the same issue.
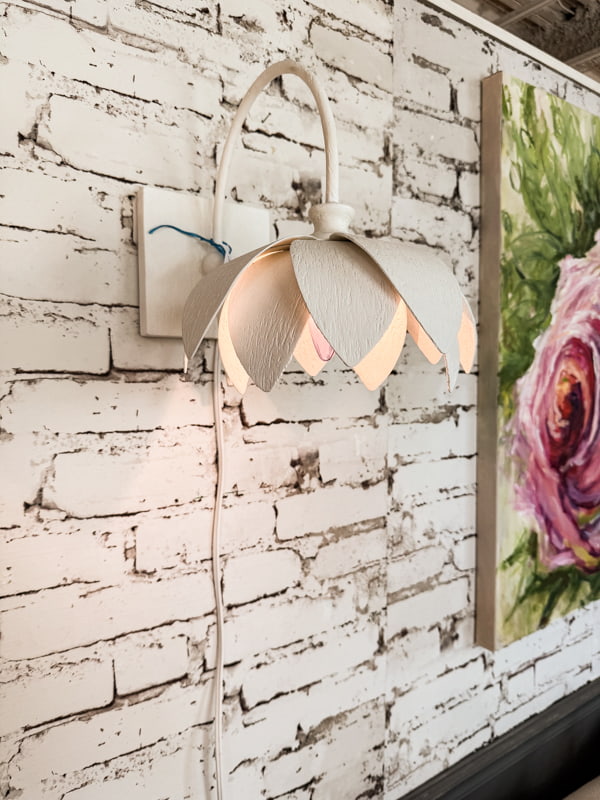
Paint and Seal Your DIY Lampshade
After the shade had been dry for 4 days, I decided to add a coat of Chalky white spray paint.
Then, after the paint had dried, I added one coat of Hard Coat Mod Podge to all the exposed areas of the petals. The hard coat takes four weeks to cure, so I can add another layer for extra protection during our next beach trip.
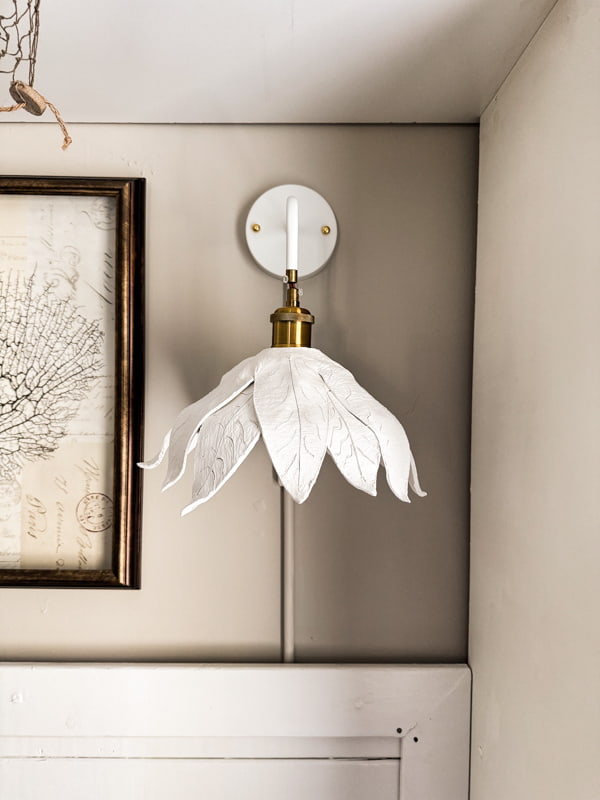
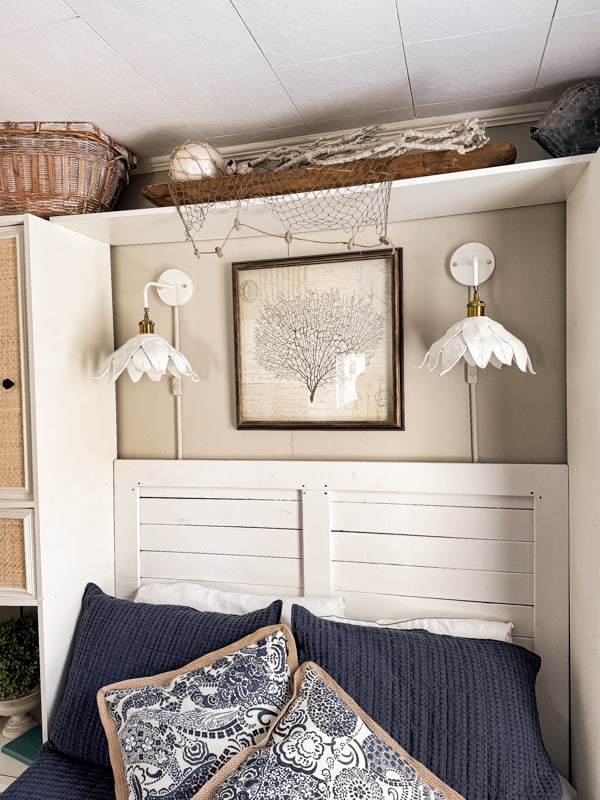
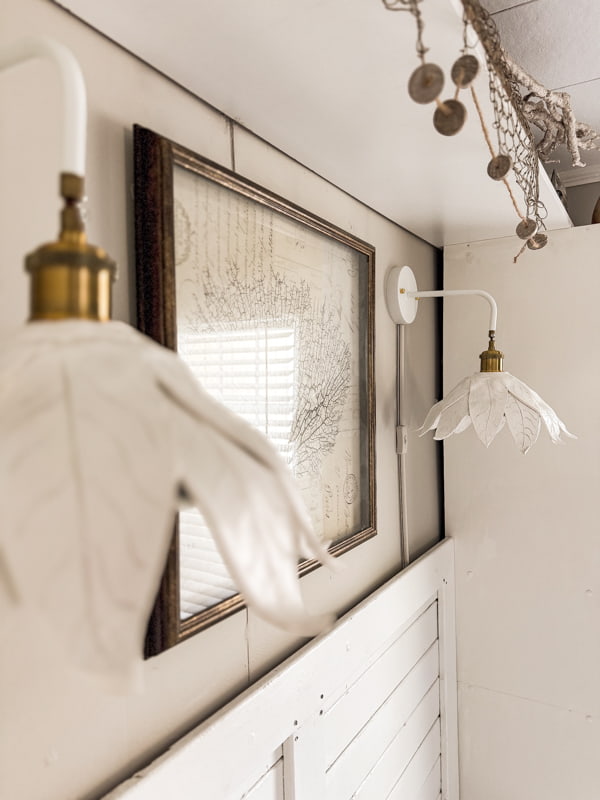
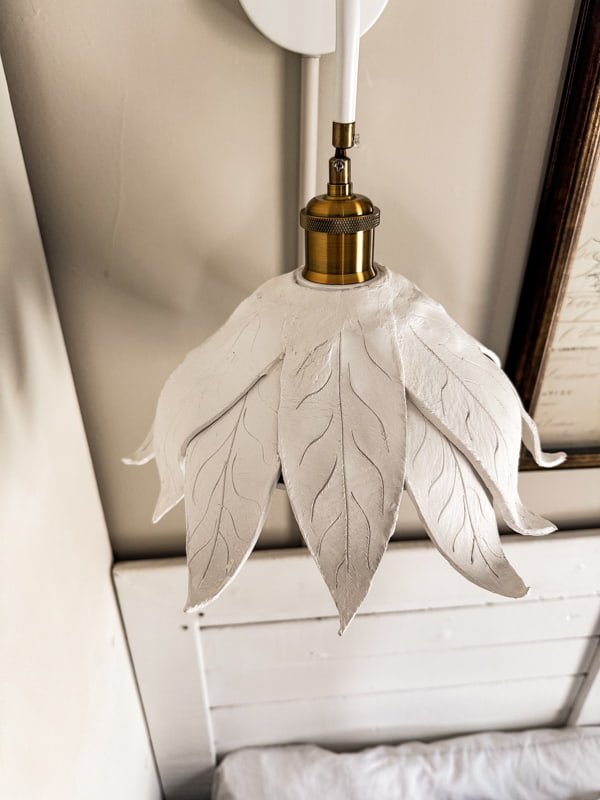
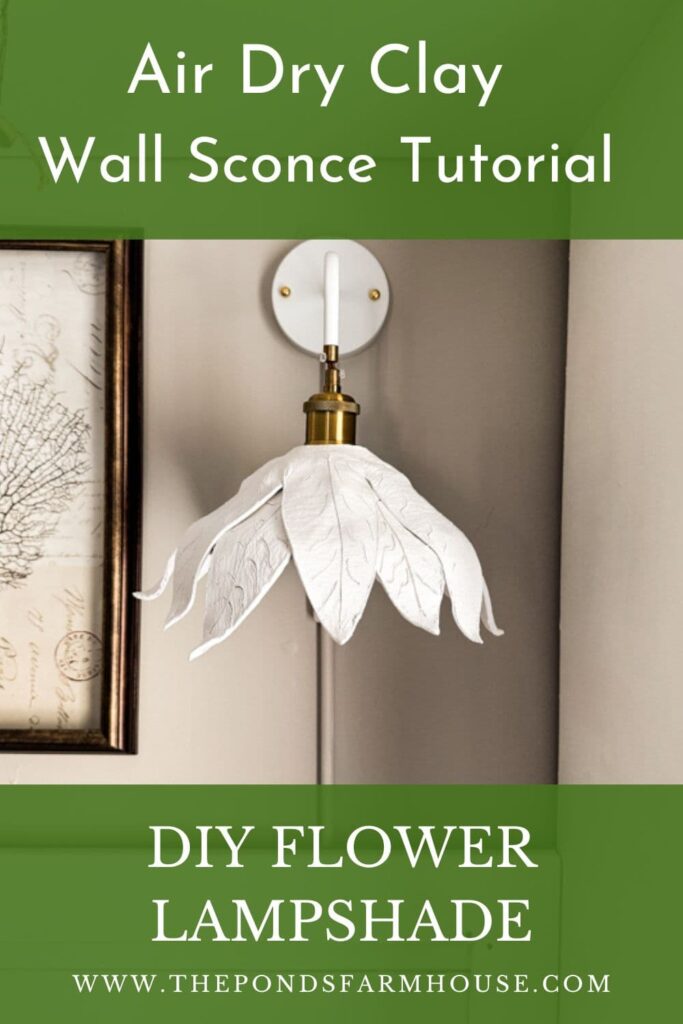
Install The Flower Wall Sconces with Shades
Finally, the wall sconces with shades were ready to hang. Following the manufacturer’s instructions, I assembled and attached them to the wall. I added a wall cord cover, which was painted the same color as the wall paint.
The flower lampshades were installed last to avoid possible damage.
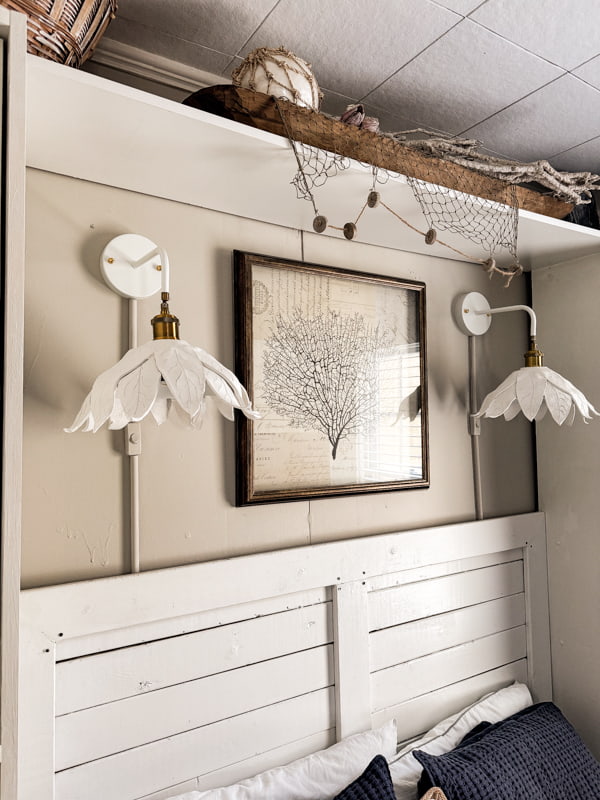
The DIY Lampshades are a perfect coastal addition to the recent rattan cane cabinet update.
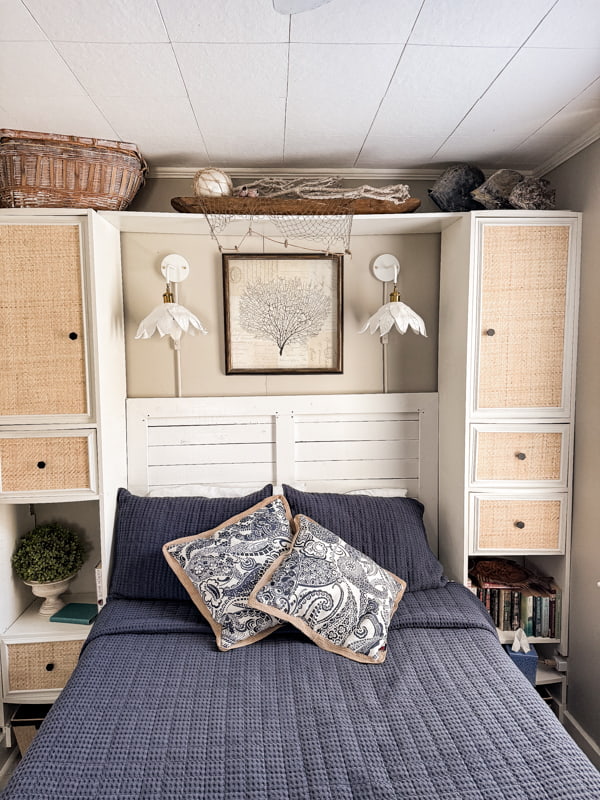
The wall scones with shades are plugged into a remote wall outlet, and the on-and-off switch is by the door. We love the convenience of the remote switch, which allows us to avoid using the switch attached to the lamps.
We also installed 25-watt Edison Light bulbs for a soft glow.
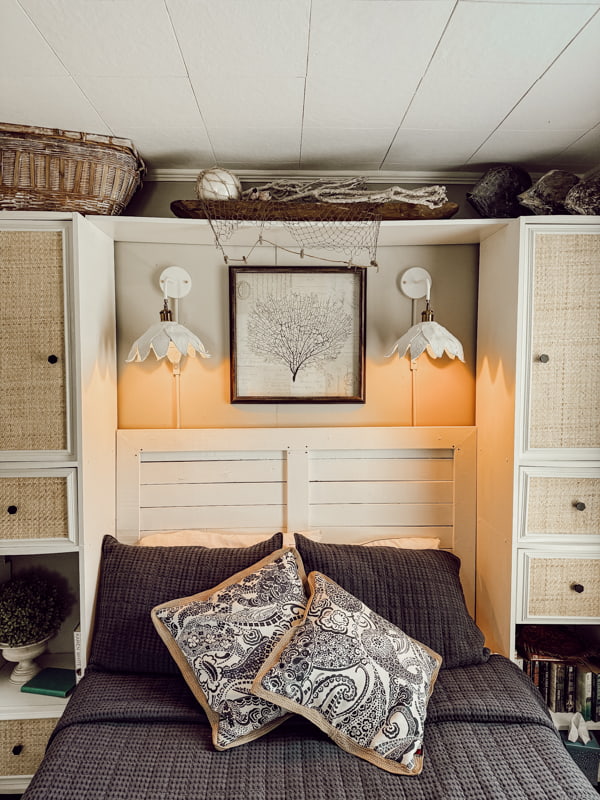
Although these flower lampshades are not 100% like the inspiration shades, I’m extremely happy with the DIY version.
One Year Update
So, how did the Air-Dry Clay DIY Lampshades hold up? One year later, they still look great. I encourage you to go out on a limb to create what you want. Not all projects are as successful as this one, but you’ll never know until you try.

Similar Lamp Resources

Related Articles
- Easy Air Dry Clay Christmas Ornaments
- Craft Fun DIY Clay Easter Eggs: Budget Pottery Barn Dupe
- DIY Ideas for Napkin Rings, Pottery Barn Style

Pin It To Remember It
Did you find some great ideas you’d like to save for future reference? To save, hover over the images and pin to your favorite Pinterest Boards when you see the PIN button in the upper left-hand corner.

Outstanding! I love them♥️
Cheryl,
I’m so glad you like them. Thank you so much.
I was with Rachel when she saw the sconce in one of our favorite places to shop for home decor in Wilmington. When I saw her bedroom with those wall scone, I honestly thought she had gone back and bought them! It is an exact replica of the ones in the store. Most amazing thing she’s done yet! 👏
Alice,
I appreciate you so much. I wanted those lights so bad and couldn’t believe how much they cost. I’m glad you think they look like the expensive version. I get so many ideas while we are shopping together. Always an adventures.
I love your posts Rachel! You are so clever and think of the best DIYs. This is one of my favorites of yours.
Sally,
Thank you so much. I’m so glad you like this project..
These turned out beautifully, but I admire your patience!
Teddee,
Thank you so much. I am so glad you like this one.
All I can say is “WOW.” Your flower lampshades are gorgeous.
Peggy,
Thank you for your kind words. I’m so glad you think so.
Unbelievably smart . I love how you look at something and then figure out how to do it yourself. You have mastered that !
Marilyn,
Thank you. I get that gift from my father and I appreciate you for your comments and encouragement.
That is the coolest thing ever! Very clever and truly beautiful!
Debbie,
I’m so glad you thank these are cool. I am extremely happy with how they turned out. Thank you for following along.
Your flower wall sconces look enchanting!
Angie,
I am so glad you like them. Thank you for following along.
Awesome idea! You are so talented, and I enjoy all your
ideas and suggestions. Keep up the good work.
Love them!
Dee,
I’m so glad you like this one. I appreciate all your words of encouragement and thanks for following along.
This is so cool!
Cindy
Thank you! I’m so happy with the finished project. Glad you like it.
I know you have heard this before but GIRL, YOURS ARE SOOOOO MUCH CUTER AND BETTER THAN THE $400 VERSION!!! I can’t even with these! I have a feeling everyone that stays in that bedroom is going to contact you asking if they can buy them. Love them, love you and your amazing talents. Seriously just beautiful!
Cindy,
Awww you just made my day. Those lampshades may be my favorite project. I’m so thrilled with the money I saved and feel I’ve still got the look. Thanks for all you encouragement. Have the best day.
These look great! I enjoyed watching how you made these…and everything else you do. I love your new email’s look…very inviting and professional.
Leisa,
I really appreciate this. I’m also glad you like the new email format. I’m still learning this new company and tweaking things. If you feel anything isn’t clear or needs improvement, please let me know. Thank you for following along.
I am crushing on these!
What a great idea.
Lori,
I’m so glad you like them. They turned out great and I’m so happy I didn’t spend all that money on the inspiration ones. Have the best day.
♥️🏵️🌷🌞🌺🌿
Dear Rachel,
Magnificent. You’re the best. Such a wonderful and imaginative presentation.
This is a must idea. I’m planning on creating a large bowl, inspired by Rachel. ♥️💗💜💗🌞
Kathleen,
I’m so glad you like this idea and I can’t wait to see what you make. Be sure to share with me when you are finished.
Don’t you love it when you can see something in your mind then make it happen. I’m the same way, got to have that creative outlet, but I have been known to copy some of your ideas lol
Heather,
I take that as the biggest compliment. I love it when a plan comes together as it did with these lampshades. Have a blessed day.
Rachel, These flower shades you created for your wall sconces are beautiful! Thank you for sharing them again.
Angie,
They are one of my favorite projects ever and I’m so happy they held up and still look good.