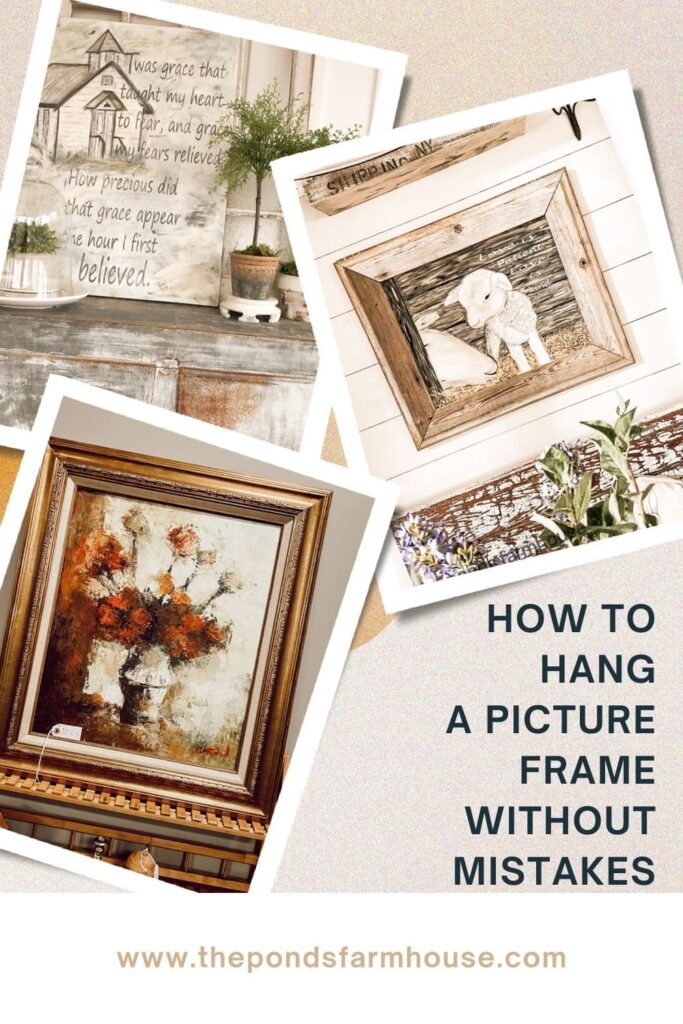
Master The Art Of Picture Hanging: Easy Tips & Tricks
Tired of lopsided picture frames and endless damage to your walls? Transform your wall décor from frustrating to fabulous with our guide on how to hang a picture frame! This article unveils easy tips and tricks that will have you hanging art frames like a pro in no time.
By following these simple tips, you will avoid making mistakes that result in costly damage to your walls.
(Posts on The Ponds Farmhouse may contain affiliate links. As an Amazon Associate, I earn from qualifying purchases. See the full disclosure details here.)
Table of contents
How To Hang A Picture Frame Without Mistakes
Do you have multiple holes in your walls from trying to hang art in your home? You measure and measure again, but when the picture frame is hung, it’s the wrong height or crooked. I’ve made so many mistakes in the past that I can never replace the art without some major drywall repair.
If this sounds like you, then you are in luck because I’m sharing hanging picture tricks and tips that will have you hanging art frames like a pro.
How to Hang Art at the Perfect Height
Knowing what is considered the proper height to hang your art is the first step to avoiding making mistakes.
So, what is the proper height? Hanging art too high is the biggest mistake most people make.
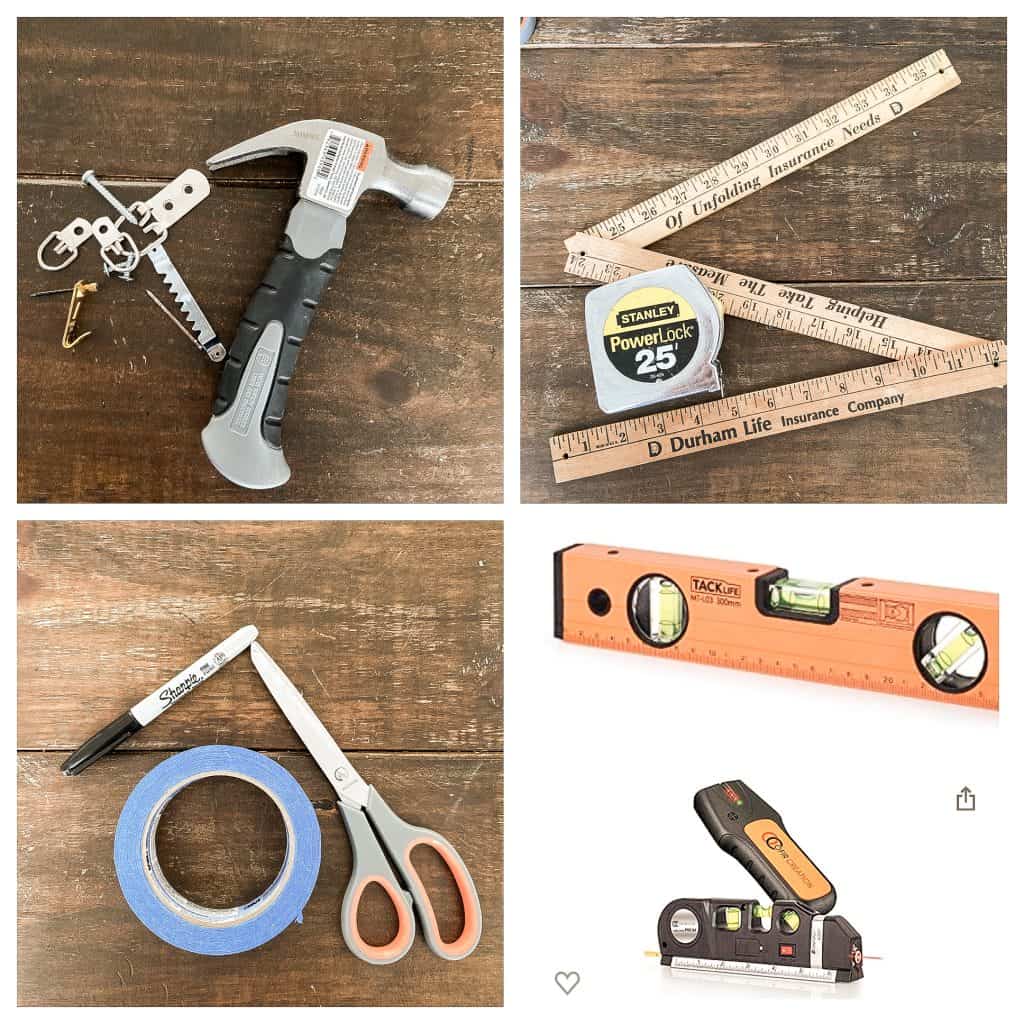
Tools to Hang Art
Next, you need the proper tools to hang a picture frame.
- Hammer
- Nails
- Screws
- Picture Hooks
- Ruler, yardstick and/or tape measure
- Painters Tape
- scissors
- sharpie
- Hand-held level or laser level
Tips For Hanging Art Frame on an Open Wall
Opinions vary; however, one good rule of thumb is that an individual art frame should be hung at eye level.
Therefore, when hanging a single piece of art, the center should be approximately at your eye level. This can vary from 58 – 62 inches from the floor. I use a standard of 60 inches.
After gathering all your tools, begin by measuring the height of your art, including the frame.
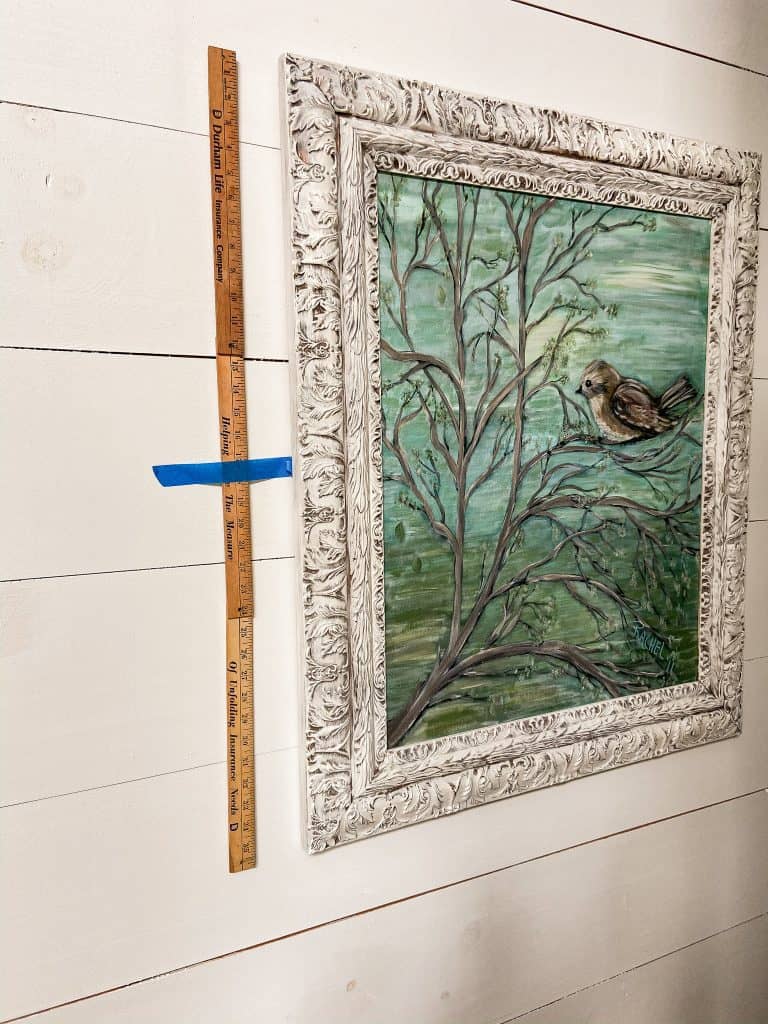
Determine where the top of your frame should be.
To determine where the top of your frame should be, measure the height of your piece, then divide that by half. This painting is exactly 36″, and half of that is 18″.
In this example, you will add 18 inches to your eye level of 60 inches. Therefore, 78 inches is the exact height at which to place the top of your frame.
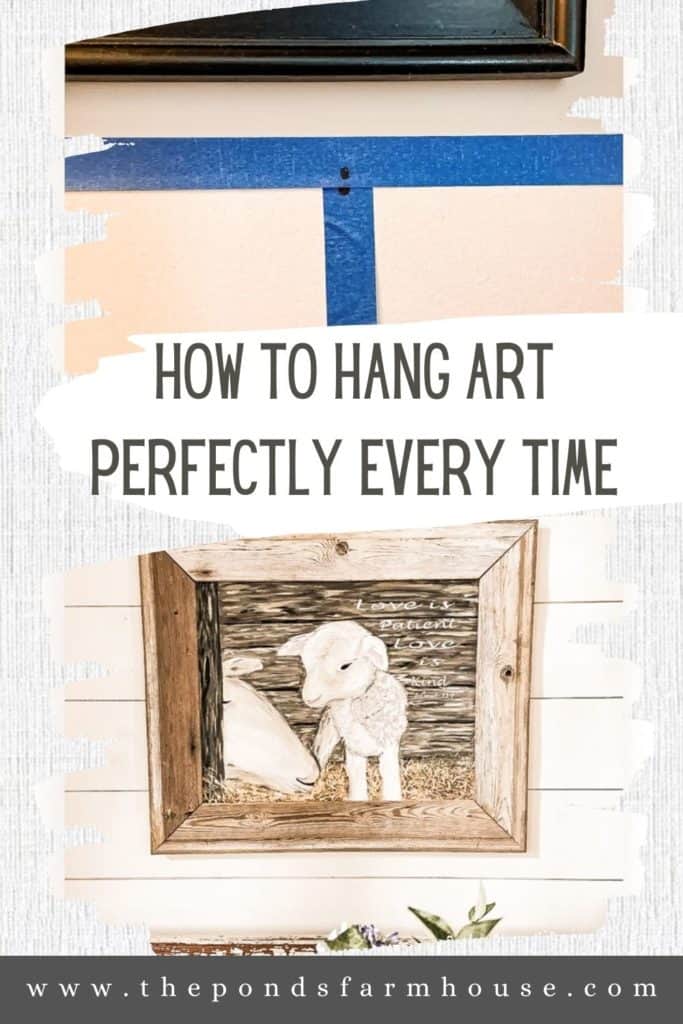
I prefer to place a piece of painter’s tape at the exact spot the top of my frame should be. Use a level to be sure you are straight. To test the placement, hold the painting up just under the tape and see if you are looking at the center of the painting.

Easy Measuring Before Driving A Nail
This is the point everyone dreads: placing the nail.
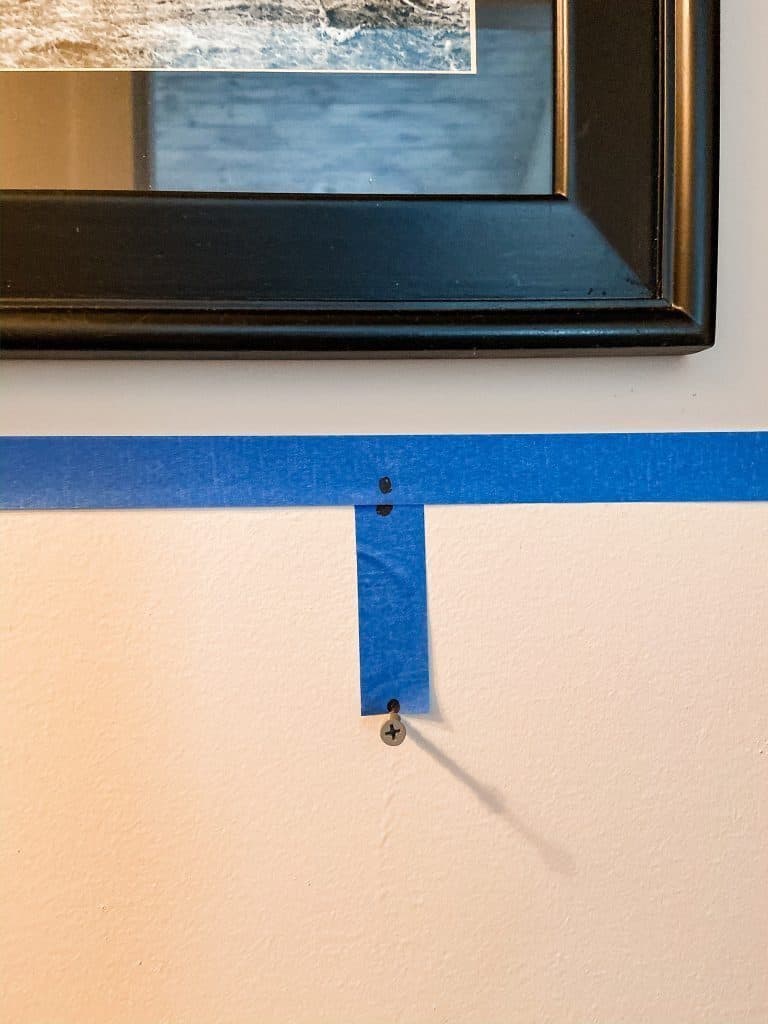
You will want to use painter’s tape to mark the spot. Begin by placing a piece across the back, horizontally, the exact length of your frame. If the art has a single hanger, mark the tape exactly where the center of the hanger is. If there is a wire, place it in the exact center of the frame.
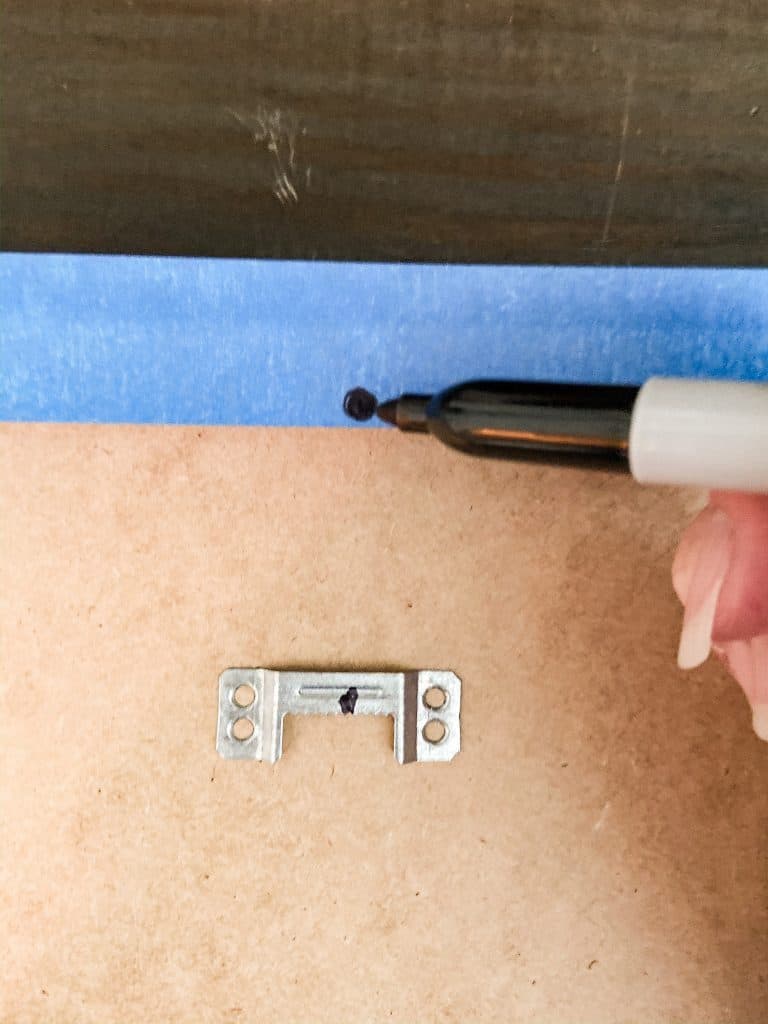
However, should the picture frame have two hangers and no wire, place a mark at the exact center of each hanger.
Remove the tape from the back of the picture frame and place it over the piece of tape you have marked for the top of the frame.

Next, measure from the top of the frame to the teeth of the hanger. Cut another piece of tape that exact length and place it under the tape on the wall. It’s important to be sure you place this piece exactly center to where you’ve marked for the hanger.
Example. The horizontal tape is exactly where the top of the frame will go. The dot indicates the position of the hanger on the back of the frame. The vertical tape is cut the exact length from the top of the frame to the bottom of the hanger. Place your nail or screw exactly at the bottom of the tape where it is marked.
You can safely place your nail at the bottom of the tape, and the painting or picture will be in the perfect spot.
How to Hang A Picture Frame Over Furniture
Here is an important tip for hanging art over furniture: Never leave more than 12 inches between the bottom of the frame and the top of the surface.
Depending on the size of the art piece, 5 – 9 inches is appropriate. The larger the piece, the more distance you can allow.
This time you will want to identify the location for the bottom of your frame instead of the top.
Measure up from the table or chair and place the painter’s tape at that height. Be sure that the tape is level across the bottom.
Next, place a piece of tape on the back of your picture frame and mark the placement of the hangers just like above. Remove the tape and place it on the other piece of tape, marking the bottom of the frame.
Finally, measure up the hangers on the backside of the frame and cut a piece of tape that exact length. The nail or screw will go at the end of the tape for proper placement.
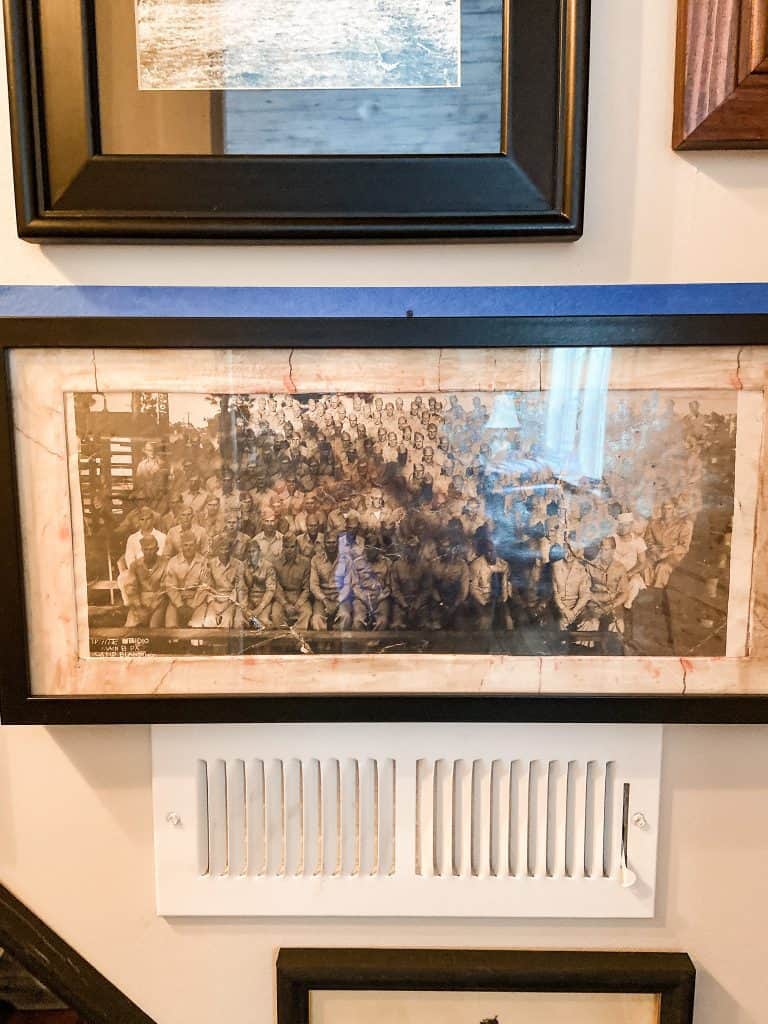
How To Hang Multiple Picture Frames Together For A Gallery Wall
Gallery Walls can be tricky, but when done properly, they are amazing. You can hang multiple art frames over a piece of furniture or use a whole wall.
If you use identical frames of a consistent size, hanging a wall of pictures isn’t as difficult. However, if you use multiple-size frames and shapes, deciding on an arrangement beforehand is crucial. Keep in mind that you want approximately 2 inches between each frame.
If you are placing larger pieces side by side, you can spread the distance between the frames up to 1/2 the horizontal width of the frames. This would be appropriate along a hallway, for example.
I recently created a floor to ceiling gallery wall in our powder room. You can see all the tips and tricks at How To Hang A Gallery Wall Without A Mistake.
Additional Articles of Interest
- How to Create a Custom Mat for Framing Vintage Photos
- How To Hang A Gallery Wall Without A Mistake
- Also, see a creative idea for what to do with your old inherited family photos
I hope these tips help you avoid the mistakes I’ve made in the past. The measure twice and hammer once rule of thumb works every time. I look forward to sharing my next adventure with you.

Pin It To Remember It
Did you find some great ideas you’d like to save for future reference? Hover over the images you’d like to save and pin to your favorite Pinterest Boards when you see the PIN button.
Brilliant Rachel!! The tape trick is fabulous – I can’t tell you how many holes are in my walls from picture hanging failures! I’m definitely coming back to this post next time I need to hang something. Thanks for the wonderful tip! 💗
Barbara,
I appreciate this. It’s the easiest way I’ve found to not make mistakes.
Love these creative, yet simple ideas. And your artwork is beautiful.
Thanks so much Amy!
Love these simple yet creative ideas. And your artwork is beautiful.
Amy,
I really appreciate this so much. Thank you for taking the time to comment.
Lots of great information, so useful, plus great ideas! Enjoyed very much! ❤ ❤ 😊😊
Oh, I’m so glad you found it helpful.