Upcycle Oyster Shell Craft: DIY Decorative Ring Dishes
Want to add a touch of coastal elegance to your home? Give shells a new lease on life with this simple and eco-friendly oyster shell craft! I’ll guide you through the steps to create beautiful oyster-shell ring dishes that add stylish coastal decor to your dresser or vanity. You can keep your jewelry from rolling off your furniture by placing it in a decorative oyster-shell jewelry dish.
I’m sharing two options for creating a ring dish, but there are many more. One option is to leave the natural pearl-like shell center as it is. However, you may want to add a decorative finish to complement your home decor. I’ve got you covered for both options.
(Posts on The Ponds Farmhouse may contain affiliate links. As an Amazon Associate, I earn from qualifying purchases. See the full disclosure details here.)
The Best Source for Oyster Shells
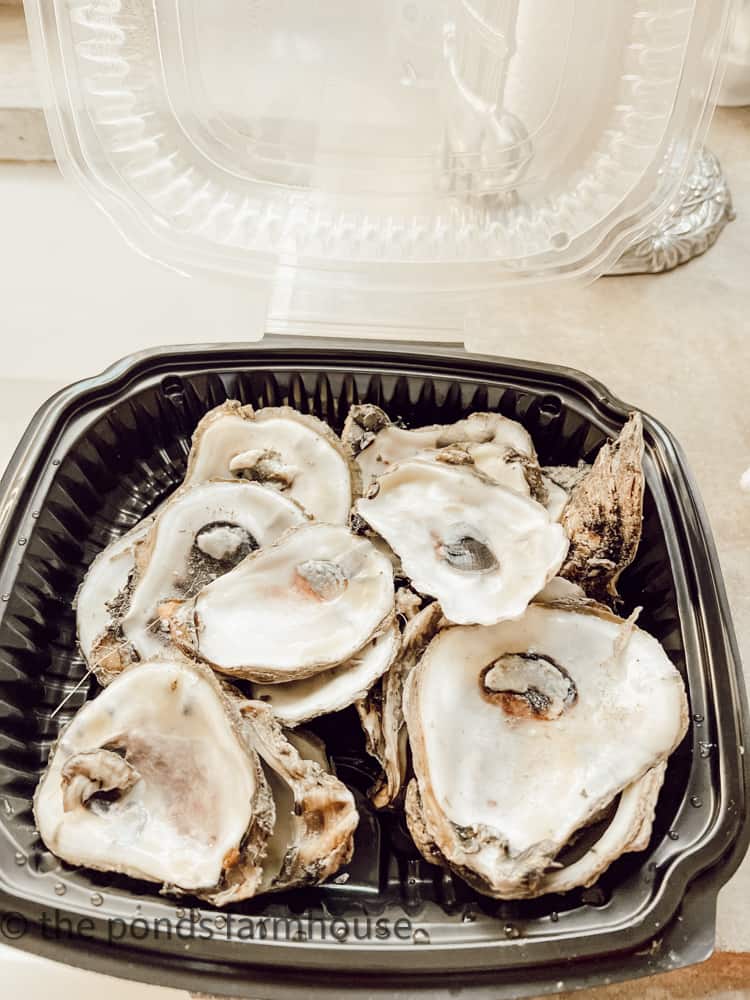
I love making oyster shell crafts because you can get oyster shells for free. Even if you are not a fan of oysters, you can visit a restaurant serving oysters on the half shell and ask for a takeout box of shells. I am sure you can get all you need for any project.
How To Prepare Oyster Shells For Crafts?
Once you have your shells, you must clean them to remove any oyster residue. I begin by washing the shells and scraping away any oyster meat. Next, I add the shells to a bucket with 1 part Clorox and 1 part water. I allow the oysters to soak for a few hours. Finally, I rinse them and allow them to dry. Once dry, you can begin your projects.

How To Make an Oyster Shell Ring Dish
Making an oyster shell ring dish is easy, and even with limited crafting skills, you can create a decorative dish. The shells come in all shapes and sizes. I recommend using large shells to make a trinket dish. Next, ensure the shell sits level and doesn’t rock. Here are some ways to level and stabilize your oyster shell jewelry dish.
How to Level the Oyster Shell
You may get lucky and find a level shell without making any adjustments. However, most shells have a rocky bottom and may need assistance to create a steady, level jewelry dish.
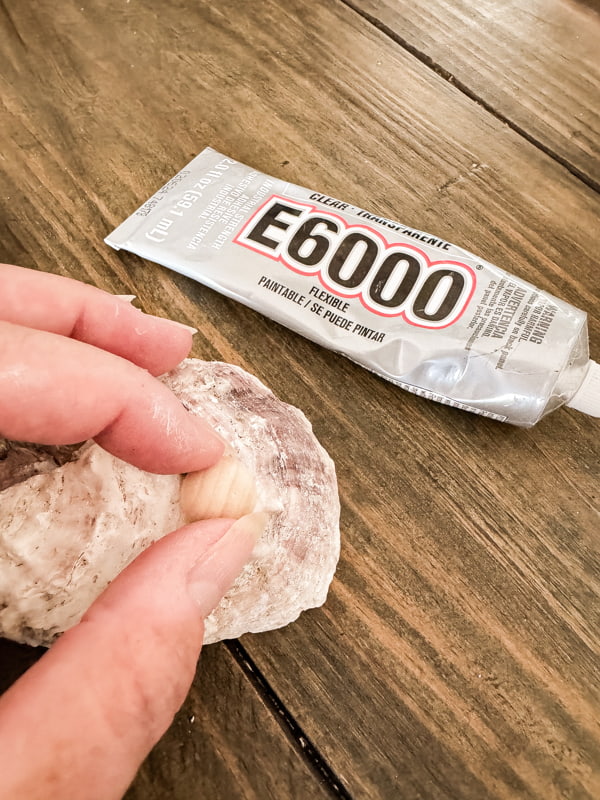
There are several ways to level the shells. I like to add beads or shells to the bottom.
Place your shell on a table and determine where you need a bead to keep it steady. Then, add a drop of permanent glue, such as E6000, and adhere the bead or shell in place.
Insider Tip
I recommend turning the shell over before the glue dries to ensure it is properly placed. You can also leave it in that position until the glue dries, but be sure no glue is dripping from the shell.
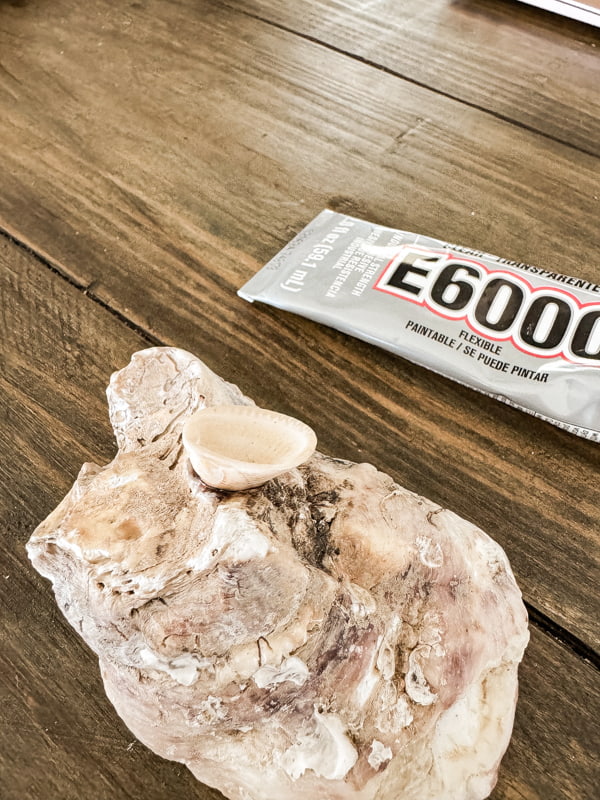
Another idea is to use multiple beads or shells to create tiny legs to steady the oyster shell.
How To Make A Natural Oyster Shell Jewelry Dish?
Once you have attached your items to create a level shell, you are ready to decorate it into a stunning shell jewelry dish.
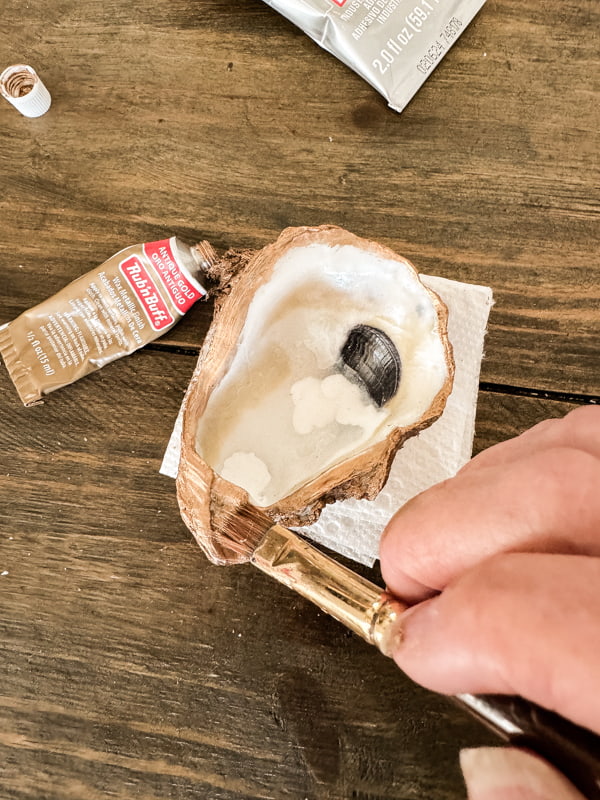
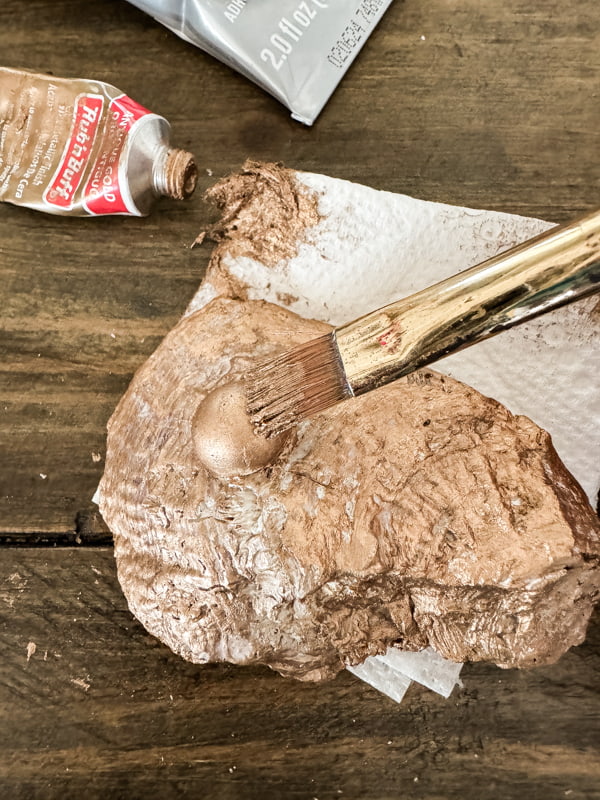
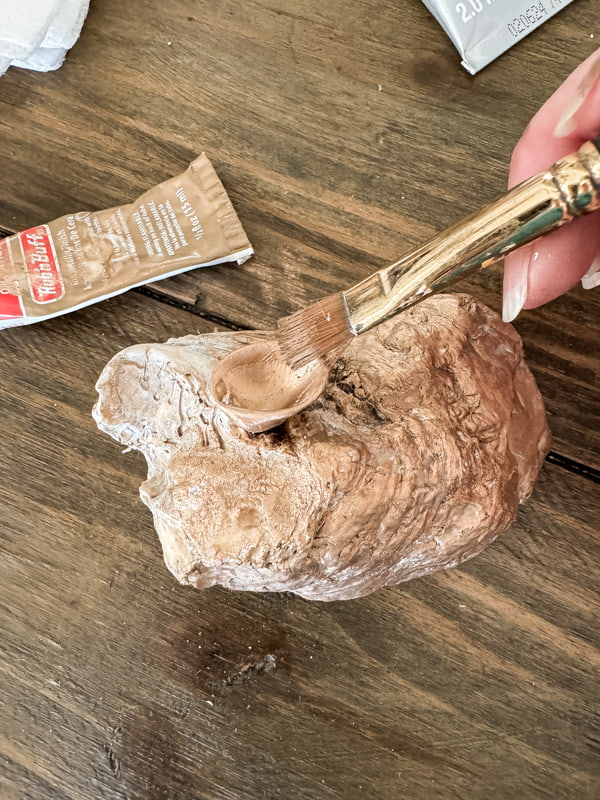
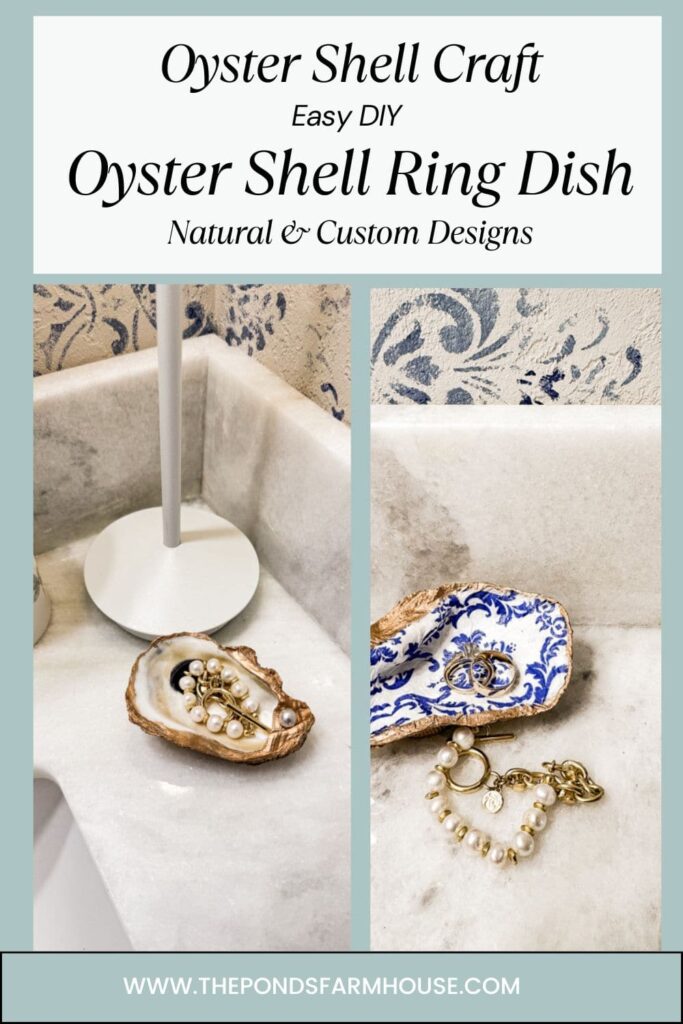
To dress up the shell, you can add a rim of gold around the edges. I recommend covering the bottom of the shell with gold paint or Rub N Buff. I personally like the finish achieved with Rub N Buff, but you can use paint if you prefer.
I add a drop of gold to a disposable brush and paint the rim and back of the shell. Rub off any excess.
For added decoration, I added a pearl to the top rim of the Oyster Shell Ring Dish. I used a pearl button and glued it in place. You can also embellish the dish with additional seashells.
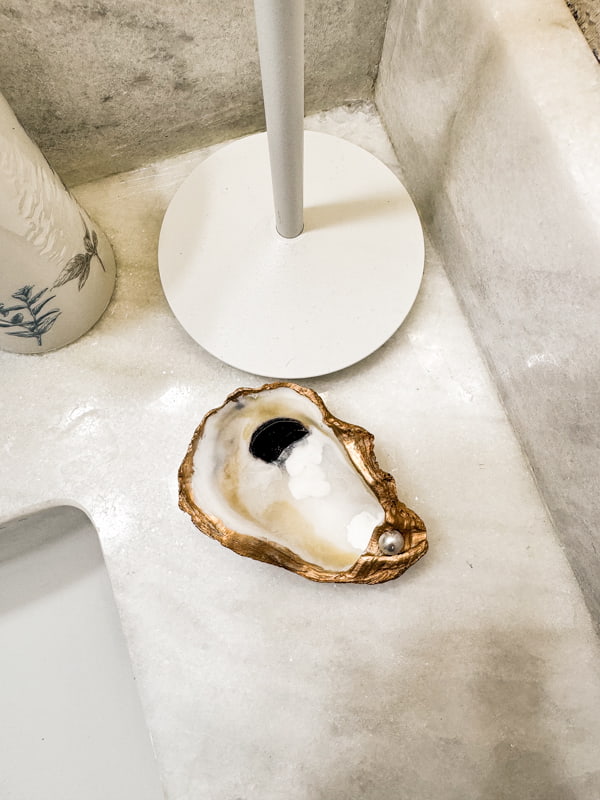
See how quick and easy that was! This natural design will be perfect for any decor style.
How To Make A Napkin Decoupage Oyster Shell Ring Dish?
For our next oyster shell craft idea, let’s make a napkin decoupage oyster shell ring dish. For this one, I used a small seashell to level and create a steady dish.
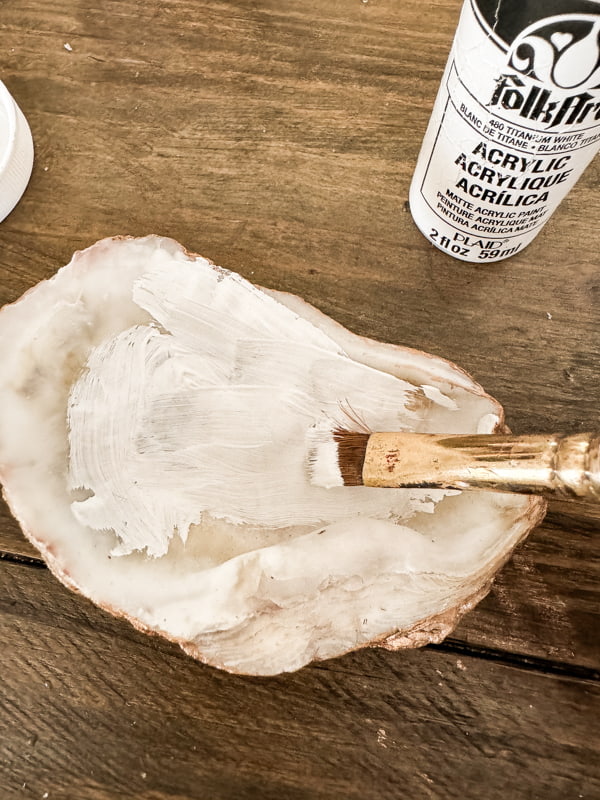
Begin by painting the back with gold Rub n Buff and the inside with white craft paint. Painting the inside of the shell will ensure the shell color doesn’t distract from the napkin’s design.
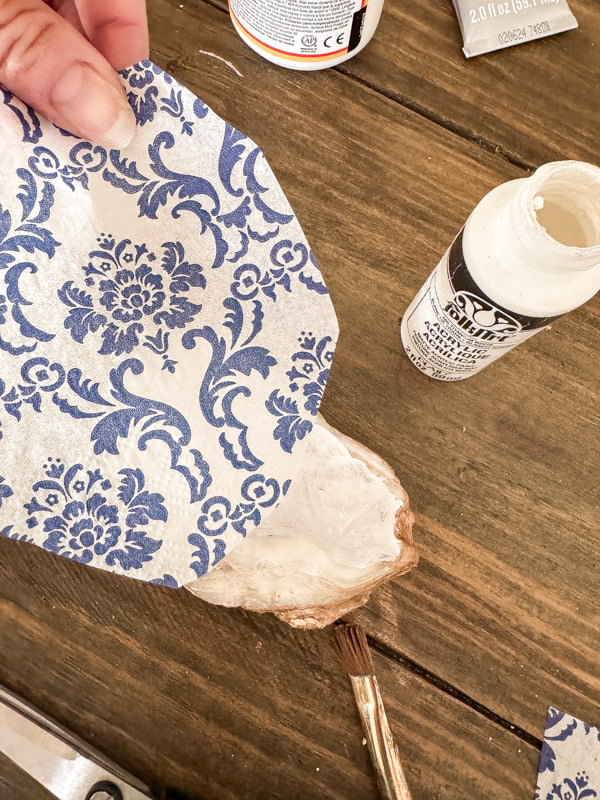
How To Apply Napkin Decoupage To Oyster Shell
Separate the napkin layers to add napkin decoupage to your oyster shell craft. Then, cut the decorative layer to approximately the same size as the inside of the shell. Ensure that the paint on the shell’s inside is dry, and then add a coat of Mod Podge. Gently press the napkin onto the Mod Podge to prevent it from tearing. Use your brush to help spread the napkin evenly over the shells inside.
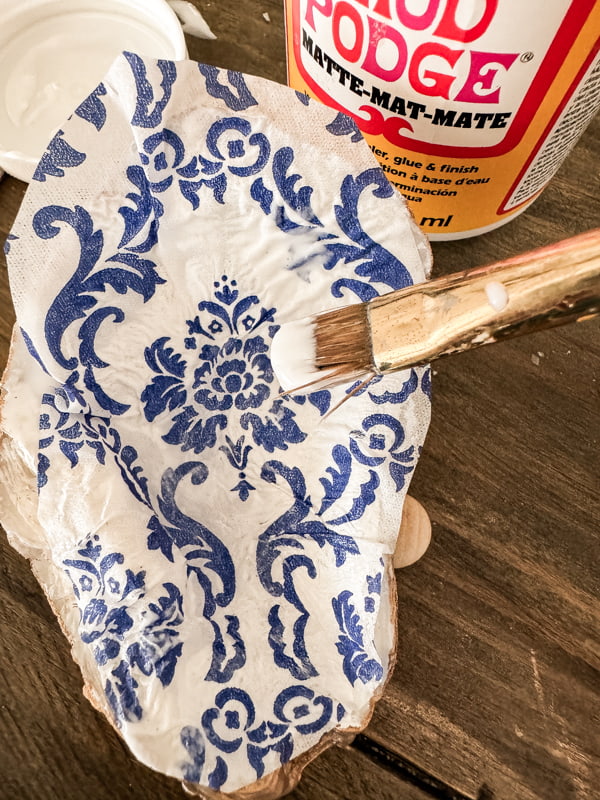
Apply another coat of Mod Podge over the top, and gently press out any bubbles and wrinkles as you go. Remove any excess napkin around the edges and allow it to dry.
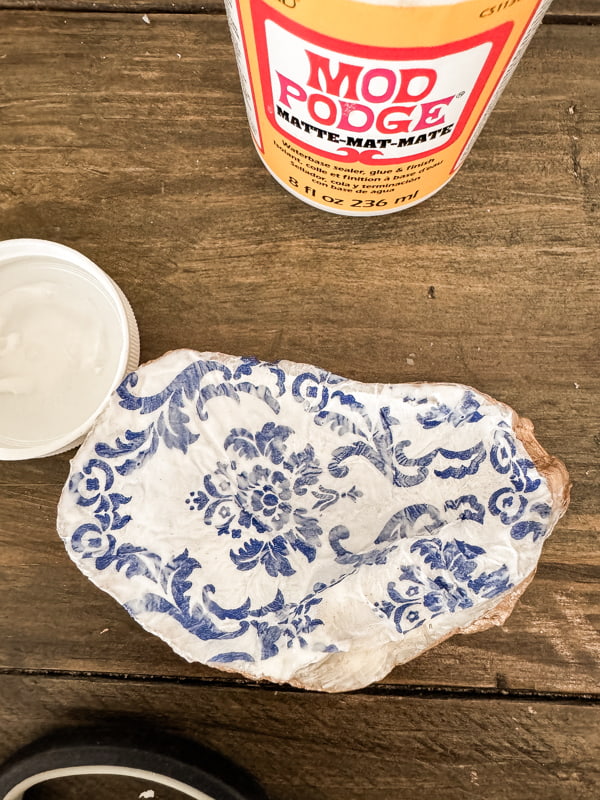
Finally, apply the gold Rub n Buff to the top edge of the shell and over the napkin edges.

Insider Tip
You can paint your shells with craft paints and use any color combinations you choose. I like the gold Rub N Buff finish, but use your creativity to create a unique design.
You can also hand-paint the insides of your shells instead of applying a napkin decoupage. Let your imagination guide you as you create your oyster shell crafts.
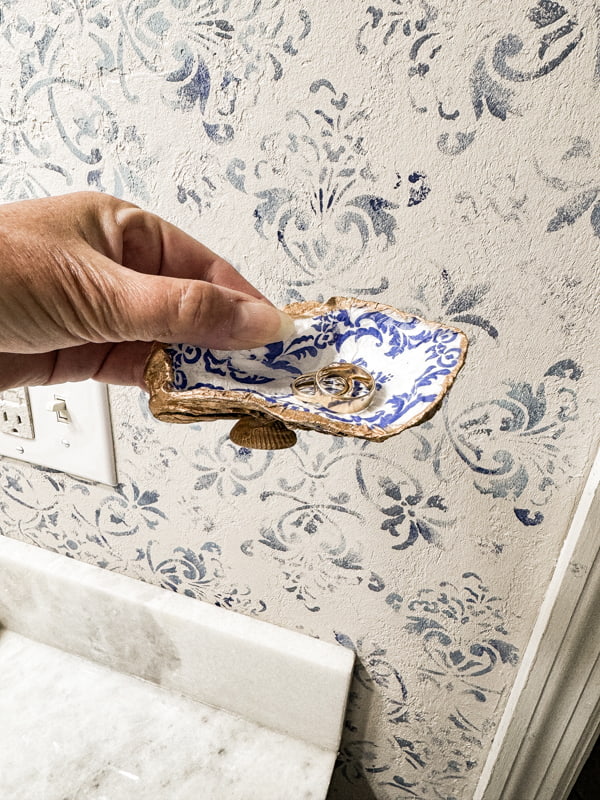
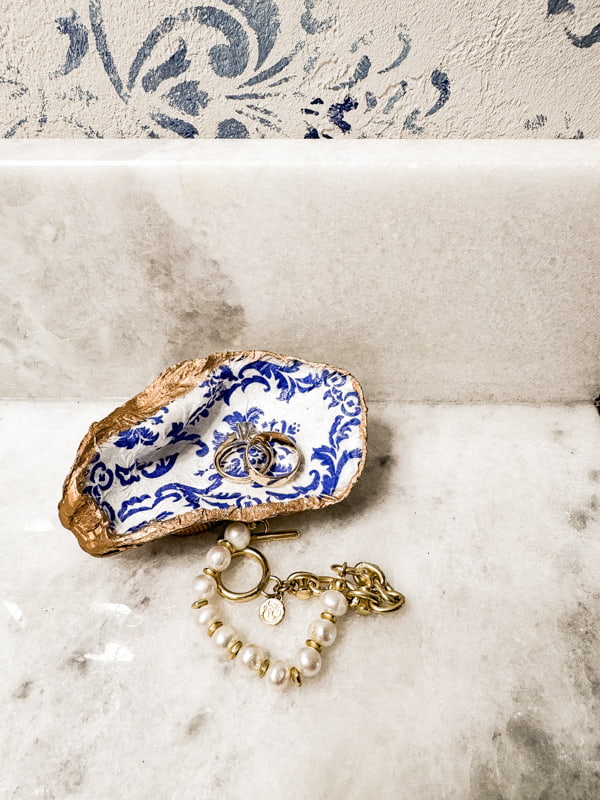
Stylish Coastal Oyster Shell Trinket Dishes
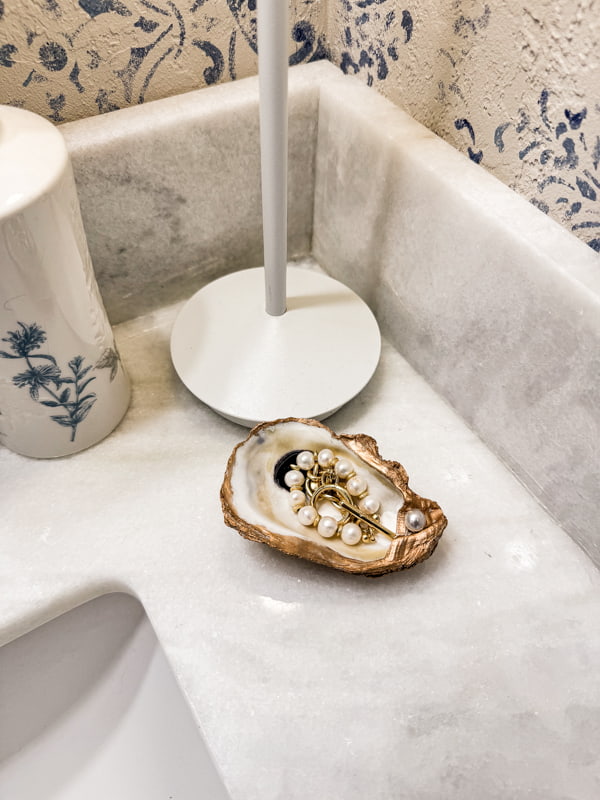
Once everything is dry, you can add jewelry to your dish.
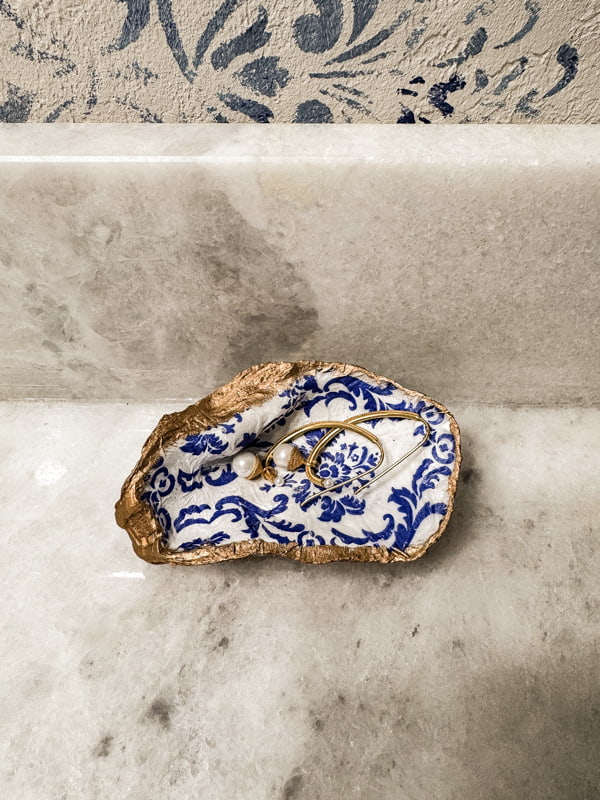
The small seashell helps balance the oyster shell, but I also love how it adds to the design.
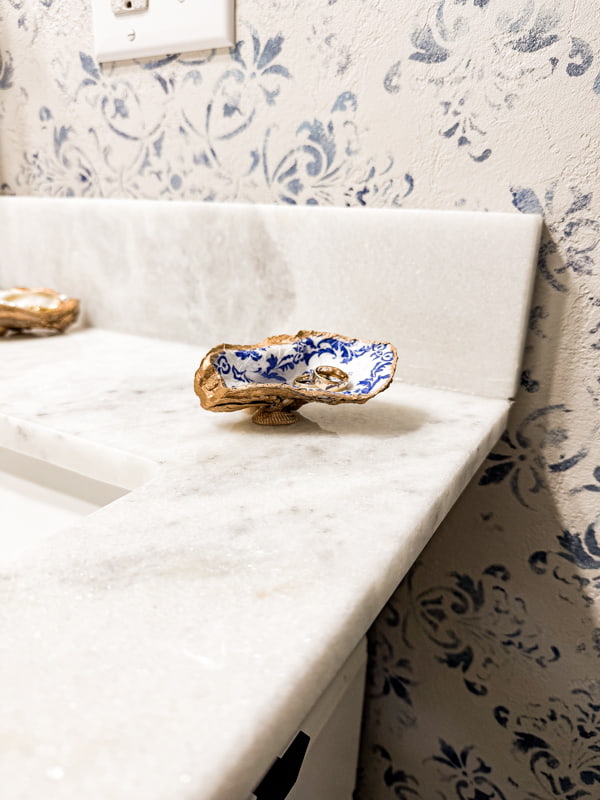
The blue-and-white napkin design works well with the DIY faux wallpaper in our beach cottage bathroom.
Related Articles
Here are some other articles that include oyster shell crafts and coastal DIY projects.
- DIY Cottage Oyster Shell Garland: A Unique Coastal Craft Idea
- Decoupage Oyster Shell Ornaments
- DIY Nautical Mirror from Thrifted Supplies
- Pottery Barn Dupe Candleholders
- 15 Simple Coastal Decor Ideas for Any Home
Resources
Thank you for stopping by today. I look forward to sharing my next adventures with you.

Pin It To Remember It
Did you find some great ideas you’d like to save for future reference? To save, hover over the images and pin to your favorite Pinterest Boards when you see the PIN button in the upper left-hand corner.


This is so professional looking, so smart and so adorable! Thank you for sharing it with us on Farmhouse Friday! I’m excited to feature it tomorrow. Hope you had a wonderful July 4th! pinned
Cindy
Thank you so much. I appreciate you.
Any idea why napkin colors would change when put it on top of mod Podge
Donna,
I don’t think they change color so much as they are just tranparent and the underlying color shows through.