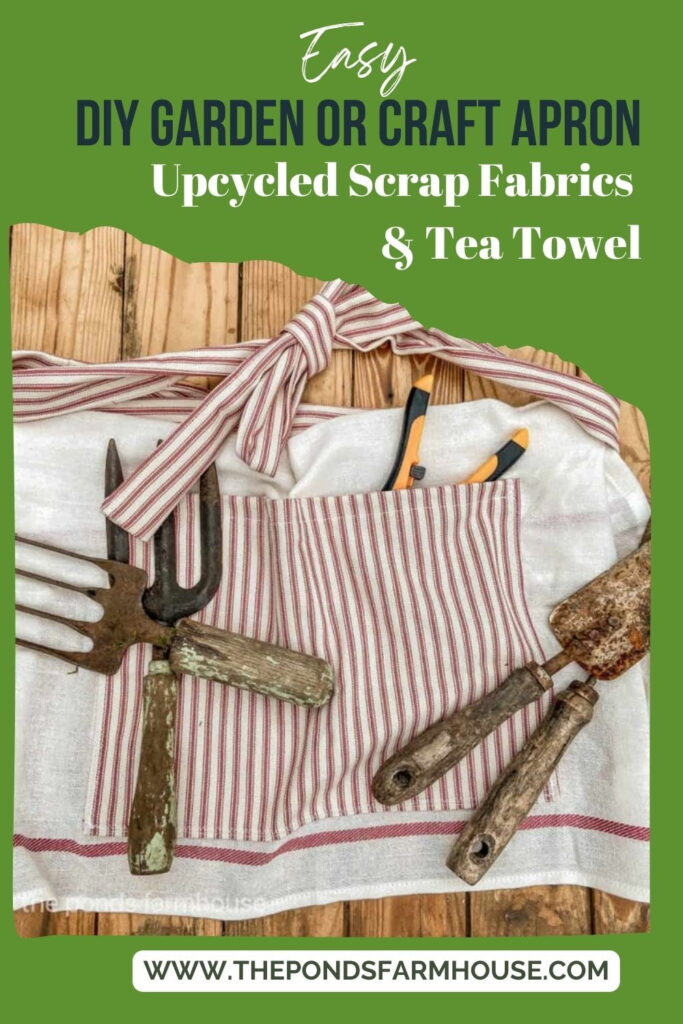
Easy DIY Garden Apron: Upcycled Tea Towel & Scraps
Do you love gardening or crafting? If so, you need a sturdy and stylish garden apron to protect your clothes from dirt and stains. But you don’t have to spend much money on an apron. In fact, you can make your own Garden or Craft Apron for just a few dollars using a tea towel and some scrap fabric.
Y’all, I have been wanting an apron to keep all my gardening and craft tools close at hand. However, I also wanted it to be cute, so I decided to make one, and here’s what happened.
I’m a spur-of-the-moment kind of girl, so I’m digging through my scrap fabrics to find something to make my apron with. Then I saw this tea towel that was left over from another project, and I decided it would be perfect. In addition, I have plenty of scrap ticking fabric.
Since the tea towel had a red stripe, I decided to use some red ticking fabric scraps to complete the project.
(Posts on The Ponds Farmhouse may contain affiliate links. As an Amazon Associate, I earn from qualifying purchases. See the full disclosure details here.)
How To Make A Tea Towel Gardening Craft Apron
First, determine how long you want your apron to be, then fold the excess tea towel fabric. I decided 13″ would be a good length.
Then pin the folded fabric in place so that it doesn’t slip. The folded edge will be the top of your gardening/craft apron.
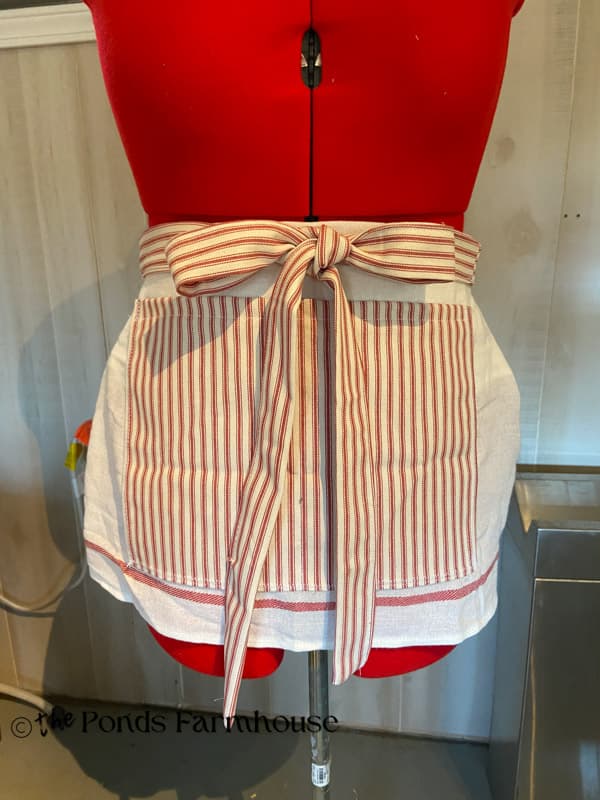
Next, cut the ticking fabric needed for your apron’s pocket and ties. I cut a 14 x 10 piece for the pocket and two 50″ x 2 1/2″ pieces for the ties.
How To Stitch the Apron Pocket
To make the pocket, stitch all the raw edges of the ticking fabric.
For the front pocket, fold it under 3 sides, approx. 1/4 ” and approx. 1/2″ across the top edge. Then, stitch all edges using a straight stitch on a sewing machine.
Then, place the pocket in the center of the apron and stitch it to the tea towel, leaving the top edge open. Then, run a stitch down the center of the pocket from top to bottom. This will form two pockets instead of one.
How to Make the Apron Ties
Next, fold the ends of each tie together, right sides touching.
Stitch the ends together and turn the right side out. Then, fold under the raw edges along the length of the tie and stitch them together.
Note: If you don’t feel comfortable making the ties from fabric, you can use heavy-duty ribbon or trim.
Once both ties are stitched, make a 2″ pleat at the top edge of the tea towel and place the ends of the ties in the middle.
Finally, stitch together along the side and top edge to secure the ties.
Budget-Friendly DIY Gardening Craft Apron
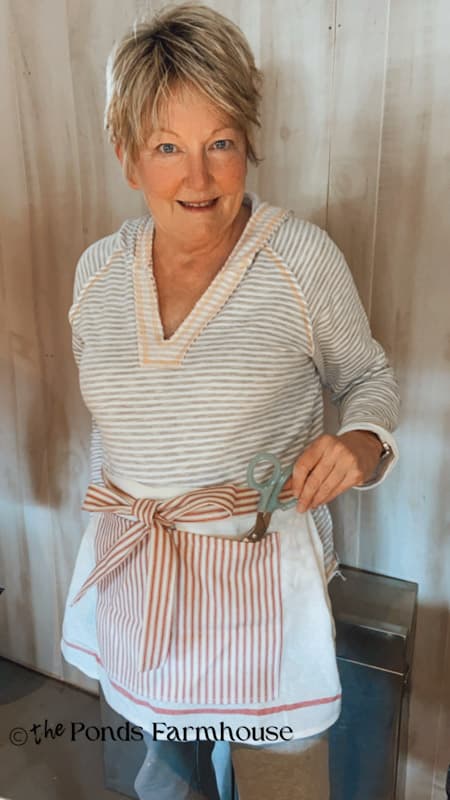
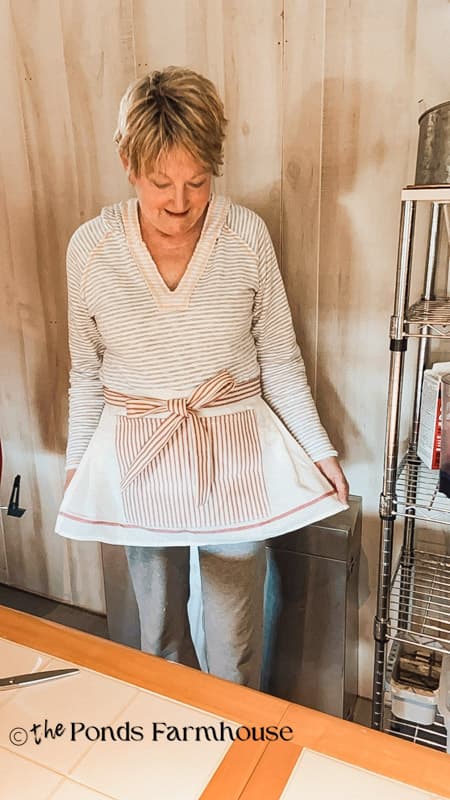
Wrap the ties around the back and tie the apron in the front with a cute bow.
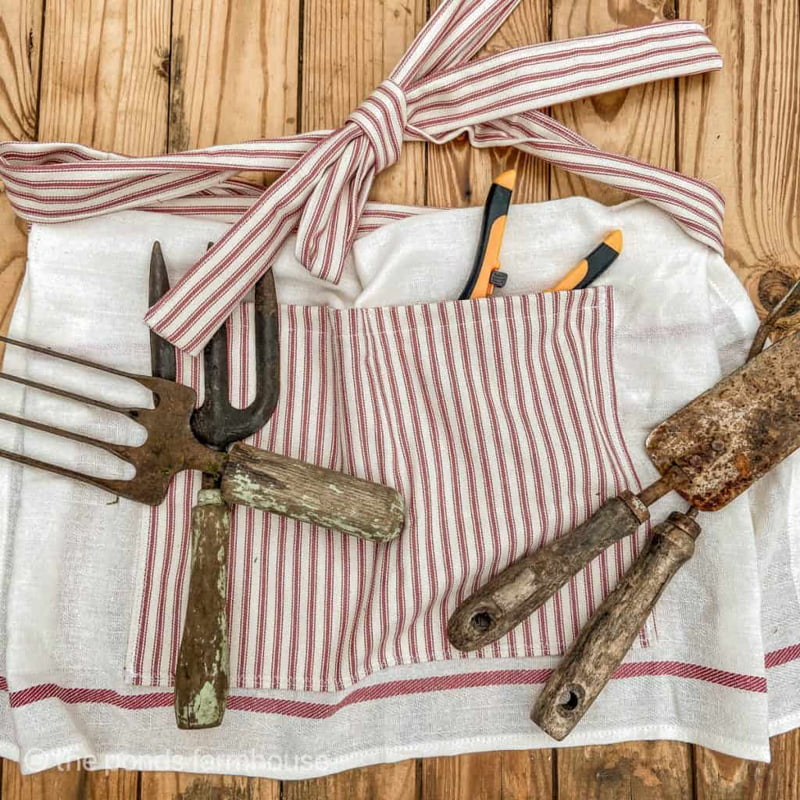
This project only costs $2.00 to make, and it will hold all my tools for both gardening and craft projects.
Cute DIY Apron
Video Tutorial

Pin It To Remember It
Did you find some great ideas you’d like to save for future reference? Hover over the images you’d like to save and pin to your favorite Pinterest Boards when you see the PIN button.

How cute is that! A clever idea too! It’s too pretty to get dirty 🤗 thanks for sharing Rachel!
Margie,
I had thought that too. LOL. At least it was inexpensive to make.
This is so cute Rachel. Love it and pinned!
Thanks so much Ann.
So cute! You’re amazing!
Barbara,
I really appreciate this.
That is adorable!
Miche,
I’m so glad you like it.
Very cute. I need to do this as I lose my garden tools all the time.
Your suggestions and tutorials are the BEST.
Happy Resurrection Day
Diana,
I really appreciate this so much. Thanks for stopping by.
That is simply adorable. Your creativity inspires me!!
Tammy,
I really appreciate you so much. Thanks for the encouragement.
I love the tea towel apron and the tera cotta pot wreath. I am going to make the wreath now, I have all the items here at my home to do this right now.
I love all your post and the fact I have most of the stuff on hand to do them.
Thank you,
Terry Babin
Terry,
Thank you so much. I really appreciate your encouragement and support. Have the best day.
Oh I love this, pretty and so useful. This should keep me from leaving my tools all over my yard, lol!
Marlene,
That’s why I made it. I spend half my time looking for something I left behind. LOL. Thanks so much for stopping by and sharing.
Rachel, I’m so happy to have found your blog! And that you are closer to my age. Lol What you and your husband have built is so inspiring. I also enjoy seeing your ideas for decorating… we’re pretty much on the same page there. You change things up as much as I do. I’m loving my adventures down the dirt at the ponds. 😉
Bonnie,
I’m so glad you stopped by to share. I think it’s important to stay busy and interested at any age. I hope your continue to follow along.
Great job! Its sooooo cute
Debbie,
Thanks so much for stopping by. I’m glad you like it.
I love your projects…so creative!!!😊❤️
Sue,
I really appreciate this.
What a great idea Rachel. It looks so good on you too. I only wish I could sew.
Kim,
This could be made with fabric glue as well.