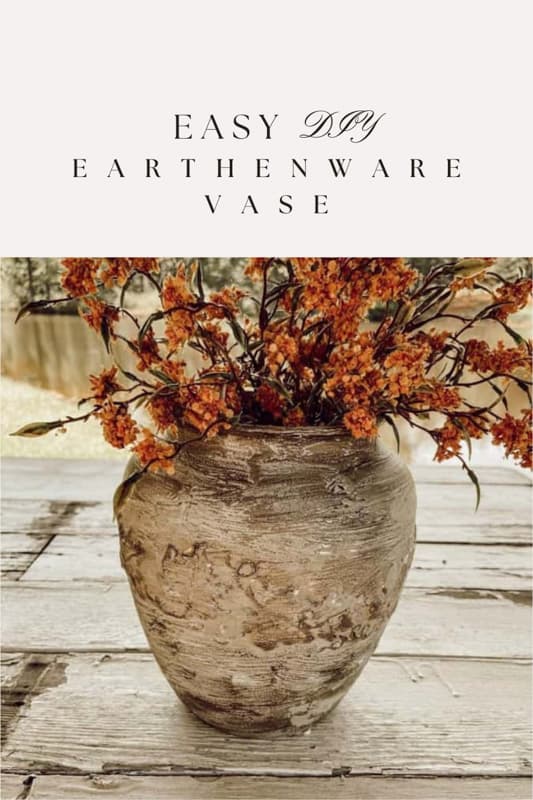
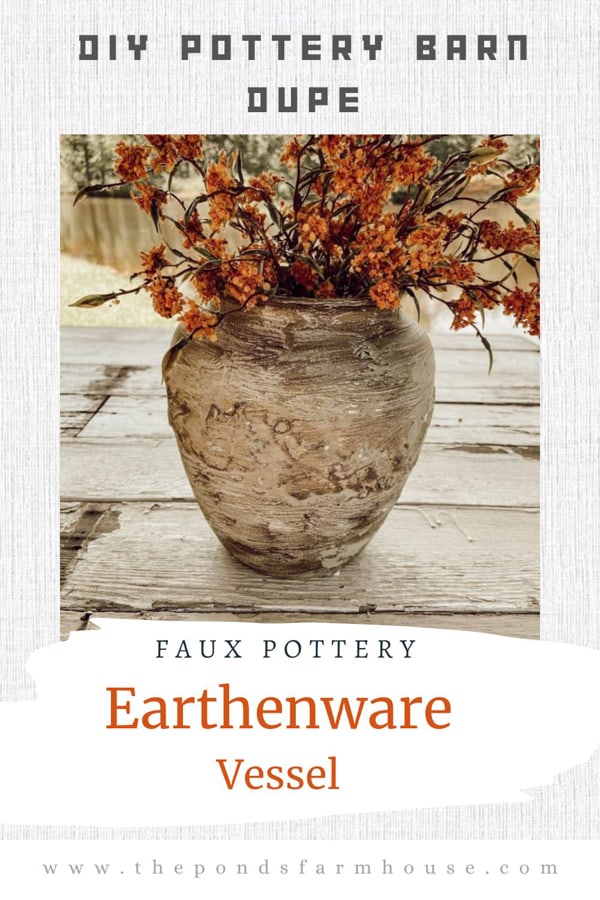
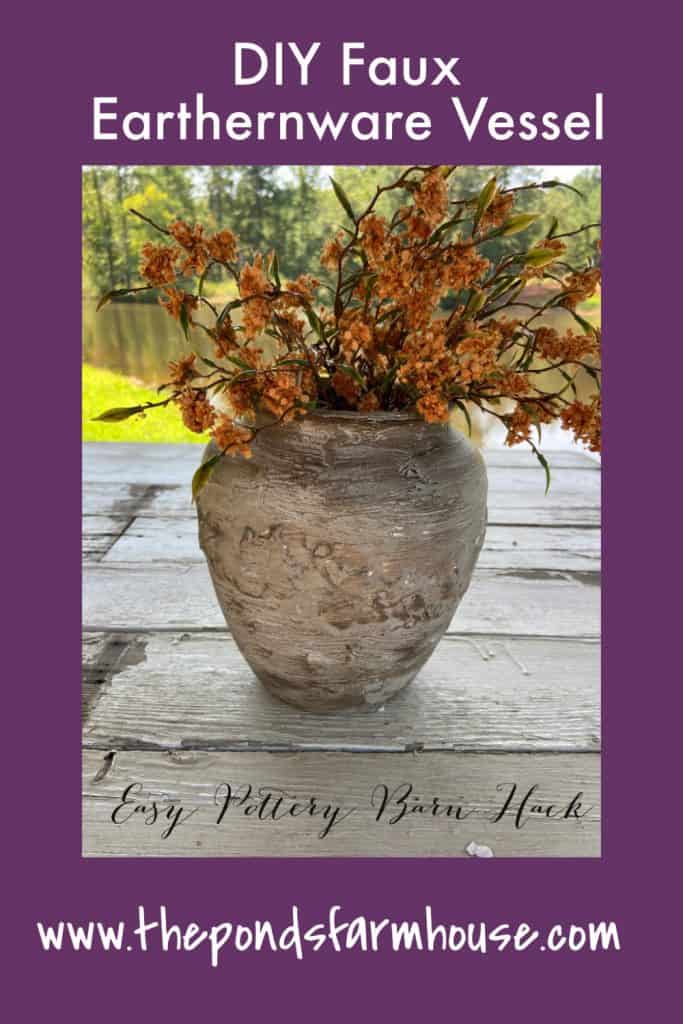
Easy DIY Faux Earthenware Vessel: Pottery Barn Dupe
Do you like shopping at Pottery Barn? I was recently browsing, and a Pottery Earthenware Vessel caught my eye. I’m always looking because I come across so many great Pottery Barn Dupe ideas. So instead of ordering one, I began searching for a vessel of similar proportions that could be transformed. I’m sharing step-by-step instructions to create a DIY faux earthenware vase using a thrift store find. So grab a similar vase and let me show you how easy it is to save money.
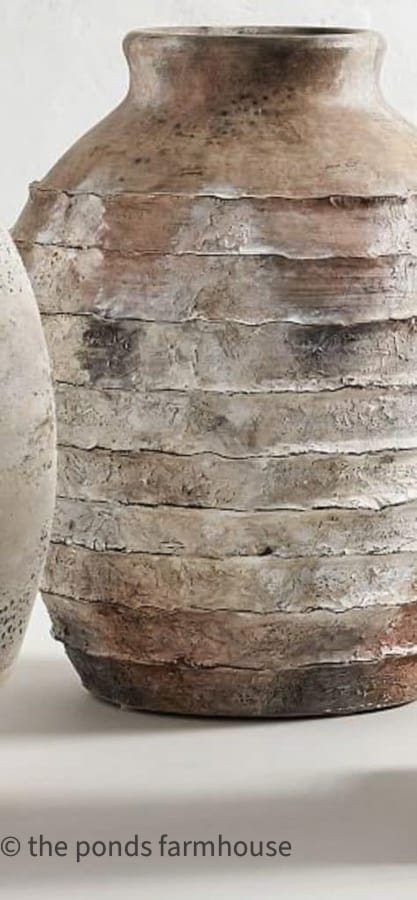
This is my inspiration piece. I love the size and texture, but I couldn’t justify the purchase price.
(Posts on The Ponds Farmhouse may contain affiliate links. As an Amazon Associate, I earn from qualifying purchases. See the full disclosure details here.)
How To Make An Earthenware Vessel Pottery Barn Dupe
To create a Pottery Earthenware Vessel, start by selecting a few styles and taking a screenshot. You may also want to jot down the size and dimensions of the vase you like.
Next, go on the hunt.
Step 1 – Find a Similar Vessel
You will find that most thrift stores have a good selection of vases and containers. All you need to do is find a similar shape and size vessel. It doesn’t matter what the finish looks like.
I found this cute little ceramic vessel for only $4.00 at a thrift store within a few days of searching.
Step 2 – Prepare The Vessel
Once you find your vessel, be sure to clean it with soap and water. Additionally, wipe with rubbing alcohol to remove any greasy residue.

Although I thought this piece was nice as it is, I had something different in mind.
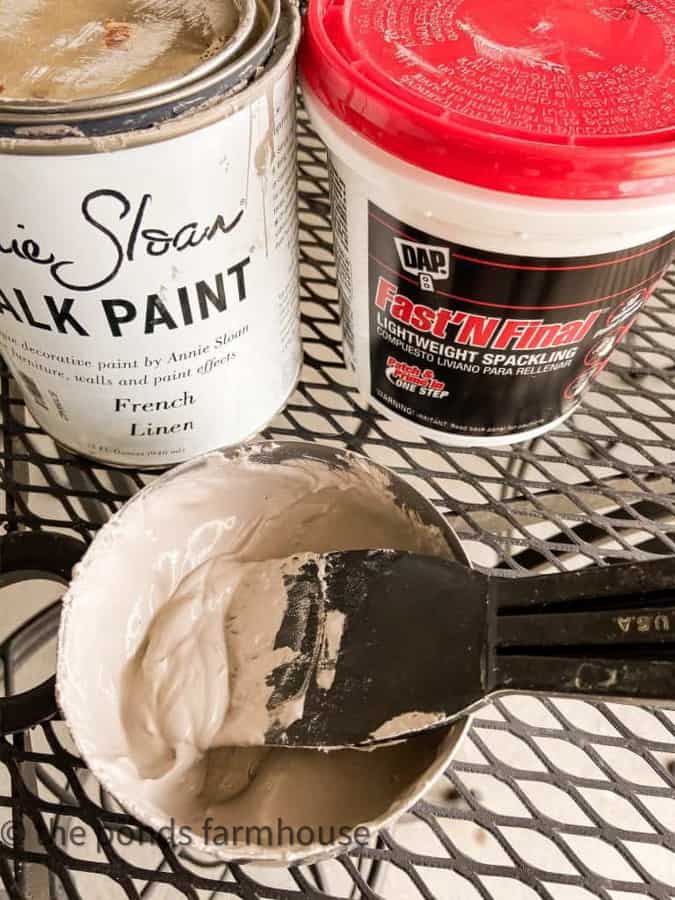
Step 3 – Add Texture to Create a Pottery Earthenware Look
To add texture to your vessel, you will need Lightweight Spackling. I recommend adding chalk paint to the spackling to give it color. In addition, it will adhere to almost any surface and you can use any color you choose.
Next, mix the paint and Spackle. Stir until you have a smooth mayonnaise consistency. You only need enough to coat the vase once.
I used Annie Sloan Chalk Paint in French Linen for my base color.
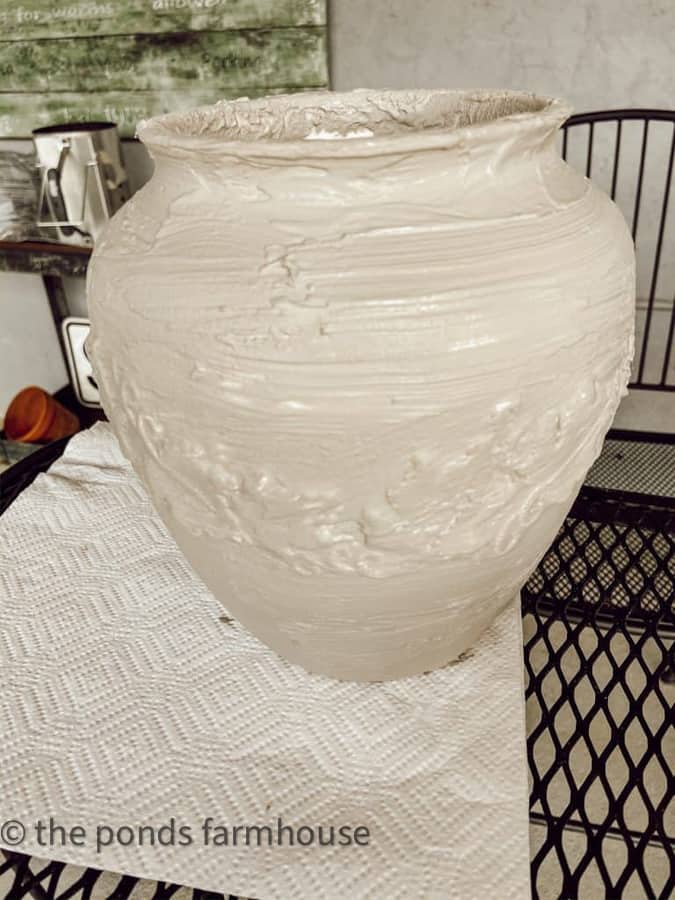
Step 4: Faux Earthenware Finish
Now using a paintbrush, apply the mixture over the entire surface of the vessel. Work in a circular direction around the vase and allow your brush strokes to remain visible. Let the spackling mixture create ridges for more texture.
Also, you will want to add some of the texture mixture to the inside of the rim.
Once you have the desired coverage, allow the mixture to dry for several hours.

Step 5 – Add DIY Color
Once the vessel is completely dry, color can be added to any area you desire. This vessel had a raised leaf design, so I highlighted the raised area with a dry brush of burnt sienna craft paint.
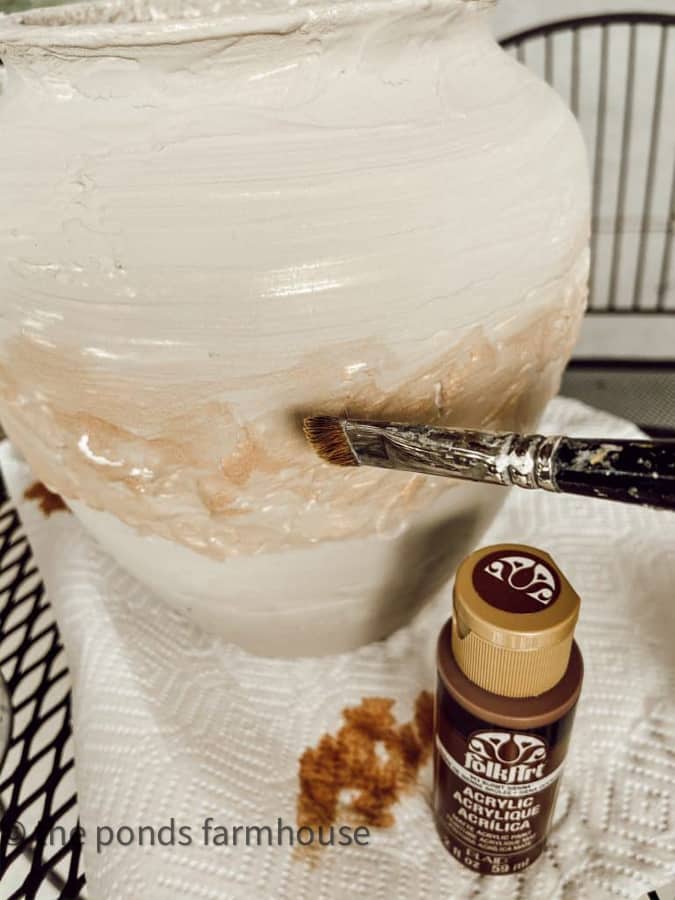
Additionally, I used dark wax to add color to the bottom and top of the vessel, achieving an aged pottery earthenware style.
Begin by applying a small amount on a rag or paper towel and rubbing off any excess as you go.
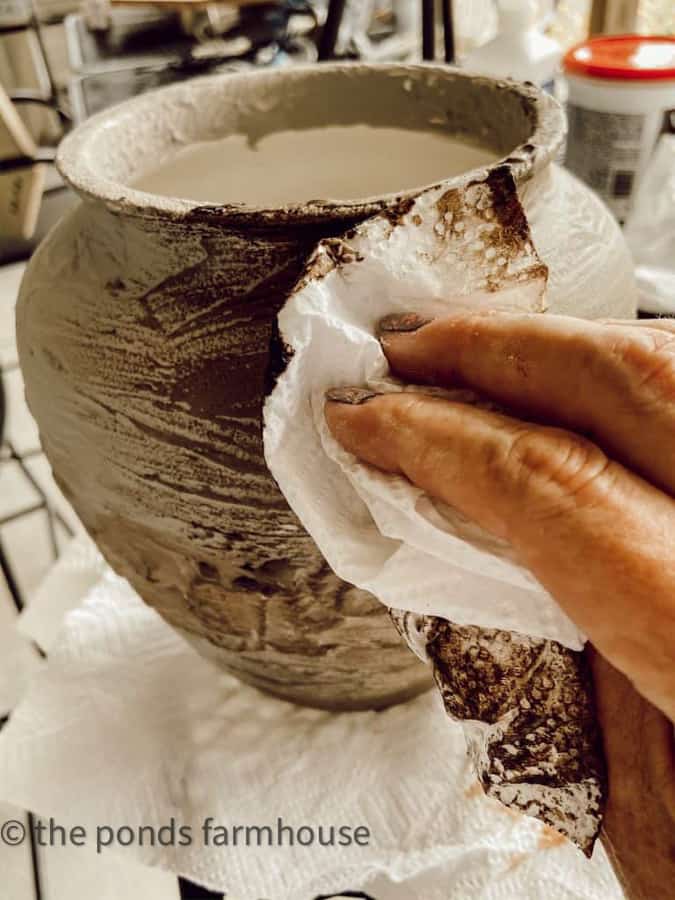
Continue to work with the color until you are happy with the finish.
This may include adding more of the texture mixture or other colors of craft paint.
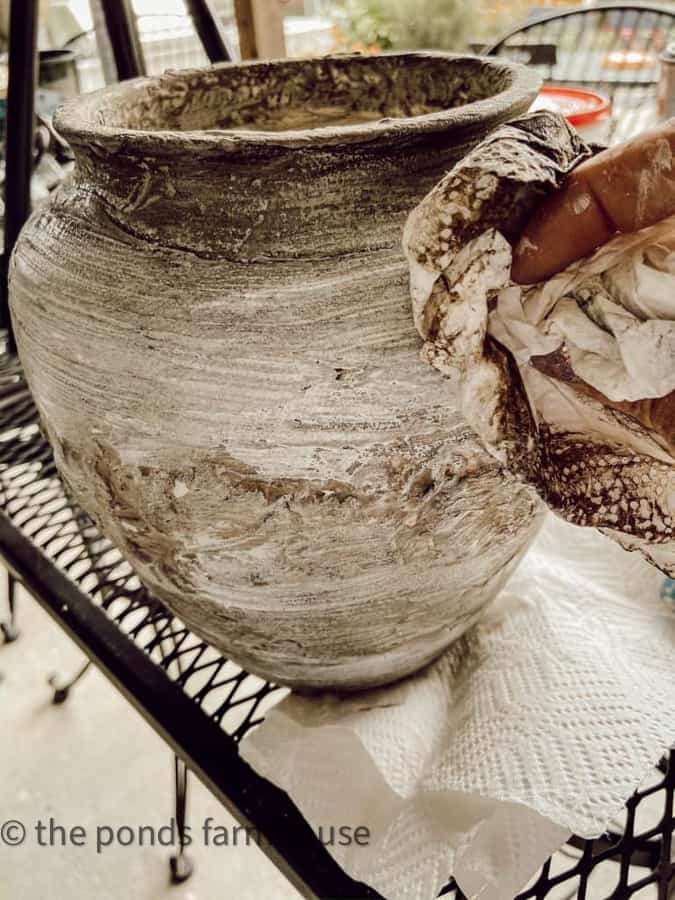
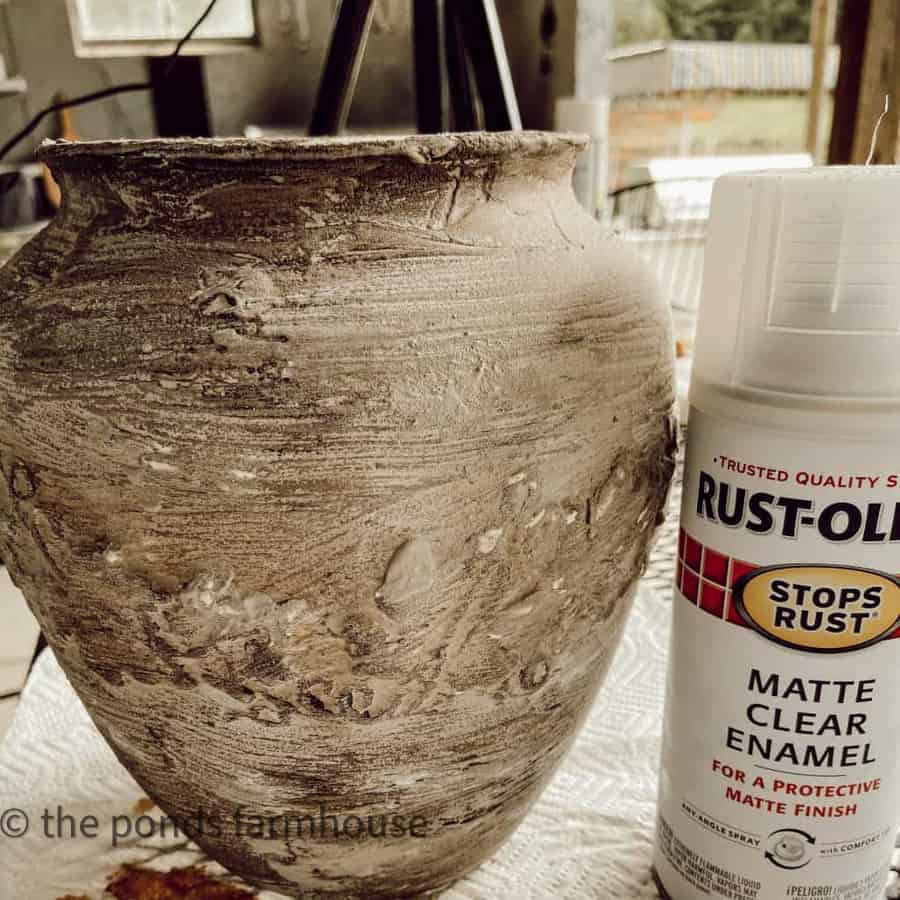
Step 6 – Seal to Protect Vessel
This step is optional, but if you plan to use your vessel outside, you may want to apply a sealer.
To seal, mist the entire surface with a Matte Clear Spray.
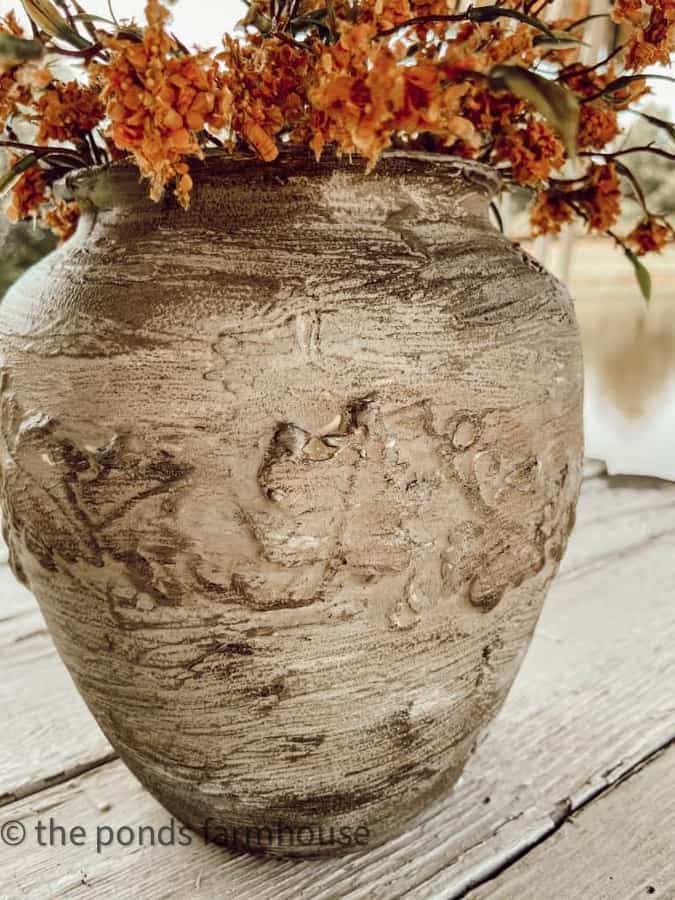
Pottery Barn Dupe Pottery Earthenware Vessel
Here is a close-up view of the texture that was added to the ceramic vessel. Although the shape of the vessel is different from the inspiration piece, the texture, and style are what I wanted.
How To Use an Earthenware Vessel
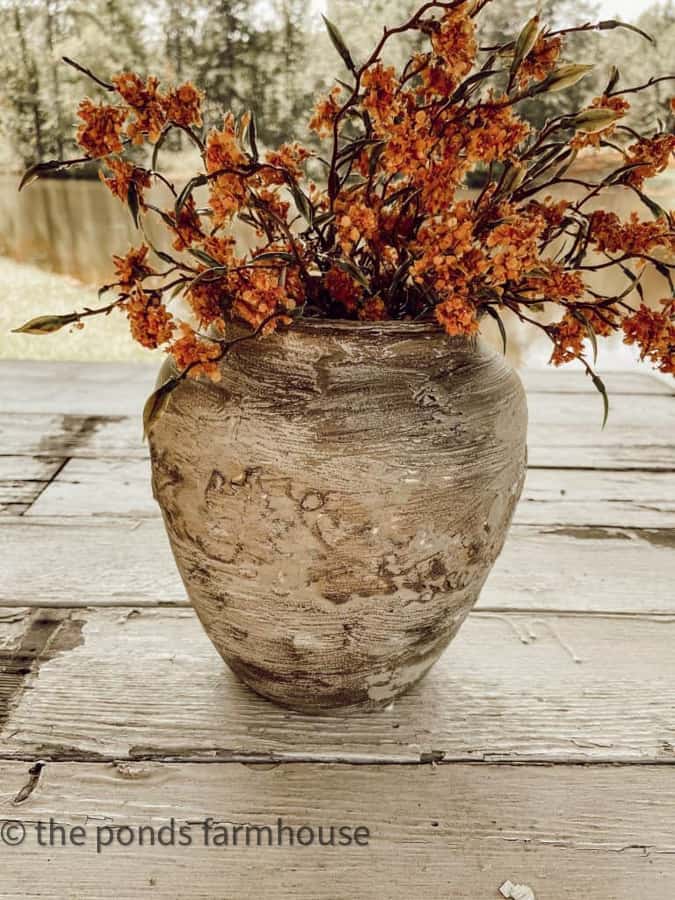
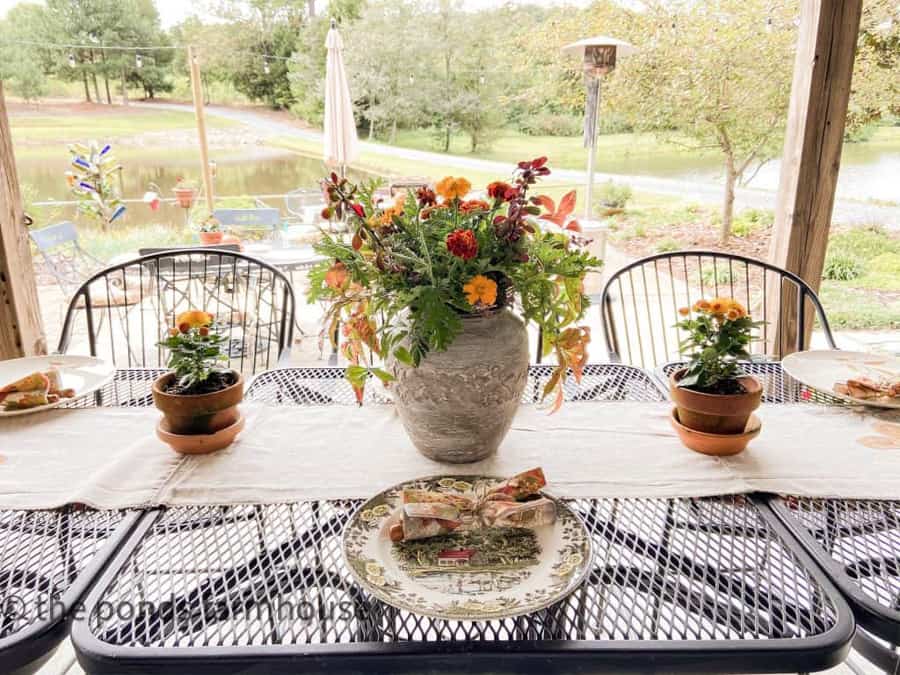
The earthenware vessel has a rustic appearance that works well with any farmhouse and country-style home.
The vessel looks beautiful, filled with floral arrangements, or as a decorative piece in a bookcase, entry table, or coffee table. I love using the Pottery Barn Dupe to decorate the outdoor kitchen.
The size makes a great centerpiece for almost any tablescape or entry table.
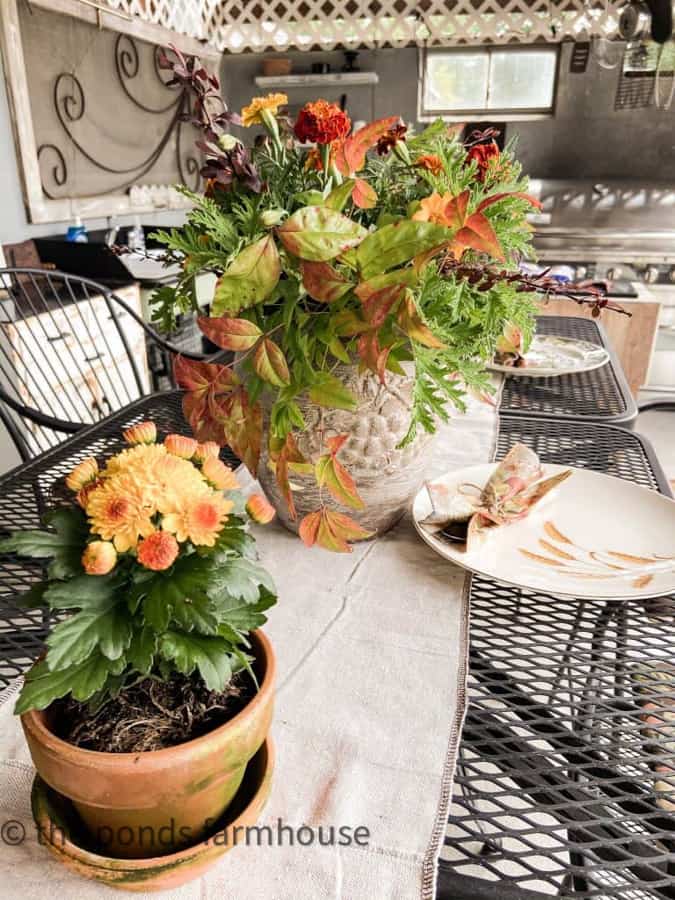
Update Two Years Later
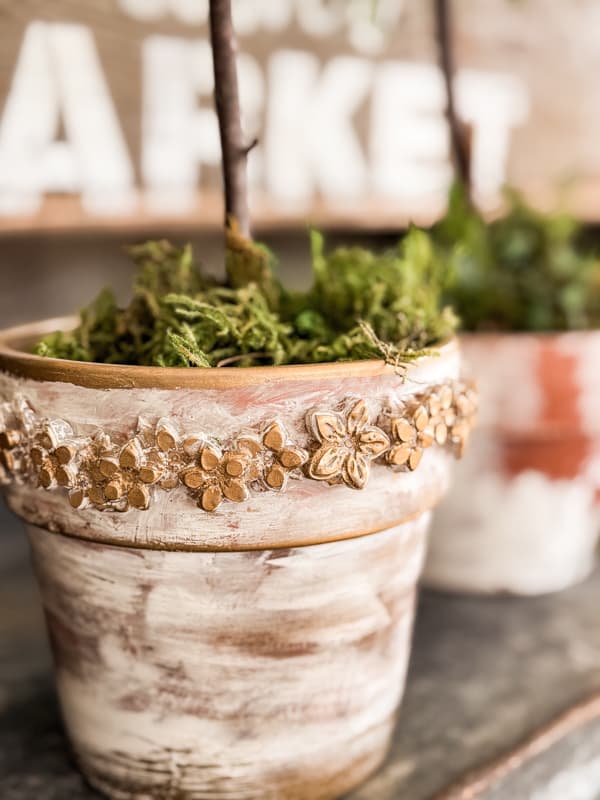
Several people have asked how this technique will hold up over time. The vase has been used in the outdoor kitchen and exposed to the elements for over two years. Here is a recent photo after two years.
Similar Project
After transforming this vase, I applied this faux finish to achieve a Pottery Earthenware appearance to a thrift store lamp. Click to see the final results.

Thanks so much for stopping by today. I look forward to sharing my next adventure with you.

Pin It To Remember It
Did you find some great ideas you’d like to save for future reference? Hover over the images you’d like to save and pin to your favorite Pinterest Boards when you see the PIN button.


Love this and you sure found the perfect vessel to make over! Great job!
Barbara,
Thank you so much. I’m so glad you like it.
Rachel
This turned out fantastic and don’t you love joint compound? I have used it for so many projects over the years.
Pinned
Cindy
Cindy,
Yes, I use it a lot as well. Thanks for stopping by.
Rachel
The vessel looks great!!I like it better than the PB one.
Cheryl,
Wow, what a compliment. Thanks for stopping by.
Rachel
Great job!
Miche,
Thanks so much for stopping by.
Rachel
Oh my soul, that looks amazing! Great job!
Cindy,
I’m so glad you like it. It’s so easy to do.
Rachel
Hi Rachel
I love this project* but then again I love all your projects.
But really this came out so great. I love the way it looks like it has so much texture. and Love the color. Great great project
deezie
Deezie,
I’m so glad you like it. Thanks and have a great weekend.
Rachel
Looks good! Great idea. Thank you for the inspiration….looking through my stash now:)
Hey Becky,
Have fun. Thanks for stopping by and sharing.
Rachel
Wanted to let you know we are featuring this on the Farmhouse Friday Link Party. It is fantabulous! Thanks for sharing it with us. Hope you link up again soon. 🙂
Oh how exciting. Thanks!
Wow, totally amazing. I love everything about this diy, and plan to do several pots I have, this summer. Thanks for sharing
Ivory,
Thank you so much. I appreciate you for stopping by.
I love this project….I intend to try soon. So glad I discovered your site.
Your ideas are terrific and I love your home.
Oh I really am so glad you found me. Thanks for making my day.
What a cool diy! I’m sure I have something laying around that I can use for this one.
Stacy,
Thanks so much.
Love that idea! Thanks for sharing Rachel 🙂
Margie,
Thanks so much for your kind encouragement.
I love it Rachel! It turned out great!! Especially love the color and texture! Thanks for your beautiful and inspiring posts!
Heather,
I really appreciate this. I’m so glad you like it. Thanks for stopping by.
So pretty! I love it.
Renae,
Thank you for stopping by.