DIY Christmas Tree Stand Container
My husband and I recently made faux galvanized planters to look like the European Antique zinc Container that we use for our Christmas Tree. Several people wanted exact instructions to make the container the size of our antique piece. So here it is.
This DIY Christmas Tree Stand Container is a close replica of a European Antique Grape Gathering Hod. This easy tutorial is an inexpensive way to achieve the vintage Christmas feel.
Now you can make your own tree container to use for the holidays.
Christmas Tree Stand Materials & Tools
Here are the supplies you will need to make this Christmas Tree Stand.
- Trim Pieces for top of box
- 1 – 4×8 Sheet of Plywood (heavy weight)
- Wood glue & Finishing Nails
- Metal Strap 1 inch wide
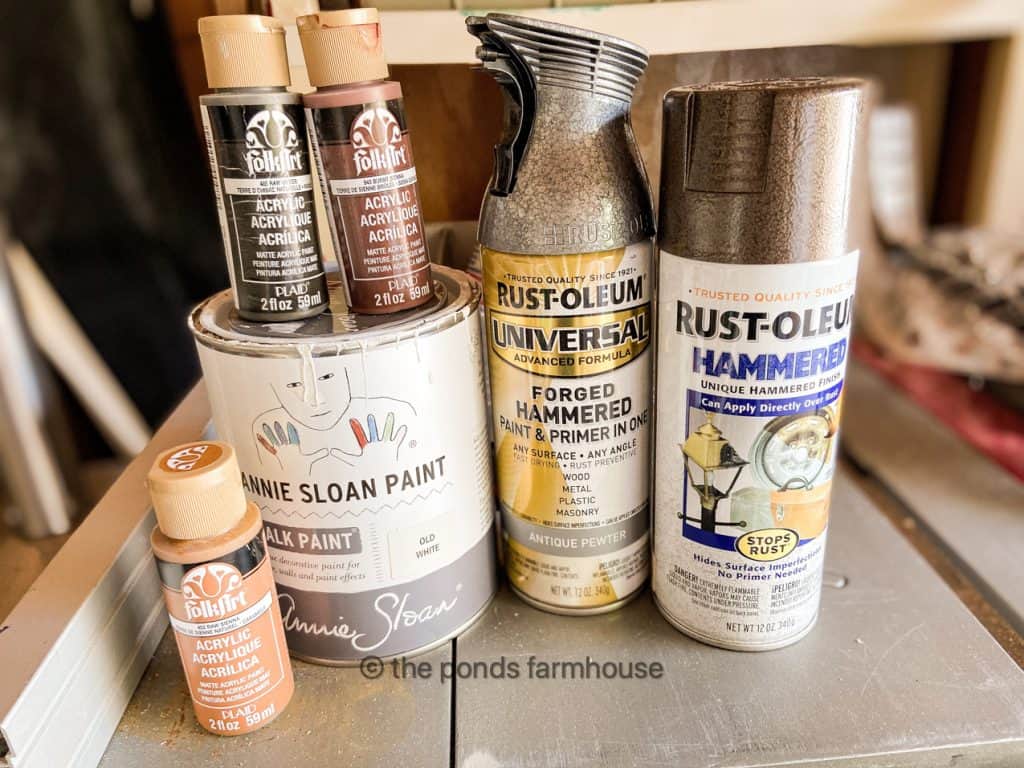
- Antique Pewter Hammered Spray Paint
- Brown Hammered Spray Paint
- White Chalk Paint
- Craft Paint in Raw Umber, Burnt Sienna & Raw Sienna
Tools Needed
- Table Saw
- Circular Saw
- Miter Box or Miter Saw
- Hand Held Sander or Sand Paper
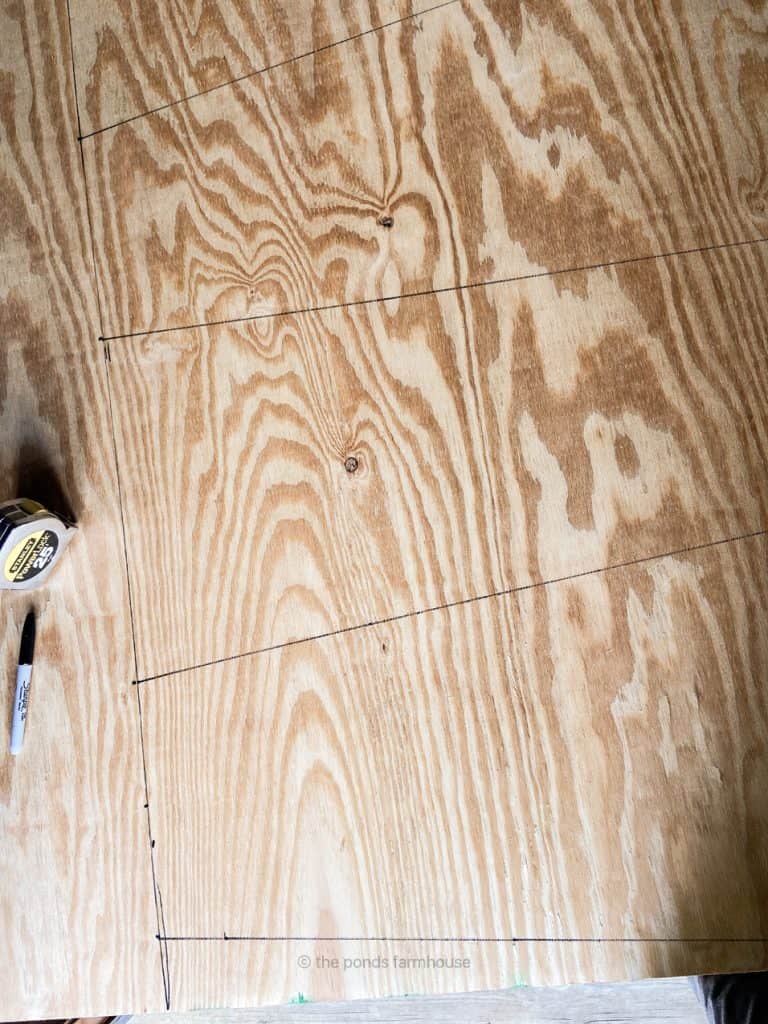
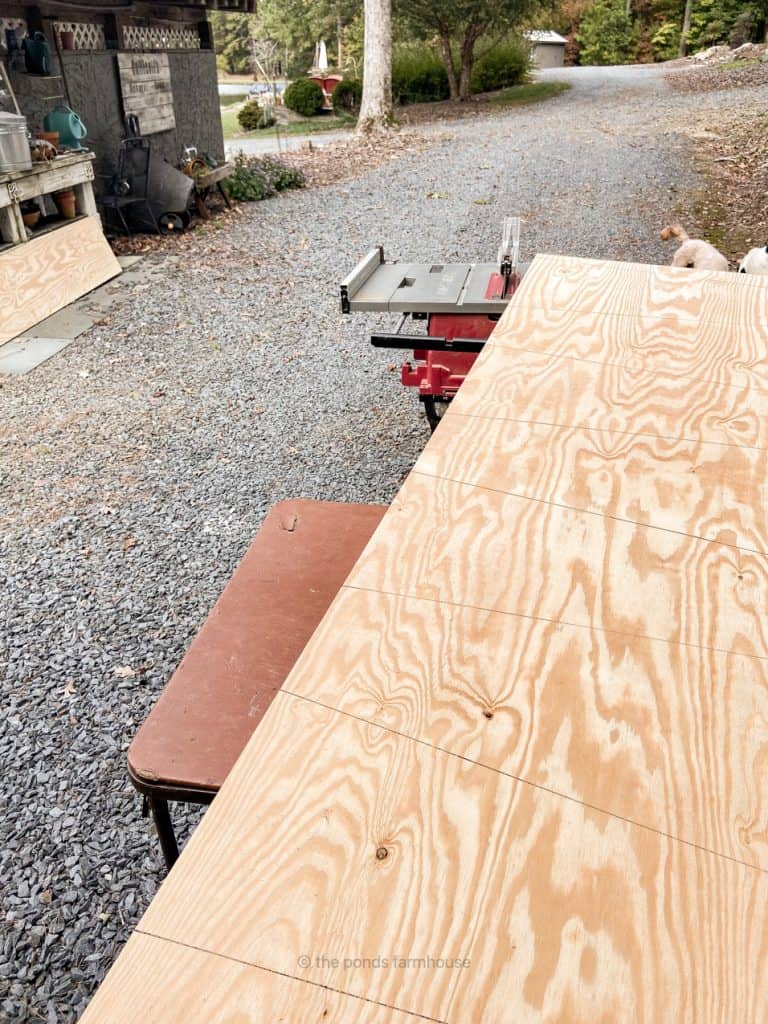
Draw Pattern & Cut Plywood
Begin by drawing out your pattern onto the plywood. In order to duplicate the antique container, here are the measurements I used.
- 30 Inches tall
- 20 Inches wide at the top
- 12 inches wide at the bottom
This tree stand container is 30 inches tall so you will need to cut 18 inches off the unmarked side of your board on the 4 foot side. A table saw will make a clean cut or you may be able to get the home supply store to make this cut for you.
This is the same procedure as the smaller planters.
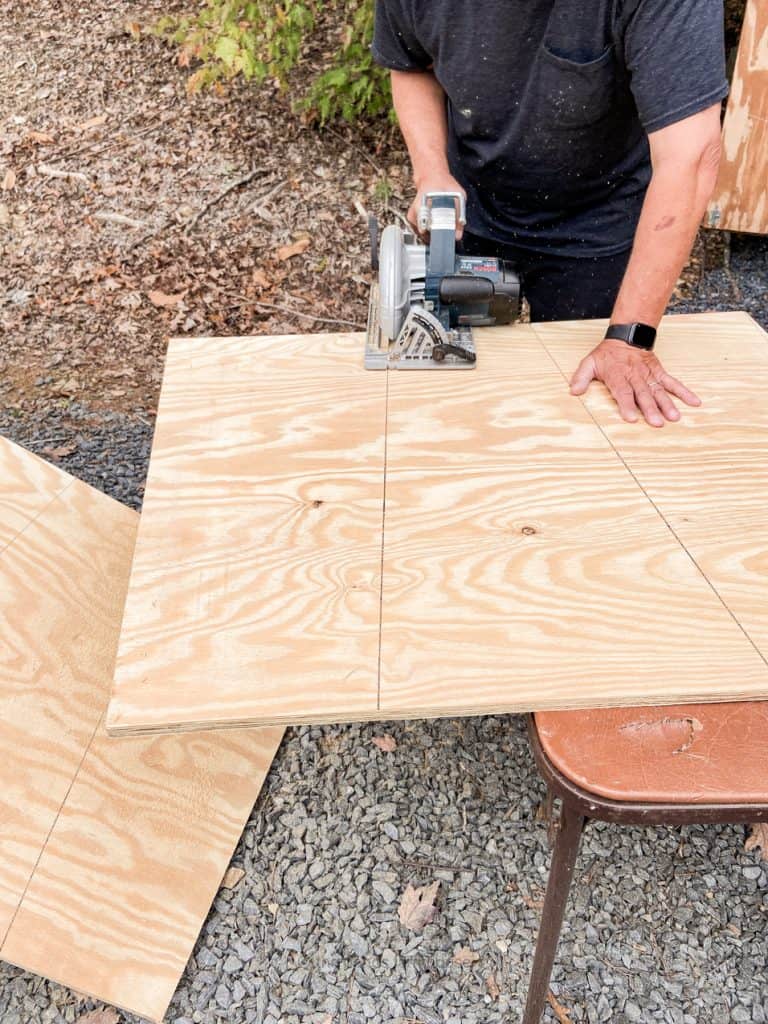
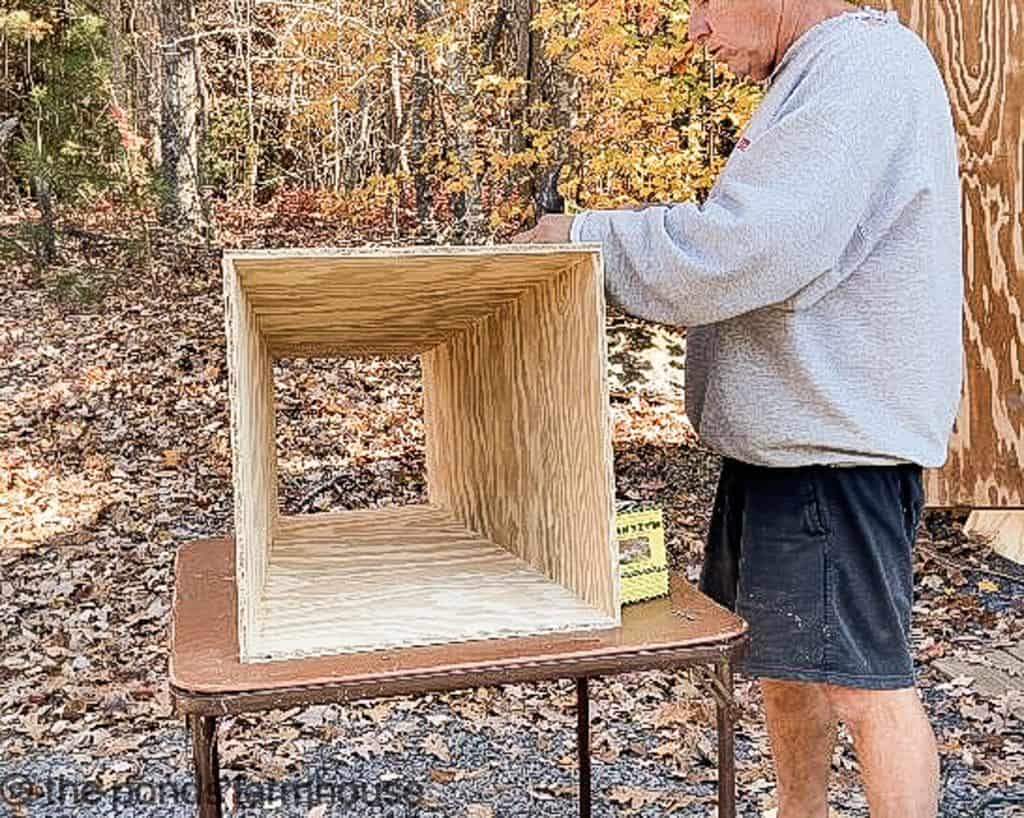
Next using a circular saw, cut the side pieces along the drawn lines.
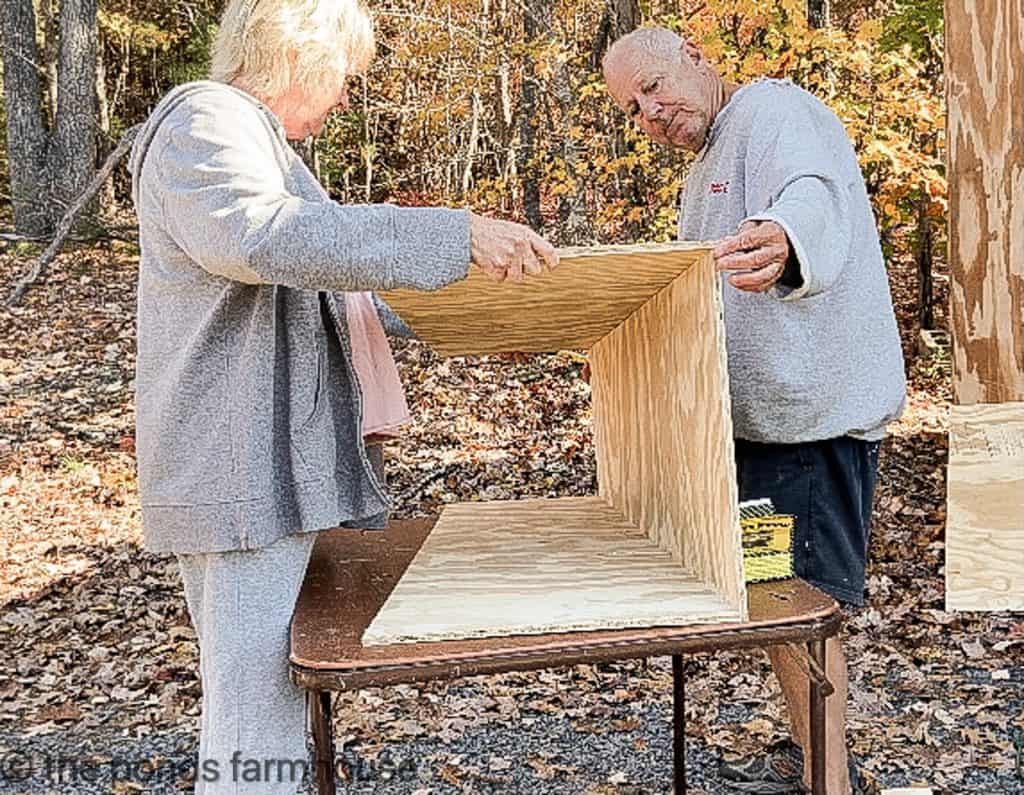
Assemble Christmas Tree Stand Container
Begin with a bead of wood glue along the edge and then attach with finishing nails.
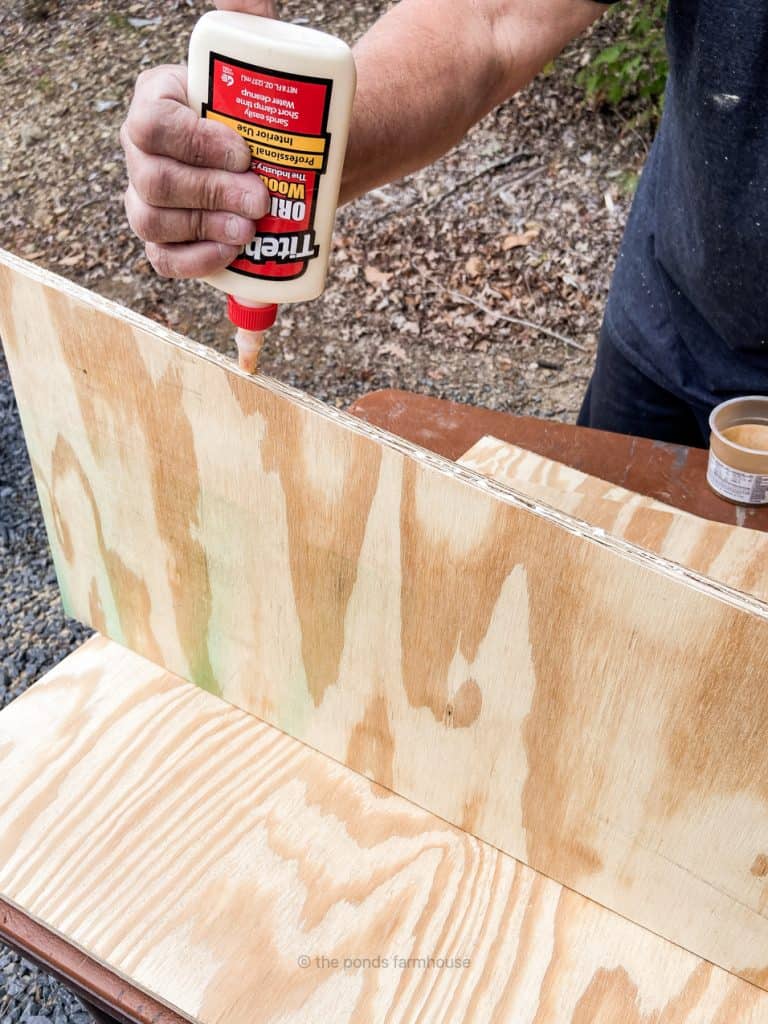
Be sure to alternate the corners to form a square box as you attach the sides.
Finish with a bottom piece
Cut a piece to attach to the bottom of the container and attach with wood glue and finishing nails.
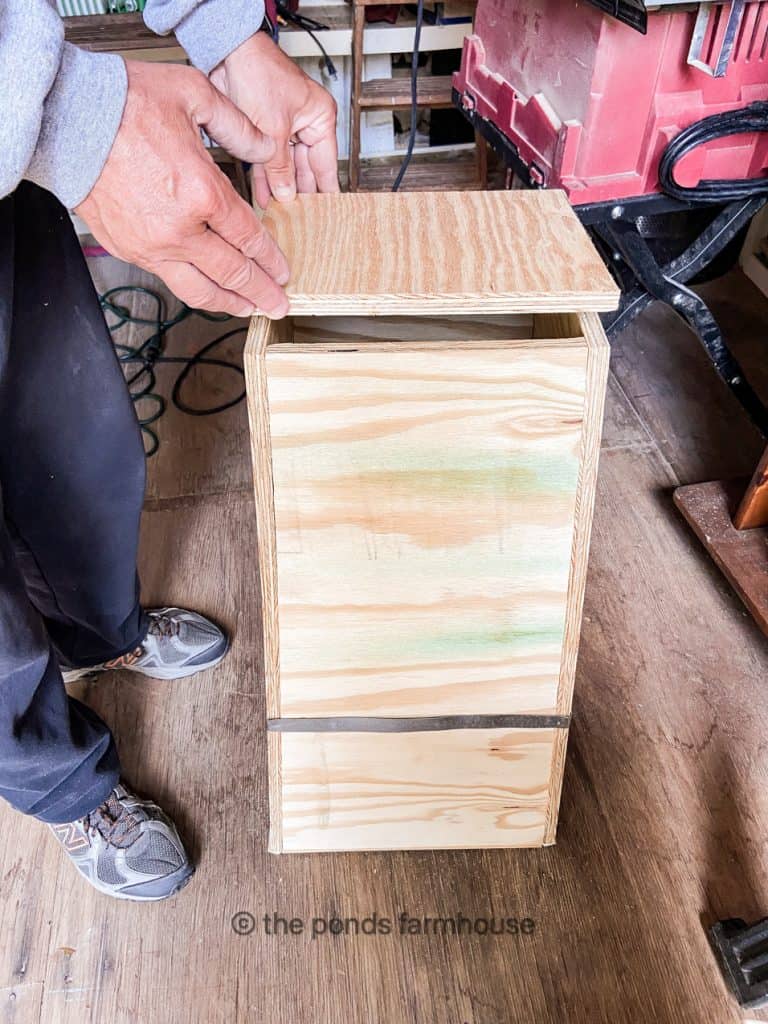
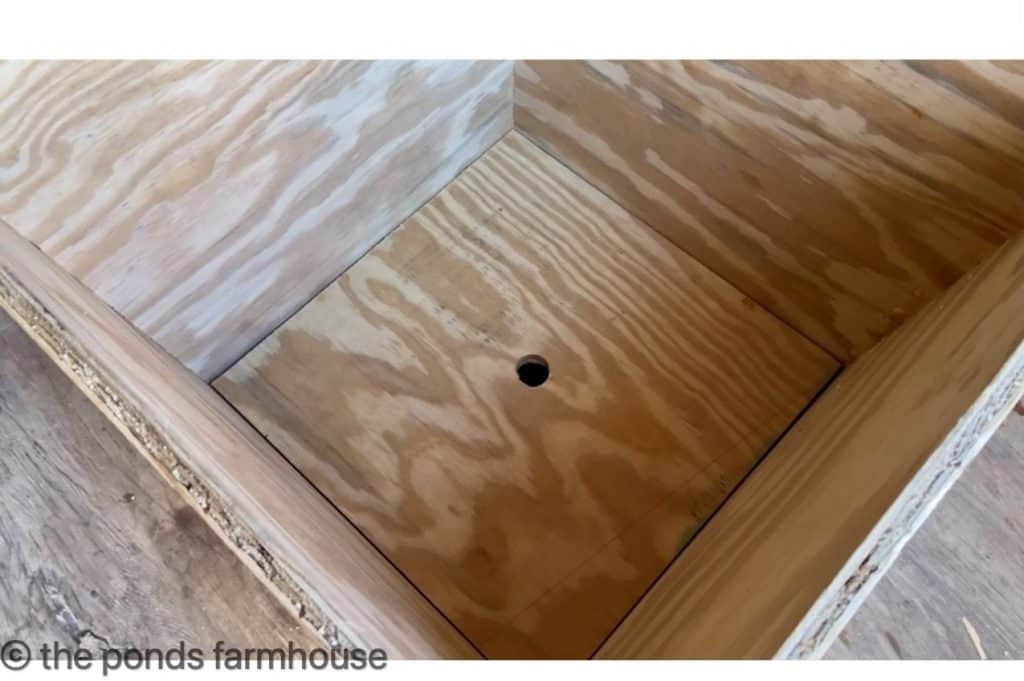
You may also want to add a tray to the inside of the container for your tree stand to rest on.
For this container, we added a tray that rests approx. 14 inches down from the top. Drill a hole in the tray, allowing you to lift out of the container.
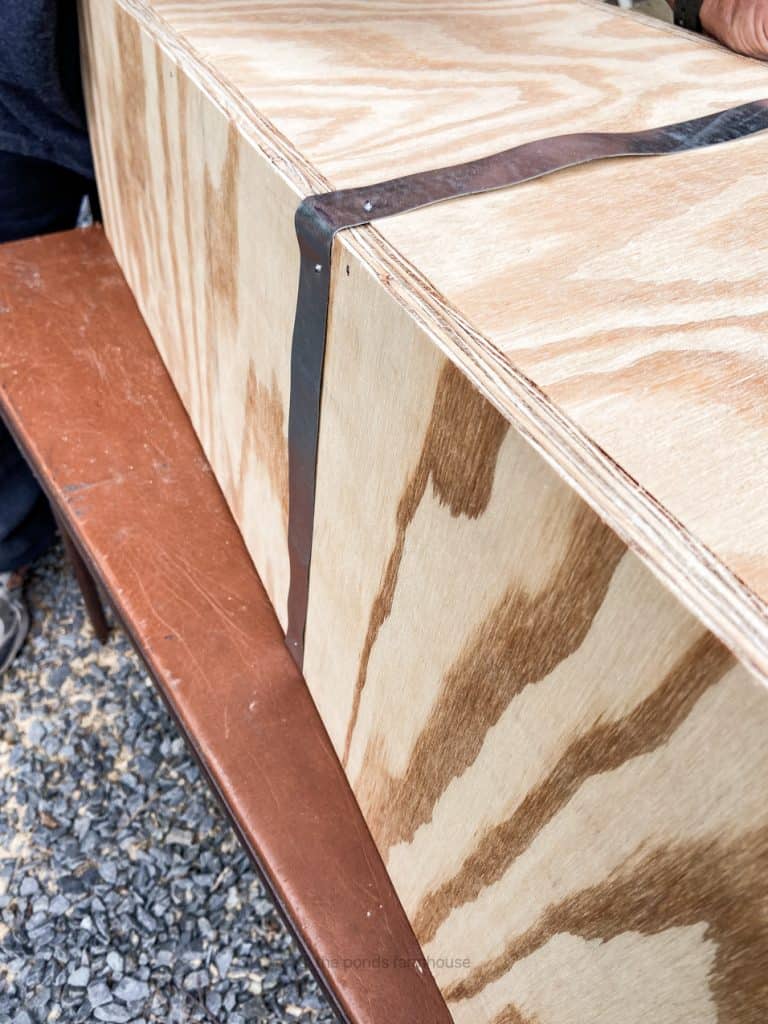
Attach Trim Pieces Christmas Tree Stand Container
Attach trim pieces to the top of the container and add the metal strap around the outside of the container.

Both are attached with finishing nails.
Paint Christmas Tree Stand
Now that your container is constructed, you will now want to paint to look like a rusty, crusty zinc or galvanized antique.
Here are the variety of paints that I used and each is on the materials list.
To see painting details, please refer to the planters tutorial here.
You can also see the original video for the smaller planter version below.
Antique Vs. Faux Galvanized Container
Here is the original container vs. the wooden version. I’m happy with the results. Let’s check how it looks with a tree in it.

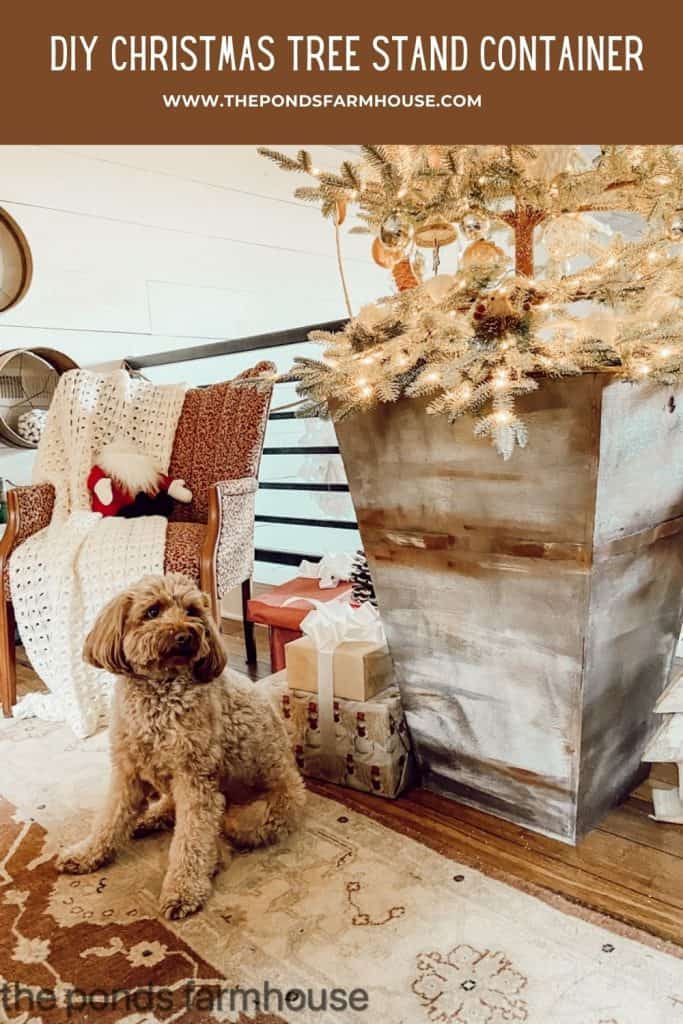
We are using the faux Christmas Tree Stand Container in our loft with the frosted tree that was downstairs last year.

Rudy matches the colors in the Christmas Tree Stand.

This version costs a lot less than an authentic antique grape gathering hod.

This tree includes ornaments from Belk and my Easy DIY Christmas Ornaments

Thanks so much for stopping by today and I look forward to sharing my next adventure with you.
You may also enjoy reading How To Make A DIY Metal Christmas Bow.

pin it to remember it


Looks so cool Rachel!!! Love it!!!
Stacy,
I really appreciate this. Happy thanksgiving.
I love how this turned out Rchel. Such a great idea since all the containers out there are so expensive these days. I would love to share this on Saltwater Sounds this week,
Thanks so much Kim.
Absolutely gorgeous. This on my to do list, this summer. Thanks for sharing
I’m so glad you like this. Thanks for stopping by.
Beautiful!!! Love your Christmas Tree!
Ellen,
I’m so glad you like. I just finished this years tree and I’m loving it. Can’t wait to share. Have a blessed day.