How To Crochet A Purse: Easy Vintage-Inspired Free Pattern
Hey friends! I’m back with another project for my ‘Old School’ Nostalgic Crafts Series. I’ve been experimenting with vintage-inspired crochet purses, and I’m so excited to share this week’s design with you.
This project is beginner-friendly, using simple stitches to create a unique handbag in just a few hours. I’ve included everything you need to know, from a free downloadable pattern to a list of my favorite supplies and step-by-step images. Ready to get started?
(Posts on The Ponds Farmhouse may contain affiliate links. As an Amazon Associate, I earn from qualifying purchases. See the full disclosure details here.)
Stitch Guide – American Crochet Terms
- Ch – chain stitch
- Sl St – slip stitch
- Sc – single crochet
- Hdc – half double crochet
- Dc – double crochet
- FS – Fan Stitch – *ch 3, add 4 more dc in same stitch, skip 2 spaces, sl st in next stitch. Repeat
Supply List
- Download step-by-step instructions for crochet purse.
- Natural 2mm 100% cotton yarn
- 5 mm crochet hook
- Bamboo Handles
- Pearl Beads (optional)
- Yarn Needles
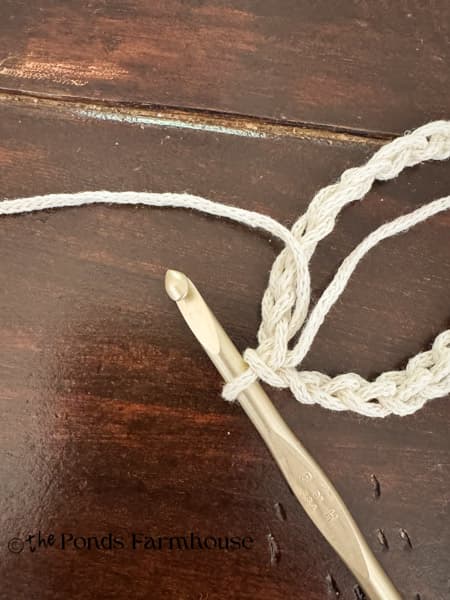
Round One: How To Start DIY Crochet Handbag
You will begin at the top of your purse, and this will determine the opening. If you prefer to make a larger handbag, you can increase the stitches.
- Add yarn to the hook with a slip knot
- Ch 42, sl st the last ch to the slip knot. (Be sure the chain is not twisted and turn so that you are working the next round at the front of the chain.)
Round 2 – Create Top of Purse
- chain 2
- hdc in each stitch around
- Sl st to join in the top of the beginning ch 2
Note: You are working in a circle now.
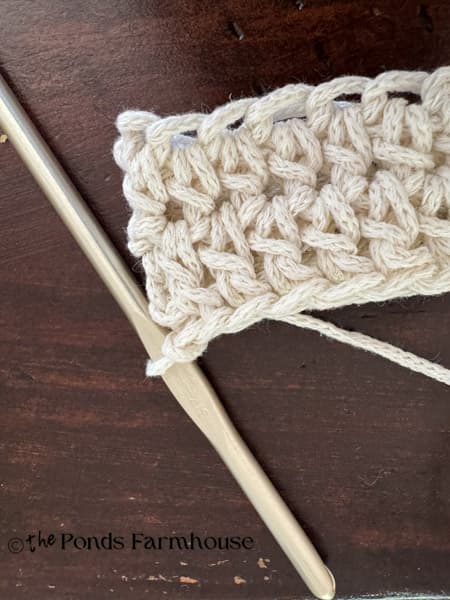
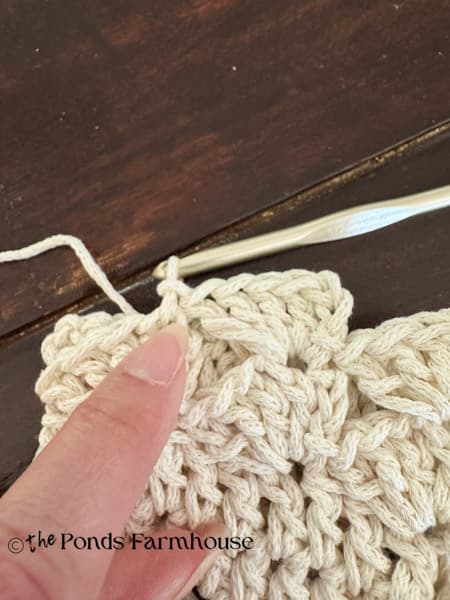
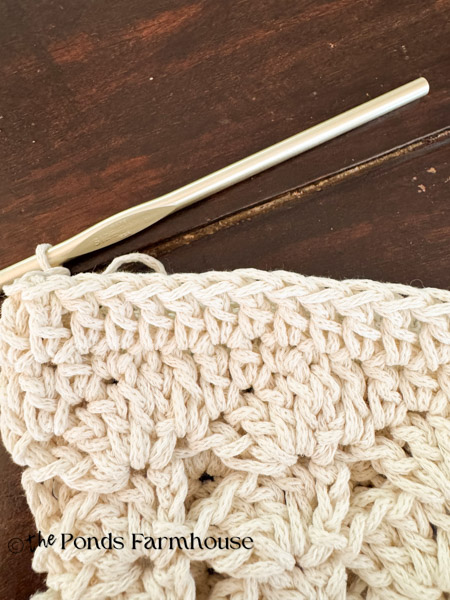
Round 3 – Double Crochet
- ch 3
- dc in each stitch
- sl st to join in the top of the ch 3.
- Below is an image of the two rows. At the top is the hdc and then the dc round.
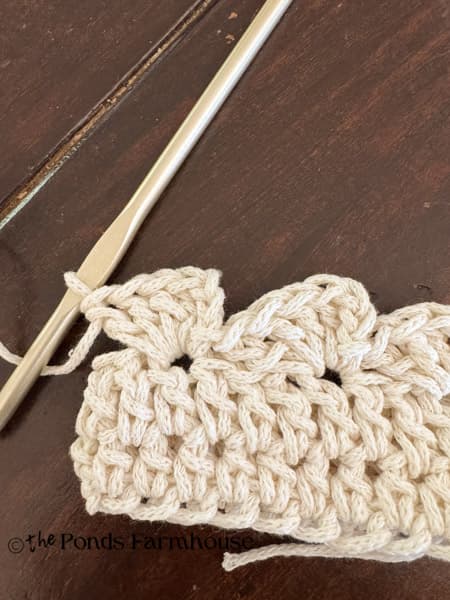
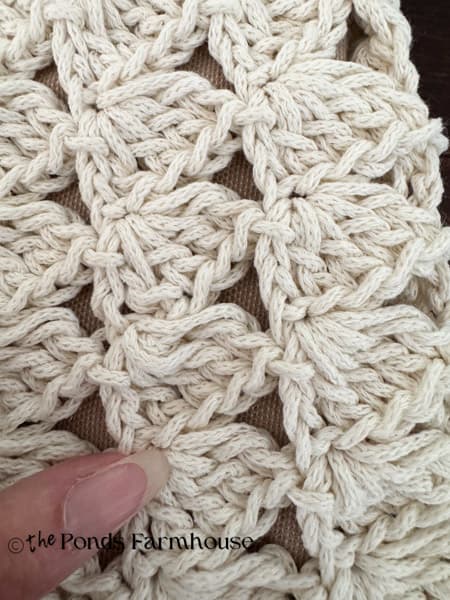
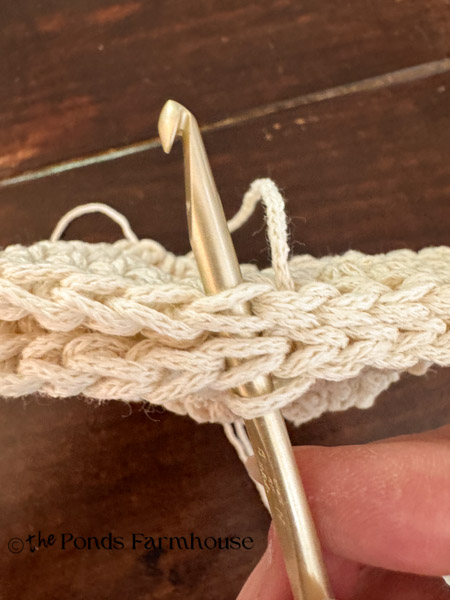
Round 4 – Fan Stitch
Don’t worry, the fan stitch is so simple, it’s just a chain 3, then 4 double crochets all in the same space.
- ch 3 (counts as 1 dc)
- in the same stitch work 4 more dc’s.
- Skip 2 stitches
- sl st in the 3rd stitch
- *Ch 3 again and add 4 more dc’s all in the same stitch, skip 2 stitches, sl st in 3rd. Repeat until you are around the circle.
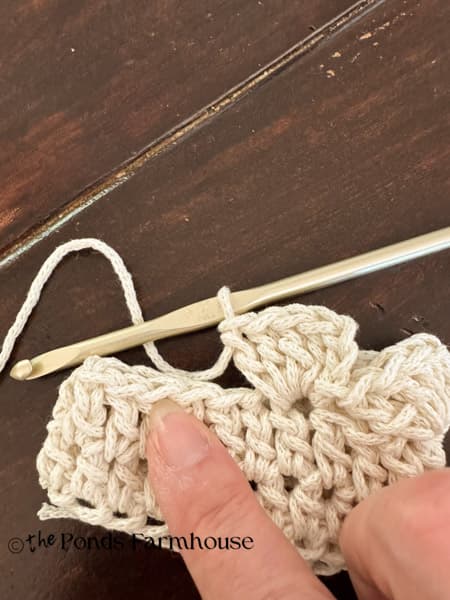
Round 5 – Continue with the Second Round of Fan Stitch
- When you are back around, at the beginning of round 4 (your first row of fan stitches)
- sl st your last set of dc’s into the top of the first ch 3 of round 4
- *Ch 3, add 4 more dc’s in the same stitch
- sl st into the top of the next ch 3.
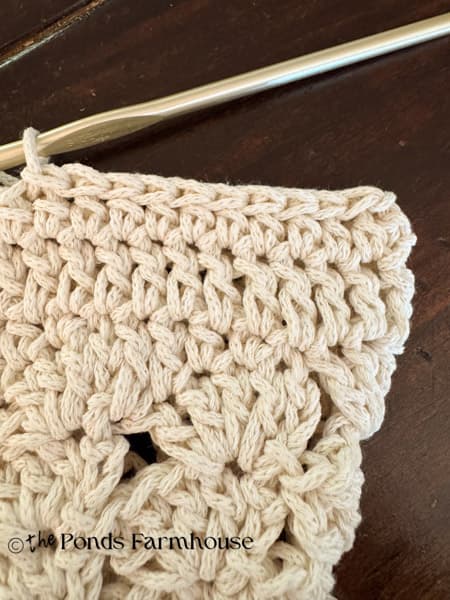
Round 5 doesn’t end; you continue repeating without finishing off a row until you have 7 rows of fan stitches. Then Sl st into the top of the ch 3 of the next fs. The fan stitches are all stacked evenly on top of each other.
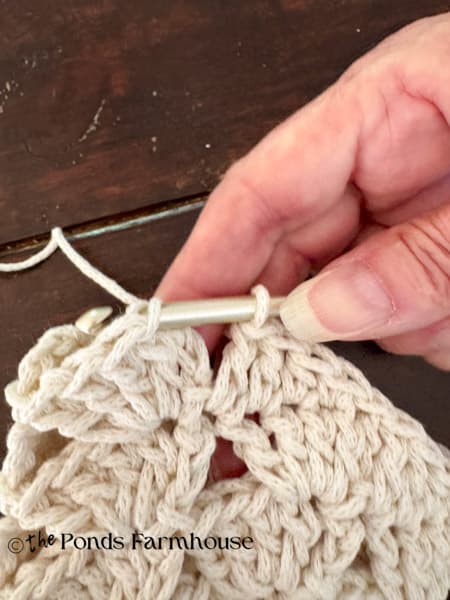
How To Even Out The Fan Stitch at the Handbag Bottom
Next, you will need to even out the fan stitch before completing the bottom of the purse. Here are the steps to do so.
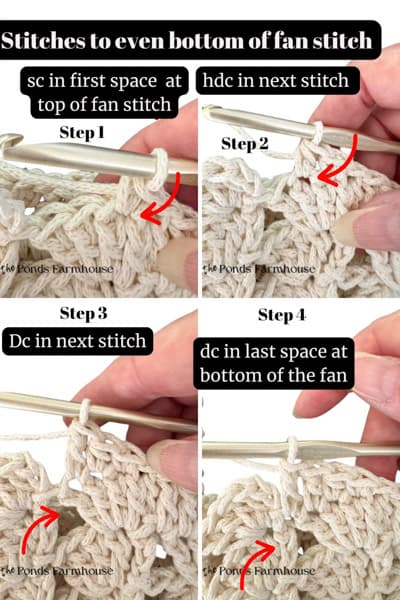
- At the top of the final fs, you will begin to crochet to even the pattern.
- After the sl st at the end of your fan stitches, *sc in the next stitch
- then hdc in the next
- dc, crochet in the next
- at the bottom of the fan, add 1 more dc
- Sl st into the top ch 3 of the next fs.
- Repeat from * around and join with a sl st. (Now your purse bottom should be more of an even, straight line.
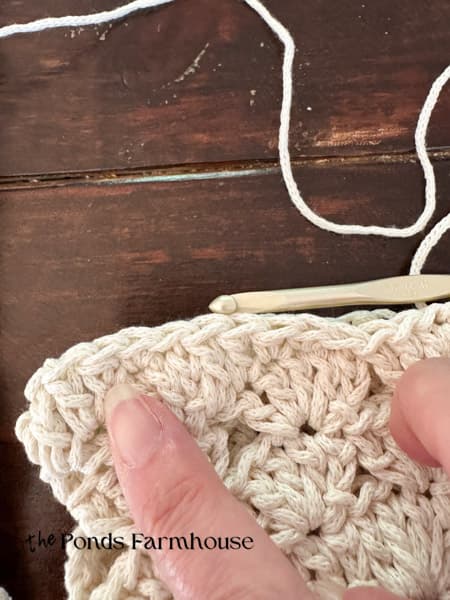
Add Two More Rows at Bottom
Now, to finish, add two more rows to mimic the purse’s top.
- dc in each space around, sl st to join.
- hdc in each space around, sl st to join.
How To Stitch The Bottom Of Purse Together
To stitch the bottom of the purse…
- fold it in half with the stitches aligned.
- Sl st in each space across, joining the front and back together.
- Tie off and secure yarn.
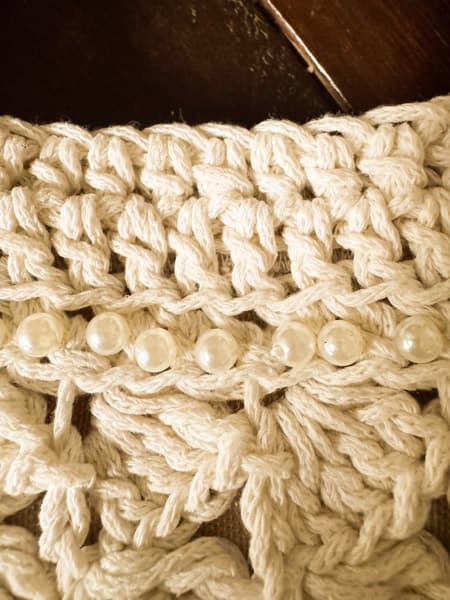
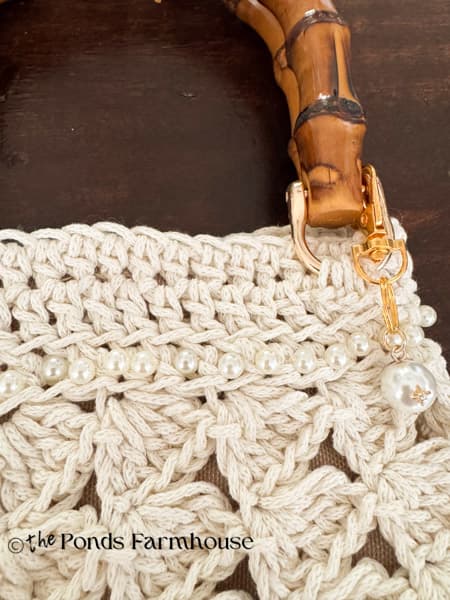
How To Embellish a Purse With Pearls
Before adding the liner, I decided to dress my purse with a few pearls. It was easy to stitch the pearls to the crocheted areas with a heavy-duty thread and sewing needle. You can space them as you desire.
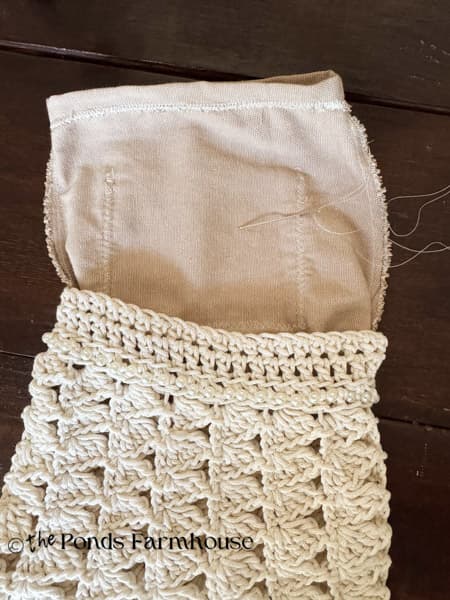
How To Add A Liner to the DIY Crochet Purse with Fabric
I recommend lining the purse with a sturdy cotton fabric such as duck or heavy muslin.
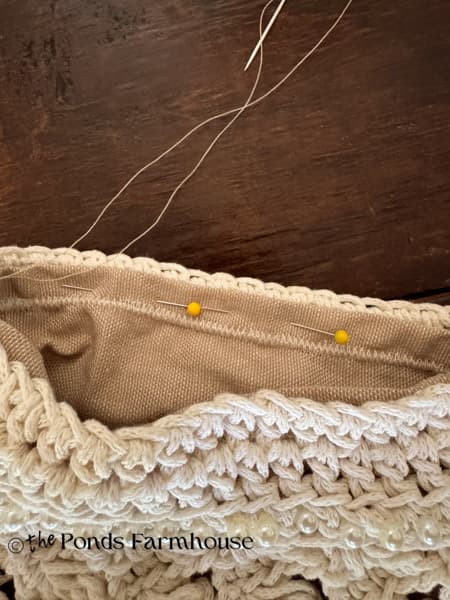
- Fold the fabric with the crease at the bottom of the purse. Ensure the fabric extends beyond the top of the purse so it can fold down and conceal the raw edge.
- Trace around the purse with a marker.
- Cut the fabric along these lines with pinking shears. (You can zigzag around the edges with a sewing machine, if you would like.)
- Stitch the fabric together with a small seam allowance, either with a sewing machine or by hand, using heavy-duty thread and a tight stitch.
- Fold down the top of the liner so it fits just inside the handbag’s top.
- Insert the liner into the bag with the raw edges facing out.
- Stitch the liner to the bag at the top with a heavy-duty thread and a hand needle.
Optional: Before stitching the sides together, you can add a storage pocket if you desire. Stitch the pocket to the front of the fabric so it is accessible inside the handbag.

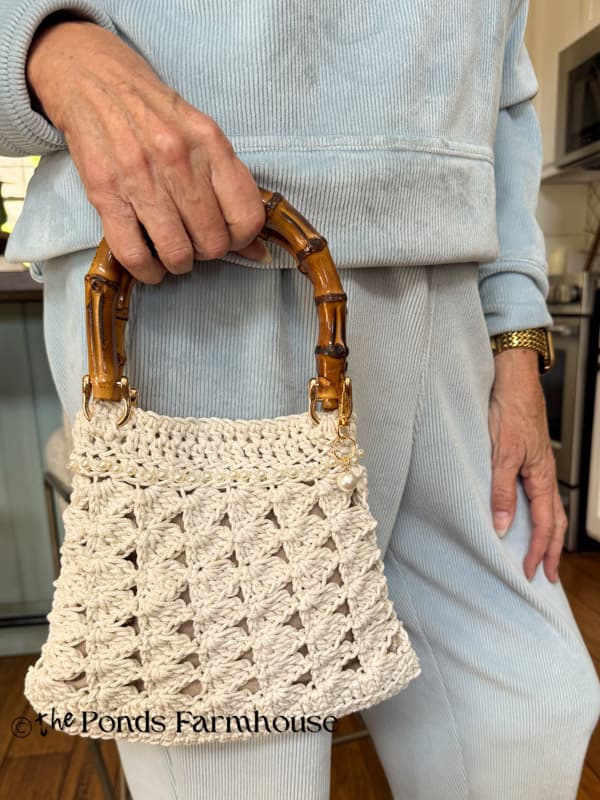
How To Add Handles to a DIY Purse
Finally, you are ready to add the handles of your choice to your new purse. You can use a chain handle for a crossbody bag or use bamboo handles for a cute mini tote bag.
Align the handle hinges on the bag and use your yarn and a heavy-duty needle. Stitch the hinge to the crochet bag using a chain stitch to secure. Be sure to secure the yarn ends so that they don’t unravel.
Insider Tip
To make the handles more secure, you can use a long length of yarn and between each handle. You can easily go between the crochet and liner with the needles and yarn. Run the yarn under the crochet area, until you get to the next handle, secure and repeat until you have all 4 handles secure. You will only need to secure the beginning and end of the yarn.
One other tip is to use the heavy duty thread to secure the handle to the liner as well. After you have the handles secured to the crochet layer, use the needle and thread to stitch a few times through the crochet layer and attach to the liner. This will keep the liner and crochet layer from separating if you carry heavy items in your purse.
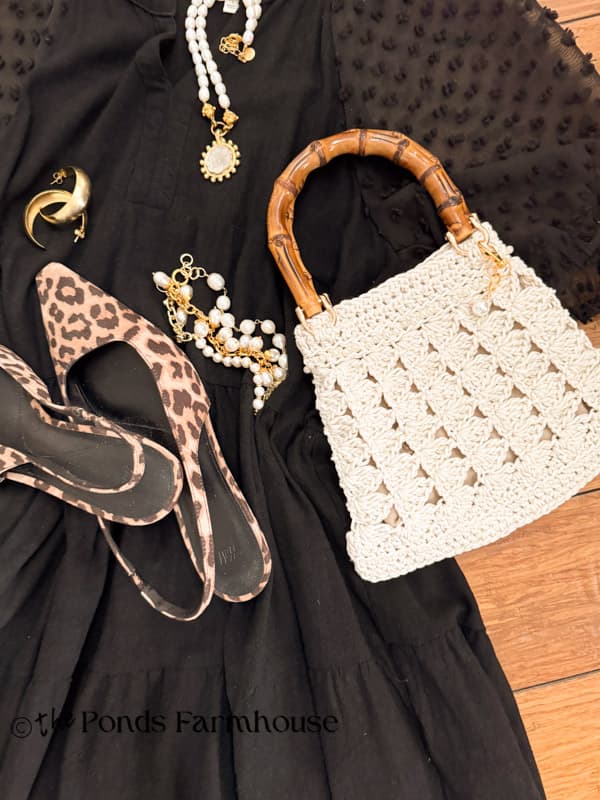
Easy DIY Crochet Purse
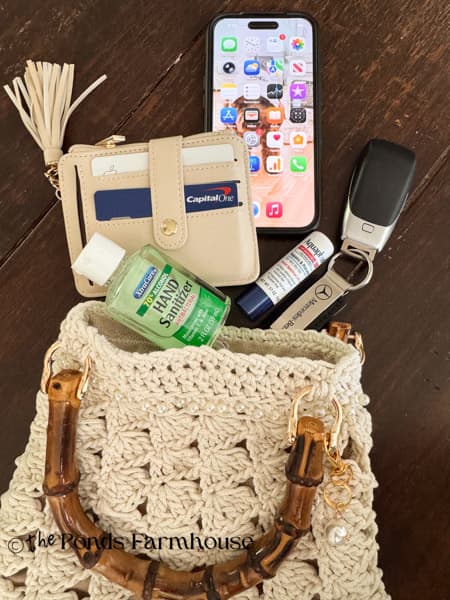
The DIY crochet purse turned out so cute. Don’t let its small size fool you; it holds much more than you think.
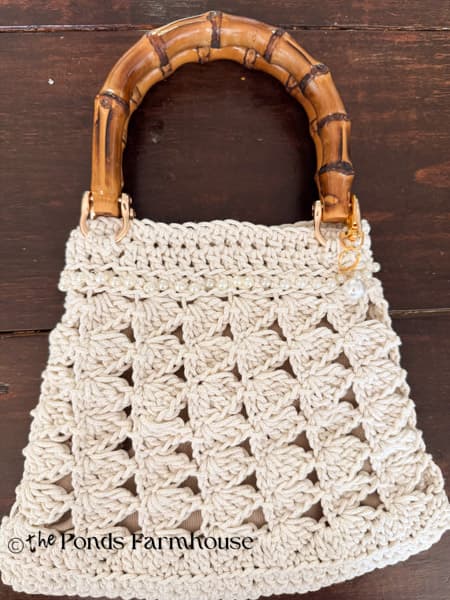
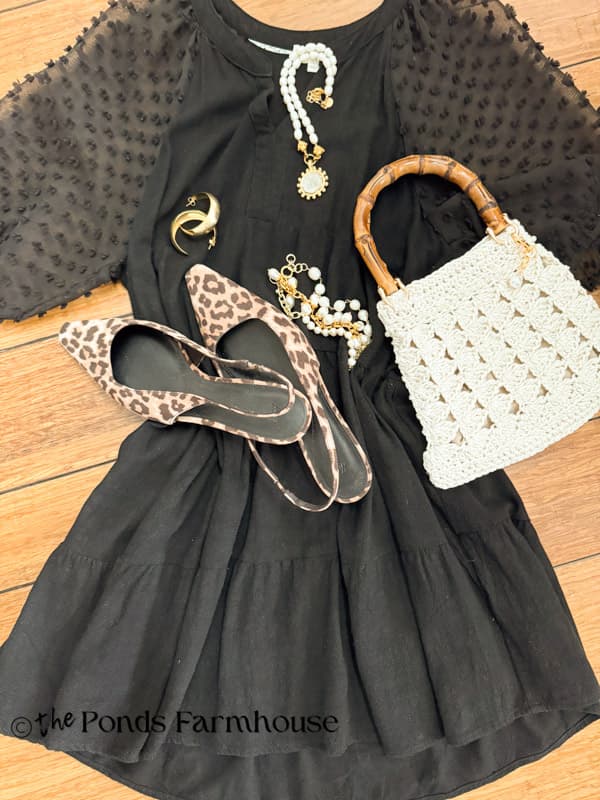
This cute vintage-inspired handbag is perfect for casual wear or dress it up with a little black dress.
FAQ
Shop This Post
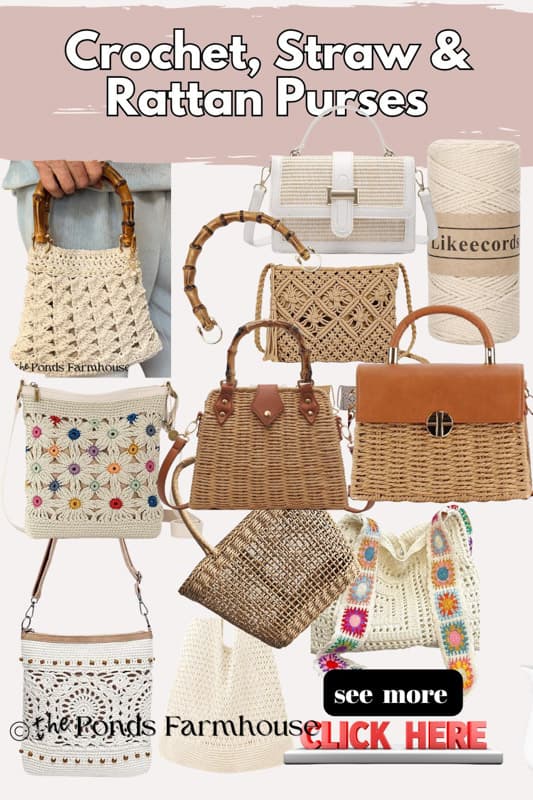
Click here if you want to see more ideas for Crochet and Rattan Handbag Ideas.
I hope you enjoyed today’s “Old School” Nostalgic craft, and please let me know your thoughts. I’d love to see your creations, so send me a photo, and I’ll share it on my next Dirt Road Adventures.