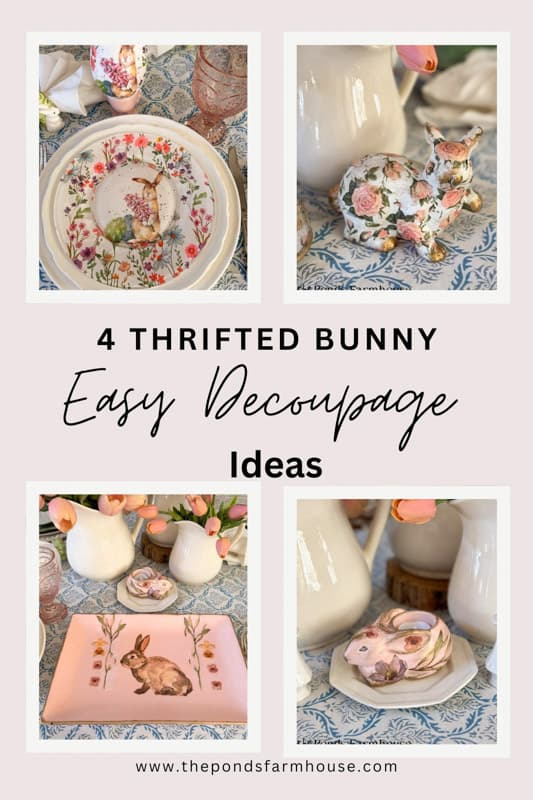
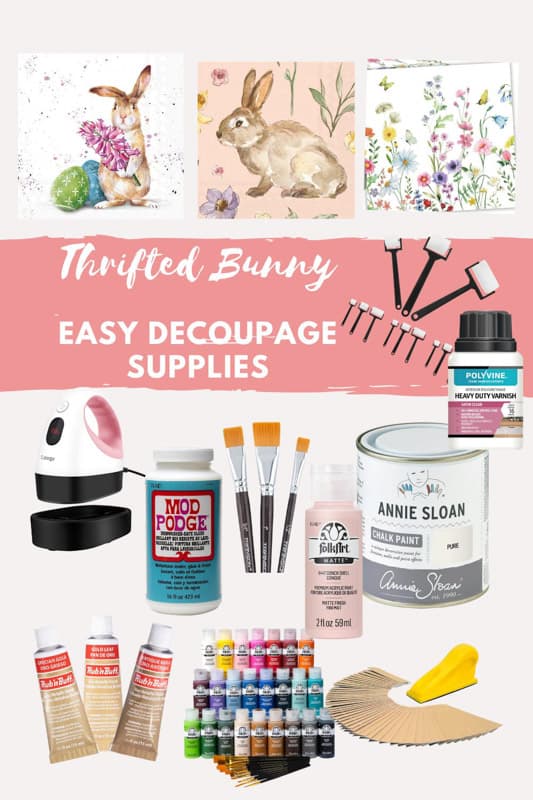
High-End Easter Bunny Decor: Easy Decoupage Thrift Store Upcycles
Hey friends! You know I’m all about upcycling thrift store finds into high-end decor treasures.
Today, you’re in for a treat because I’m turning a few inexpensive pieces into whimsical Easter Bunny decor. We’re transforming a boring platter, an uninspiring bunny candleholder, a simple figurine, and even a glass plate into boutique-worthy Easter decorations.
Using easy napkin decoupage techniques, I’ll share the step-by-step details for each makeover. I promise you’re going to love these budget-friendly transformations—let’s get started!
(Posts on The Ponds Farmhouse may contain affiliate links. As an Amazon Associate, I earn from qualifying purchases. See the full disclosure details here.)
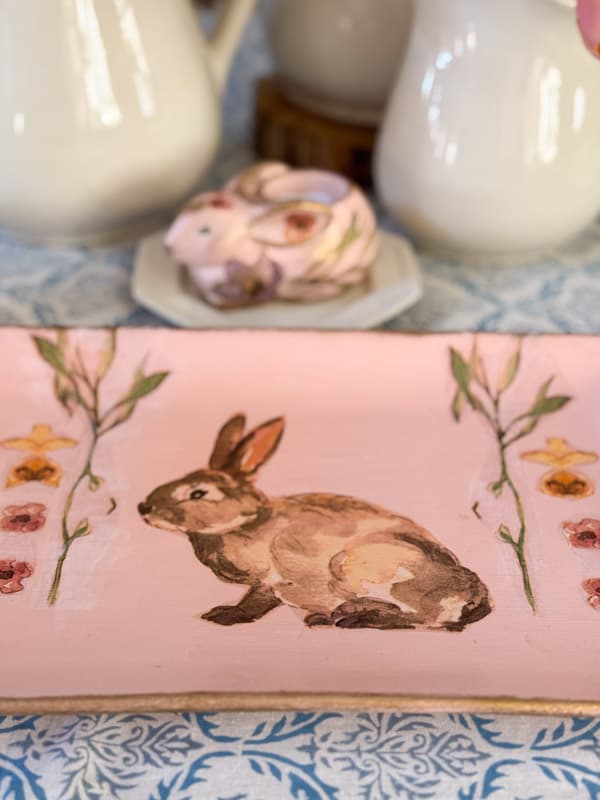
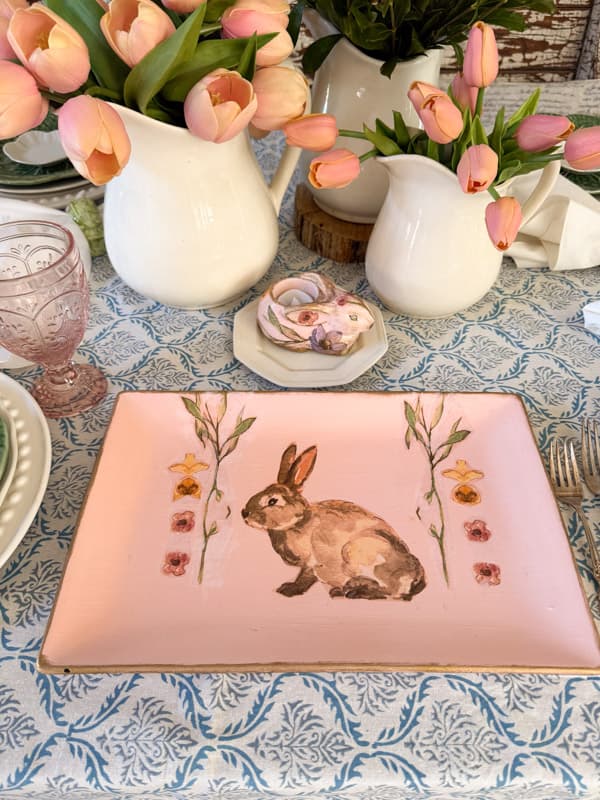
Pottery Barn Inspired Thrifted Platter Makeover
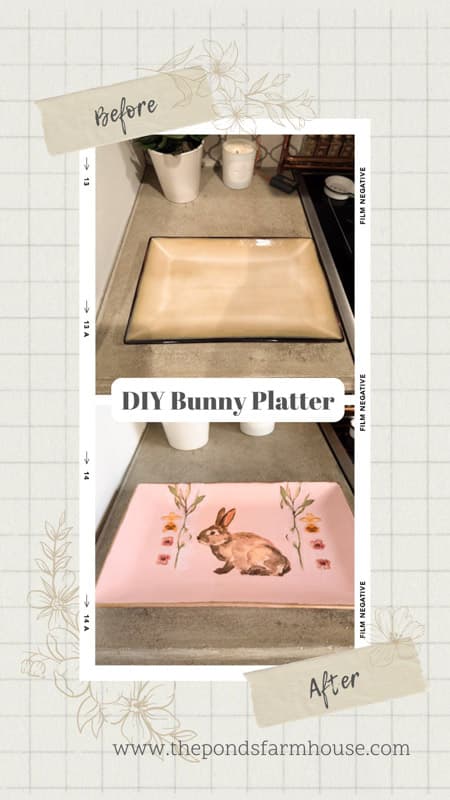
I was inspired to make this project when I ran across a bunny napkin that reminded me of an Easter platter I saw at Pottery Barn. I easily found a similar-shaped platter for $2.00 at a Habitat ReStore. With just a little paint and only one napkin, here’s what I did.
Bunny Platter Supply List
- Thrift Store Platter
- Conch Shell Craft Paint
- Bunny Napkin
- Mod Podge – Gloss
- Gold Leaf Rub N Buff
- Mini Handheld Heat Press
Step 1 – Paint the Platter
First, I cleaned the thrifted platter and used rubbing alcohol to remove any oily residue. Then I painted the platter with two coats of conch shell pink acrylic craft paint.
Once the paint was dry, I applied a thin layer of Mod Podge over the top.

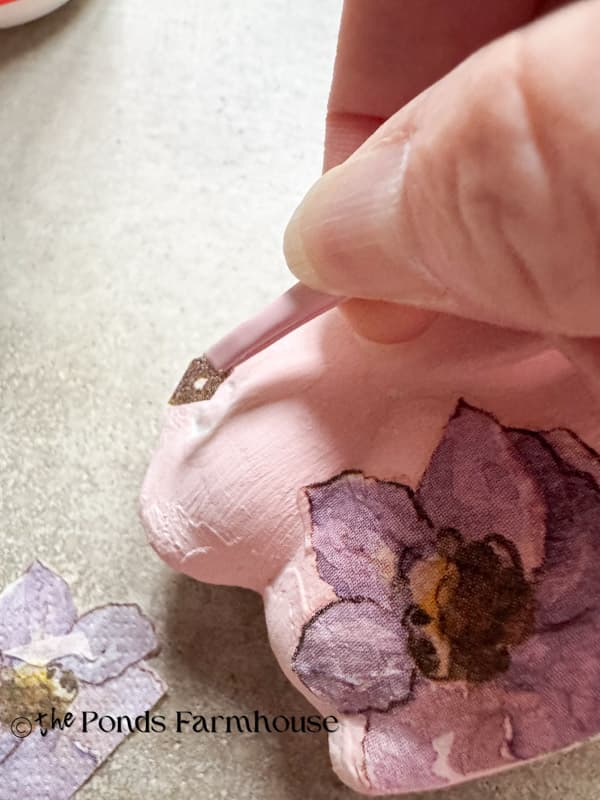
Step 2 – Prepare the Napkin
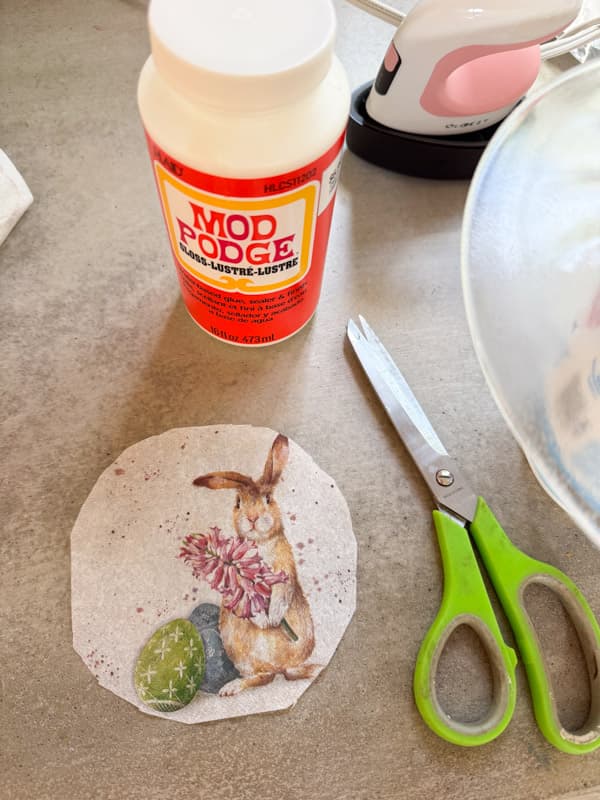
For this technique, I cut the bunny and the other designs from the napkin. Separate the layers and only use the thin printed layer. Trim carefully around all the edges of the pieces you plan to add to the platter.

Step 3 – Apply the Napkin with the Heat Press
Next, position each piece of the napkin where you want to apply it. Hold the napkin in place with your hand, then apply the heat press to adhere it. Gently smooth the napkin on the top of the platter with the heat. Repeat with all the napkin pieces.
Step 4 – Finish and Seal Bunny Platter
Lastly, apply another light coat of Mod Podge over the entire platter. Once it is dry, add gold Rub n Buff around the edges of the platter with a paper towel.
Before and After Platter Makeover
A $2.00 thrifted platter is transformed for pennies. This quick and easy makeover prompted my next makeover, using the same napkin to create a cute 50-cent clear glass bunny candleholder.
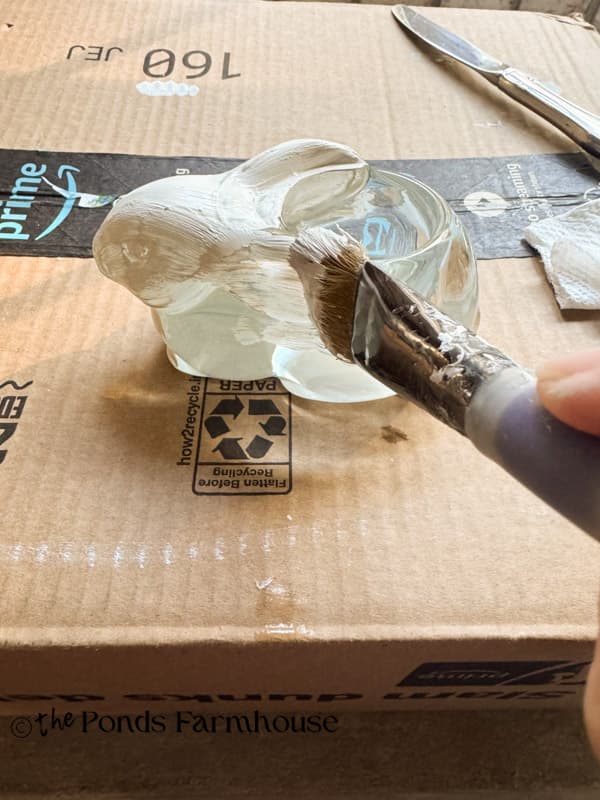
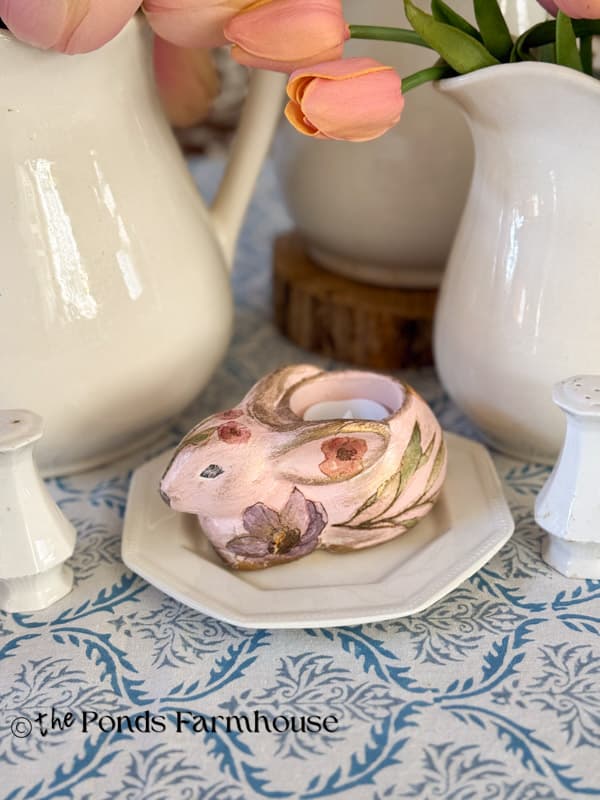
$.50 Clear Glass Bunny Candleholder Makeover
This 50-cent glass bunny candleholder gets a similar makeover with a different technique. Here’s how I accomplished this makeover.
Supplies For Candleholder Makeover
- Thrifted Bunny Candleholder
- Annie Sloan White Chalk Paint or another light shade of chalk paint as a primer.
- Conch Shell Pink Craft Paint
- Bunny Napkin or other floral style napkin
- Mod Podge – Gloss
- Gold Leaf Rub N Buff
Step 1 – Paint the Bunny Candleholder
Since the bunny candleholder is clear glass, I decided to paint it with white chalk paint to secure a good bond to the glass.
Then I painted over the white with the Conch Shell Pink craft paint.
Step 2 – Napkin Decoupage the Candleholder
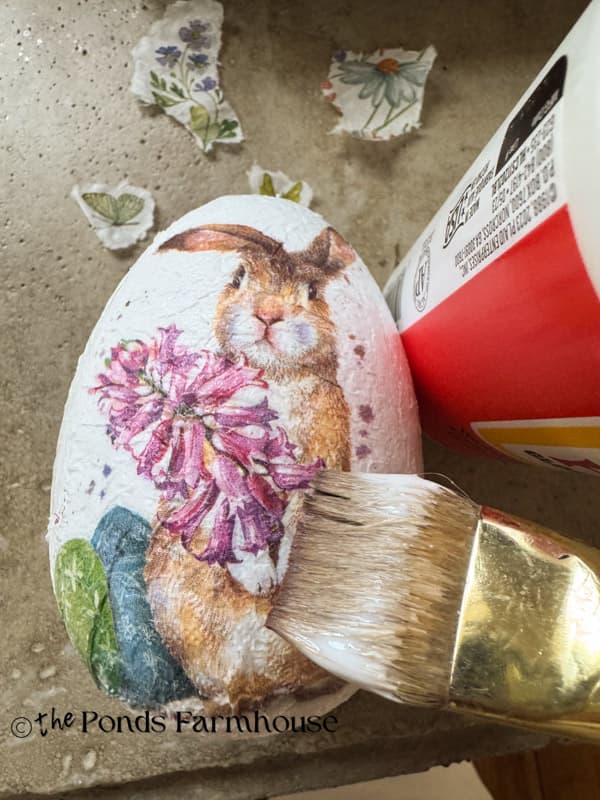
Once again, I cut the pieces of the napkin that I wanted to add to the bunny candleholder. Use a small brush to apply Mod Podge only to the area where the napkin will be placed. Don’t try to paint all the areas at once, as it may dry before you are ready.
I applied each piece of the napkin, including the bunny’s eyes. I used tweezers to place the smaller pieces.
Go back over each area of the napkin with a light coat of Mod Podge and smooth any wrinkles. Be gentle with the brush to avoid tearing the napkin. Set aside to dry.
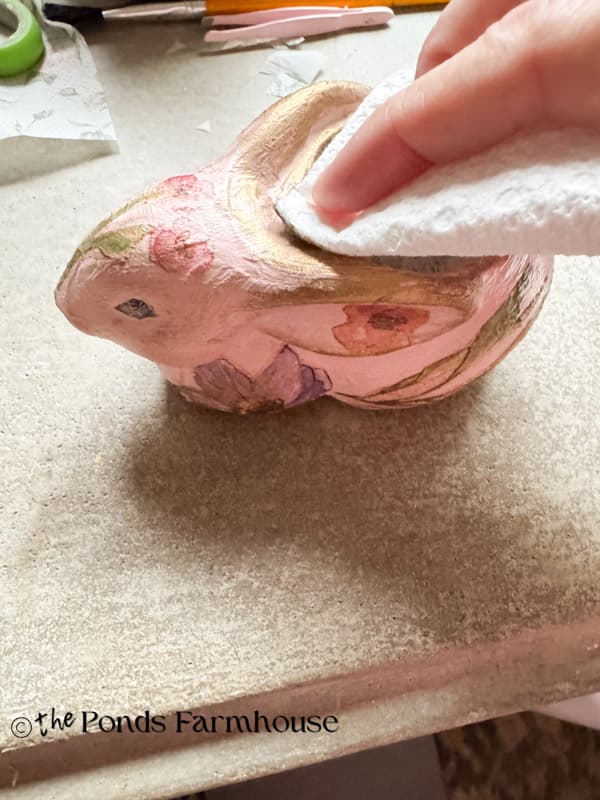
Step 3 – Finish Bunny Candleholder
Finally, I used the gold Rub N Buff around the bunny’s edges with a paper towel.
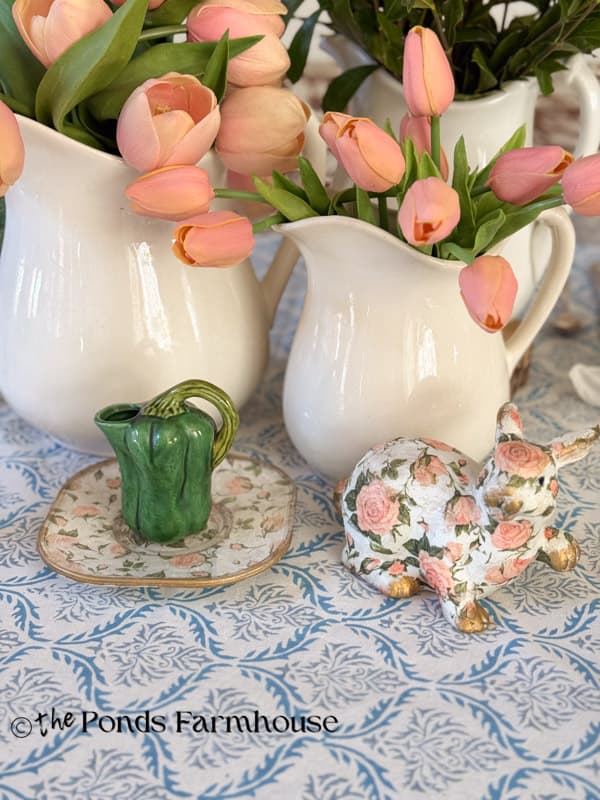
Decorate with the Thrifted Bunny Decor
I decided to add the decoupage bunny candleholder to my Spring table, along with the matching bunny platter. The updated candleholder has a very high-end look.
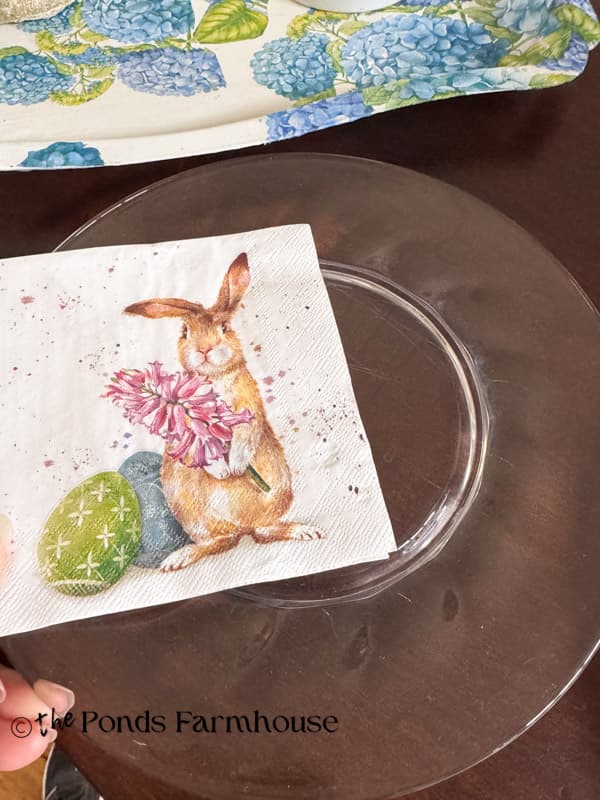
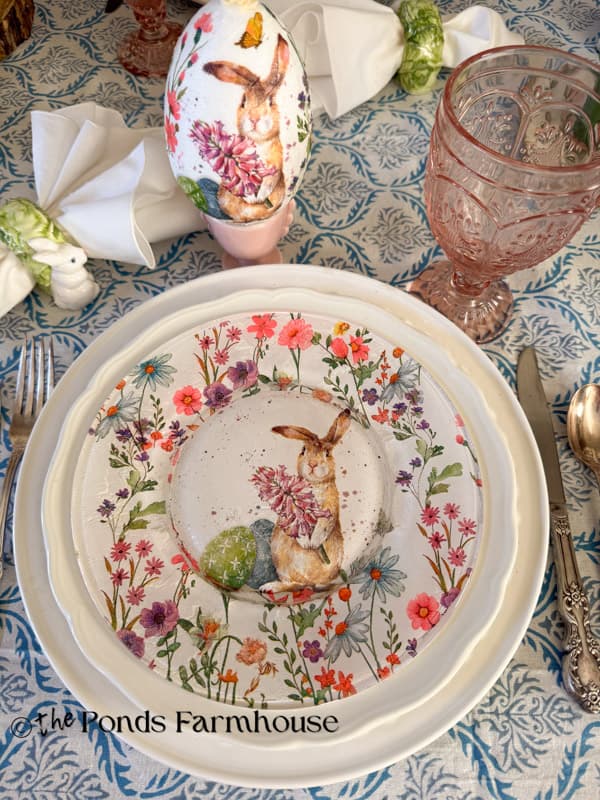
From Thrifted Clear Plate To Stunning Bunny Tableware
Have you seen those adorable bunny dishes that Pottery Barn releases each year? Well, I decided that since I won’t pay $15-20 a plate, I would try making my own. Then I found the perfect bunny napkin, and here’s what happened.
Supplies for Bunny Plate
- Clear Thrifted Plate for $.25 each (or Clear Dollar Tree Plate for $1.25)
- Bunny Napkin
- Floral Napkin
- Mod Podge – Gloss
- Annie Sloan Pure White Chalk Paint
- Clear POLYVINE Varnish Satin
- Mini Handheld Heat Press
- Mod Podge Dishwasher Safe
- Foam Roller
- Mini Finger Sander
How To Prepare a Clear Plate For Napkin Decoupage
First, the difference in this style of napkin decoupage is that you will be working from the backside of the plate and applying the napkin upside down. But don’t worry, I’ll guide you through all the steps so that you don’t make a mistake.
- Wash the plate and use rubbing alcohol to remove any oils or sticky residue.
- Use the foam roller to apply a thin coat of gloss Mod Podge over the entire back side of the plate. Try not to leave streaks or heavy areas. Apply as evenly as possible.
- Allow Mod Podge to dry for several hours or overnight.
How To Apply a Napkin to a Plate
Begin by separating the napkin layers using only the top printed layer. Place the bunny napkin in the center of the plate, then use a pencil to trace around the center of the circle. Then cut the circle from the napkin.
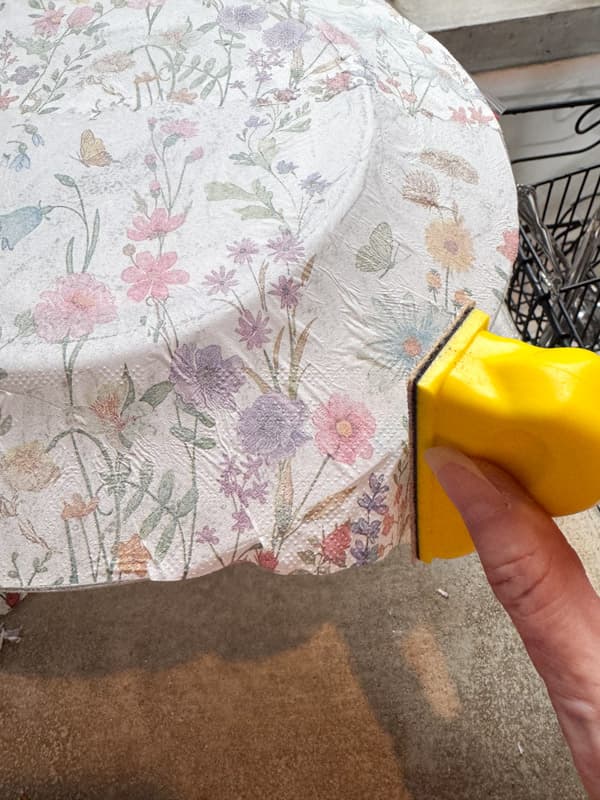
Next, cut the floral napkin into sections that will fit around the edges of the plate. Tear any edges of the napkin that will overlap.
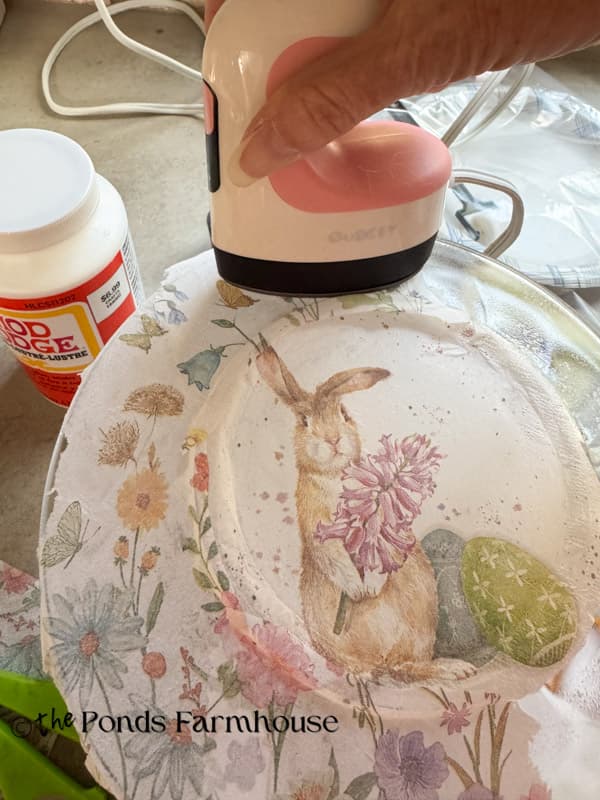
- Preheat the Mini Heat Press
- Begin with the center bunny napkin and hold it in place.
- Apply the heat press to the center of the napkin to activate the Mod Podge.
- Work outward gently, smoothing the napkin and adhering it to the plate.
- Next, begin applying the floral napkin around the edges. It’s okay to let the napkin extend beyond the edges of the plate.
- Sand around the edges of the plate to remove any excess napkin
- With a small brush, apply a thin coat of Clear POLYVINE Varnish Satin over the napkin. Be gentle and work from the middle outward to smooth any wrinkles as much as possible.
- Allow varnish to dry for several hours or overnight.
How To Paint and Seal the Decoupaged Plate
After the varnish has sealed, paint over the napkin with pure white chalk paint. I applied two coats for good coverage following the label instructions for dry time. After the second coat, I let the paint set overnight to ensure it was completely dry.
This next step is optional, but if you plan to use the plate for anything other than decoration, I recommend sealing one more time. To seal and allow the plate to be washed, apply a coat of Mod Podge Dishwasher Safe sealer.
I decided to add a napkin to styrofoam eggs to match the plates, and it turned out really cute as well. The technique for the egg is the same as for the glass bunny candleholder, except I used white paint under the napkin.
Insider Tip
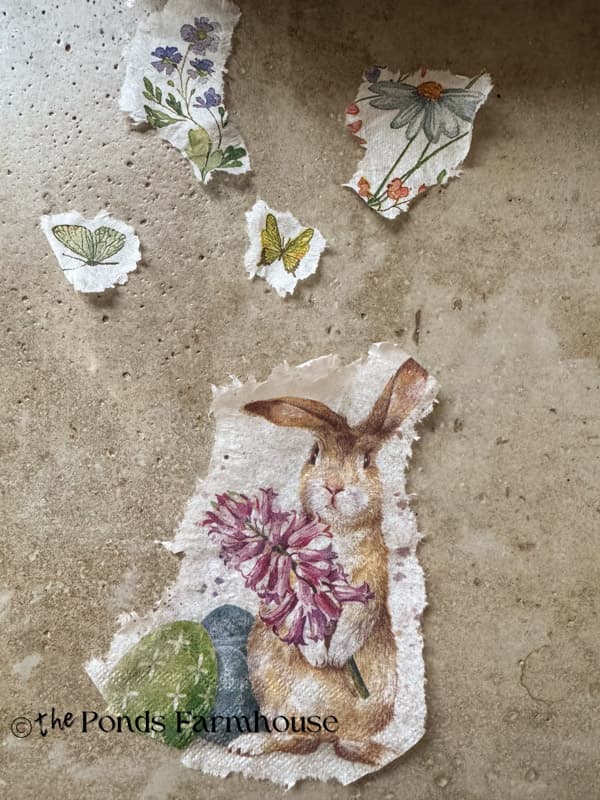
When overlapping pieces of napkin, it’s best to use torn pieces of napkin instead of using scissors to cut it. One easy way to ensure a jagged edge without tearing the napkin in places you didn’t intend to, is this techinque.
- Dampen a small paintbrush with water (don’t over have it dripping wet, just damp)
- Use the brush to go along the areas you want to tear.
- The wet napkin will tear perfectly along this line.
- Place the pieces as close together or slightly overlapping to decoupage.

Rose Covered Thrifted Bunny
Last but not least is another ceramic bunny I found for $1.00 at the thrift store. I already have several white bunnies, so I decided to add flowers to this one. I found this great set of vintage-inspired flower napkins and used a sweet rose pattern for the bunny.
Supplies For Rose Bunny
- Thrift Store Ceramic Bunny
- Floral Napkins
- Mod Podge
- Gold Leaf Rub N Buff
- White Chalk Paint (Optional)
Prepare Thrift Store Bunny
First, clean and remove any residue with rubbing alcohol. I decided that since I had white chalk paint on hand, I’d paint the bunny with it to ensure a good base coat.
Next, I separated the napkin layers and cut pieces to fit around the bunny’s body.
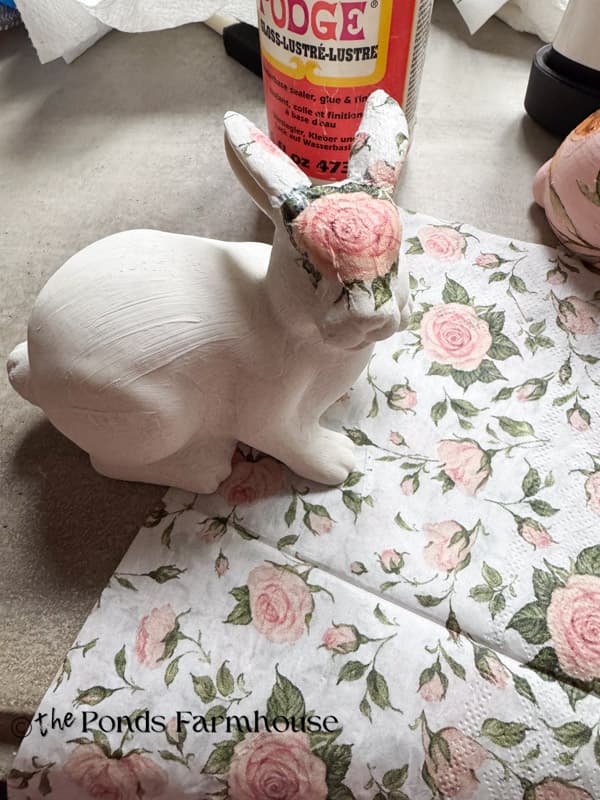
Apply Mod Podge in small sections, then attach the cut pieces of napkin until the entire bunny is covered. I left the eyes open. Use the brush to smooth out areas and apply more Mod Podge to overlapping areas. Allow to dry.
Once dry, apply Rub N Buff to the bunny’s edges with a paper towel.
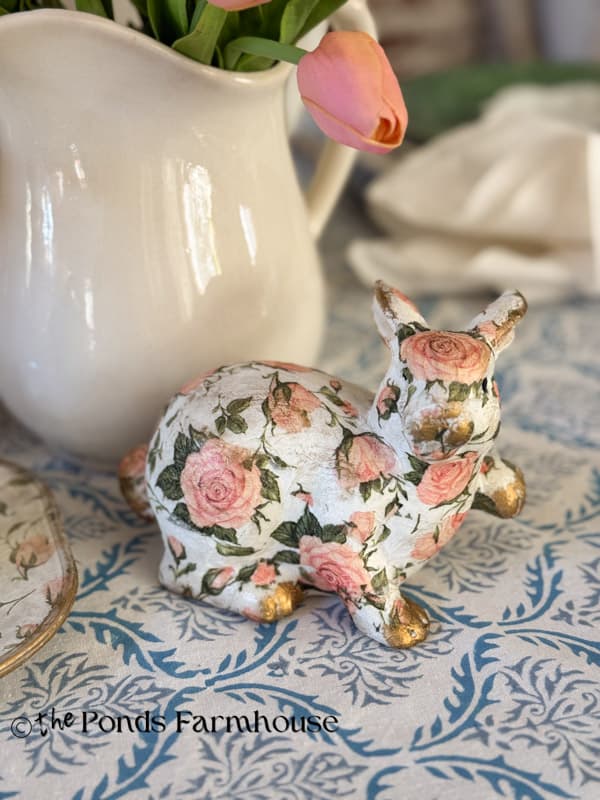
It turned out so cute. I also added the same napkin to a small clear plate using the plate napkin decoupage technique I shared above.
From Budget Thrift Store Finds To High-End Easter Decor
Creating a high-end Easter look doesn’t require a designer budget—just a little imagination and some Mod Podge! Whether you want a Pottery Barn-style platter or give a thrifted bunny a boutique-style makeover with napkins, the beauty is in the unique, collected feel you bring to your home. I hope these DIY decoupage ideas inspire you to look at those thrift store finds in a whole new way this spring. Happy crafting!
Resources: Click Image To See All Supplies in One Place


Dear Rachel,
All the fun Easter projects are adorable. Thanks for sharing.
Marcie,
So glad you like these ideas. Let me know if you make any of them. I’d love to see your ideas. Have a blessed weekend!