Top iPhone Photography Tips
Top iPhone Photography Tips – Use these Photography Tips for iPhone to get the best quality photos without purchasing an expensive camera.
Do you think you need an expensive camera to capture quality photos? I did for the longest time; then, I began to study more about my iPhone’s capabilities.
Today I’m sharing some tips I wish I’d known when I first started sharing my photo’s on social media.
When I first started photographing my home, I didn’t know these features and seriously considered buying a real camera several times.
Since implementing these tips and tricks, my most asked question is, “WHAT TYPE OF CAMERA DO YOU USE FOR YOUR SOCIAL MEDIA AND BLOG POSTS.” Honestly, I only use my iPhone for all my photos.
Please know that I DO NOT CLAIM to be an expert. These tips are gathered from different online sources, blogs, and the iPhone manual.
Most of these tips will apply to any smartphone; however, my experience is with the iPhone. The best source to learn your phone camera capabilities is Google tutorials and your phone’s manual.
Table of contents
- Tip # 1 – Take Lots of Photo’s
- Best iPhone Photography Tip – Stabilize the camera
- Easiest Tip for iPhone Photography
- Proper Lighting
- Learn All The Camera Features For iPhone
- Don’t Zoom – Don’t Flash Photography Tips for iPhone
- Photograph Objects at the Correct Height
- Suggested iPhone Accessories
- Thanks so much for stopping by
(Posts on The Ponds Farmhouse may contain affiliate links. As an Amazon Associate, I earn from qualifying purchases. See the full disclosure details here.)
Tip # 1 – Take Lots of Photo’s
Always take several photos of your subject! Professional photographers take hundreds of shots to capture the perfect one. This may sound so simple, but many posts are one shot and done. Also, don’t take photos or videos from within the social media app. You will not have the editing control you do with the iPhone camera.

Best iPhone Photography Tip – Stabilize the camera
How do you stabilize your iPhone camera? This may be the best iPhone Photography Tip and is easy to accomplish.
You can do this best with a tripod and a remote shutter. Even a slight movement can reduce the quality of your photo.
This was the first tripod I purchased, and I’m still using now. It’s inexpensive, light-weight, and includes the remote shutter.

I later purchased a Ring Light which also is a tri-pod and has a shutter remote. Although, I love using it for video’s, it is bulky and not as user friendly as my original tri-pod.

Easiest Tip for iPhone Photography
This is the most overlooked tip, and it’s so simple. Clean your lens before shooting. You are using your phone continuously, and the lens will get dirty. Cleansing the lens before taking a photo will significantly enhance the quality and clarity. Using a proper lens cleaner is also important to not scratch your lens.


Proper Lighting
Invest in a photography output lighting kit if you don’t have proper lighting. When the sun is shining, my home photographs beautifully; however, additional lighting can be helpful on gloomy days.
Learn All The Camera Features For iPhone
The cameras on the iPhone keep getting better and better. However, you need to familiarize yourself with the features to maximize the quality of your image.
Top iPhone Photography Tips from the Manual – Identify Subject
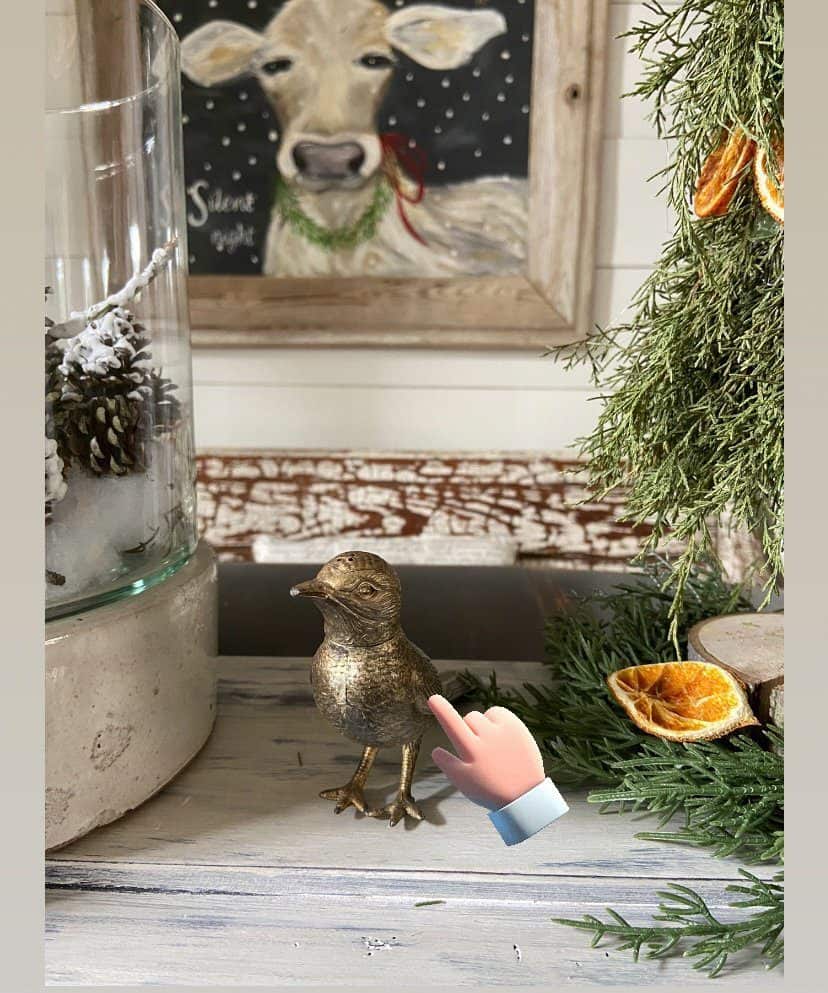
First, let your iPhone camera know the photo’s subject. Focus and Exposure are automatically built into your phone’s camera. However, as smart as your camera is, it doesn’t know what your subject is. You must touch your finger on the subject on the screen to show where you want the camera to focus. Then, if needed, you can adjust the exposure by moving your finger up or down.
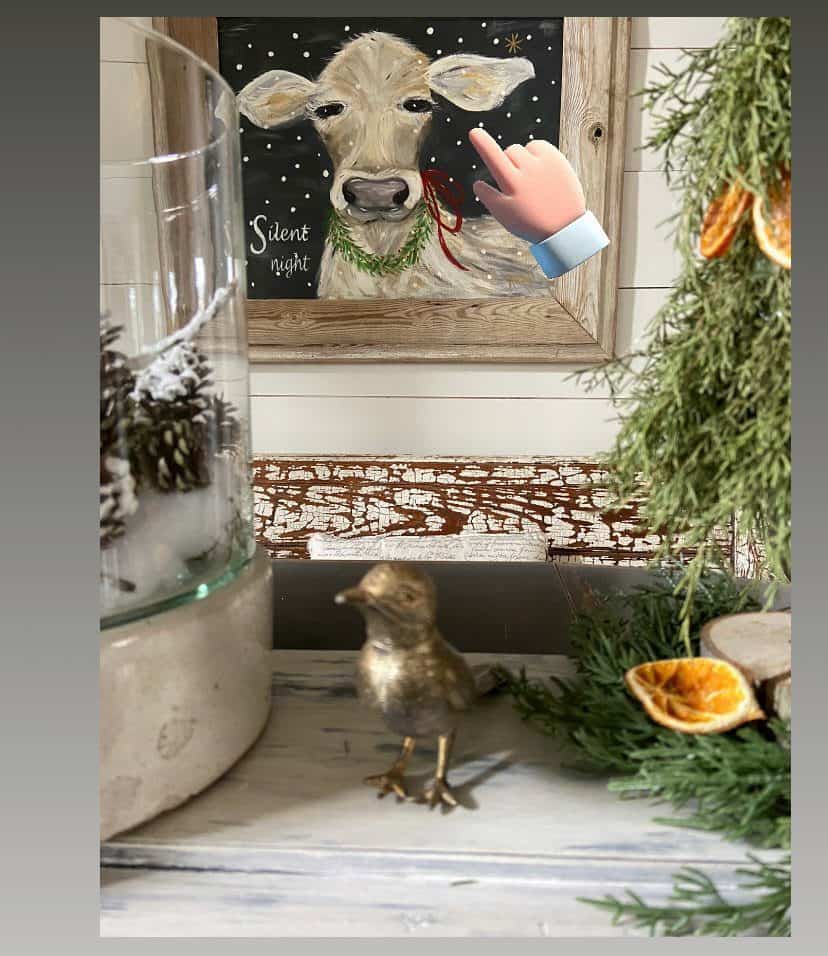
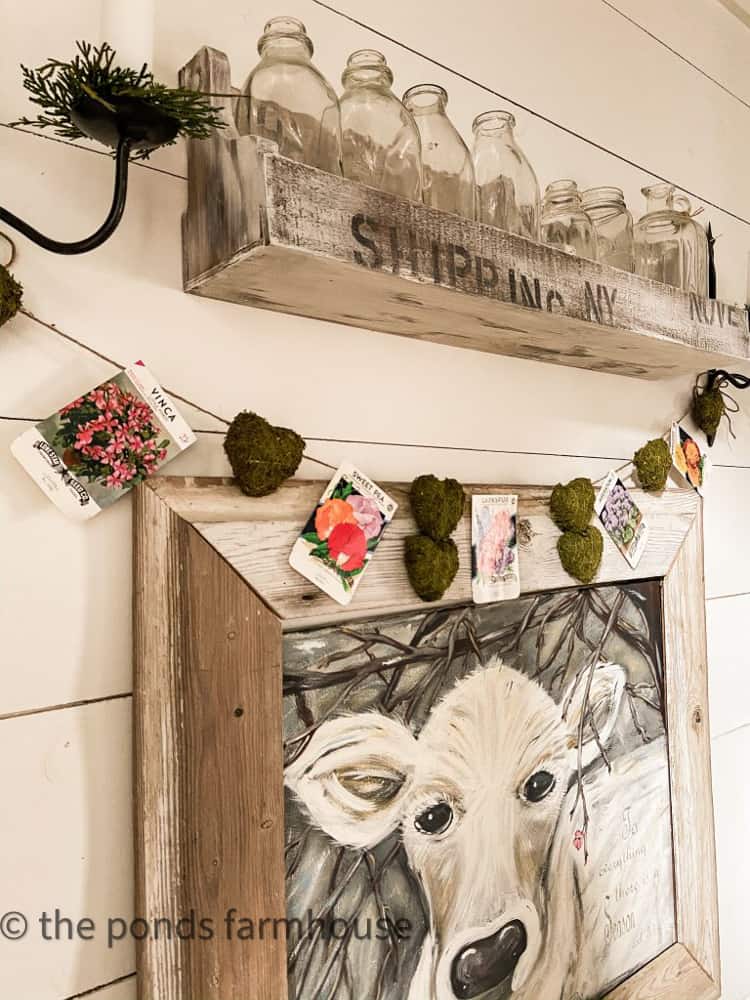
Here is the same basic photo with two different subjects.


In the first photo, the bird is the subject; in the second photo, the cow is the subject.
Just a simple touch of the finger changed the focus of this photo.
You can purchase prints of Sophie prints in my store.
AE/AF Lock on iPhone Camera
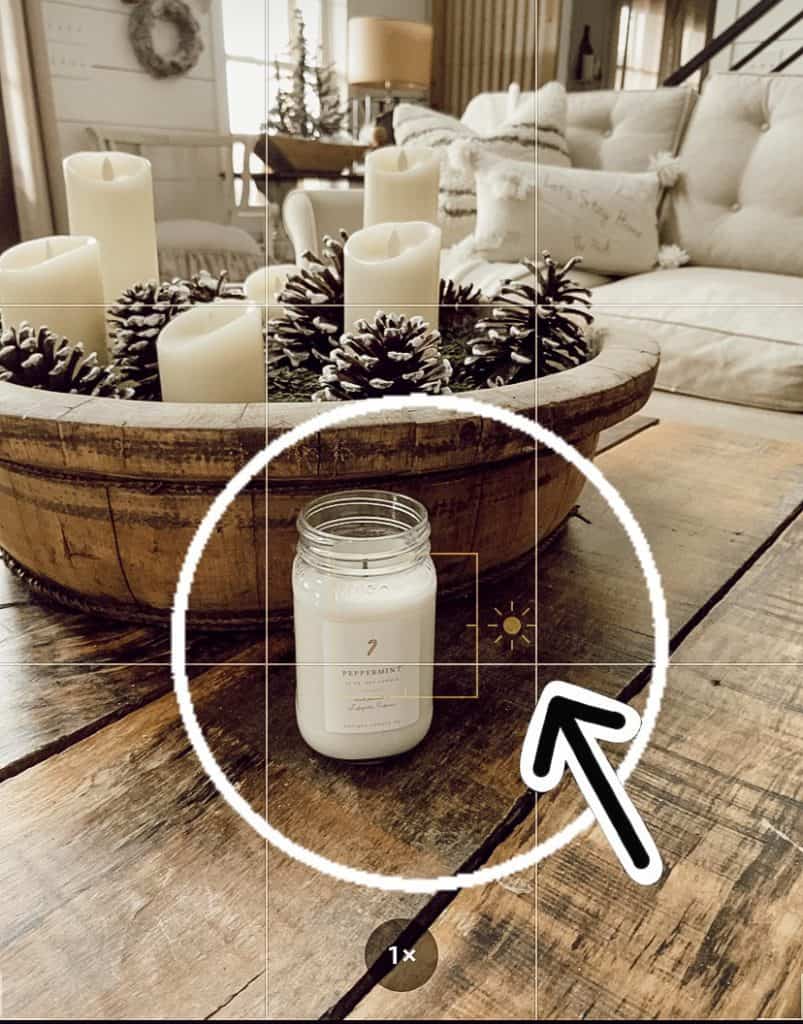
When you touch the area you want the camera to focus on, a square box appears with a sliding sun beside it. You can slide the sun up or down to adjust the exposure.
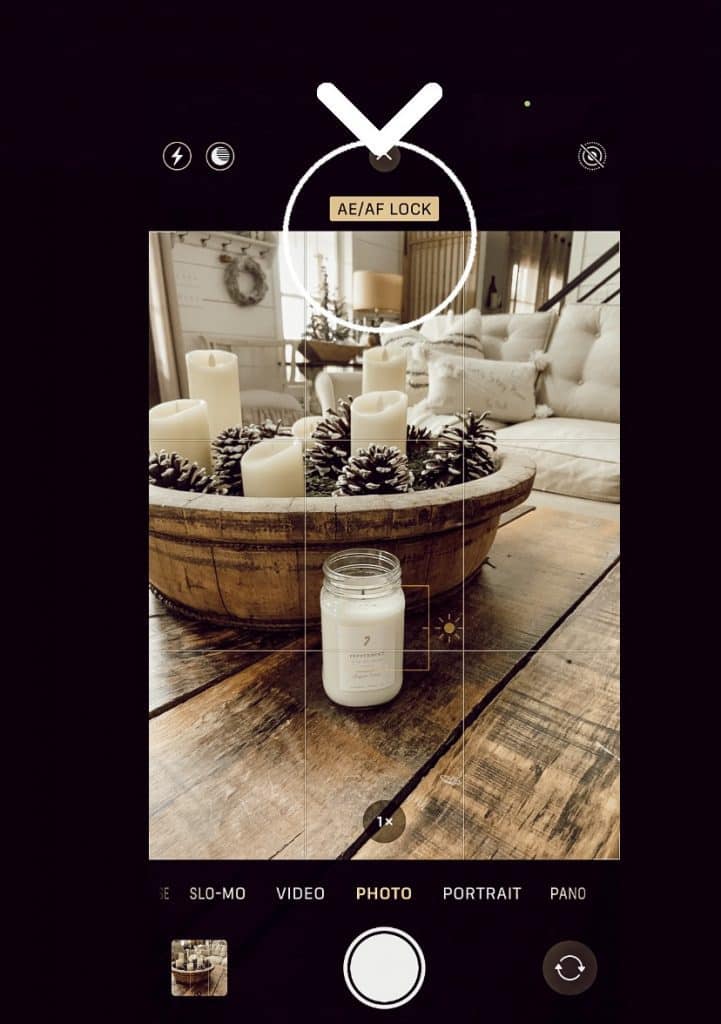
If you only touch the area of focus quickly, the AE/AF is set for the one photo. However, when you plan to take several shots, lock the AE/AF by holding your finger there until the lock appears at the top. This is my recommended method for most photos.
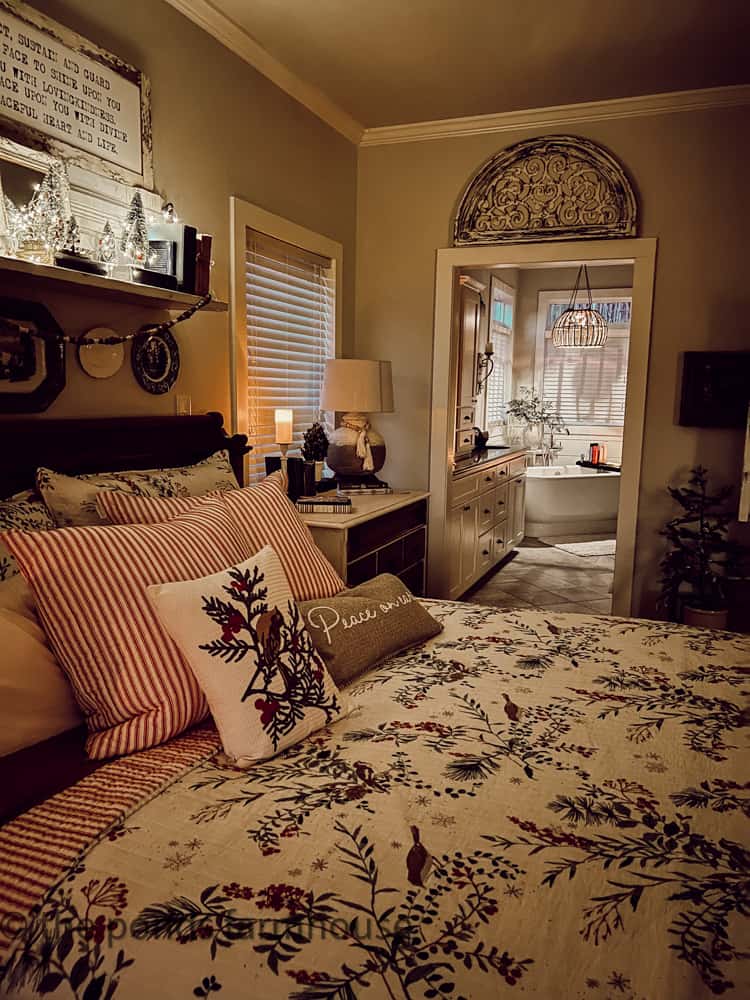
iPhone Photography Window Tips
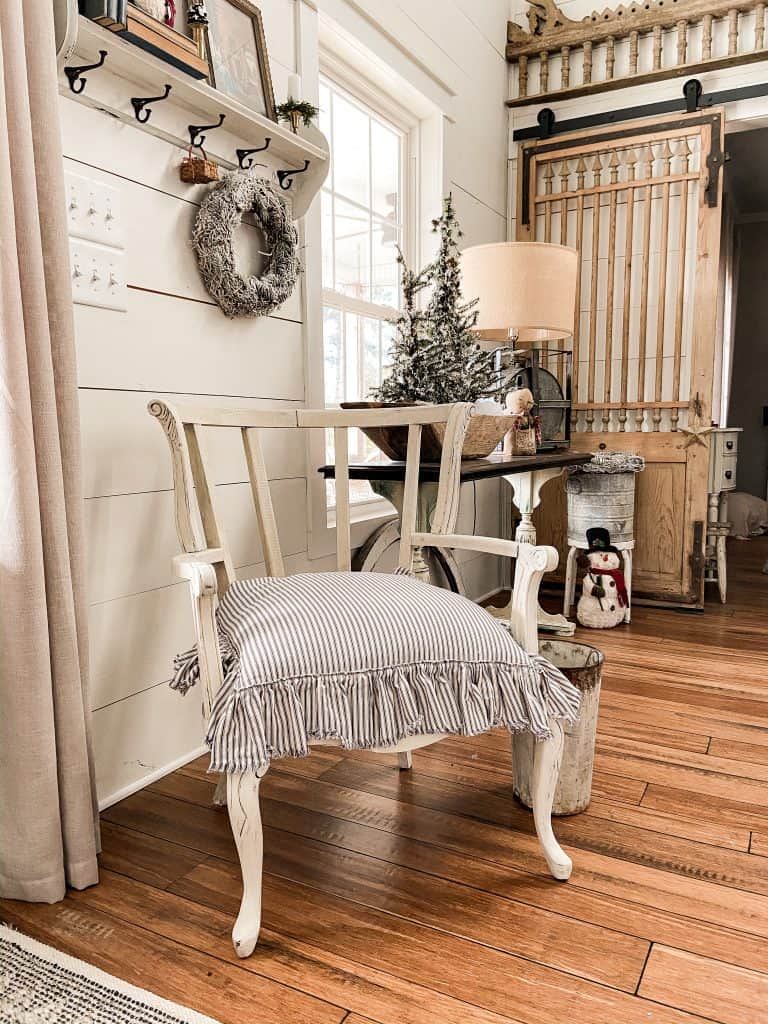
This is essential information when taking interior shots. If the light is coming into the room through a window, the exposure will automatically be set based on the light in the window. This leaves the rest of the room in the dark. Therefore, you will want to touch your finger in a dark area, setting the subject inside the room.
I rarely adjust the exposure because I use Light Room to edit the photo afterward. If you do increase the exposure, be careful not to overexpose the shot. Increasing the exposure when you edit the image is a much safer option.
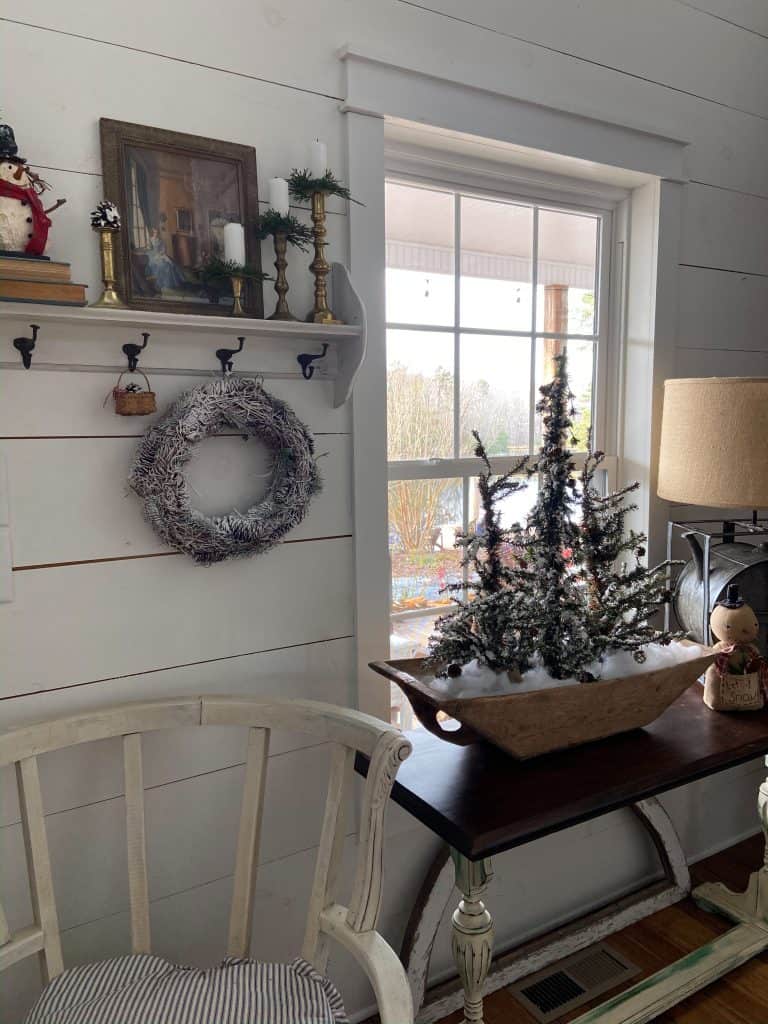
Here are some un-edited views as examples.


The first photo was taken without any attempt to focus; therefore, the camera automatically focused on the brightest spot, the window. Then the second photo was focused by locking the AE/AF on the darker area of the room, the lamp. However, the exposure needed to be adjusted in both of these examples.
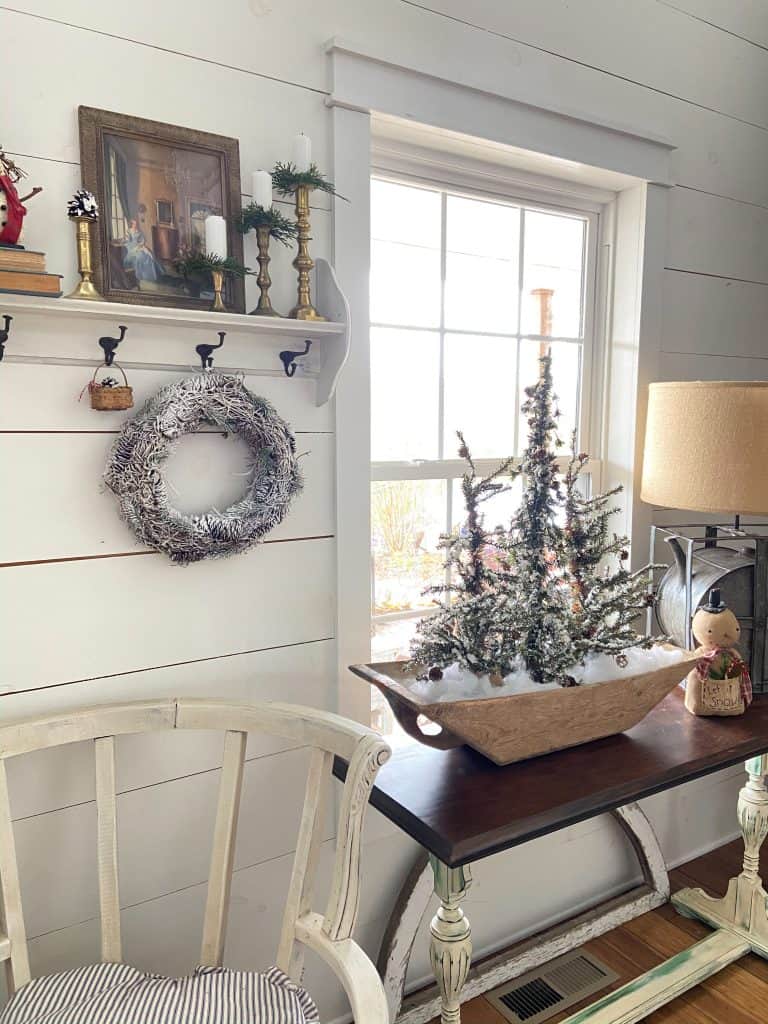
The photo can now be enhanced even more through Light Room editing.

This photography tip for iPhone was further enhanced by using the Light Room app to edit.

NOTE: Light Room is the editing app I’m most familiar with, but many popular editing apps exist.
In addition, the new models of iPhone take excellent night mode photos. A tripod is essential for night mode photography because the phone needs to be stable for longer. If you want more information, please look at this article.
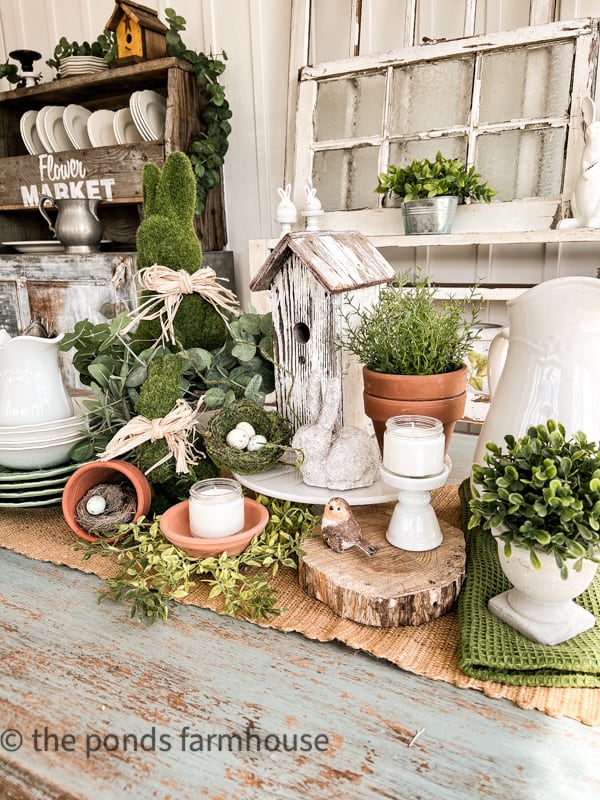
If you enjoy these photos, look at these Winter Décor Decorating Tips.
Don’t Zoom – Don’t Flash Photography Tips for iPhone
Ok, that’s two photography tips for iPhone! However, both are essential photography tips for iPhone.
Don’t Zoom
When you Zoom, it reduces the photo resolution. So, could you get as close as possible, photograph the subject and then CROP during the editing process? Cropping will reduce the resolution, but less drastically than the zoom.
You can purchase zoom lens attachments for your iPhone camera. However, most of my photography is home décor, which doesn’t require distance shots. Once again, the newer iPhone 11 pro, 12, 13, and 14 cameras are much more sophisticated and have more zoom capabilities without losing resolution.
Don’t Flash
Using natural light is best for all photography. The flash will almost always overexpose the subject. Therefore, don’t do it.

.
Photograph Objects at the Correct Height
Another common mistake most people make when photographing a room is holding the camera too high. This is an excellent tip for any camera and is not exclusive to the iPhone.
This is another good reason for a tripod because you can adjust the camera up or down. No more getting down on your knees or lying on the floor.
When photographing furniture, it’s best to have the camera level with the subject!
When photographing the entire room as the subject, a good rule of thumb is to position the camera 25 – 35 Inches from the floor. Where the seating is low such as sofas and living areas, 25″ is good. However, dining tables or kitchen counter views may look better at 35″.
This is another time when the multiple shots, at different levels, photography tips for iPhone will come in handy.
Here are a few examples of correct and incorrect camera heights.
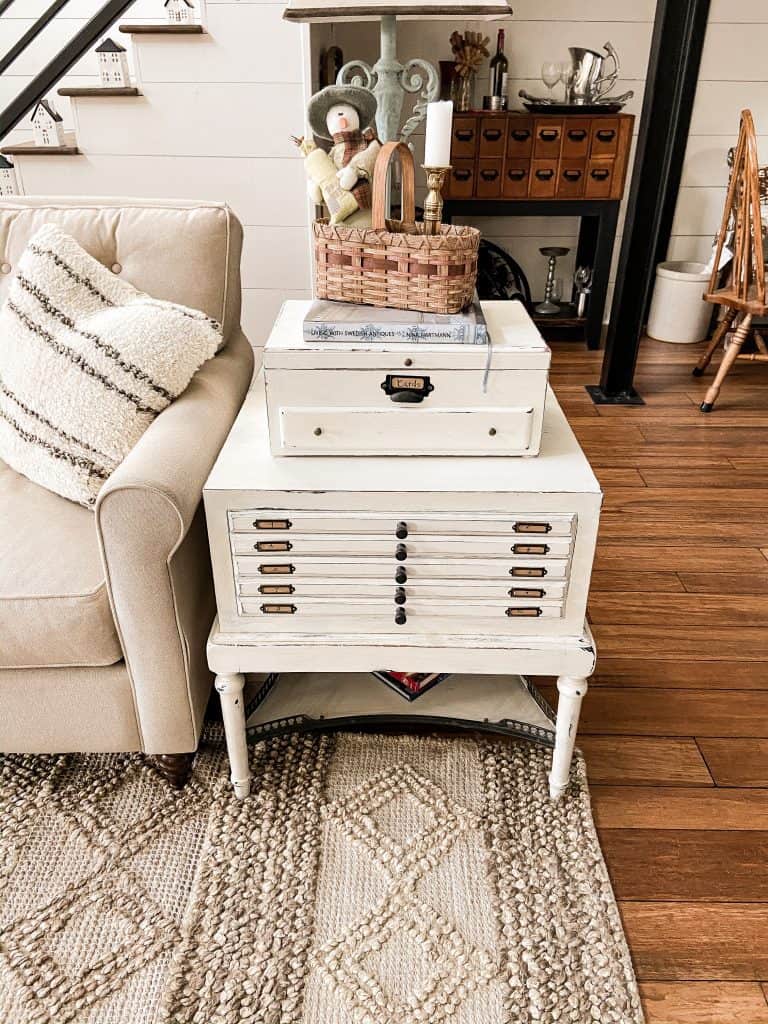
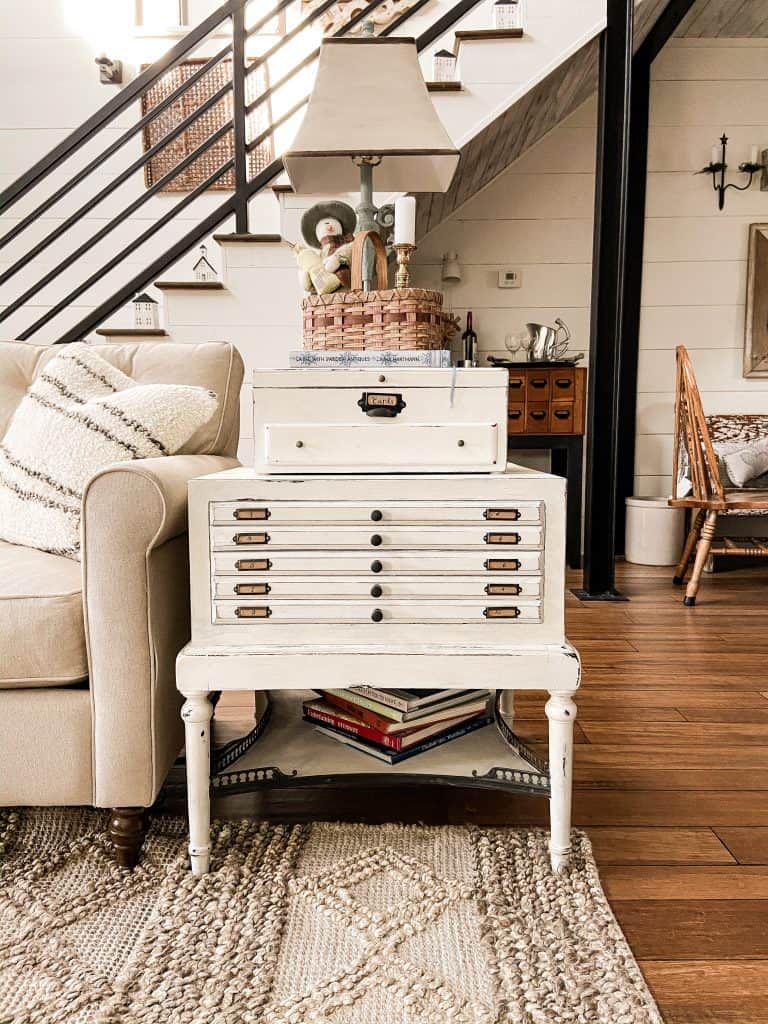
CAMERA IS HELD TO HIGH IN 1ST PHOTO – LEVEL WITH SUBJECT OF PHOTO
Notice how the shape and dimensions of the cabinet are distorted in the first photo! However, you can get a clear idea of the shape and size of the cabinet in the second, more appropriate view.
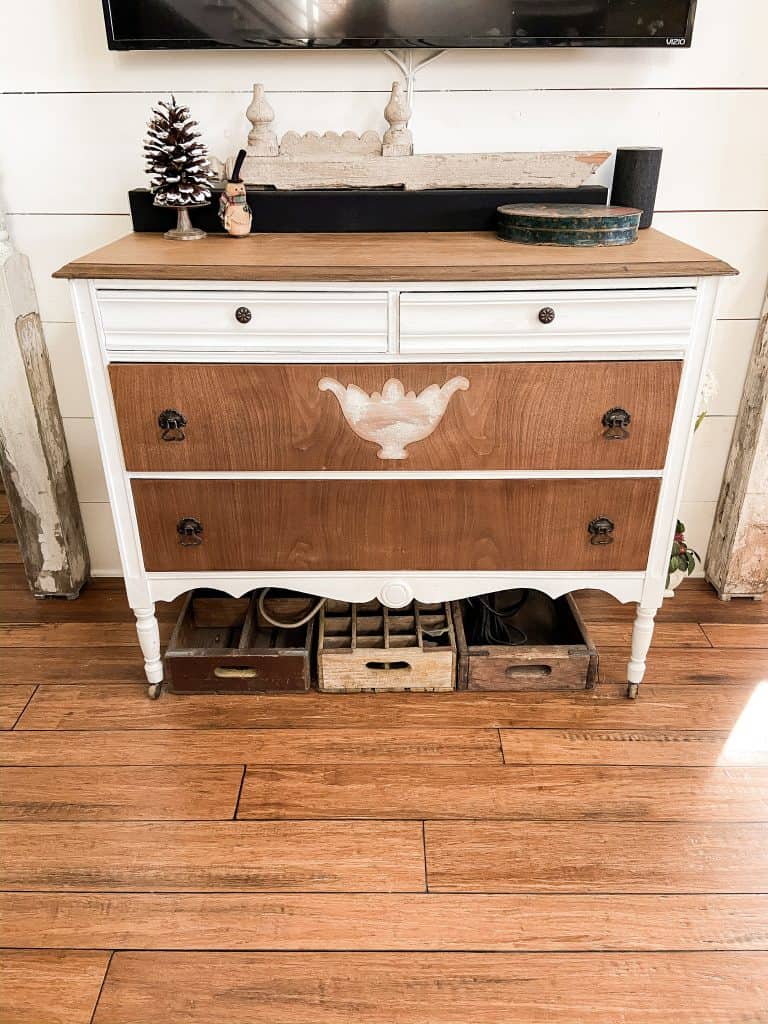
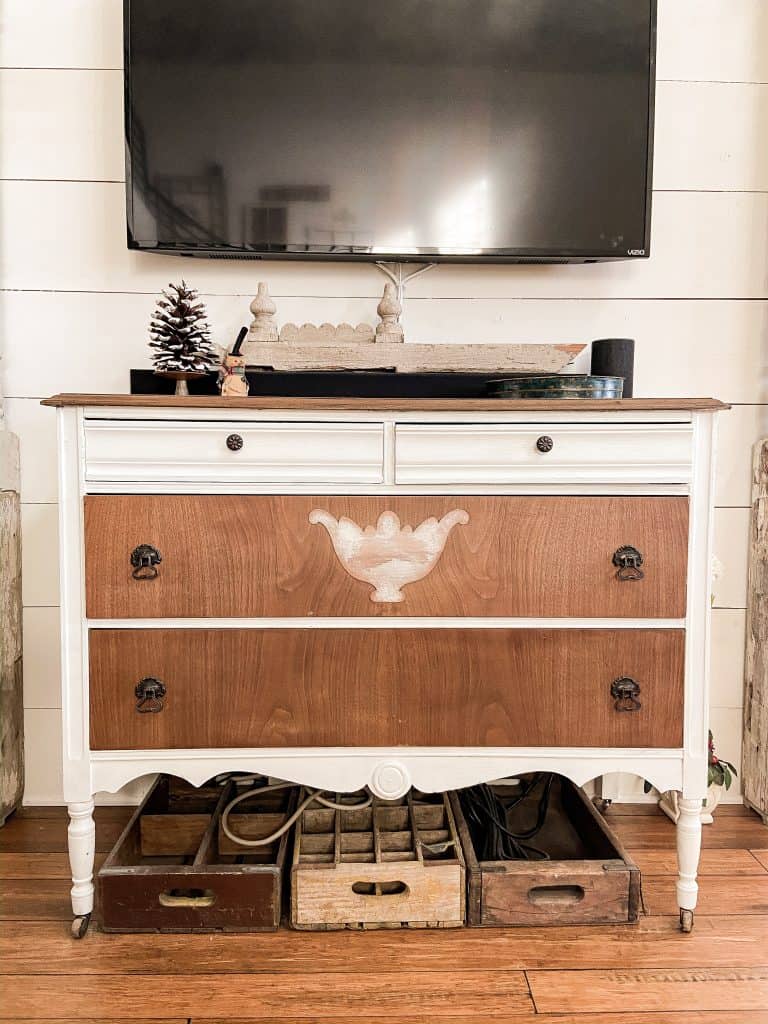
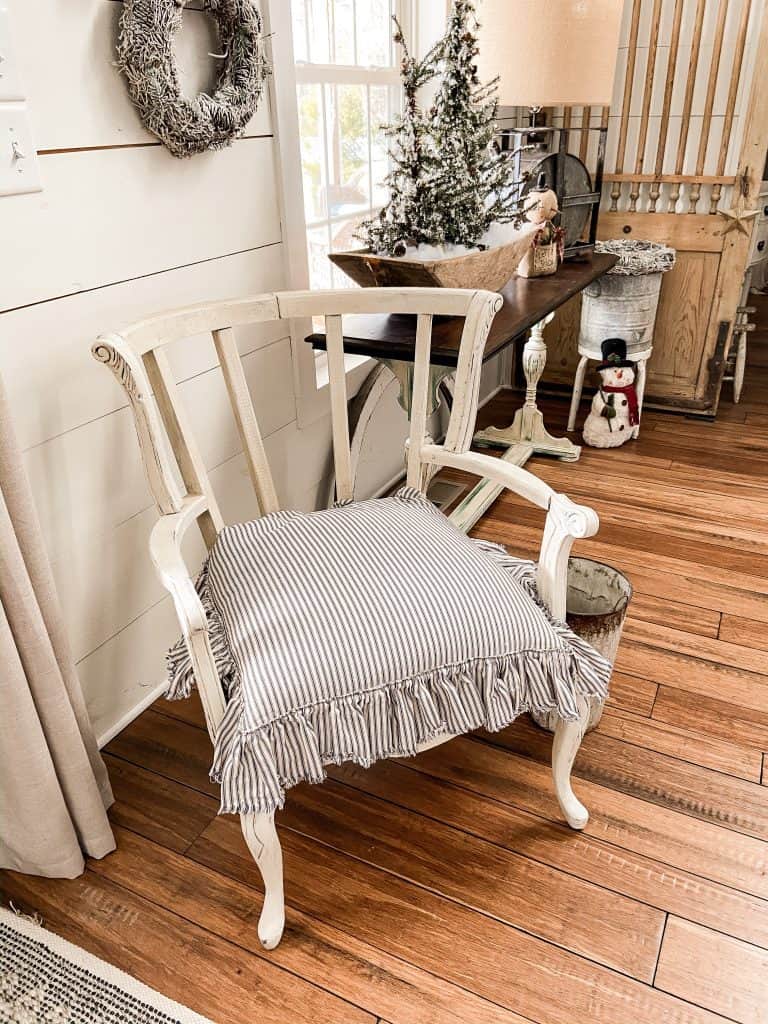
Even the chair is more appealing in the 2nd photo, which was taken at the correct height!
Please message me here or on Instagram if you have questions.
I hope these Photography Tips for iPhone will be helpful in your photography.
Suggested iPhone Accessories
Thanks so much for stopping by

If you enjoyed this post and found it helpful, be sure to pin the custom graphic to Pinterest for future reference. Your support is greatly appreciated.


So many great tips Rachel💁🏼♀️
Ann,
Thanks so much.Rachel
Rachel this is a great blog with lots of awesome tips!!!
Stacy,
I’m glad you think so. Thanks for your support.
Rachel
Thanks for the great tips! So glad I found your blog. Always look forward to your posts!
Rebekah,
Thank you so much. I’m so glad you are finding my posts helpful. That’s my goal.
Rachel
Thank you so much for sharing your tips. I started blogging in late September and I’m trying desperately to figure everything out. This helps tremendously. Keep the IG and blogging tips coming.
I so enjoy your blog.
Blessings to you.
Renae,
I really appreciate this. I hope these tips are helpful. they changed my whole way of taking photo’s.
Fantastic tips Rachel! I still struggle with photography and my husband was a professional photographer when we first got married. I think he’s tired of repeating his advice. I’m so impatient though. If I don’t like the photo I immediately delete it so I don’t have several to choose from. Guess I should stop that. And I need to get better at navigating Light Room but goodness gracious, I feel I need an entire 6 week course for that! Happy New Year!
Cindy,
I’m not using all the features of light room but what I know has helped greatly.
Thanks so much.
Rachel, great post. I don’t have an IPhone I have Samsung S10 Note and thr camera is fantastic.
It was rated better than the IPhone 11.
Some of these tips will help me. I have a tripod and it does help.
Funny thing, my husband says stop thinking you are smarter than the camera,
Have a great afternoon!
Cindy
Cindy,
I’m so glad you found some of these tips helpful.
Thanks for stopping by.
Rachel
Thank you so much for sharing your tips. A really good post.
Debbie,
I really appreciate this.
Rachel
You shared such helpful advice! These are great tips no matter what we photograph! Love your blog!!
Betsy,
your comments are so appreciated. I certainly hope these tips are useful..
Great information. Having the pictures to show the difference is so helpful. Explaining about the heigh really makes a difference in the looks of a picture. THANK YOU
Shannon,
I appreciate your comments and I hope these tips are helpful.
Rachel
Thanks for all the great tips Rachel! I really enjoyed reading about some of the things I could be doing and will be trying. Best wishes, Julie
Julie,
Thank you and I do hope these tips are helpful.
Rachel
Do you use a specific preset for Lightroom? I’m trying to learn it, but I see people use presets a lot. Thanks for the tips.
Traci,
I purchased 2 of Liz Marie’s presets early on. However, I have now developed my own and that’s what I love about Light Room. You can keep tweaking a photo and when you get it right, you can save and name your preset so the next time you just click the preset and it’s done. I have about 5 that I rotate depending on the light of my original photo.
My jaw dropped that your gorgeous photos are taken with your iPhone! Oftentimes when visiting your blog I’ve thought that you must have really expensive camera equipment. I have a big girl Nikon and even after taking a couple of courses, I still struggle. I much prefer using my iPhone can never get the focus and lighting just right…until now. Thank you so much for these awesome tips!
Oh Marie,
I’m so glad this was helpful. Thanks so much for stopping by.
Rachel
Thanks so much for this post. You included a few new tips for me! Will you do one for editing in LR?
Linda,
I’m so glad you found this helpful. Thanks for stopping by.
Rachel
Linda,
I’m so glad you found this helpful. Thanks for stopping by.
Rachel
Thanks so much for all of the awesome tips. I certainly learned a lot about my IPhone!
Kate
Kate,
I’m so glad you found this useful.
It’s always great to discover something new about an item I use so much. Thanks for the tips!
Sandra,
I’m so glad you found this helpful.
Thanks for sharing these tips Rachel, I learned so much more than I thought I would. Will be playing later to see how I do….wish me luck :)) xx
Janette,
I’m so glad you found this helpful. Best of luck.
Thank you for the useful tips.
Lauren,
I really appreciate this.
This is a great post. I would love to share it on my weekly newsletter. Hugs to you.
Renae,
I really appreciate this.
Fabulous post Rachel, thx for sharing!
Wendy,
I really appreciate this.
I can’t wait to start practicing these tips, Rachel! I use my big camera for everything because the quality of my iPhone photos is awful. Thankfully, I have your fabulous tips to help get me on the right path. Hugs, CoCo PS: Sharing on Friday!
CoCo,
I hope this was helpful. Thanks for sharing.
thanks for sharing.