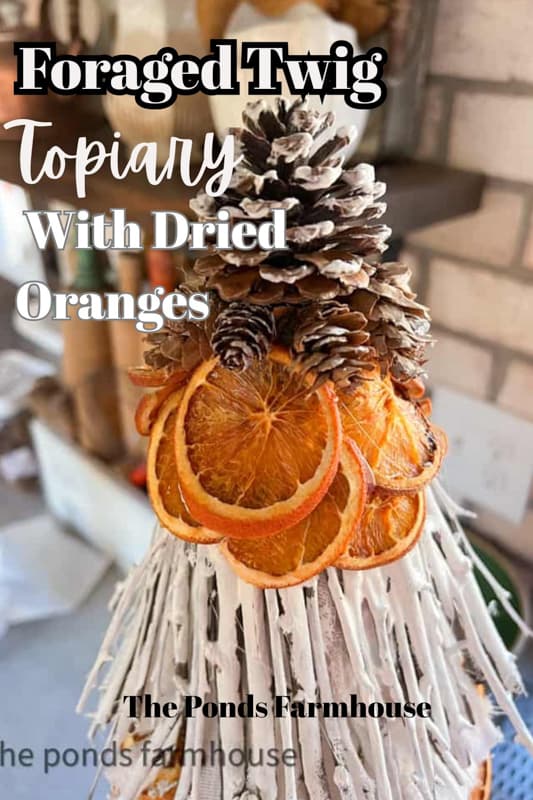
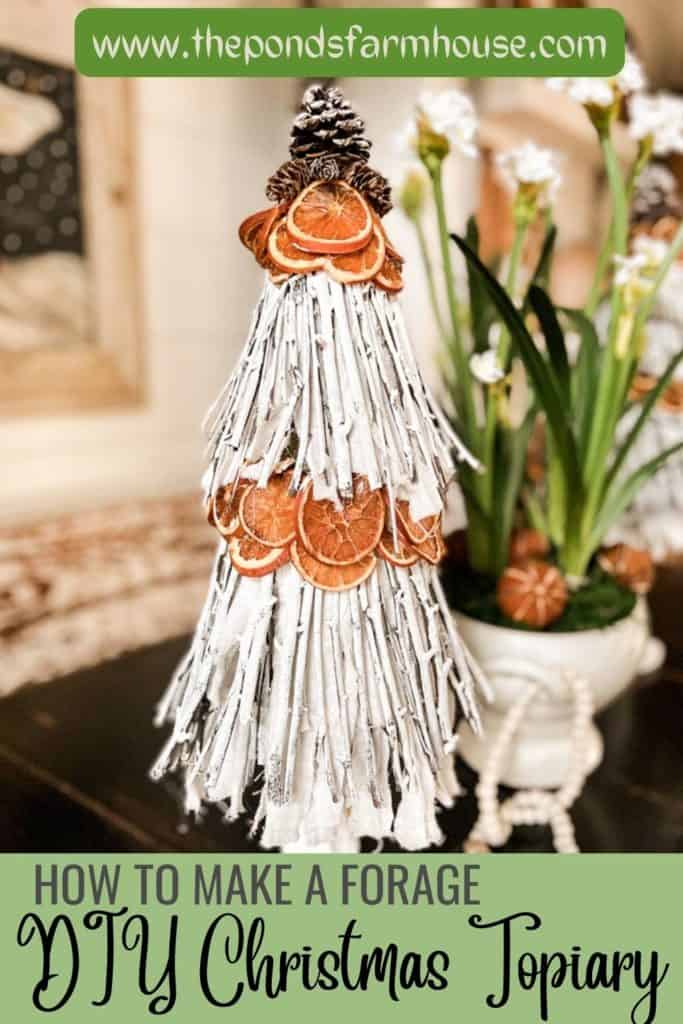
How To Make Foraged Twig Christmas Topiaries With Dried Oranges
Looking for cheap and sustainable Christmas Craft Ideas? You will love these easy-foraged twig Christmas Topiaries. These DIY Christmas Topiaries can be made for almost nothing because all the supplies are gathered and recycled. The only items you need to purchase are the styrofoam cones and a couple of oranges. So grab your supplies and let’s get started.
For this project, I used new cones. However, I usually recycle my natural topiary cones to save money. So if you have some old styrofoam cones, pull off the ornaments and recycle them. I’ve also picked up some cheap decorated cones at thrift stores to use for a new project.
What Are Foraged Supplies
For this project, I used a combination of gathered twigs and pinecones foraged from our property. In addition, I used recycled scrap fabric and dried oranges.
The only purchased items were the thrift store candlesticks I used as bases and the styrofoam cones.
There are several options for the topiary bases. I used these DIY bases for the Cedar and Orange Topiaries a few years ago.
(Posts on The Ponds Farmhouse may contain affiliate links. As an Amazon Associate, I earn from qualifying purchases. See the full disclosure details here.)
How To Make Christmas Topiaries
These cute Christmas Topiaries are easy to make and so inexpensive.
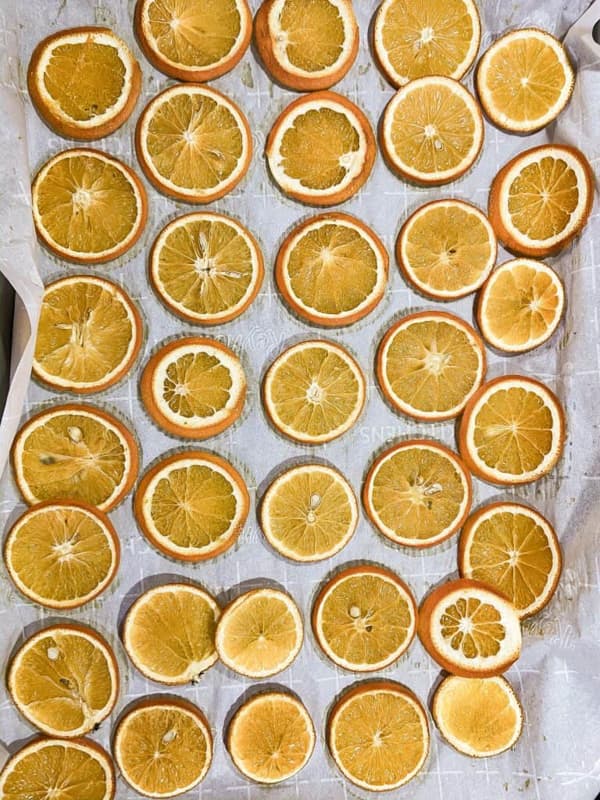
Dry Orange Slices
Before you begin, you need to dry some orange slices. I always dry several oranges to decorate with during the holidays. You can read How to Dry Fruit for all the details.
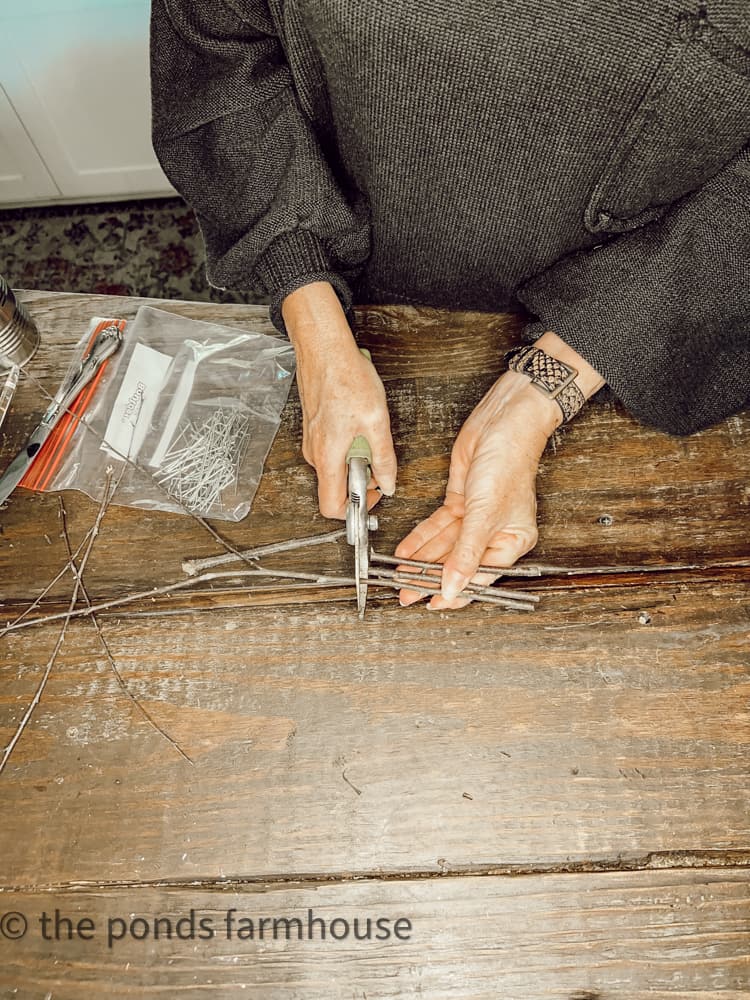
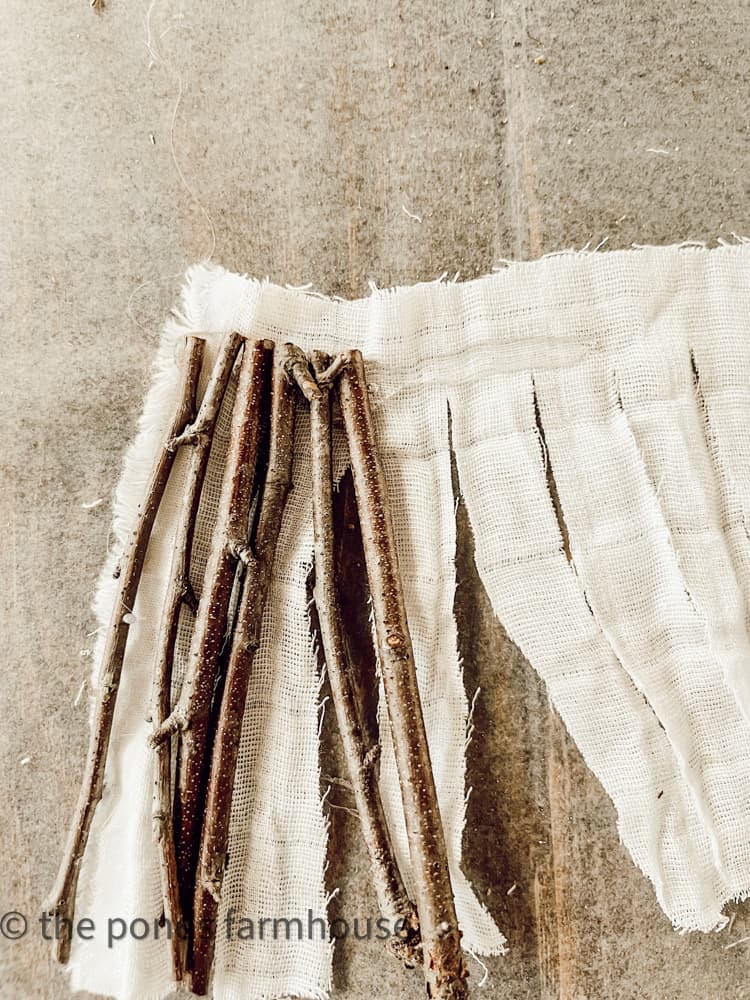
Gather Twigs
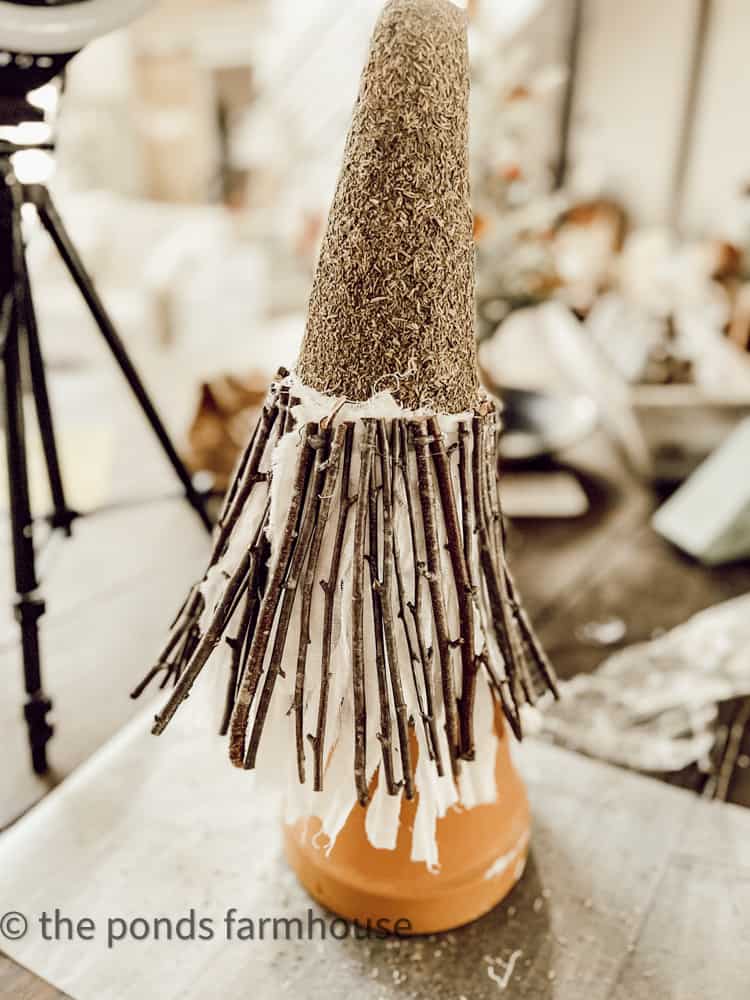
Next, gather a good selection of twigs to use as the base of the topiaries. You will need two lengths of twigs to make two rows on the styrofoam cone. The size of your cone will determine the length.
I allowed the lower row of twigs to be slightly longer than the top row.
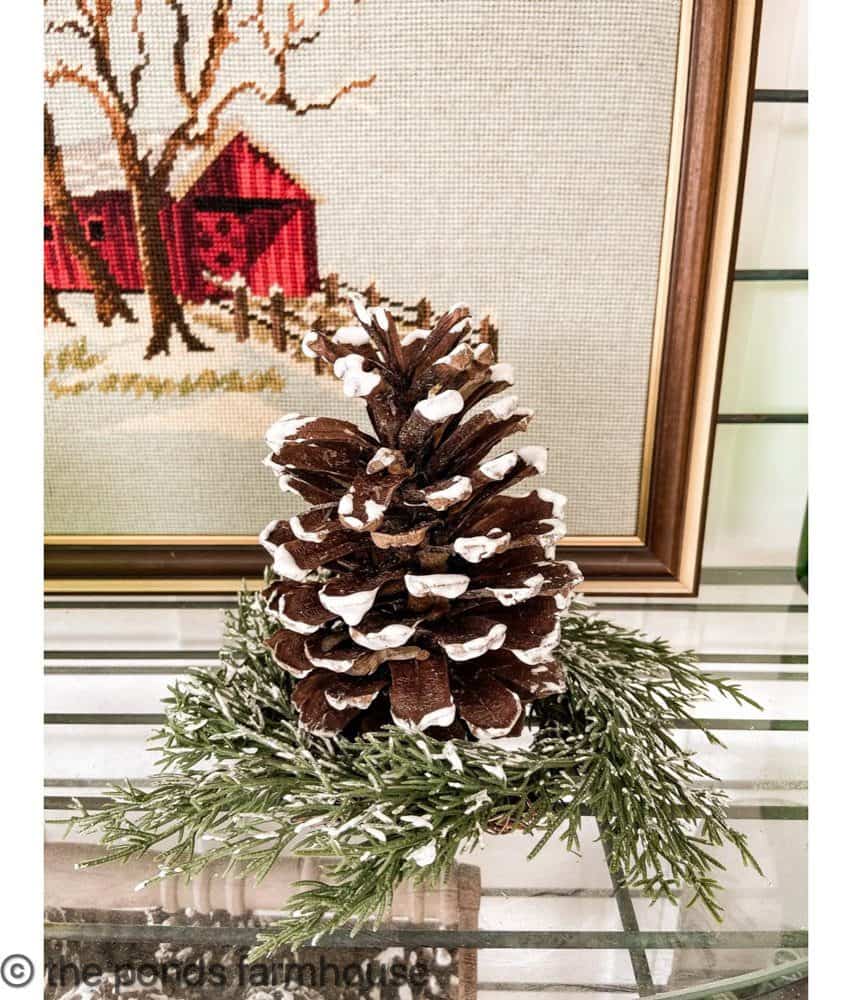
Prepare Pinecones
Also, gather small pinecones and apply a little faux snow to the tips using this easy two-step flocking method. Allow the flocking to dry before attaching it to the topiaries.
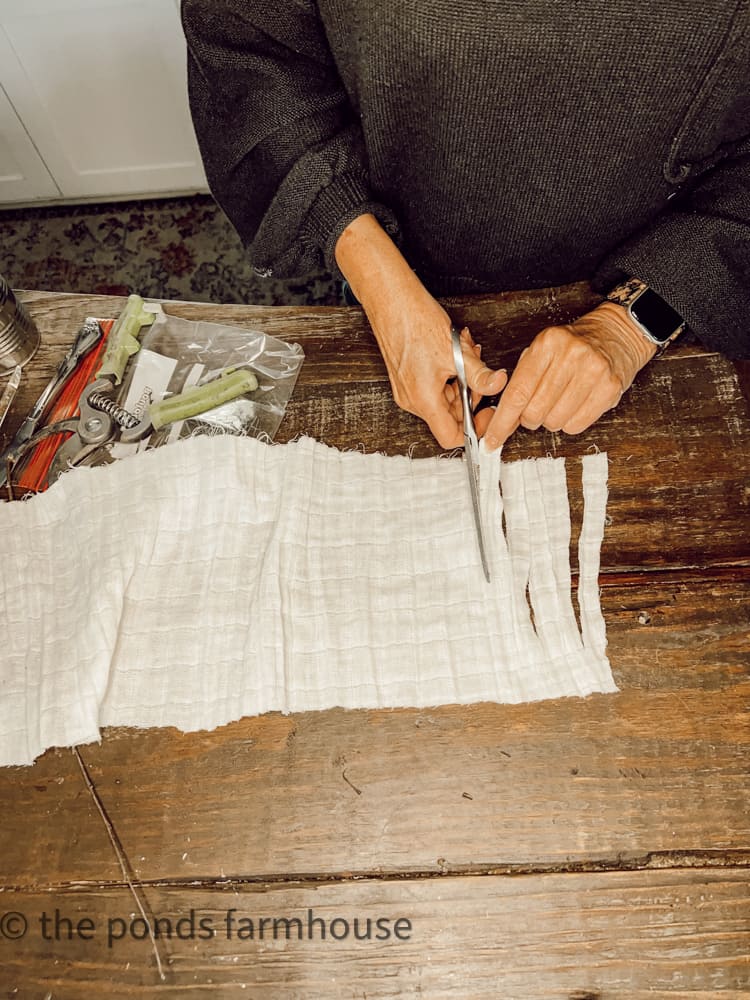
Scrap Fabric
Next, cut the scrap fabric the same length as the twigs or slightly longer. Allow for wrapping around the cone three times at both levels.
Then cut strips in the fabric, leaving only 1/4 inch left at the top.
Supply List
- Two Styrofoam Cones
- Gathered Twigs
- Dried Orange Slices
- Scrap Fabric
- Gathered Pinecone with faux snow
- Pillar Candle Sticks for Base
- Hot Glue Gun
- Floral U Picks
- White Chalk Paint
- Paint Brush
Assemble DIY Christmas Topiaries
Once all the above supplies are prepared and organized, you can begin to assemble the topiaries.
Protect your table surface from hot glue, etc., with a layer of wax paper.
Beginning with the lower row of fabric, attach two rounds of split fabric to the cone using floral picks.
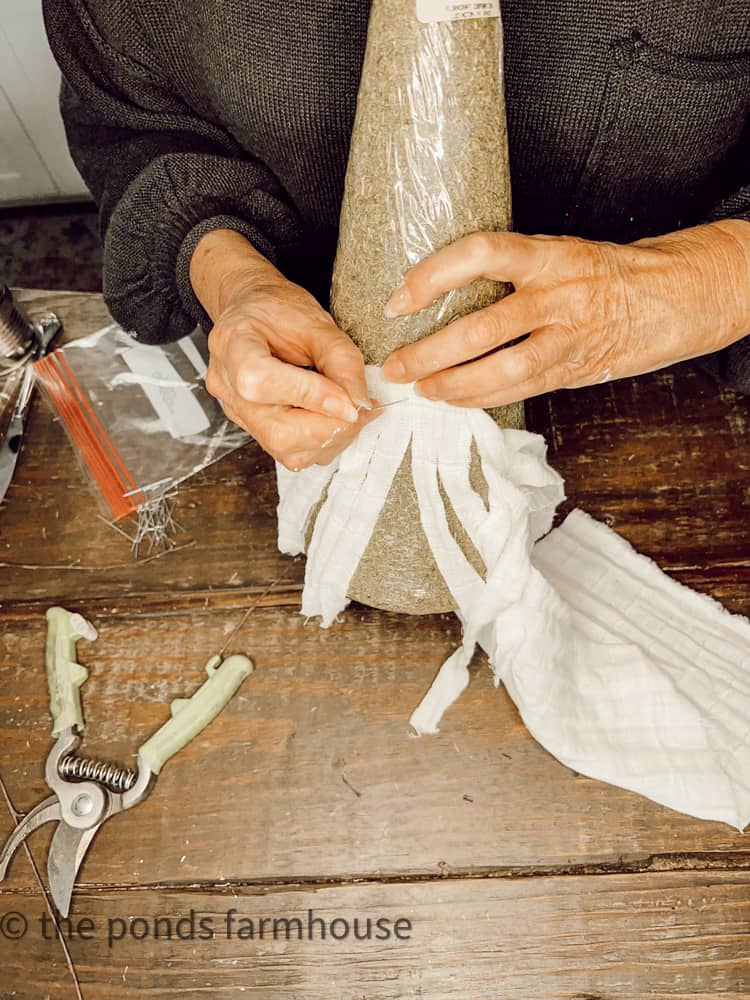
Next, take the third round of scrap fabric and attach the twigs with hot glue.
Once the fabric is filled with twigs, attach the piece to the cone using floral picks. Be sure to cover the original material.
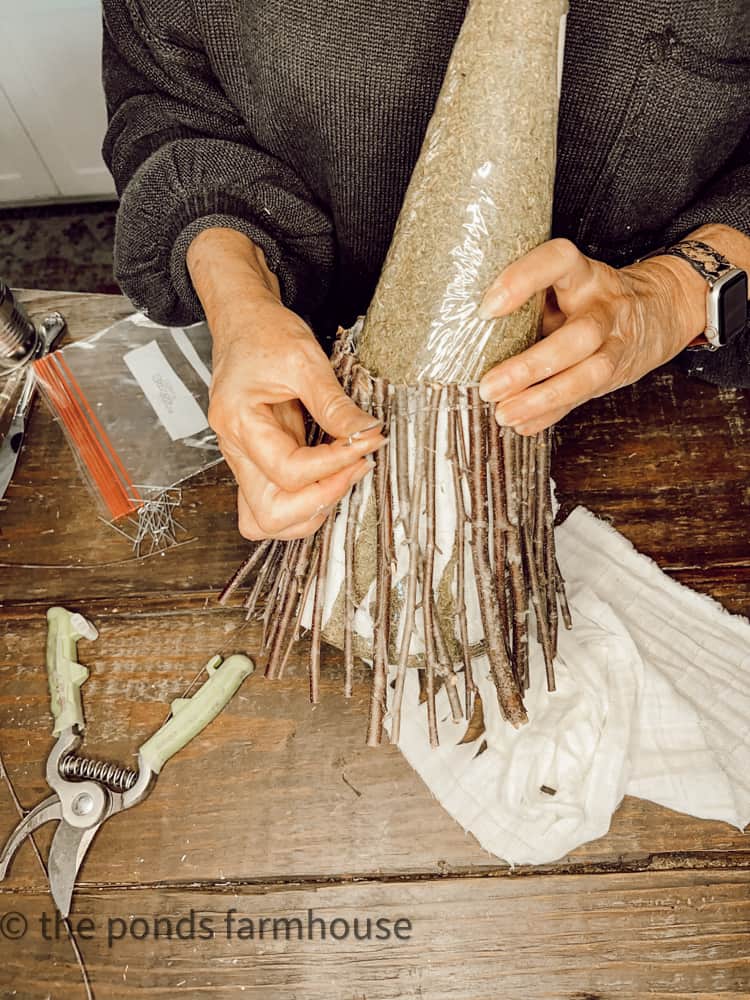
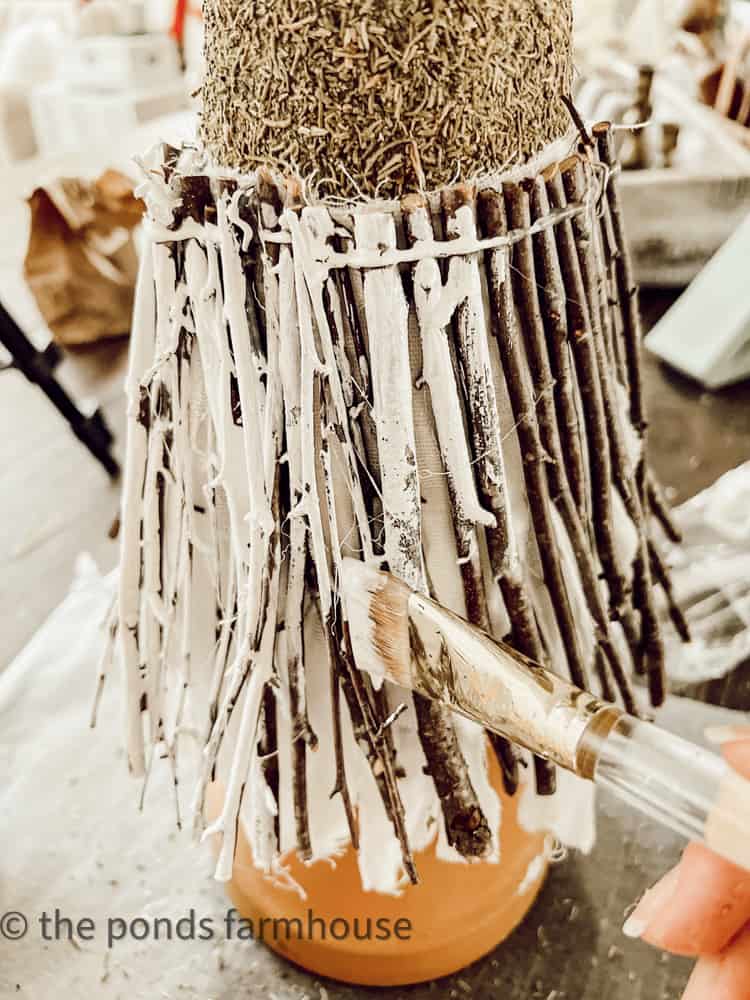
Fill in any gaps by attaching additional twigs with hot glue.
Paint Twigs (Optional Step)
Next, using white chalk paint and a small brush, paint the twigs’ surfaces.
You may prefer to leave the twigs natural for a more rustic DIY Topiary.
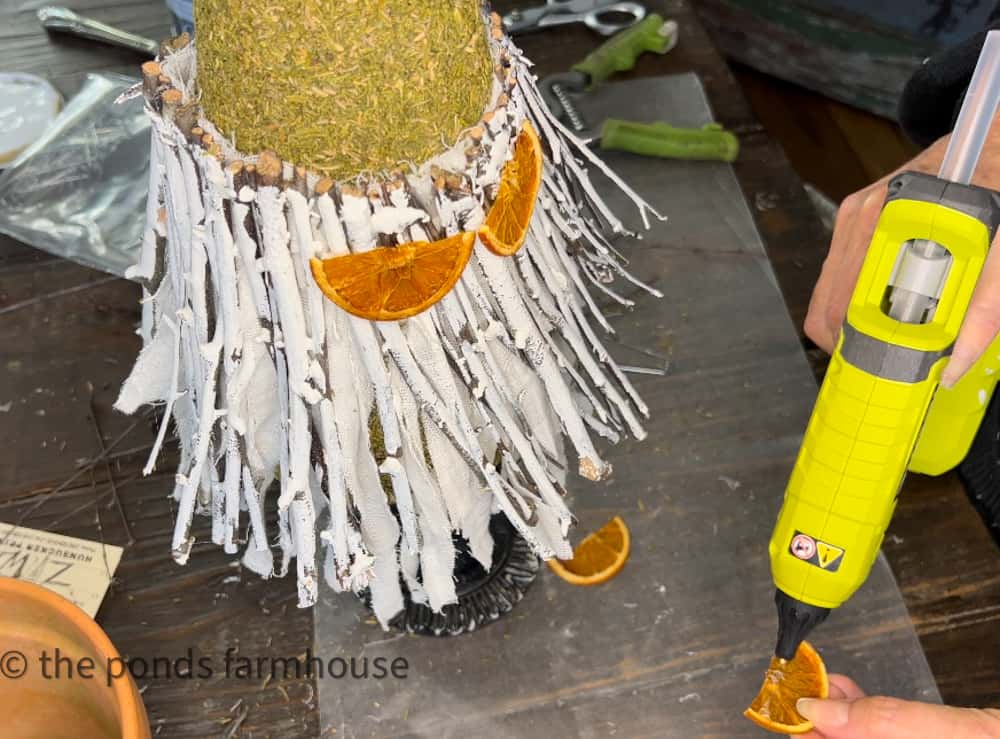
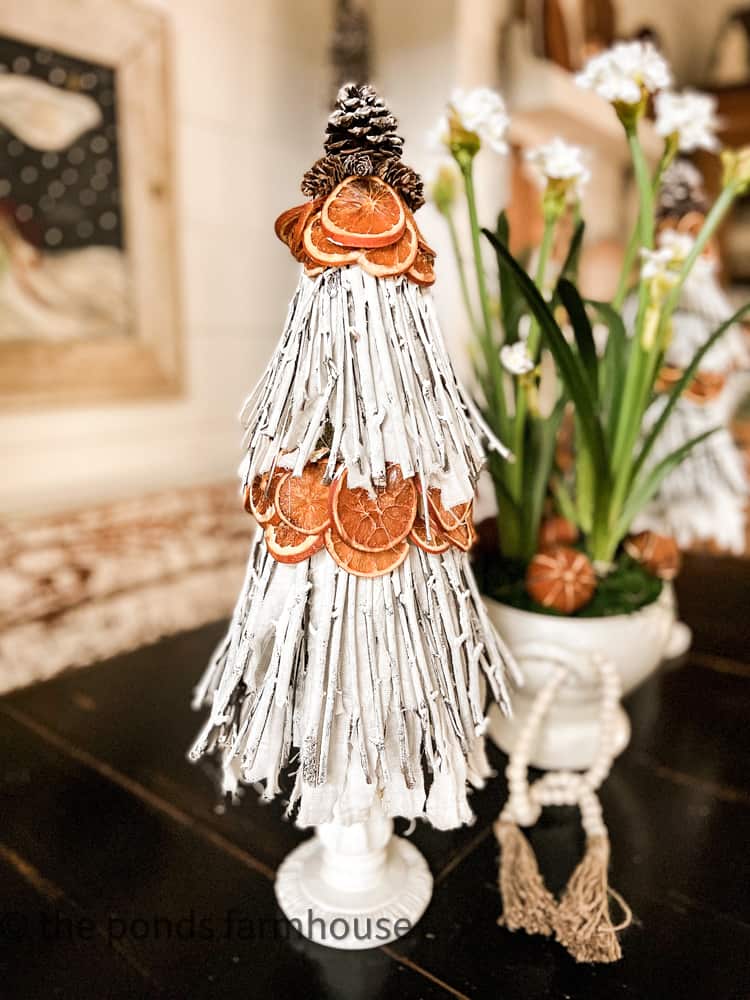
Attach Orange Slices
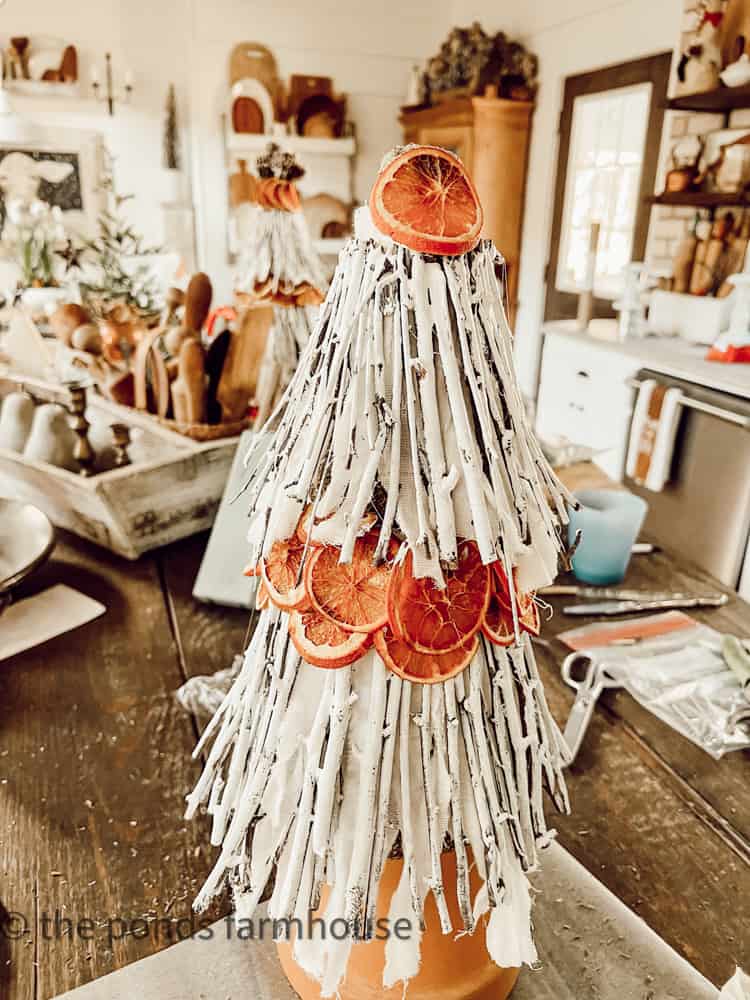
You can begin adding the orange slices to the first row immediately.
Cut the slices and place them slightly below the top of the twigs. Surround the cone with a couple of rows of orange slices overlapping. You will want the oranges to be visible once the second layer is applied.
Add A Second Row
Following the instructions for the first row, add a second row, leaving a small space at the top of the cone.
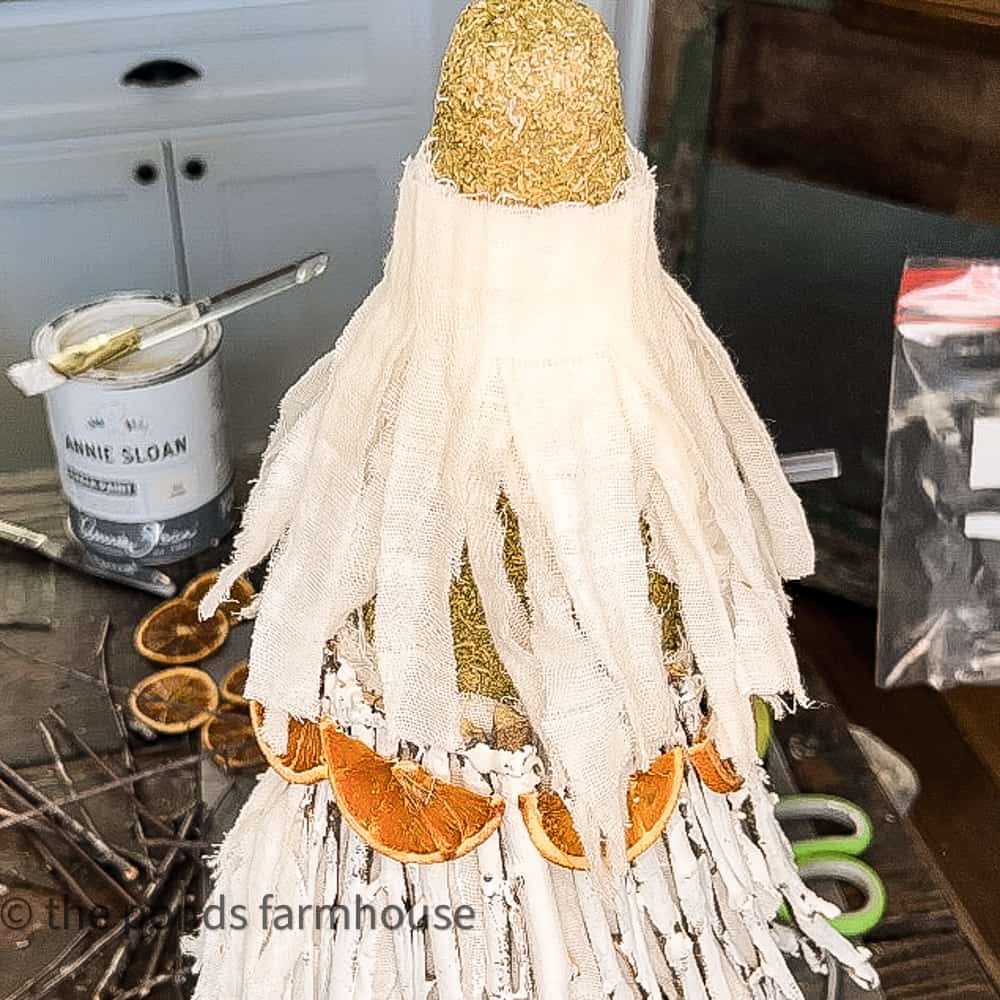
Attach Orange & Pinecone Topper
Finally, attach another row of orange slices to cover the top of the cone. Allow the oranges to cover the top of the twigs and the scrap fabric layer.
Then, using hot glue, attach the pinecones to the top of the cone.
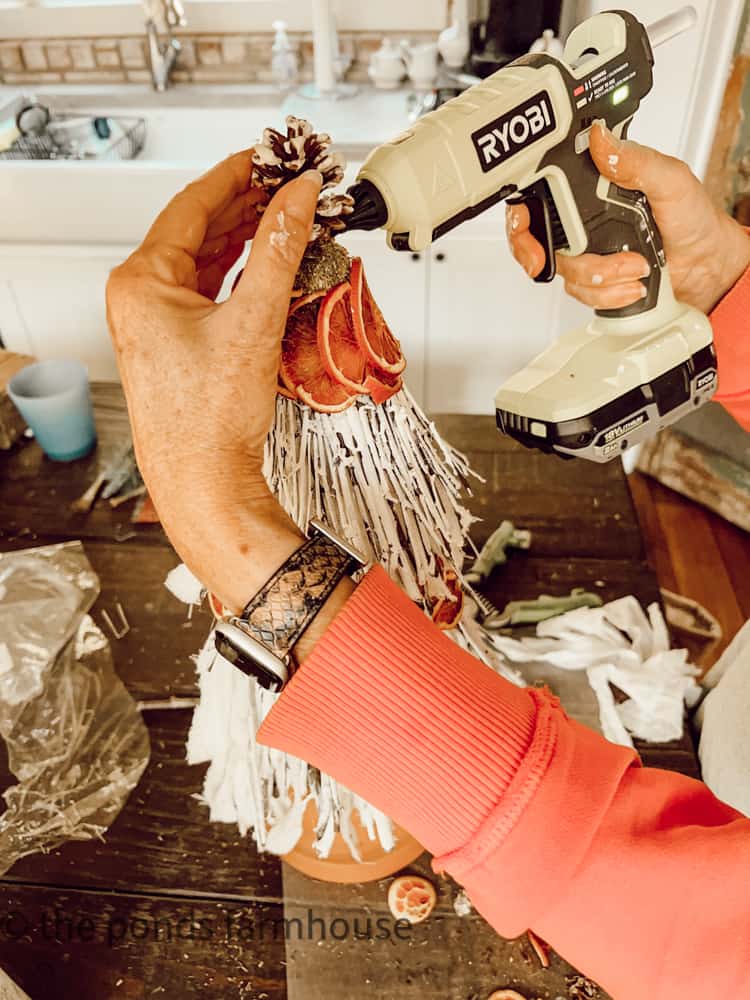
I used one slightly larger pinecone and then surrounded it with smaller pieces.
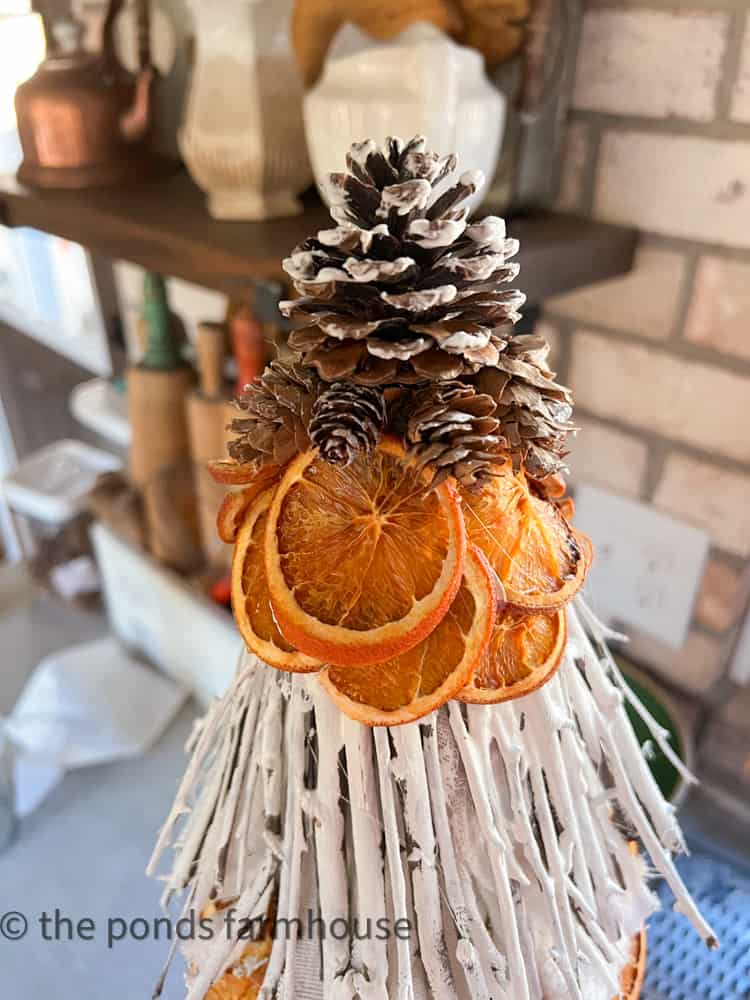
If you see any gaps or areas that need additional twigs or orange slices, you can add more until you are pleased with the Christmas Topiaries.
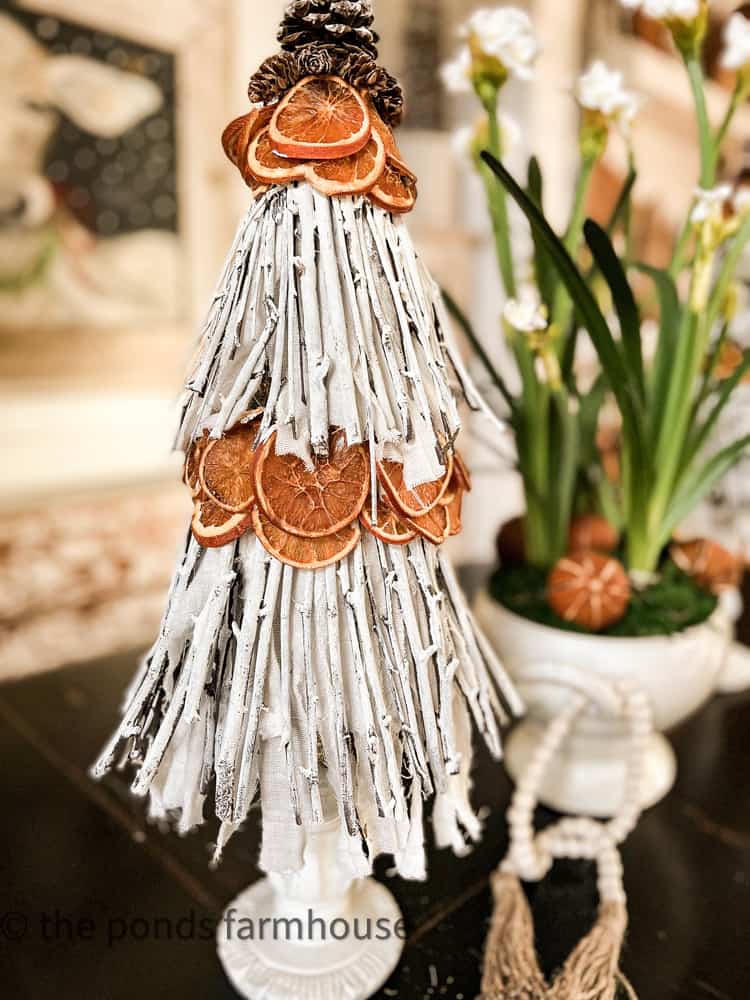
Place the DIY Christmas Topiaries on a base of your choice. Depending on your intended use, you can attach it with hot glue or double-stick tape.
I have these thrifted pillar candlestick holders that work well with the topiaries.
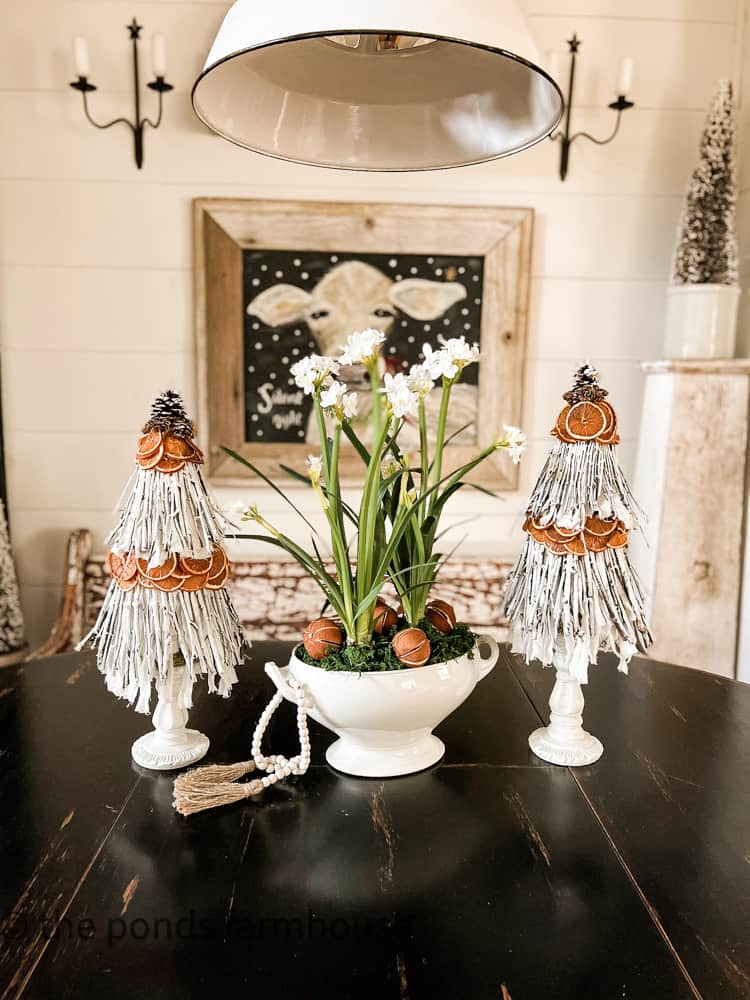
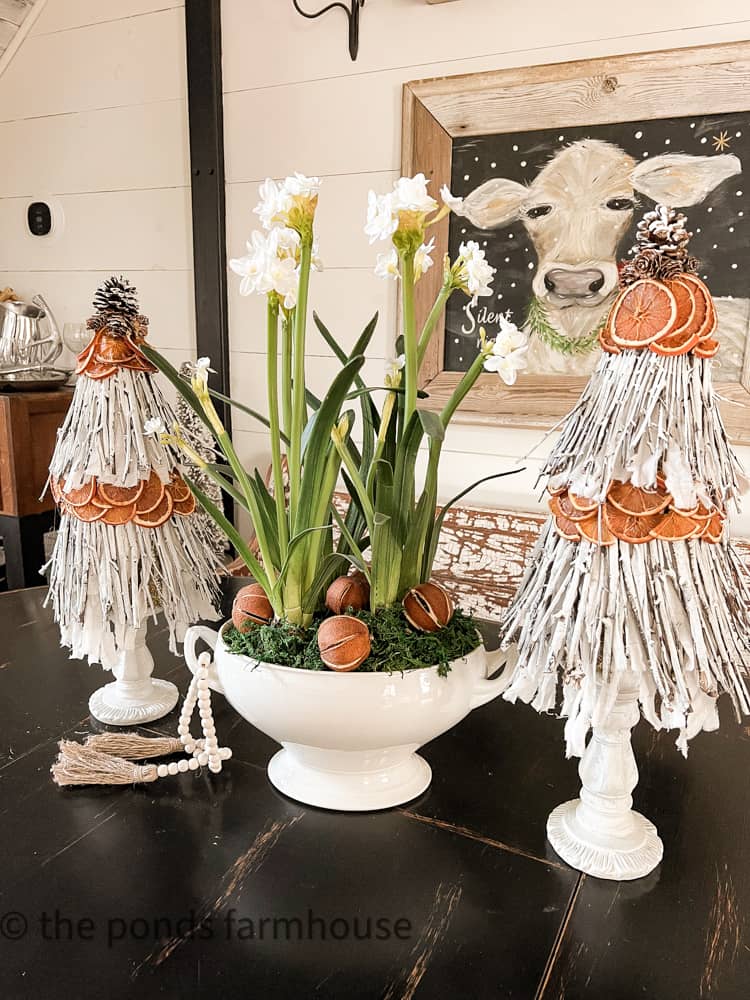
Christmas Table Centerpiece
The faux Paperwhite arrangement for the dining table inspired the topiaries.
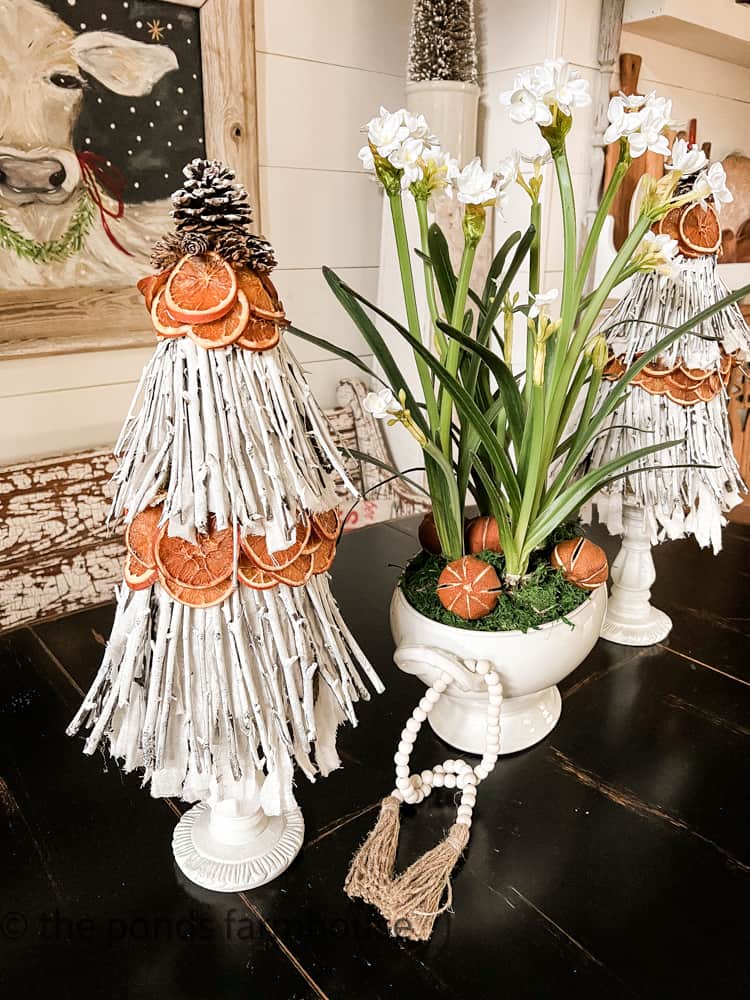
Combining the two topiaries with the floral arrangement makes a stunning Christmas Table Centerpiece.
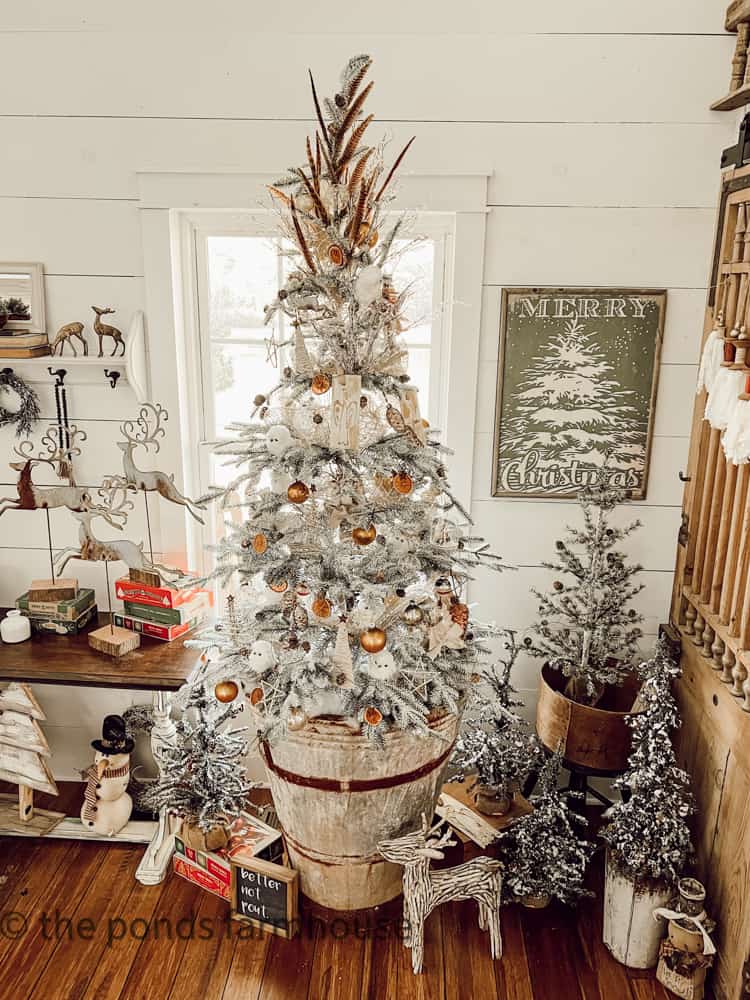
They also work well with this year’s sustainable, eco-friendly, and budget-friendly Christmas decorating goal.
You can see how the centerpiece looks on my Christmas Breakfast table for this month’s Supper Club on Thursday.
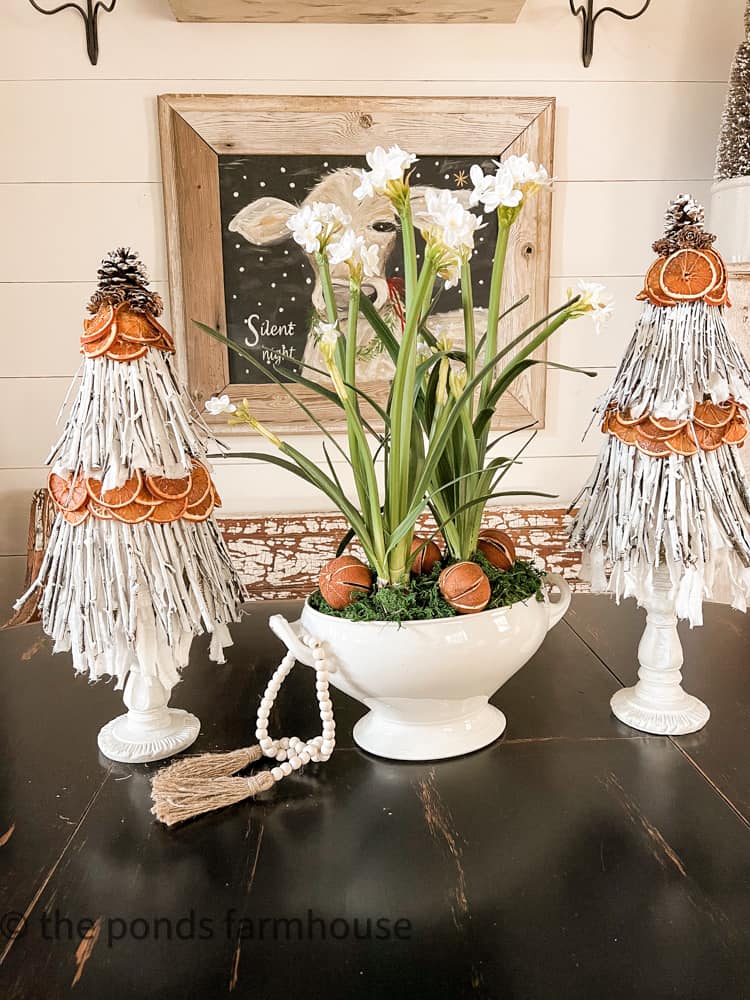
The paperwhite arrangement is made with these faux bulbs, and dried oranges are added to the moss base.
I hope you enjoyed seeing this tutorial.

How To Make Foraged DIY Christmas Topiaries
Equipment
- Hot glue gun
- Floral U Picks
- Paint Brush
Materials
- Two Styrofoam Cones
- Gathered Twigs
- Dried Orange Slices
- Scrap Fabric
- Gathered Pinecone with faux snow
- Pillar Candle Sticks for Base
- White Chalk Paint
Instructions
- Dry Orange Slices
- Cut Twigs to length to cover the cone twice
- Cut scrap Fabric wide enough to wrap around the cone at 2 levels 3 times.
- Cut strips into the fabric leaving approx. 1/4 inch at the top of the fabric.
- Wrap two rounds of fabric and attach to the cone with floral picks
- Hot glue a row of twigs to the third row of fabric
- Attach to cone with floral picks.
- Fill any gaps by attaching twigs with hot glue.
- Paint the twigs with white chalk paint
- Add a row of orange slices (using hot glue) just below the top of the first row of twigs.
- Add second-row repeating first-row instructions leaving a small section at the top of the cone.
- Attach another row of oranges at the top of the cone.
- Top with pinecones.
- Add to a pillar candle stick. Attach with hot glue if you want to secure.
Notes

Thanks so much for stopping by, and I look forward to sharing my next adventure with you.

Pin It To Remember It
Did you find some great ideas you’d like to save for future reference? Hover over the images you’d like to save and pin to your favorite Pinterest Boards when you see the PIN button.


The topiaries are cute. Thanks for great instructions. You are so creative.
Nancy,
I appreciate your words of encouragement. I get lots of ideas and some are a win. I’m glad you like it.
Rachel you did it again what a marvelous and different craft. I love this and will be taking your lead. Thank you
Shelley,
I’m so glad you like this idea. Thanks for stopping by.
These turned out so cool Rachel! I love repurposing and finding new ways to use things too. And when it turns out this beautiful, it’s a win! Tanya @twelveOeightblog
Tanya,
I really appreciate this kind comment.
You come up with ideas I would never even dream of, Rachel! I love this creative take on topiaries. It’s really pretty and I love that it can be used throughout the holidays and winter season too. Hugs, CoCo
CoCo,
you always boost my confidence. I appreciate you.
This is the cutest Christmas topiary idea Rachel. I literally don’t know how you keep coming up with these amazing ideas. You must not sleep much with that brain of yours going into overdrive, especially during the holiday season.
Kim
You are so funny. I appreciate your encouragement.
I have spent a couple of hours on your wonderful blog. LOVE all your fun ideas. I want to make one of your twig trees. They are so clever! Thank you for wonderful ideas!!! ♥
Frani,
I really appreciate your sweet compliments. So glad you are enjoying the blog.
These are adorable! I don’t know if I remember them from last Christmas??!! Love!!
Jennifer,
I’m so glad you like them.
These are so adorable, I love how they came out! You are seriously so creative, friend!!
AnnMarie,
I really appreciate this.
I love these, Rachel! So festive!
Kim
I’m glad you like them. They are so fun to make.
So whimsical! I love this project!
Stacy,
It was a fun one.