How to Build a Garden Trellis – Garden Obelisk for Free
Would you like to build a garden trellis for FREE? This is how we made a Free Standing Garden Obelisk Pyramid using a reclaimed porch railing that was discarded after a recent porch update.
As I learn more about planting flowers, the more I realize the need for a garden trellis or Obelisk for upright plants.
I’m also learning new terms for all these garden accessories and how expensive they are to purchase.
So began the search for inexpensive ways to build a trellis or free-standing obelisk. Finding some reclaimed wood was the perfect solution.
Check out these easy, step-by-step instructions that will help keep your new plants vertical and off the ground.
(Posts on The Ponds Farmhouse may contain affiliate links. As an Amazon Associate, I earn from qualifying purchases. See the full disclosure details here.)
Table of contents
First, I love the look of a garden obelisk filled with tomatoes or a climbing vine.
One of my favorite blogger friends, Jennifer, at Cottage on Bunker Hill, recently shared a tutorial on gardening projects.
After seeing her easy tutorial, I shared with my husband the need to make some obelisks for our garden. The cost of lumber was our number one concern.
So we began looking through our discarded wood supply and found an old porch railing that had recently been removed. The wooden spindles were the perfect size to use on the obelisk.
Warning: This is a rustic version of Jennifer’s beautiful Obelisk. You can see her design here.
What Is A Garden Obelisk or Garden Trellis?
There are so many terms when searching for instructions to build a support for climbing plants.
A few that I am familiar with are garden trellis, garden obelisk, vertical & garden towers.
A trellis can be free-standing or anchored into the ground. Most obelisks are usually free-standing, pyramid-shaped, and are often called Eiffel Towers as well.
All can be constructed from various materials such as wood, plastic, and metals like iron, aluminum, etc.
I have found that regardless of the name or material, they all do the same thing. They hold up your plants.
Supplies for Wooden Garden Trellis
When you are using reclaimed materials, your options may be limited. Here are the dimensions that we were able to work with based on the wood dimensions that were available for free.
- 2 x 4 lumber 44 inches long
- square porch spindles
- wood screws
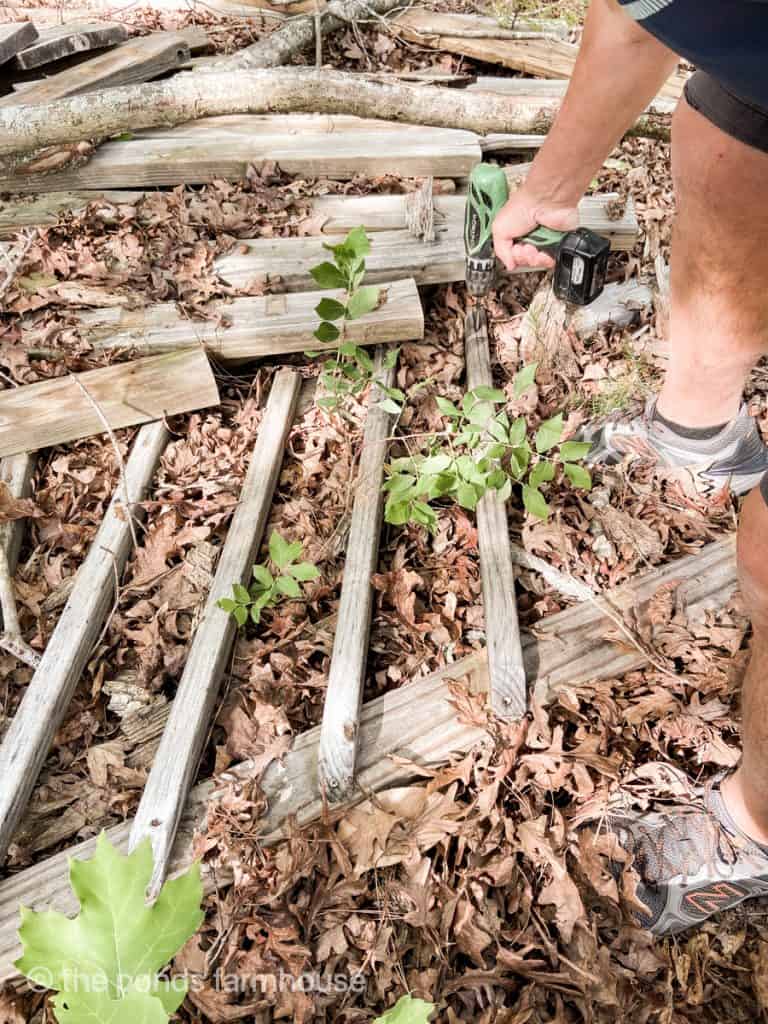
How To Salvage Reclaimed Wood for Garden Obelisk
The reclaimed wood used was treated lumber that had been on our porch for several years. The wooden railing had been replaced with a new vinyl one, and much of the old wood was still in good shape.
Therefore, the lumber would be perfect for a rustic garden obelisk.
The original porch railing was still attached with screws; therefore, we were able to salvage the wood, as well as the screws, to build the garden obelisk.
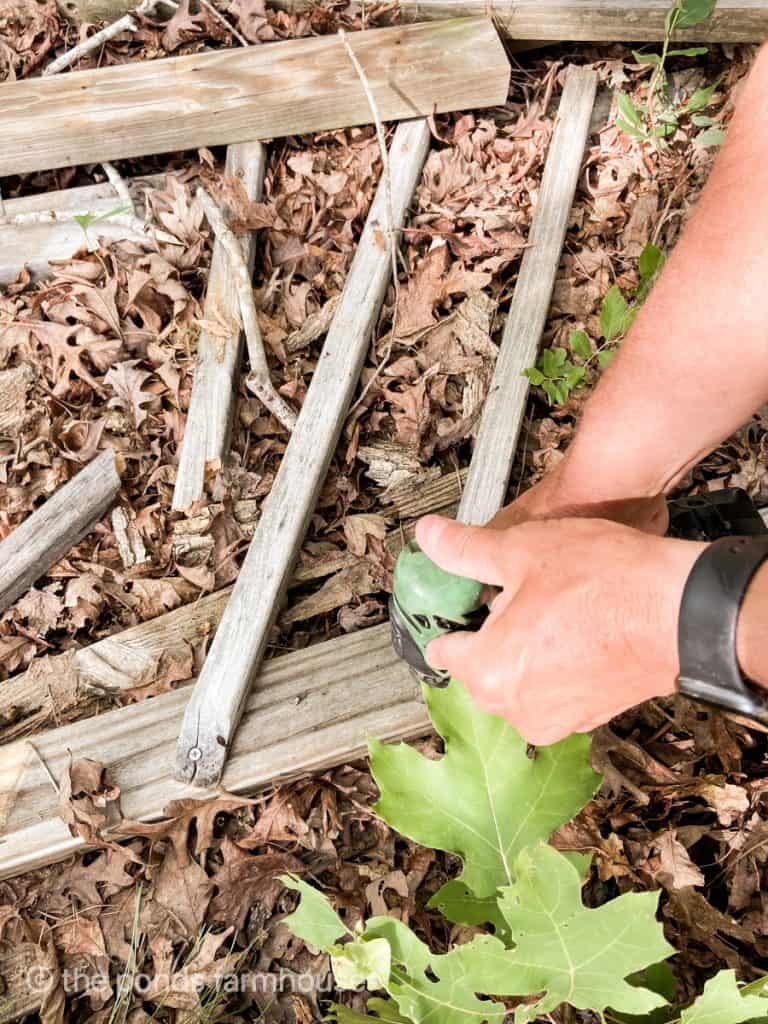
Remove Nails and Screws
Once all the wood is gathered, begin by removing any nails or screws before cutting the boards to size.
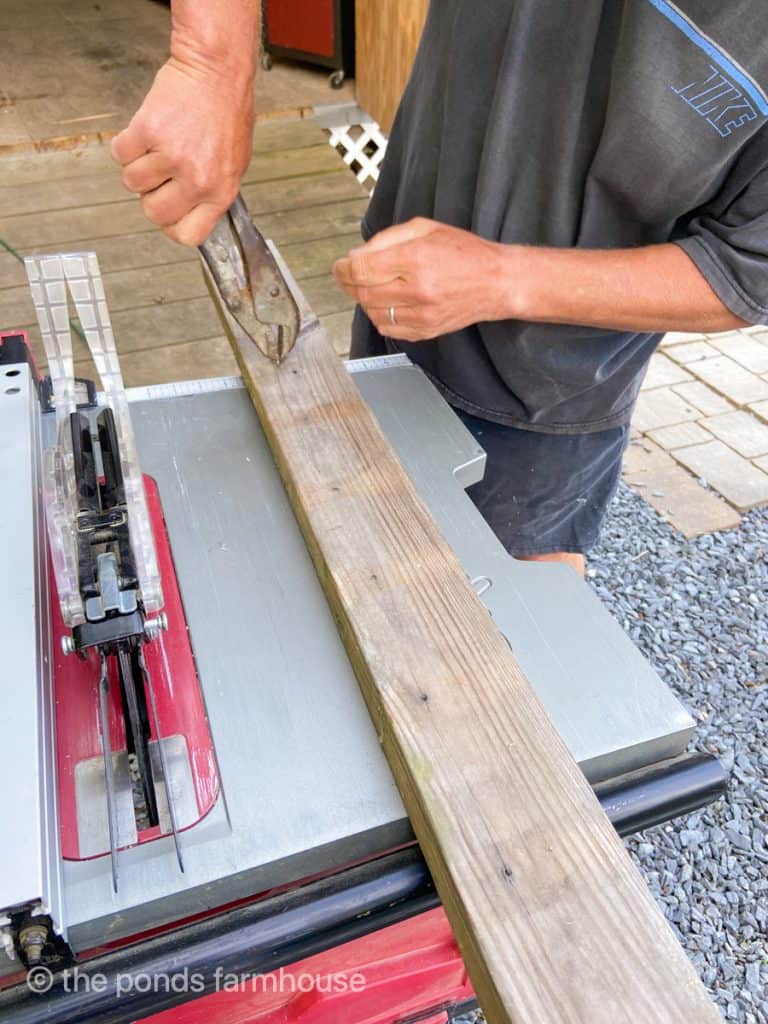
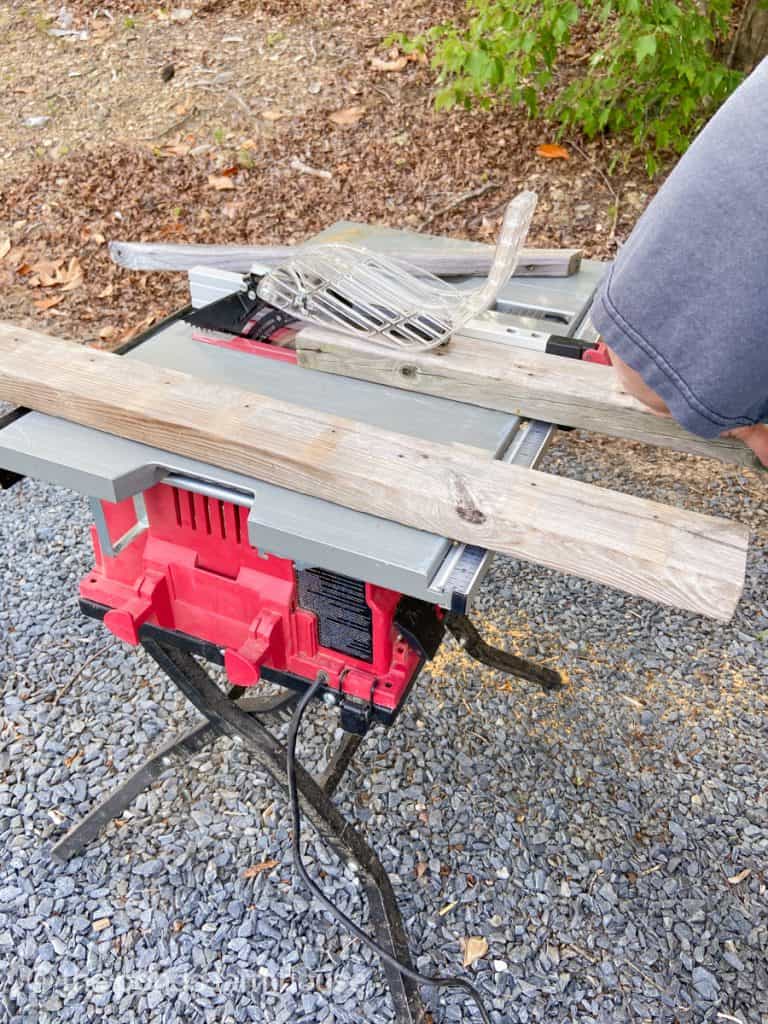
Cut Wood To Size
Next, split the 2 x 4 boards in half using a table saw.
If the spindles had been a longer length, they could have been used instead of splitting the wider boards. However, you have to be flexible when working with reclaimed materials.
Now it’s time to cut each spindle to the desired size. Here are the dimensions we used.
- Cut 4 spindles at 19 inches each – cut on a 45-degree angle using a miter saw.
- Using a thinner piece of molding, we cut 4 pieces at 14 inches each
- Then 4 more spindles at 9 inches each are cut at a 45-degree angle.
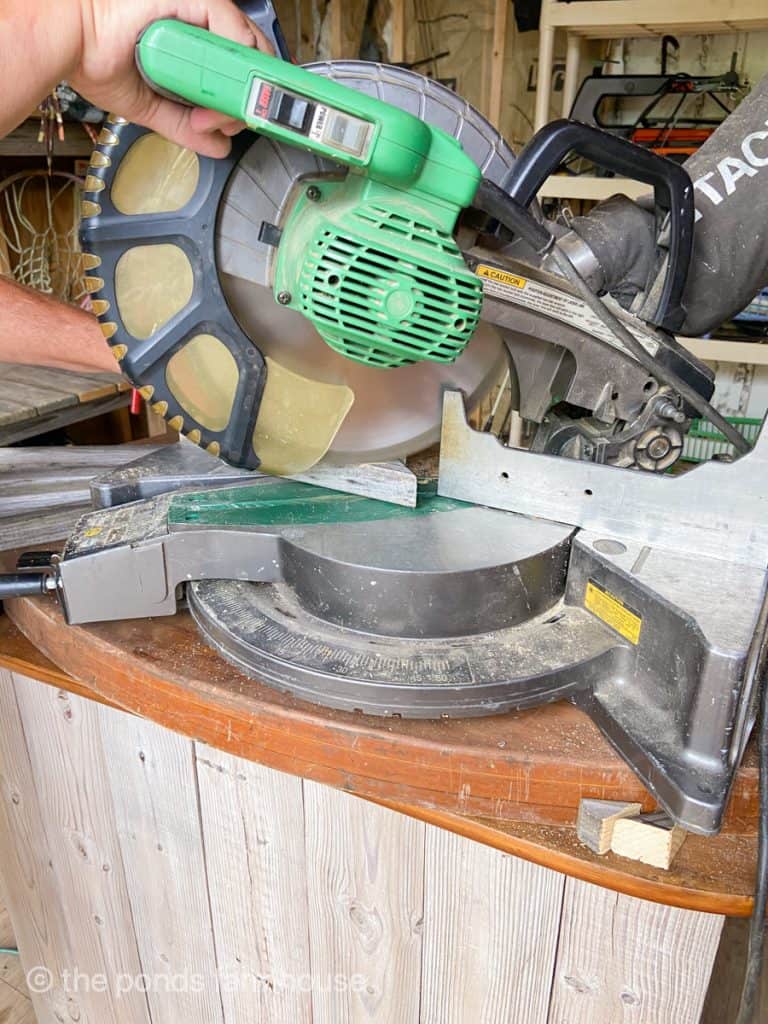
Finally, drill a pilot hole in the 45-degree angle cut with a cordless drill.
Using the original screw holes where it was feasibly possible helped to reduce the construction time.
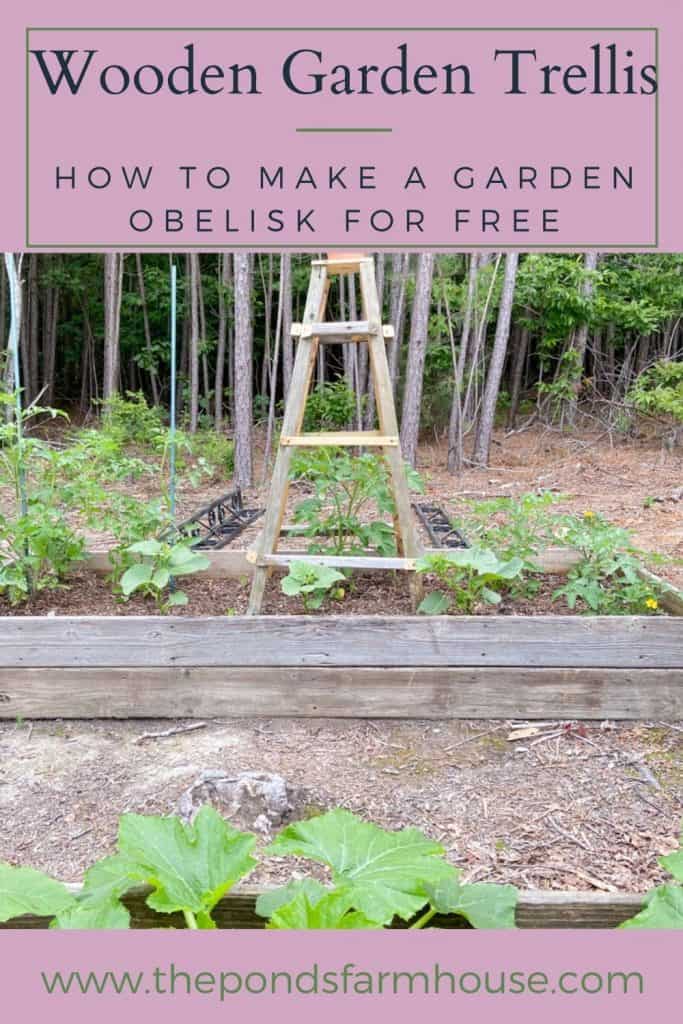
How To Assemble The Garden Trellis
Now that all the reclaimed wood has been cut to size, it’s time to assemble the garden trellis or obelisk pyramid tower.
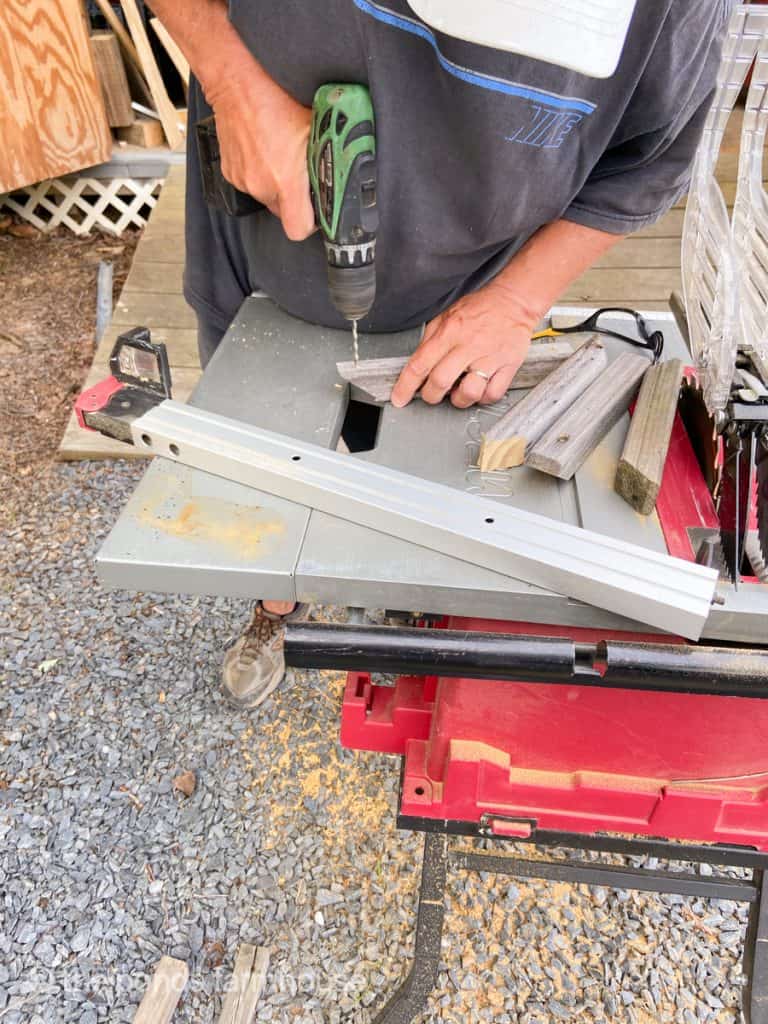
Begin by measuring and marking the location of each spindle on the split 2 x 4 post. I placed a spindle mark at 7 inches from the top and bottom of the post. Then another directly in the center of those two.
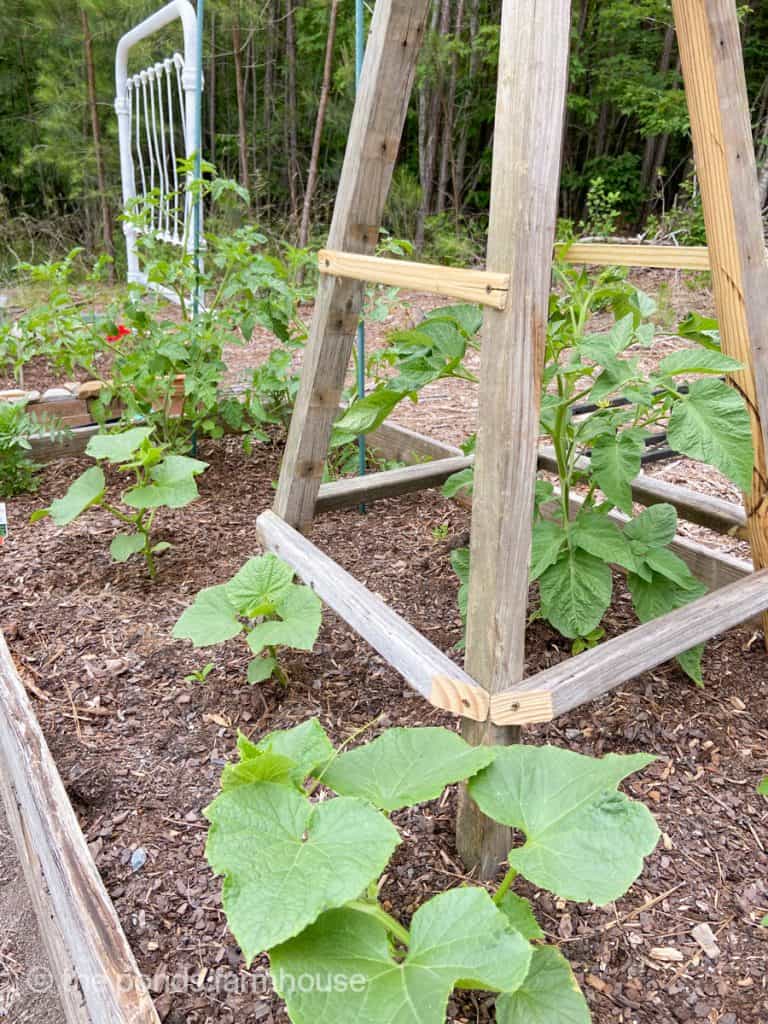
Lay two boards flat and attach the spindles to the post at each marking using wood screws. Then repeat with the two remaining posts.
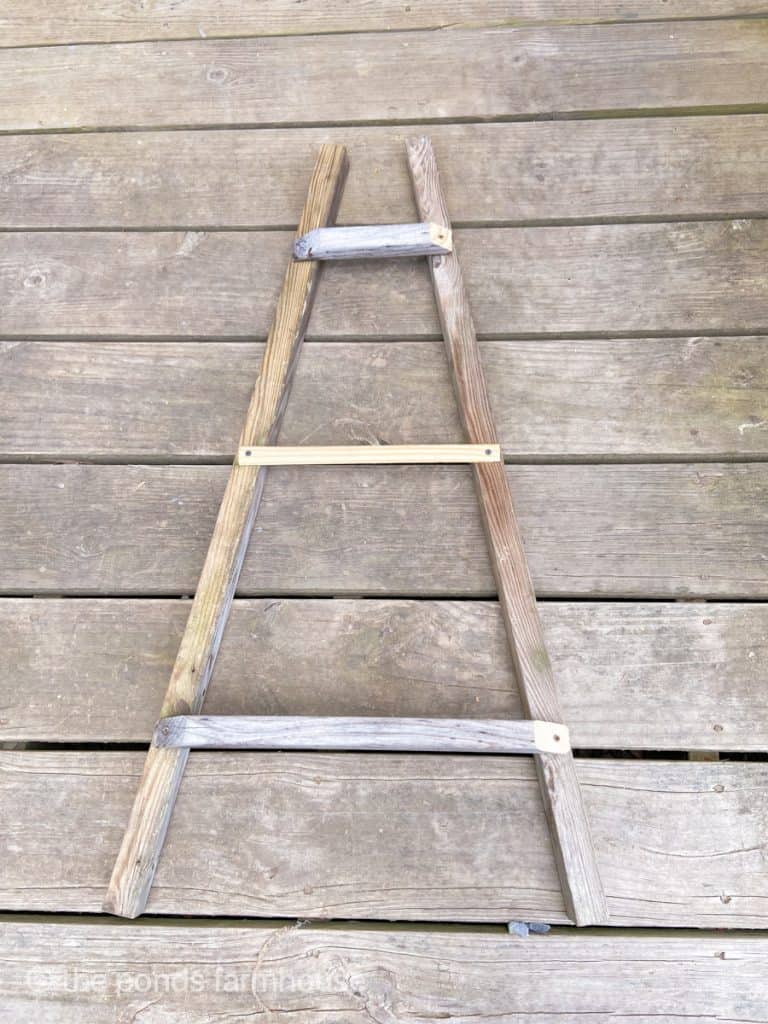
Once the two sides are secure, attach them to each other using the remaining spindles. Be sure to attach them at the same height as before.
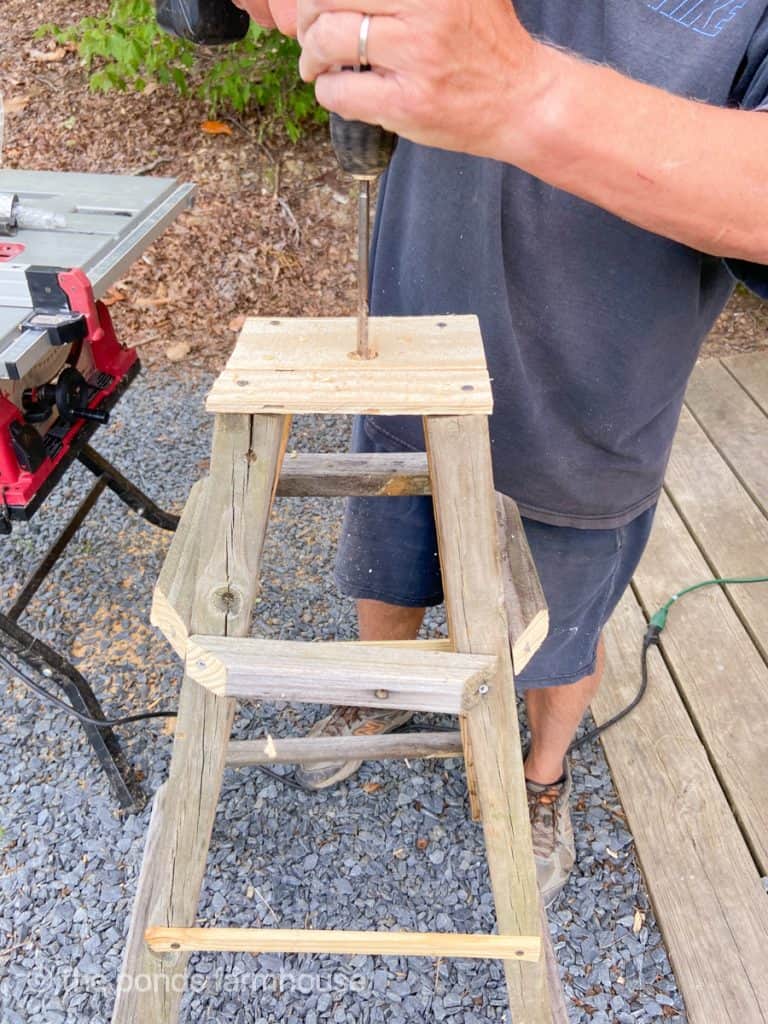
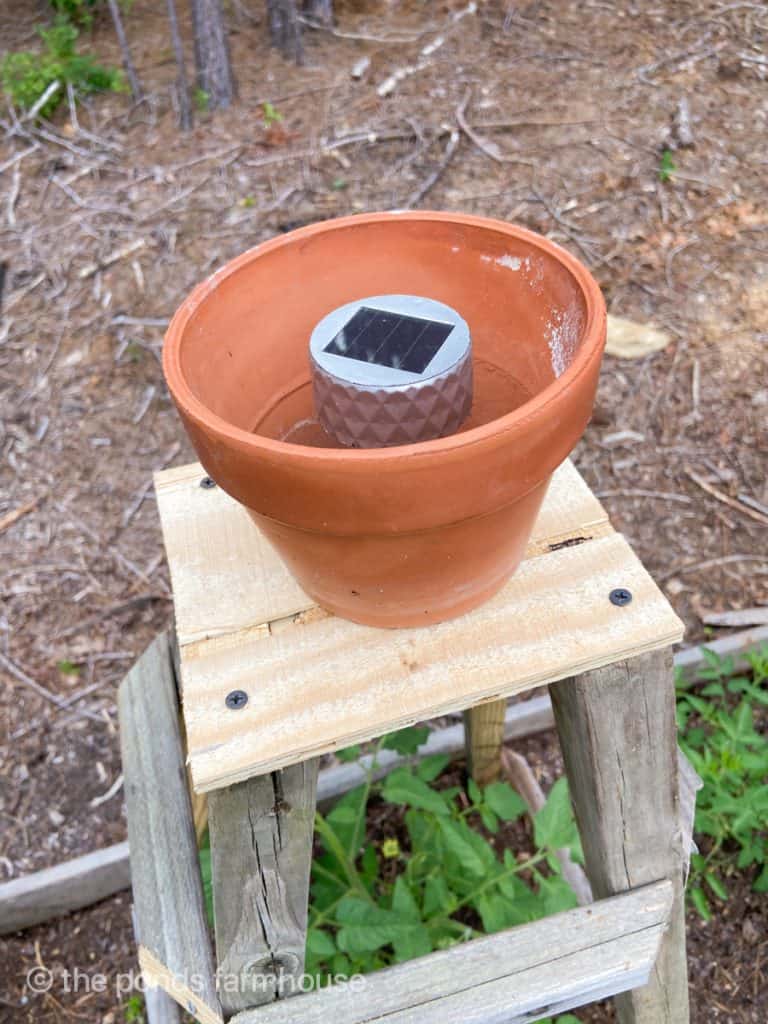
In addition, another option is to attach a top for the obelisk tower. We used a piece of treated siding and drilled a hole in the center to allow for a solar light.
I originally added a simple solar light from The Dollar Tree. However, the results were less than thrilling.
Therefore, I added a terra cotta clay pot to hold the solar light. It isn’t permanently attached, so it may be changed once I check into some other options.
I also used these same solar lights on How to Repurpose a Chandelier.
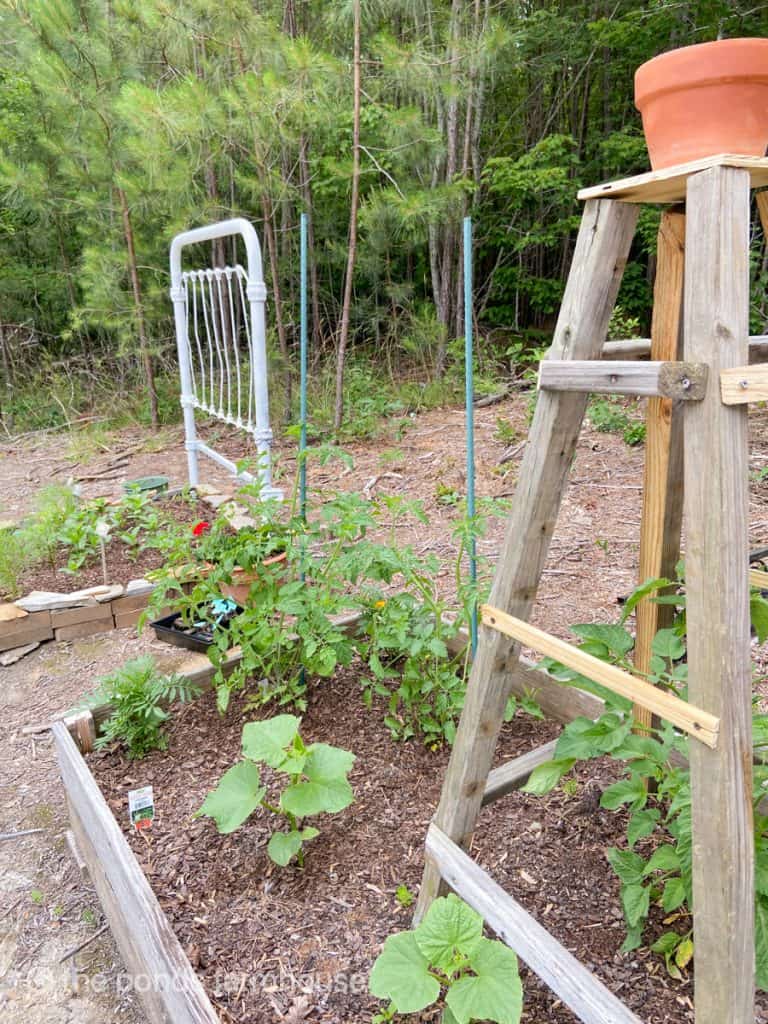
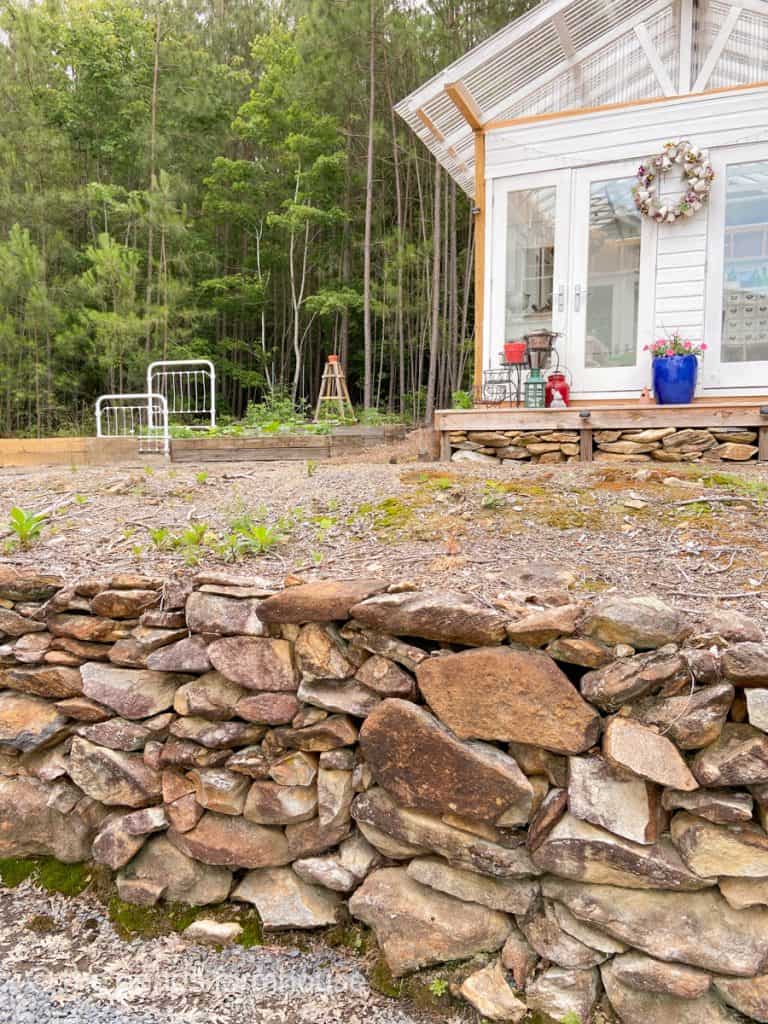
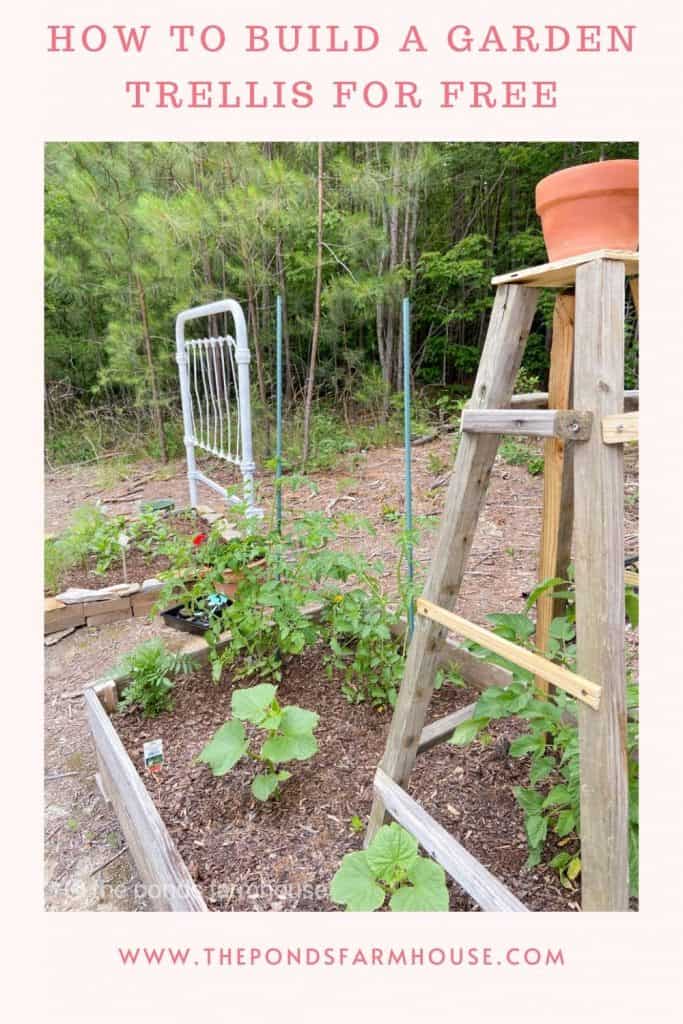
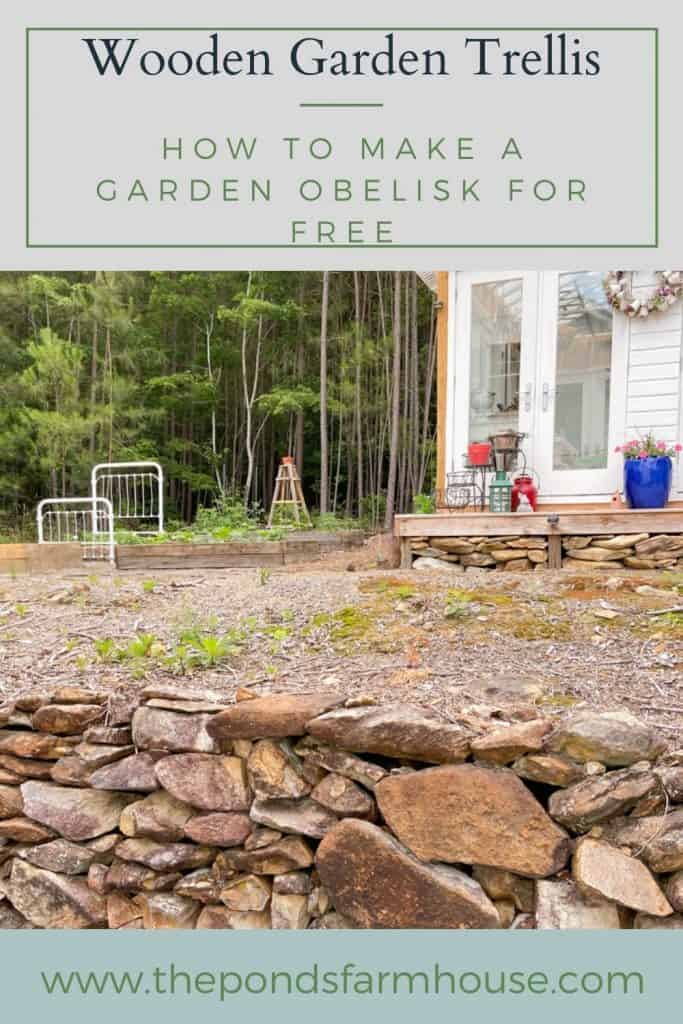
This spring, the raised garden bed was added using a trashed iron bed as the base. You can see the details on How to Build a Cheap Raised Garden Bed, and you might like 3 Reasons to Plant Lilacs also.
As you can see, the aged wood looks new when it is freshly cut; however, it will age quickly.
You can also paint the garden trellis or garden obelisk to dress up the garden if you prefer.
Garden Obelisk Pyramid Tower
The garden obelisk pyramid tower fits perfectly into the raised garden bed.
The free materials give it a primitive rustic feel, but with a little paint, you will never know the wood was reclaimed.
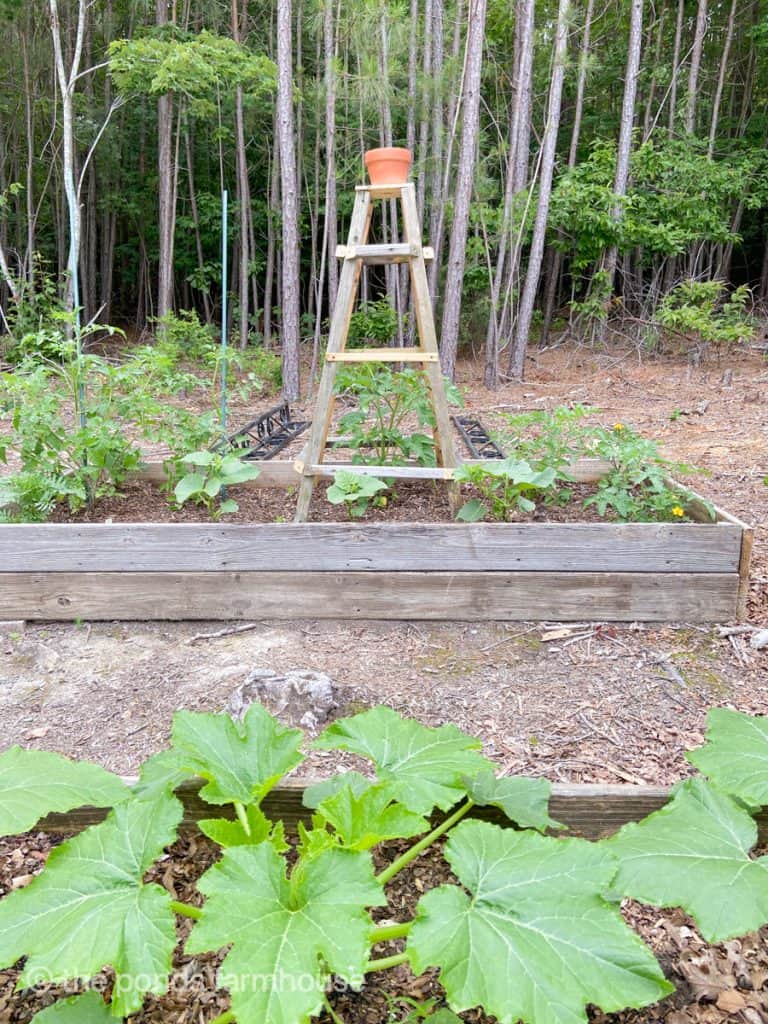
The rustic garden obelisk actually works well with our country setting and will hopefully create a vertical garden. I hope you enjoyed the Garden Trellis tutorial and that you found the instructions helpful and inspiring.

Pin It To Remember It
Did you find some great ideas you’d like to save for future reference? Hover over the images you’d like to save and pin to your favorite Pinterest Boards when you see the PIN button.
You can also see building a garden obelisk on my web stories.


I was just thinking I might add a trellis in my backyard, and this looks great! But for me would be far from free since I don’t have all the tools I will just have to enjoy looking at yours and buy one. Your garden looks amazing!
Andrea,
You are so funny. Thanks so much for stopping by.
Thanks for this idea and tutorial.
Linda,
Thanks so much for stopping by.
another great idea! Love that you reclaim materials.
Thank you for sharing detailed instructions.
Va in NC
Oh, you are so welcome.
Rachel, what a great idea to use reclaimed wood. It has such a natural patina that is so attractive (and affordable!). I think of Chas every time I see anything made with a solar light. Fun post. I am sharing an obelisk on Sunday for our monthly DIY blog hop. Always like to see other creations of a fun garden item! Thanks for sharing.
Mary,
Thanks so much for stopping by. I’m glad you like it.
I love this garden obelisk! Can you build one for me??? xoxoxo I love all your DIYs and am sharing this one tomorrow! I need to make this – it looks great in your garden!
Stacy,
Thanks so much.
I need one of these Rachel! This is such a great post, thanks for sharing it with us. I’ll be adding it to my weekly wrap-up on Sunday. Yes, I’m a day late this week.
Kim
Thank you so much sweetie. I really appreciate this.
I LOVE this, Rachel. I’ve always wanted to build one. Thank you for sharing your easy tutorial. I’m going to share a link with my readers in tomorrow’s week in rewind post.
Thanks Jen, I appreciate that!
I love this project, Rachel. It fits right in with your garden headboard! Pinned!
Thanks Cindy, I’m glad you liked it!
My goodness Rachel, just what I need !!! Will certainly try this out soon. Thanks a bunch…Joan
Joan,
I’m so glad you like this idea. Thanks for stopping by.