DIY Valentine’s Day Heart Swag Craft with Scrap Wood
If you want a Valentine’s door decoration, this sweet swag will steal your heart. An easy DIY Valentine’s Day craft is a budget-friendly wood project you can make from scrap wood or new. I’ve included a template along with the tutorial to help you create your hearts.
Table of contents
A Budget DIY Project
I loved the trio of red bells I used on the porch for Christmas, and I decided a trio of red hearts would be a fun way to decorate for Valentine’s Day.
DIY Valentine’s Day Craft Supplies
I used a scrap piece of 8 x 1-inch pine wood for this Valentine’s Day Craft. If you are purchasing new wood, you will need an 8″ x 2′ x 1″ piece of pine for one swag.
Design Your Pattern
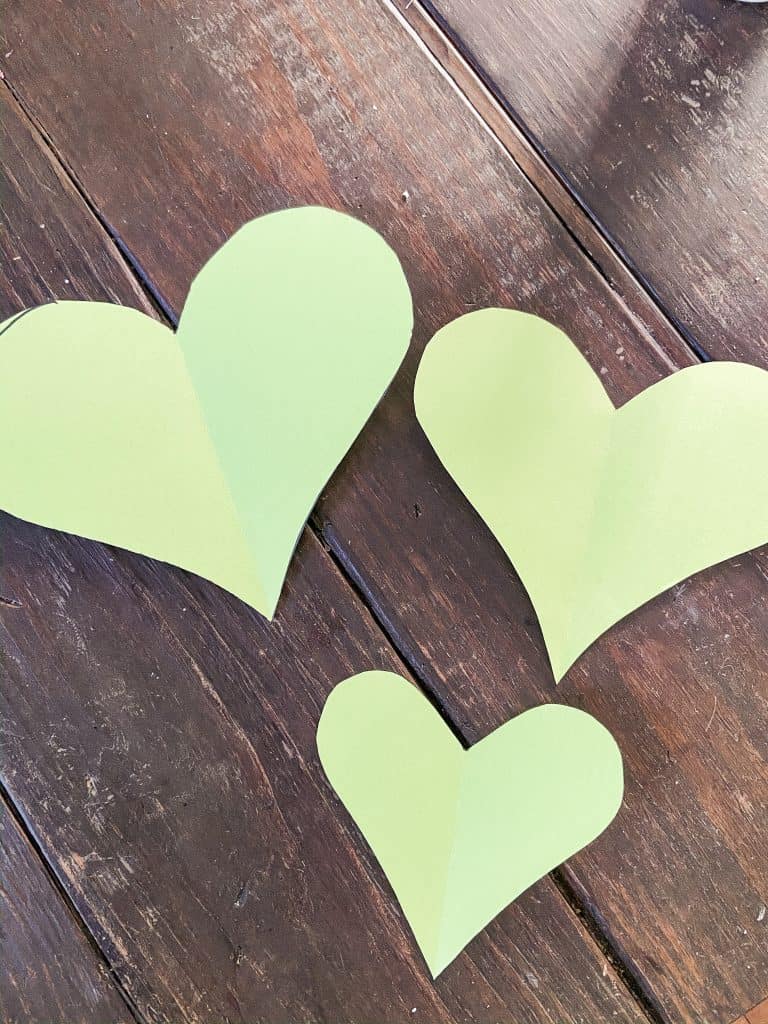
If you prefer, you can design your pattern or download this template for your convenience.
You can make your hearts any size that works for you. I used three different-sized hearts for this craft project.
Trace your design onto the wood. I decided to make two swags so you will see double the hearts on my board.
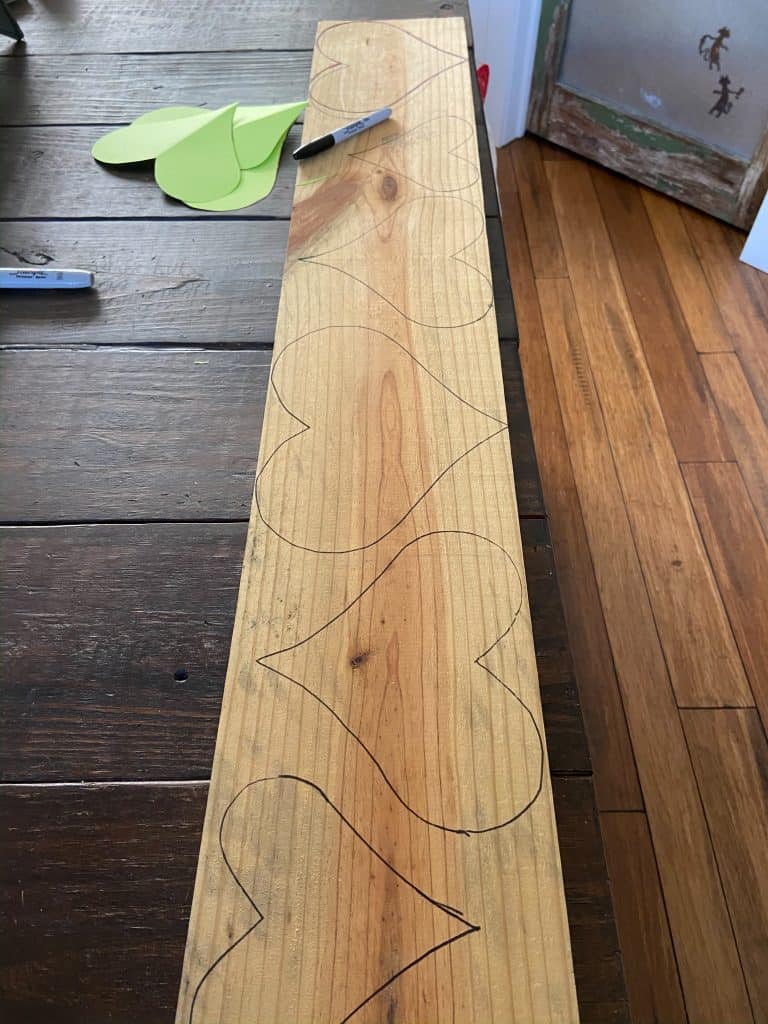
My husband agreed to cut the hearts using a scroll saw, and then he sanded the edges with a belt sander.
.
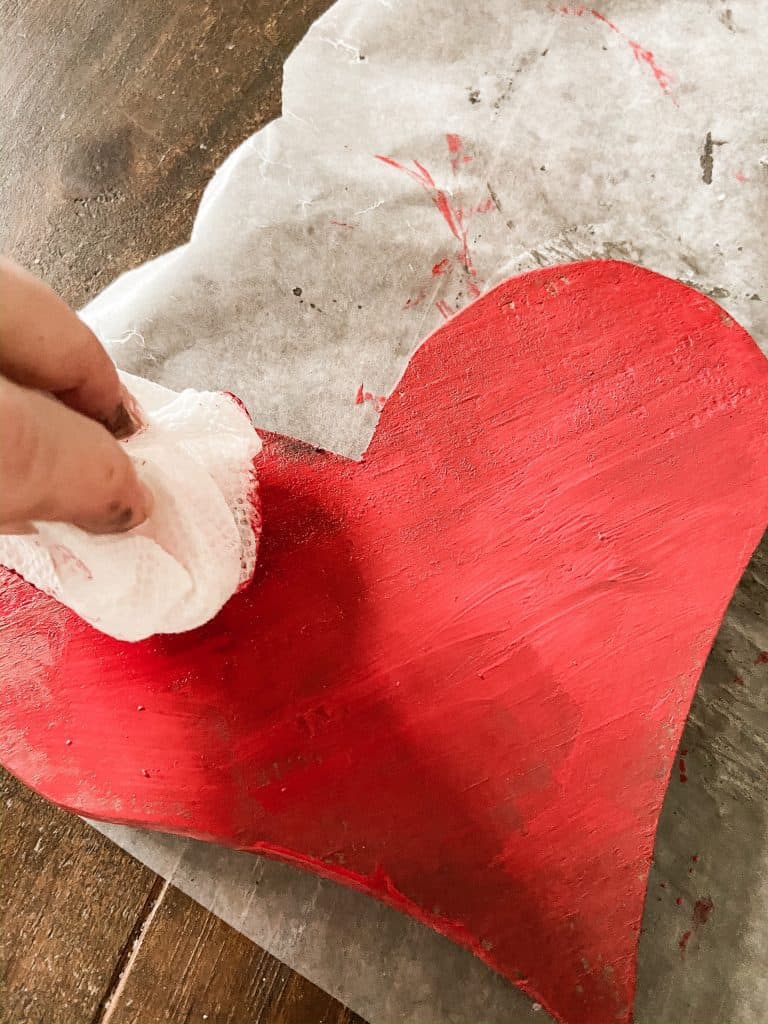
Add age to the wood hearts
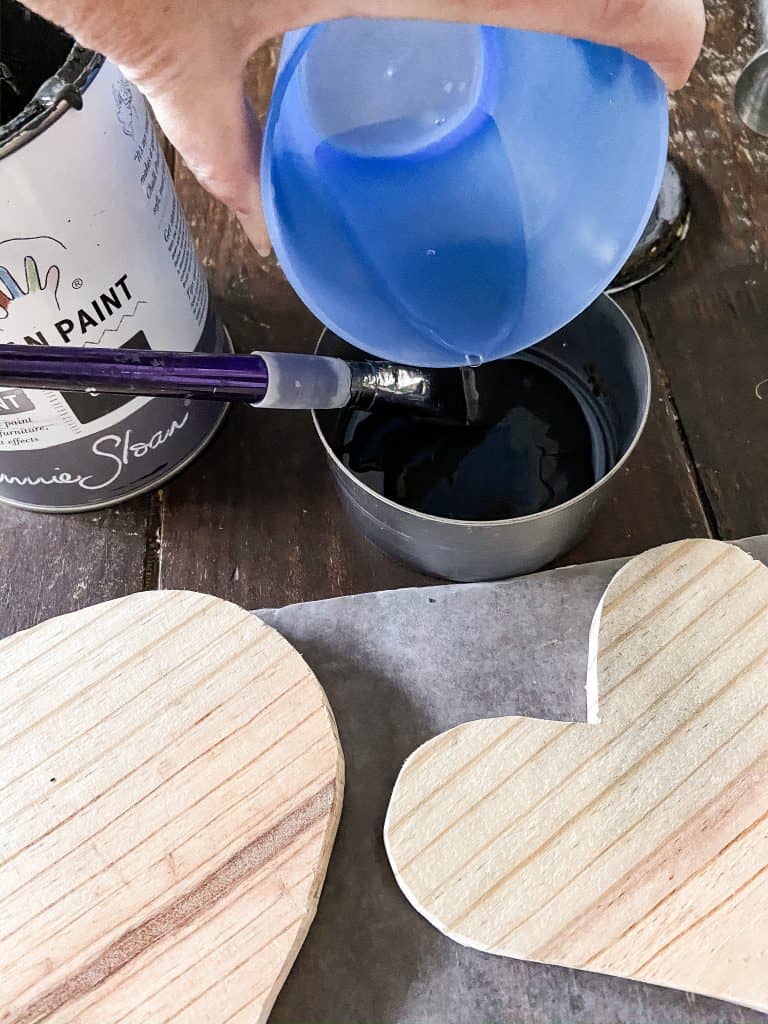
To make the hearts look older, I mixed black chalk paint with 50% water and did a quick wash over Valentine’s hearts.

Paint Valentine’s Day Craft
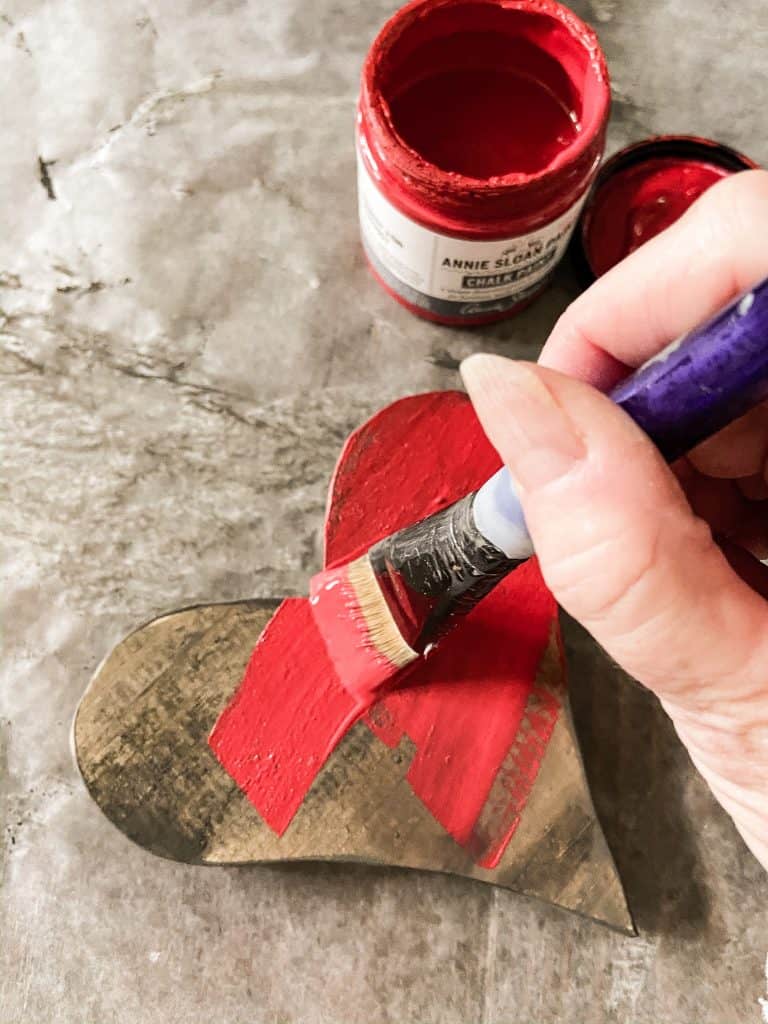
Next, you can paint your Valentine’s Day Hearts any color you wish. Mine are painted red with a coat of wax to seal them. You can use a spray sealer if you prefer.
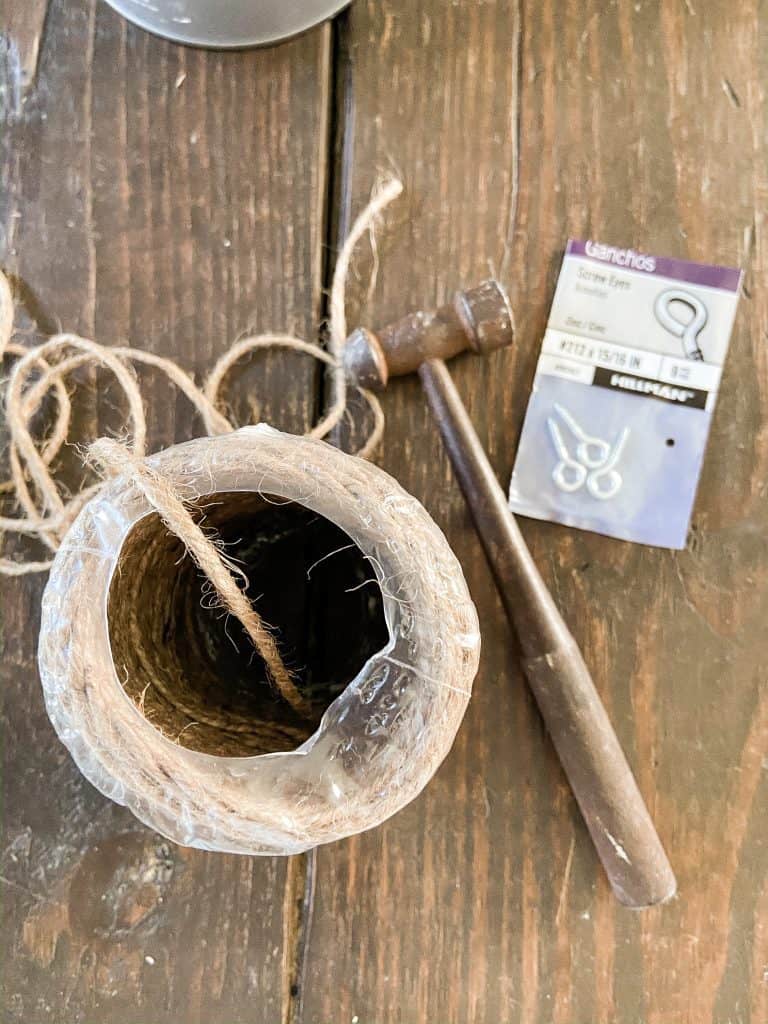
How to Hang the DIY Valentine’s Day Project
If you want to hang your hearts, you will need small screw eyes and jute rope. You can drill a small pilot hole into the side of the heart so the screw eye can be easily attached.
Tip: I used a nail & hammer to tap a small hole, and it worked like a charm.
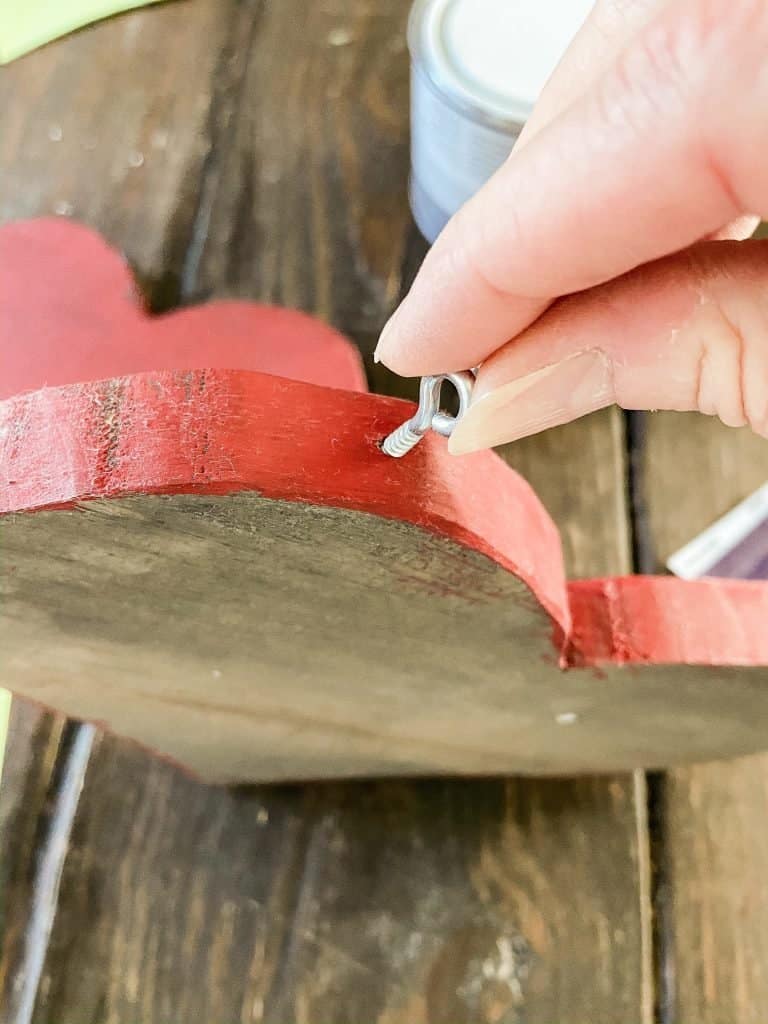
Finally, add one eye hook to each heart at the top of one side. This allows the hearts to hang slightly sideways.
I added an approx.—location to add the eye screws on the template. My placement allows the hearts to hang in the position I desire.
It would be best if you played around with the length of your jute rope, depending on how you want your hearts to hang. Be sure to leave plenty of excess rope until you have everything adjusted. Tie a knot at the top of your jute rope to connect the hearts.
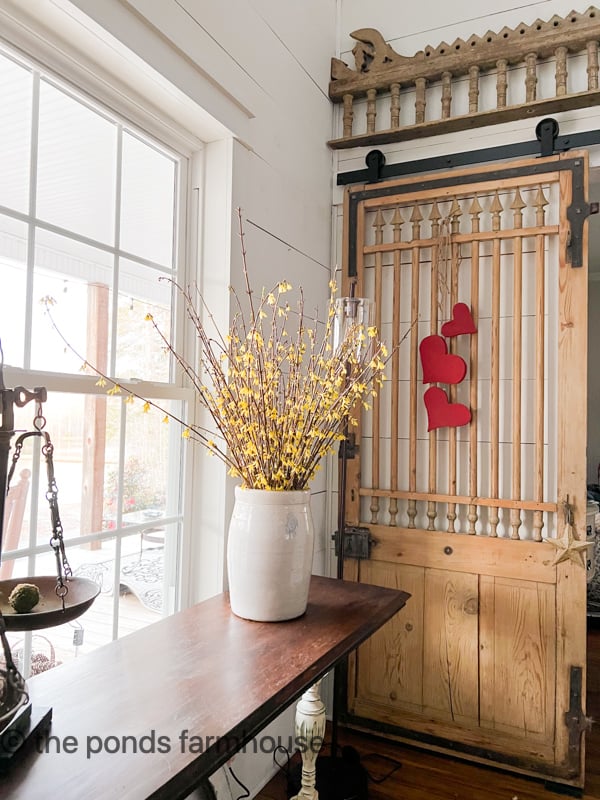
I initially used the heart swag on my guest bedroom door for this Guest Bedroom Valentine’s Day Tour.

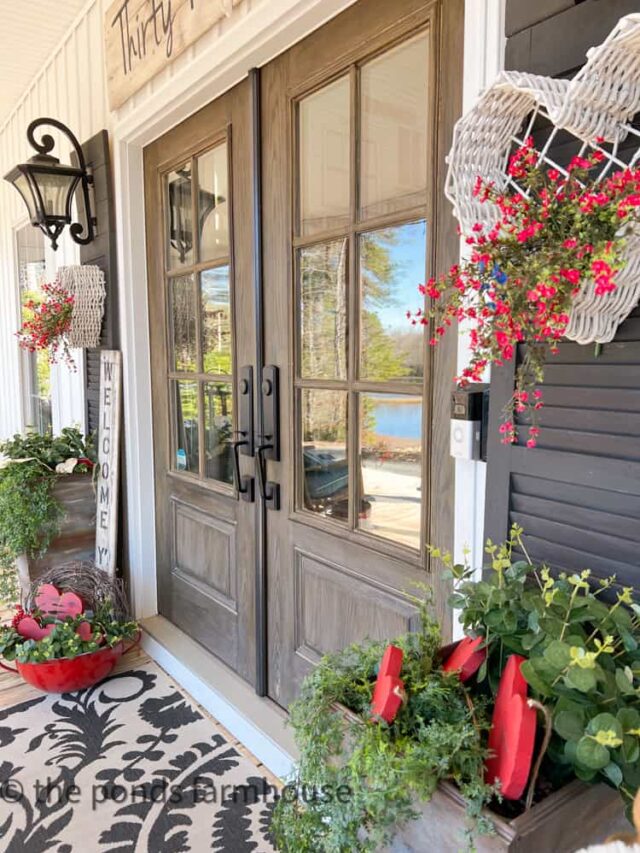
Then I added DIY Valentine’s Day Craft Swags to the front porch for winter. Please take a look at 5 Budget Friendly Winter Porch Ideas.
In addition, you can see the Scrap Fabric Heart Pillow here.
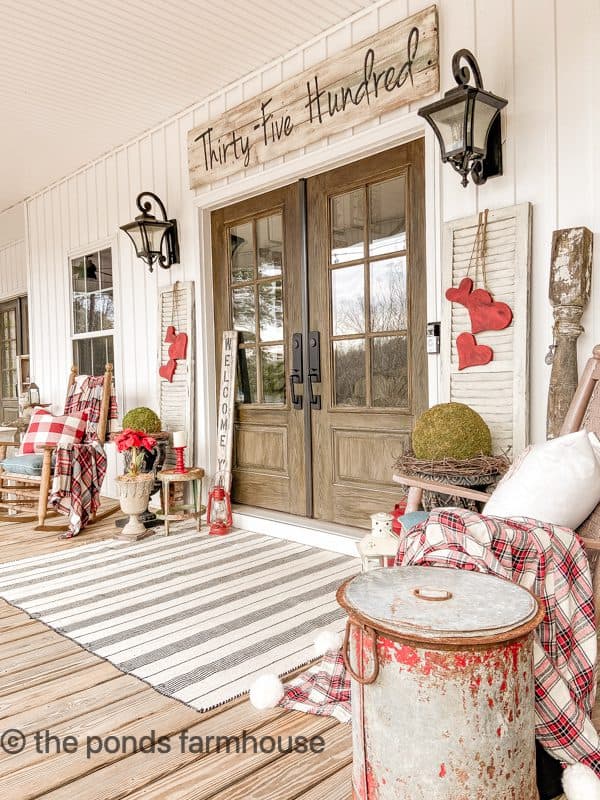
The swags look great all around the house. The forced blooms are showing up big time. Please take a look at How to Force Blooms in Winter.
DIY Wooden Hearts
You can also use the wooden hearts in several different ways. Here, they are tucked into the porch planters for another Valentine’s Day vignette. You can see the front porch styled with a Budget-Friendly Valentine’s Door Decor.
DIY Valentine’s Day Craft
Equipment
- Scroll Saw
- Belt Sander
Materials
- 8 ” x 2′ x 1″ Board or scape wood – for one swag
- Black Chalk Paint
- Red Chalk Paint
- Wax
- 3 Eye Screws
- Jute Twine
Instructions
- Print the template for the 3 hearts. Download here.
- Cut the hearts out and trace onto the wood board or scraps
- Cut the hearts using a scroll saw
- Sand the edges of the hearts with belt sander until smooth.
- Remove any dust with a tack cloth
- Paint the hearts with a 50/50 mix black chalk paint and water (allow to dry)
- Paint with red chalk paint. one or two coats.
- Once dry, add clear wax to seal and buff until smooth.
- Add eye hooks to center of each heart
- Add Jute Twine in a variety of lengths to the eye hooks
Notes
Thanks so much for stopping by today. I look forward to sharing my next adventure with you.

Pin It To Remember It
Did you find some great ideas you’d like to save for future reference? Hover over the images you’d like to save and pin to your favorite Pinterest Boards when you see the PIN button.

Rachel, these are super-cute and there are so many ways to use them! You have such a handy husband~I love that he participates in all your creative endeavors. Thanks for sharing.
Mary,
i appreciate your kind words so much.
Such a cute idea. Your porch looks amazing!
Renae,
I really appreciate this.
These are just the cutest Rachel! I love how you’ve displayed them on your porch shutters.
This is such a cute idea, Rachel! I love how they look on your shutters!
xoxo
Jennifer,
Thanks so much. I’m glad you like them.
Jennifer,
Thanks so much.
Thanks so much for sharing