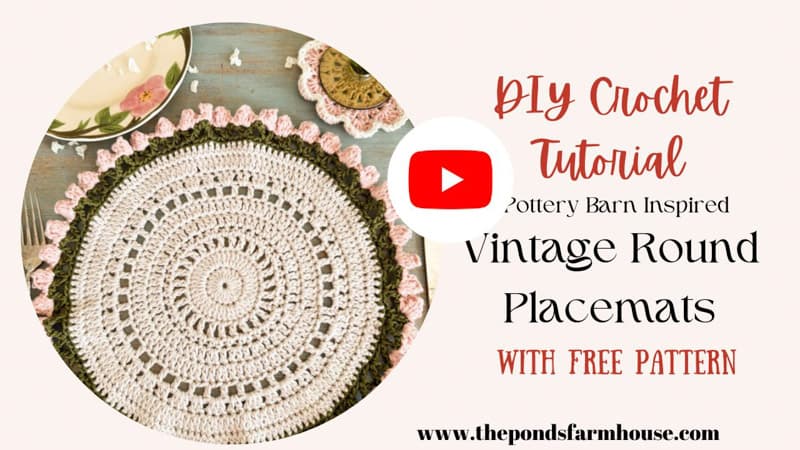
How to Make a Round Vintage Crochet Placemat: Pottery Barn Inspired
Hey friends! As soon as I spotted the vintage-inspired crochet placemats at Pottery Barn, I knew I could duplicate that high-end look for a fraction of the cost. I recently shared how to crochet doilies as part of my ‘old school’ nostalgic craft series, and really, these round placemats are just oversized doilies!
They are incredibly easy to make, plus you can customize the size and color to perfectly match your favorite dishes. Pottery Barn sells a set of 4 for $89.00, but I made my entire set of 8 for just the price of four skeins of yarn.
I’ve included step-by-step instructions and will hook you up with the list of supplies to get you started. Let’s take a look!
(Posts on The Ponds Farmhouse may contain affiliate links. As an Amazon Associate, I earn from qualifying purchases. See the full disclosure details here.)
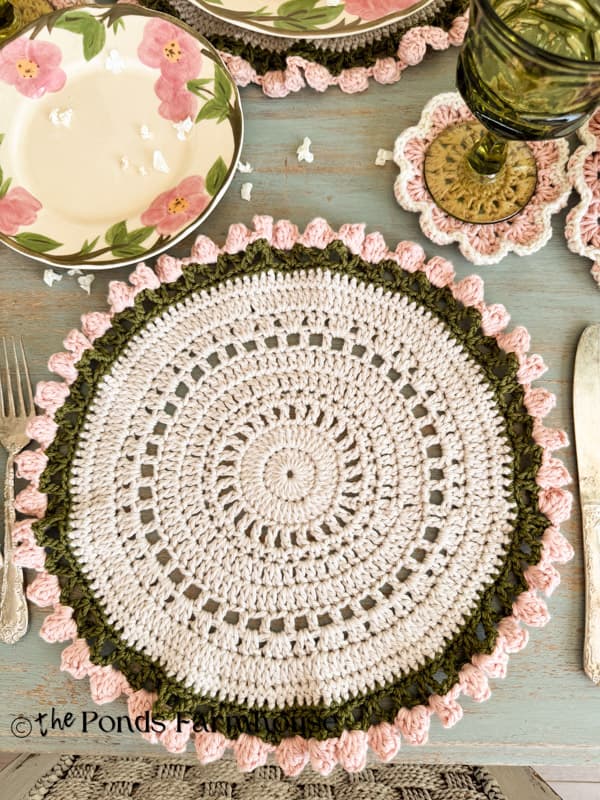
Vintage Inspired Round Crochet Placemat
I recently shared a rectangle-shaped crochet placemat pattern, and I love the simplicity of the design. However, after making several vintage-inspired dollies, I saw a crocheted Pottery Barn placemat and knew I had to make my own version.
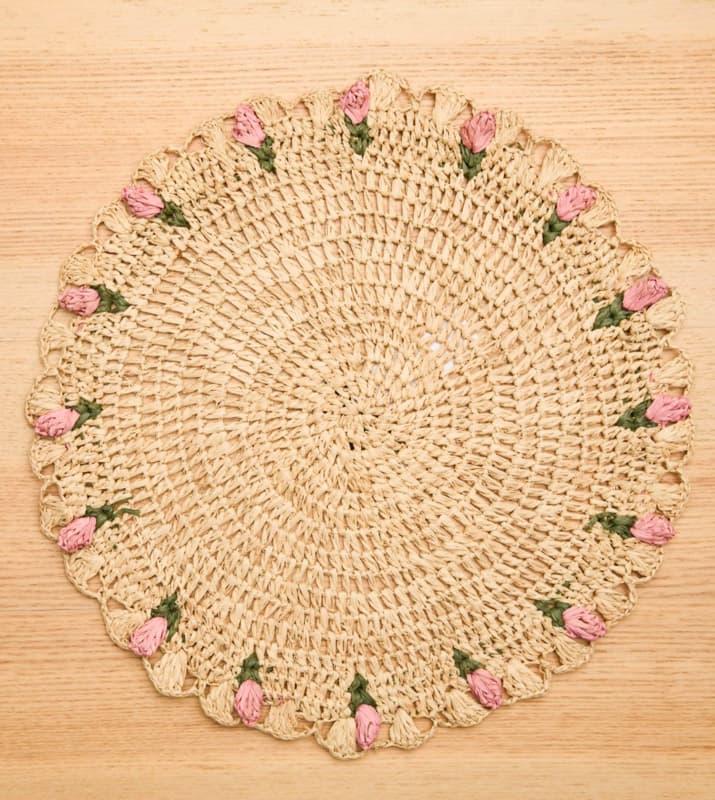
I didn’t try to copy the design exactly, but rather capture its essence. Here is the Pottery Barn version and then mine. As you can see, I added more color and more rosettes.
How To Make Round Crochet Placemats
To make your own custom round crochet placemats, begin by choosing your colors. I have a set of vintage pink-and-green Fanciscan Desert Rose Dinnerware that I want to display on vintage-looking placemats, so I’m sharing those three colors. However, I think it’s important to match them to your decor or the dishes you plan to use. Here are my supplies.
Supply List
Stitch Guide:
- ML – Magic Loop
- ch – chain
- sl st – slip stitch
- sc – single crochet
- dc – double crochet
- hdc – half double crochet
- PC – Popcorn stitch
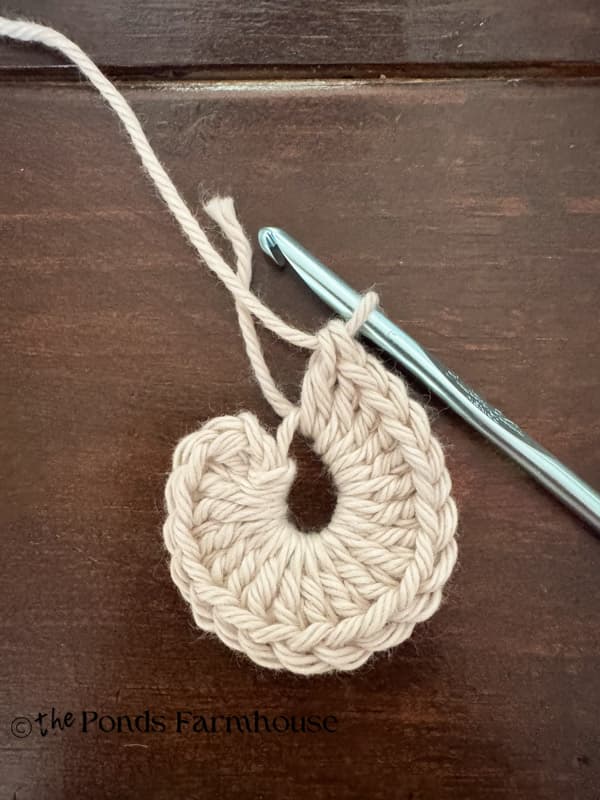
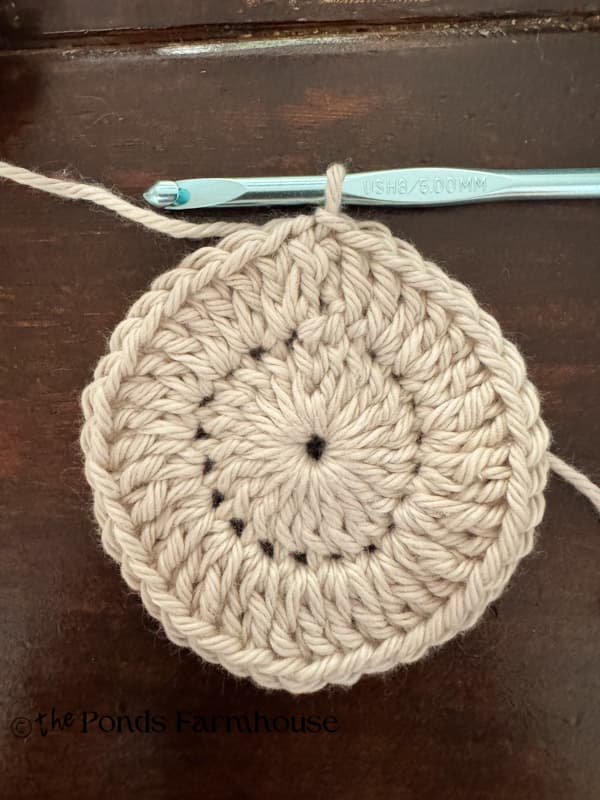
Step 1 – Magic Loop & Simple Crochet Stitches To Create the Center of the Placemat
I recommend downloading the step-by-step instructions, and all the stitches in the first color are simple. However, each round changes, so it’s important to pay attention, and it will be harder to do online.
- Round 1 – Begin with a magic loop and chain 3, then insert 20 dc into the loop. Pull the loop tight and slip the stitch in the top of the chain three.
- 2 – Ch. 3, 2 dc in each of the stitches, sl st to join.
Rounds 3 – 4
- 3 – ch 4, skip stitch 1 dc in next stitch, chain 1, 1 dc in next stitch, ch 1, 1 dc in same stitch, ch 1. *1 dc, ch 1, in next stitch, (1 dc, ch1, 1 dc, )Ch 1, in next stitch. Repeat from * around. Sl St. to join.
- 4 – ch 2 in each of the chain one spaces, repeat this pattern. *1 hdc in the first chain one space, 2 dhc in the next chain one space, repeat. Sl st. to join.

Round 5 – 7
- 5 – Ch 3, in each stitch around *1 dc in first stitch, 2 dc in next, 1 dc in next, and repeat around. Sl st. to join.
- 6 – ch 3 – in each stitch around – (*1 dc in first, 1 dc in second, 2 dc in third stitch.) Repeat from * around. Sl st to join.
- 7 – ch 4 sk st, 1 dc in next stitch, ch 1, sk st. *1 dc, ch 1, sk st. around. Sl st to join.

Round 8 – 10
- 8 – ch 3, in next ch 1 space, 2 dc, 2 dc in second ch 1 space, 3 dc in next space, – *2 dc, 2 dc, 3 dc in each chain one space around. Repeat from * and sl st to join.
- 9 – ch 3, 1dc in first stitch, 2 dc in next. Repeat 1 dc, 2 dc in each stitch, sl st to join.
- 10 – ch 2, hdc in each stitch around. Sl st. to join
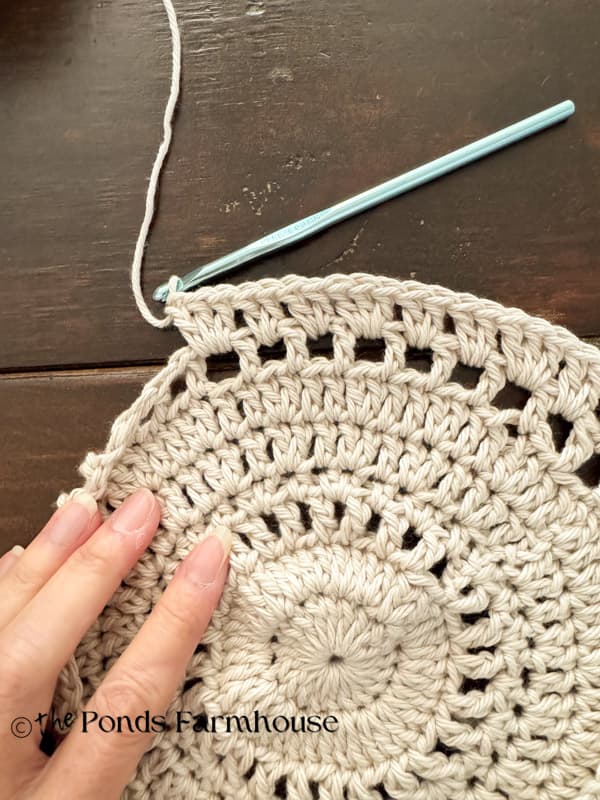
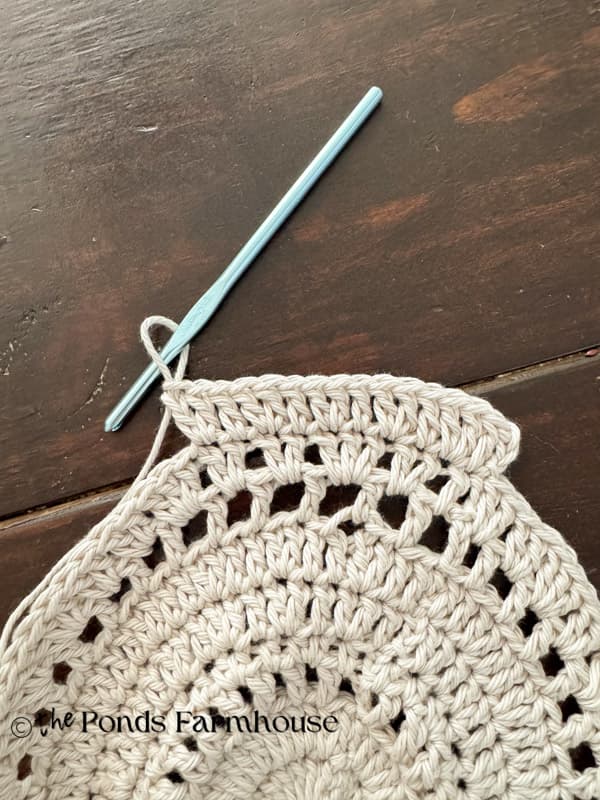
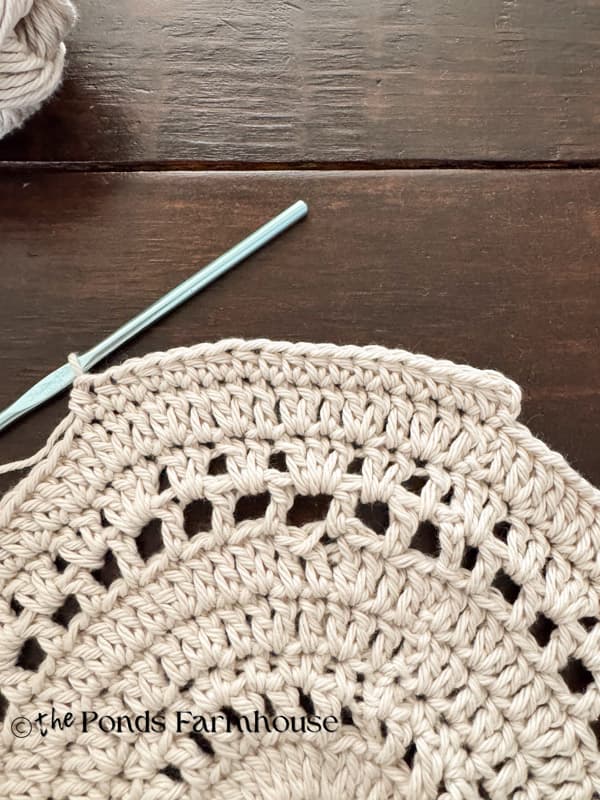
Here is the completed center of the round crochet placemat.

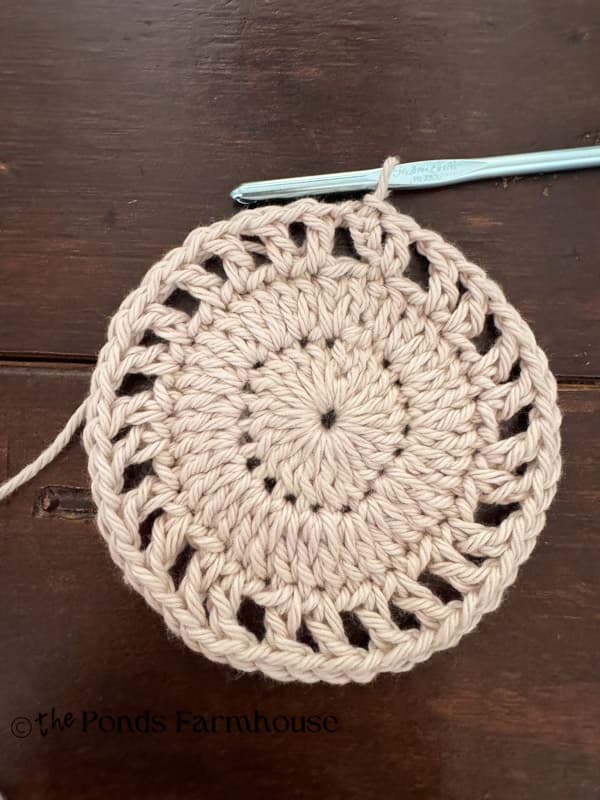
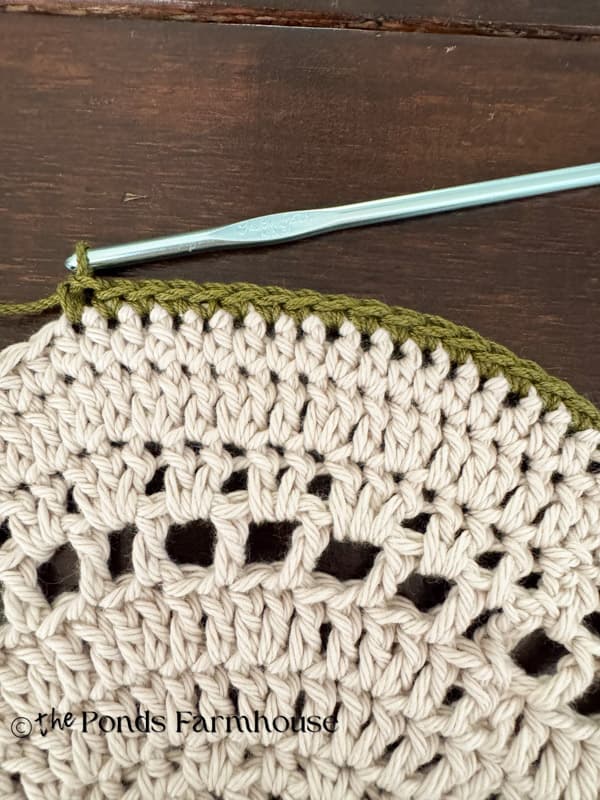
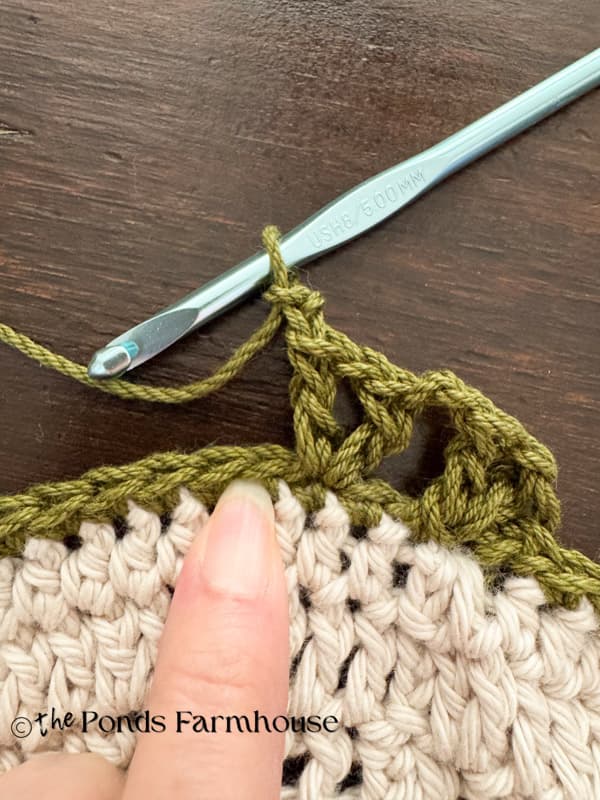
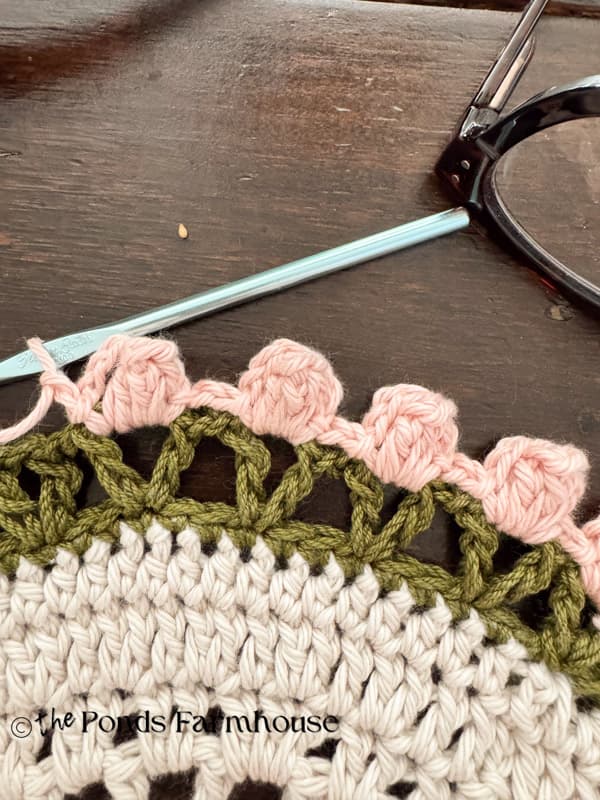
Step 2 – Create A Decorative Edge
Now you are ready to change the yarn color to Olive or your choice of color.
- 11 – change to green yarn. Sc in each stitch around, sl st. to join.
- 12 – Ch 4, dc in same stitch as chain, ch 2, skip 2 stitches, dc in next stitch, ch 1, dc in same stitch to form a V. skip 2 stitches*chain 2, dc, ch 1, dc in one stitch, chain 2, skip 2 stitches and repeat. Join in the third chain from the hook in the beginning change 4.
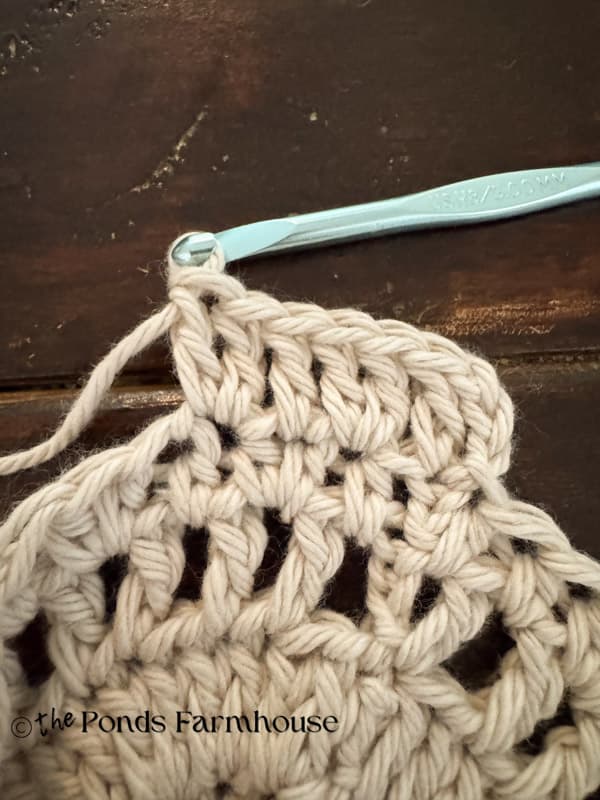
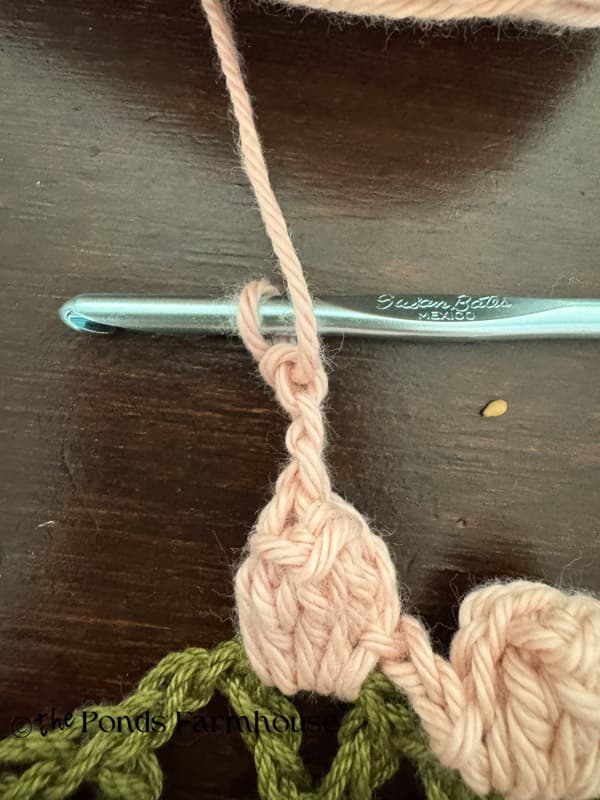
How To Make A Popcorn Stitch – Final Round
First, I’ve never shared how to make a popcorn stitch, so I’m going to share the details first, and then you can follow along.
- Add your third yarn color for the flowers.
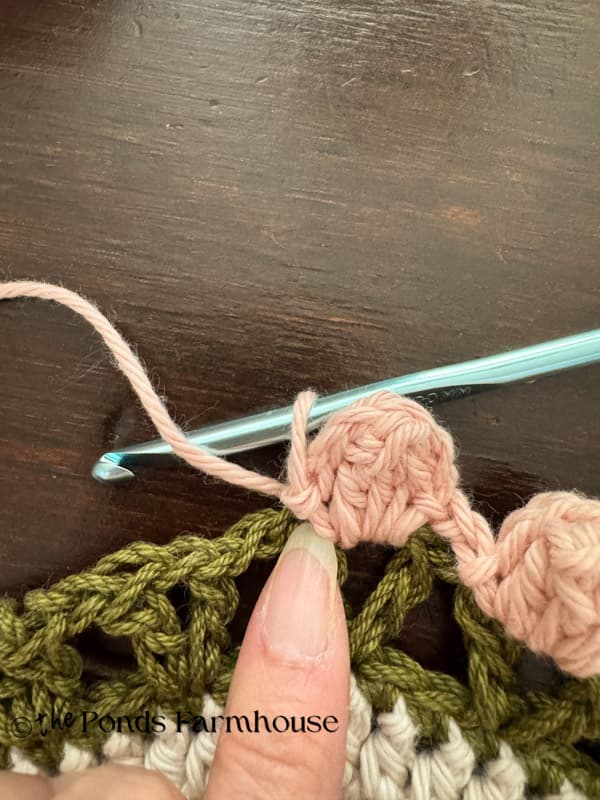
- Popcorn stitch – sl st in next V ch 1 space. Ch 3, 4 dc in the same space, loosen the yarn and remove the loop from the hook, insert the hook into the 3 ch of the original ch-3. Pick up the loosened yarn loop with 2 loops on the hook, pull the loop through the chain 3 loop.
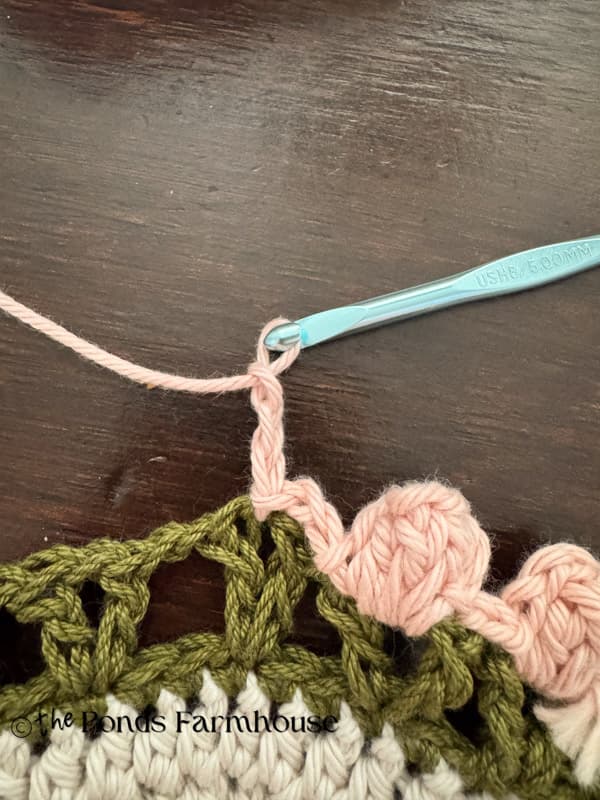
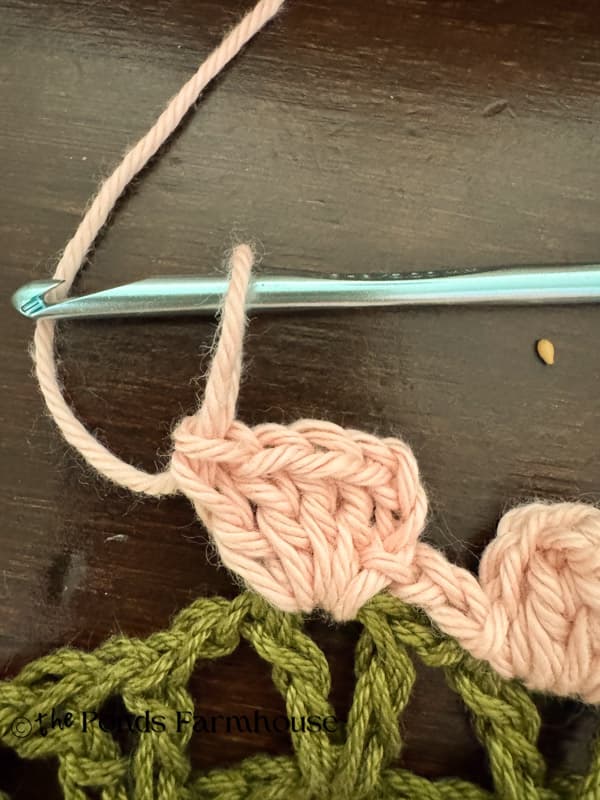
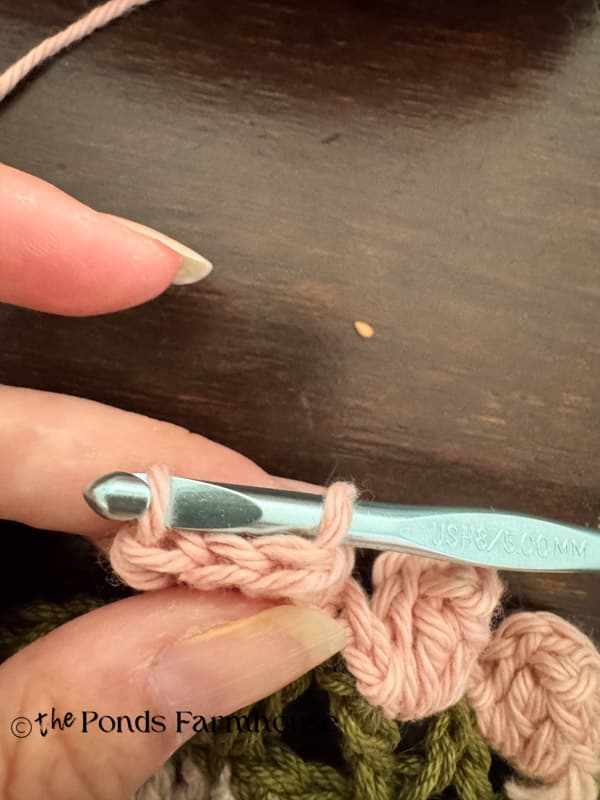
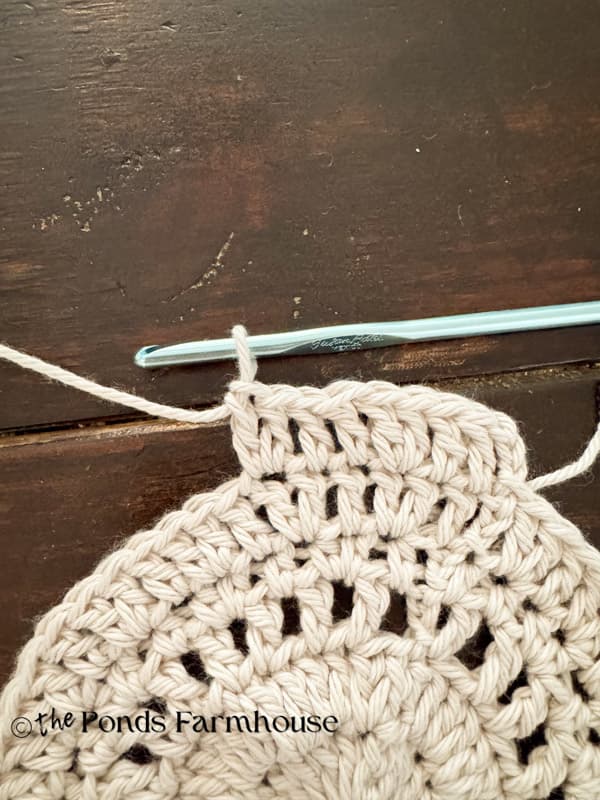
- ch 3, sl st in the same V ch 2 space. *ch2 between each V spaces and repeat Popcorn stitch in each of the V ch1 spaces.
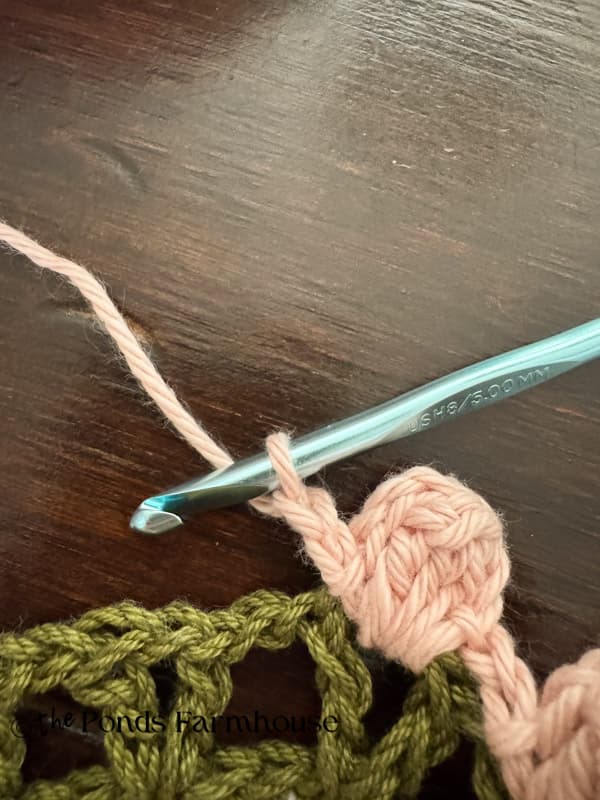
- Once all popcorn stitches are in place, sl st to finish. Tie off and secure any loose yarn on the backside of the placemat. Cut away any excess yarn.
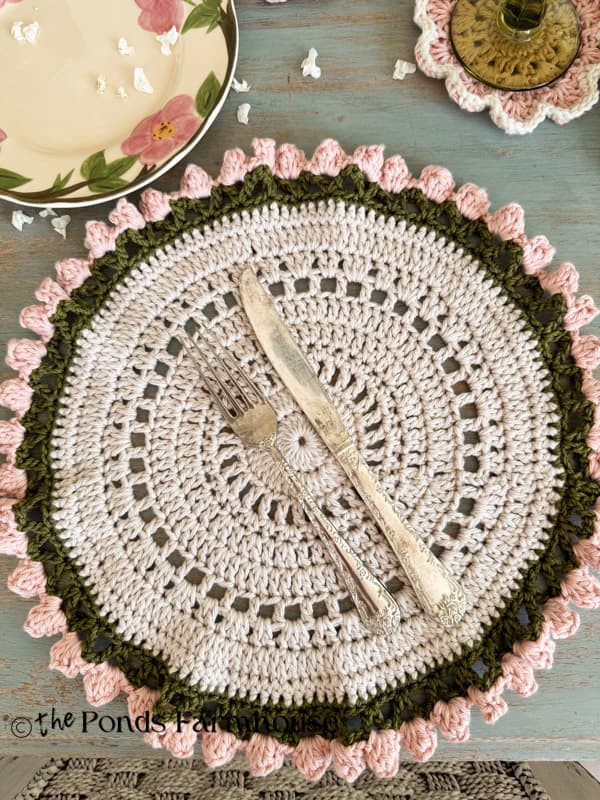
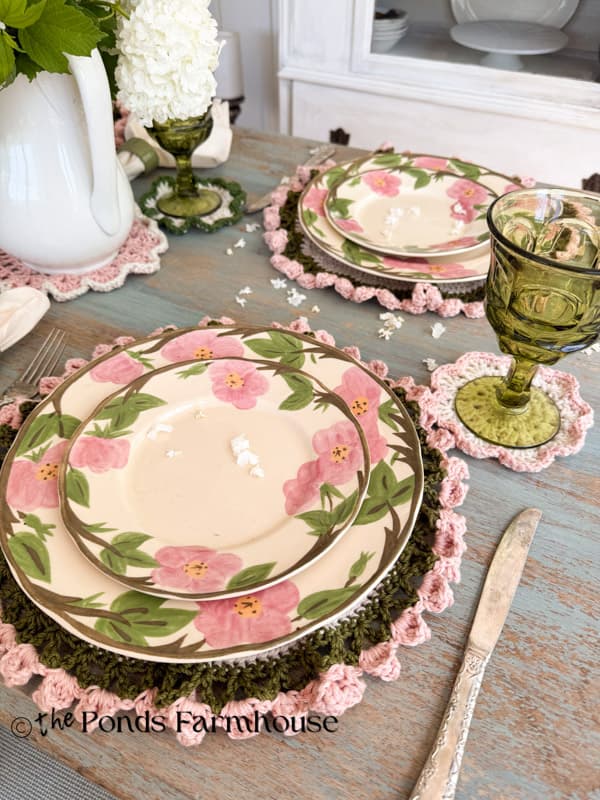
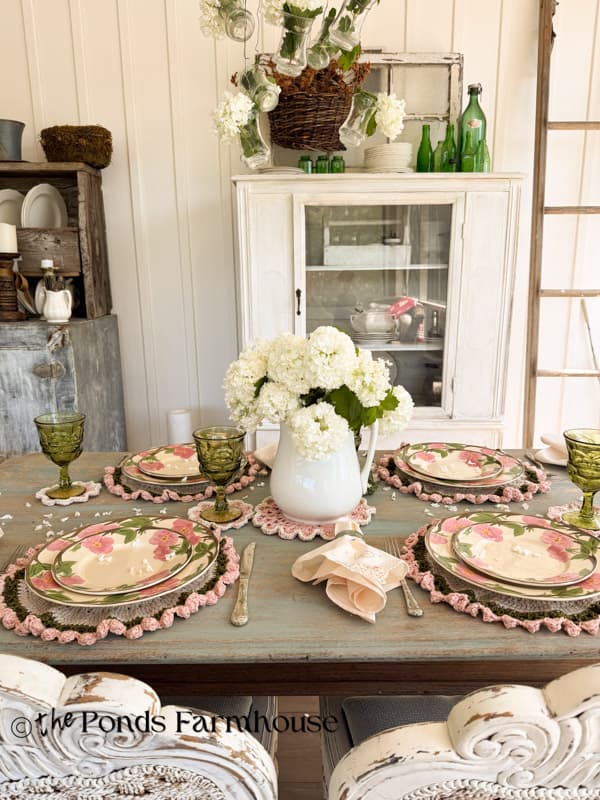
How To Style A Table With DIY Crochet Placemats
Now for the fun part. Let’s style a table using the new DIY crochet placemats. I’m using my vintage dishes along with thrift store silverware and water goblets. Can you believe I got these Fanciscan Desert Rose Dishes for 49 cents each at a Salvation Army thrift store. What a steal!
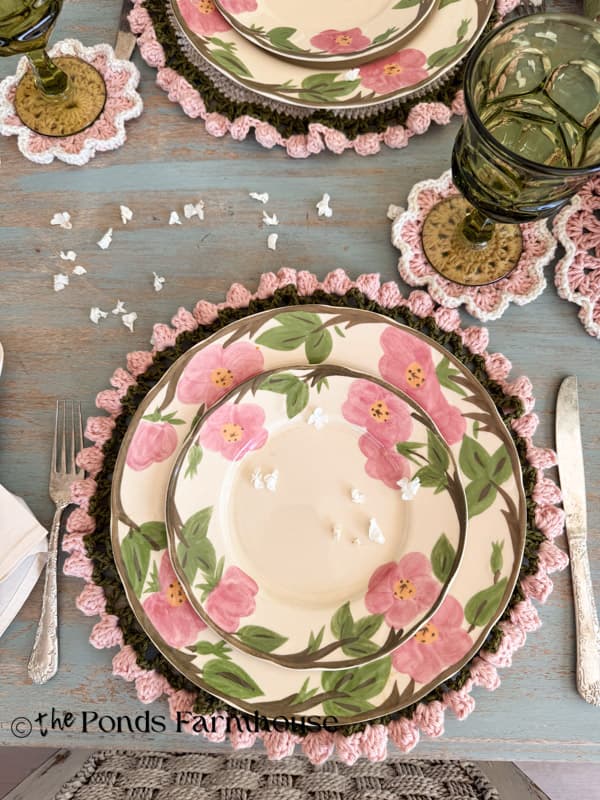
I also added some DIY crochet coasters in the same color combinations to hold the glassware.
Thrifted Tableware Details
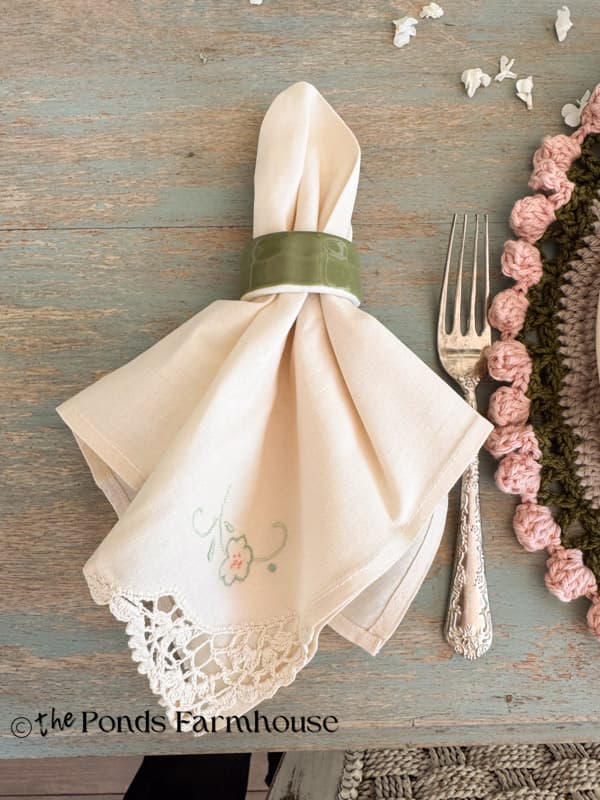
Along with the place setting I added more thrift store finds, which include the vintage napkins that are embroidered with a delicate flower and edged with a crochet detail. The green napkin rings were another thrifted deal.
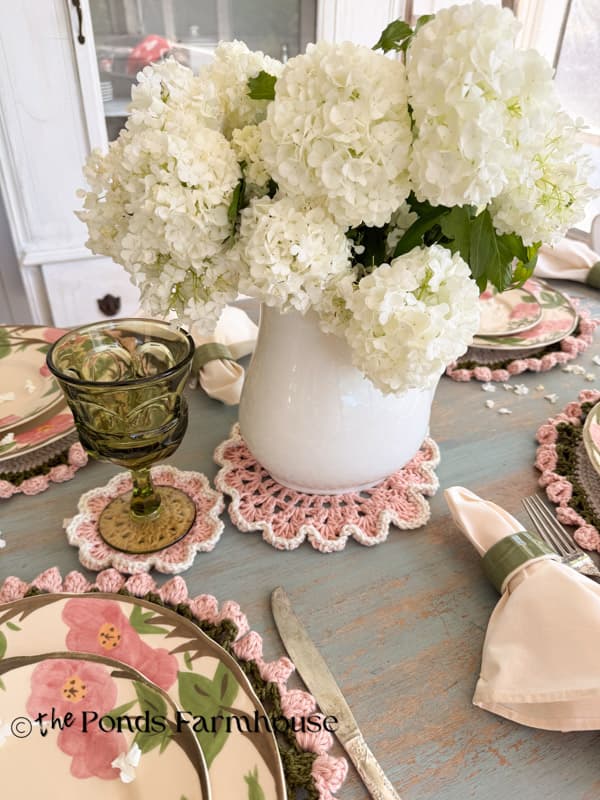
The Table Centerpiece
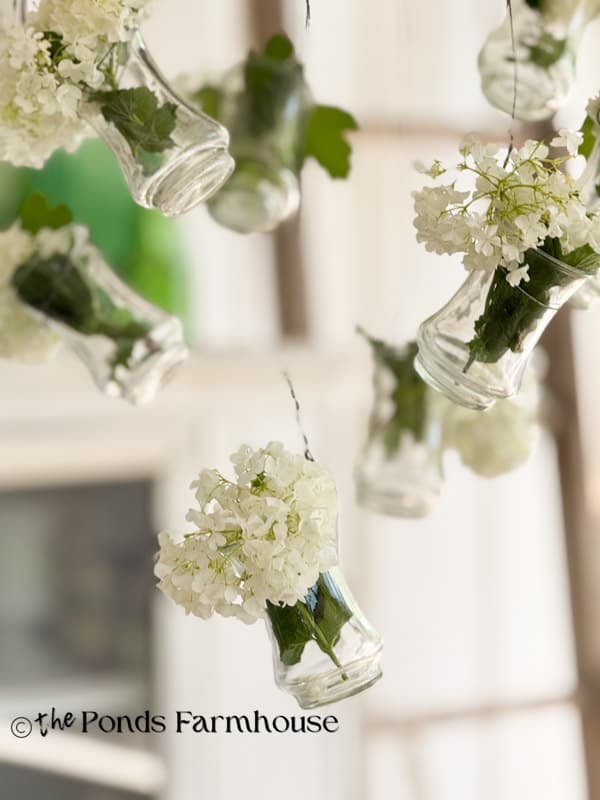
Keeping with the doily themed table setting, I used a larger doily to create a centerpiece with a vintage ironstone pitcher that I filled with fresh snowball blooms. I also added the blooms to the vases hanging from our table light fixture.
One way I save money is to always look at what’s blooming in the garden or wild in the fields to create inexpensive arrangements. My snowball bush is full this year and they have such an old-timey feel which makes them perfect for this vintage style tablescape.
The overall feel is so vintage, and I’m in love with the whole table. The soft pinks and greens add a festive but romantic feel the porch table. I never want to take it down so I will be leaving this set for a while. I’m so happy with the placemats, that I’m already contemplating what color combination I’d like to make next.
FAQ
Resources: Shop This Post

Video Tutorial
I hope you enjoyed the latest in my “Old School” Nostalgic Craft Series and that you’ll share your opinion of my design with me. I’d love to see your version of the project if you decide to give it a try. Don’t miss any of my projects, thrifting and decorating adventures by clicking here to subscribe to my newsletter.


Pretty and such a great idea!! Thanks for sharing!
Ashley,
I’m so glad you like this one. I hope you have a blessed week.
Beautiful!
Pam,
Thank you for your sweet comment.