Give Thrifted Nativity Scenes A Modern Update: 3 Easy DIY Makeovers
Do you have old Nativity scene sets that could use a modern update? I’ve been collecting thrift-store sets that aren’t trendy but are cheap. So today, I’ll share how to achieve a thrift-store flip with a modern twist on old, tired nativity scenes. You only need a few supplies, and no experience is required. All three styles are quick and easy transformations. So pull out those old sets or thrift-store finds, and let’s get started on the makeovers.

(Posts on The Ponds Farmhouse may contain affiliate links. As an Amazon Associate, I earn from qualifying purchases. See the full disclosure details here.)
Thrift Store Nativity Scenes
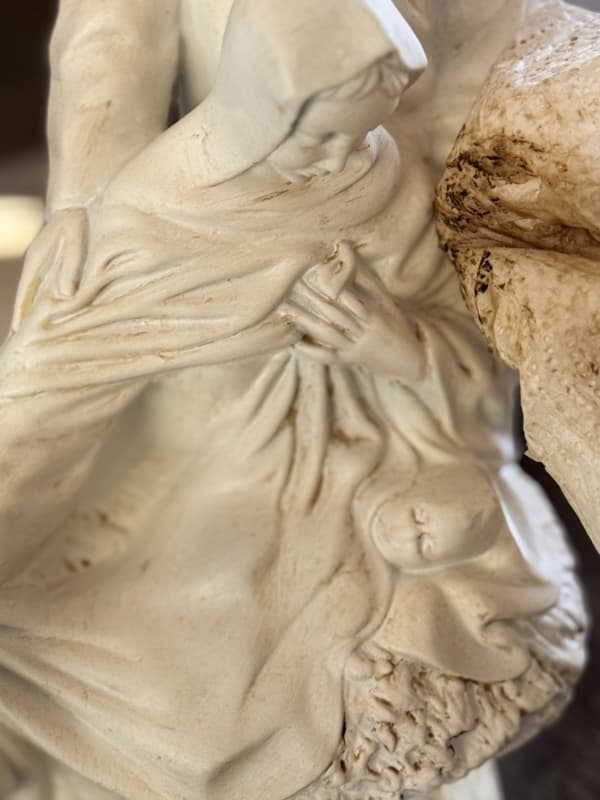
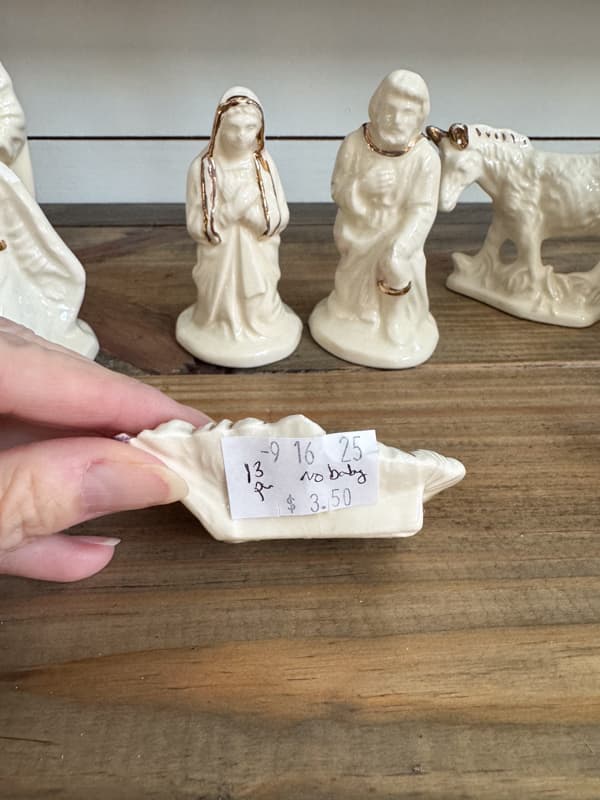
It all started with my first thrift store Nativity Scene find. Over the summer, I found one that was painted so badly, I had to rescue it for only $6.00. I love the size and shape, so I knew I could improve it. Then I found another 13-piece set for $3.50, and I couldn’t resist bringing it home. So by this point, the search was on for at least one more scene for my Christmas decorating. The last find was only $2.50, so I have to say thrift store nativity scenes are budget-friendly options for holiday decor.
#1 – How To Transform An Ugly Nativity Scene
As I said, my first find was, well, ugly. That may be a little harsh, but it wasn’t my style. Would you have brought it home? For only $6.00, I knew I could update it and make it work with my Christmas decor.

Spray Paint
The first thing I did was use Chalky Classic White Spray paint to cover the old painted nativity scene. It took a couple of coats to conceal the original paint colors.

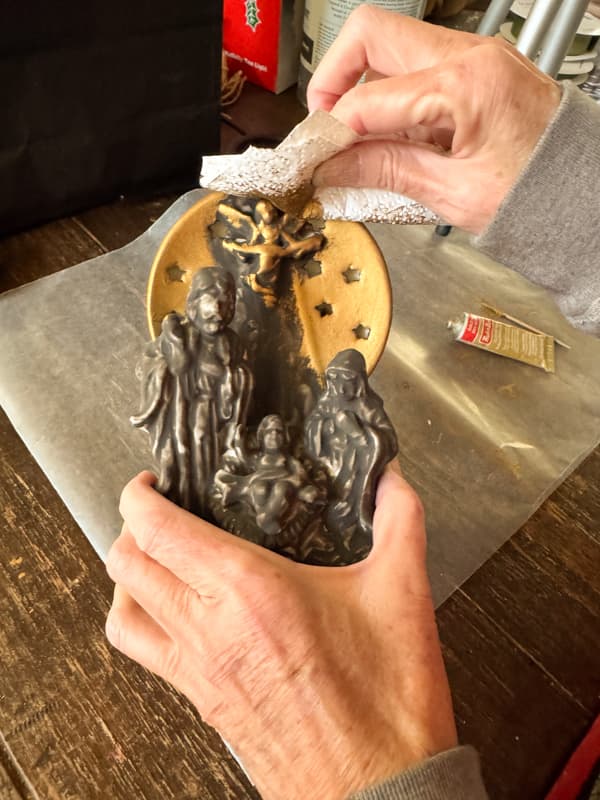
Enhance Details With Dark Wax
The chalky white finish was a little stark on this piece, so I decided to add some dark wax to enhance the details.
- I first added some clear wax, then a mixture of clear and dark wax, using a paper towel.
- Allow the dark wax to settle in the creases of the design.
- Let dry for a few minutes.
- Finally buff with a soft cloth to add a sheen to the finish. That’s it.
The updated nativity scene now works with my Christmas decor and is on trend. What do you think?

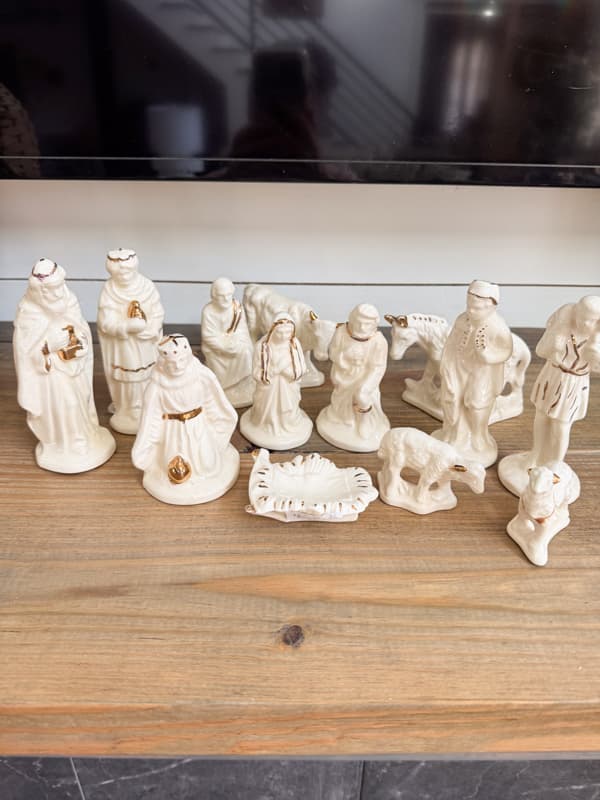
#2 – 13 Piece Nativity Scene with No Baby Jesus
My second find was this great Nativity Scene for only $3.50, because there was no baby Jesus. My first thought was, I can fix that. In addition, some of the gold details were a little worn, so here’s what I did.
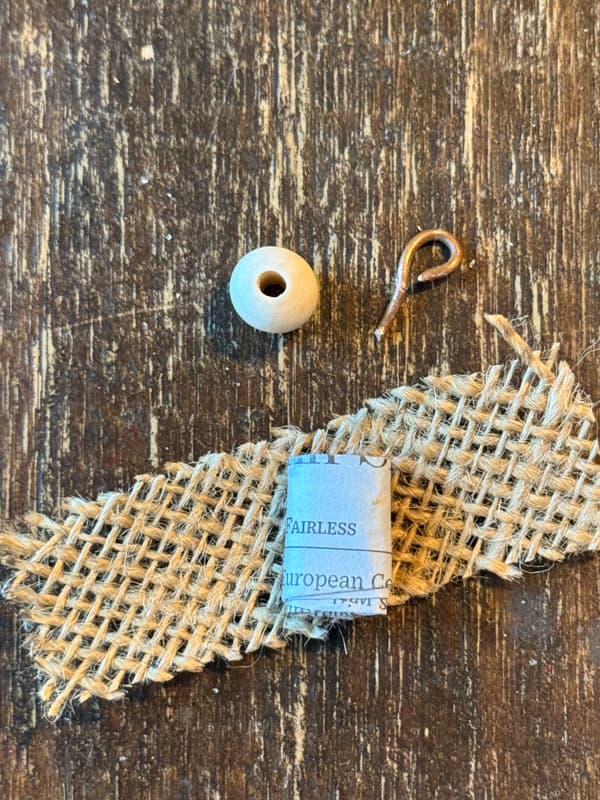
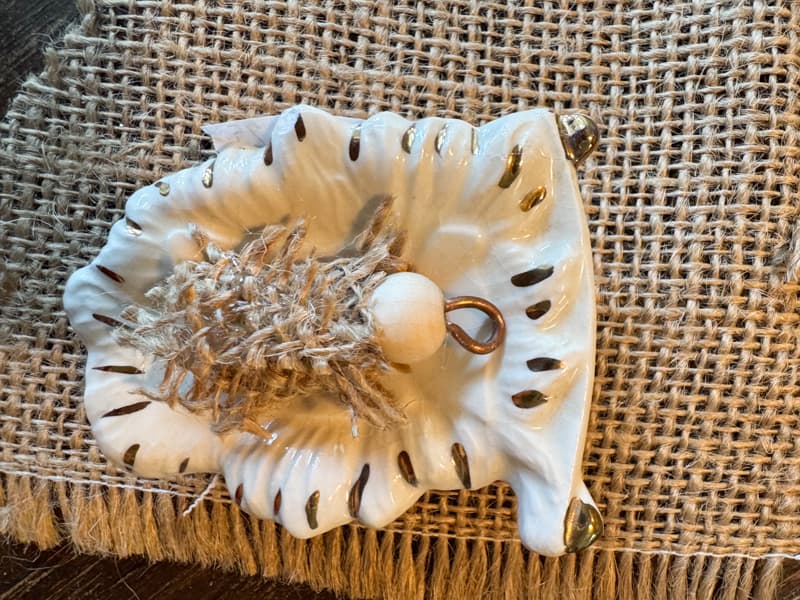
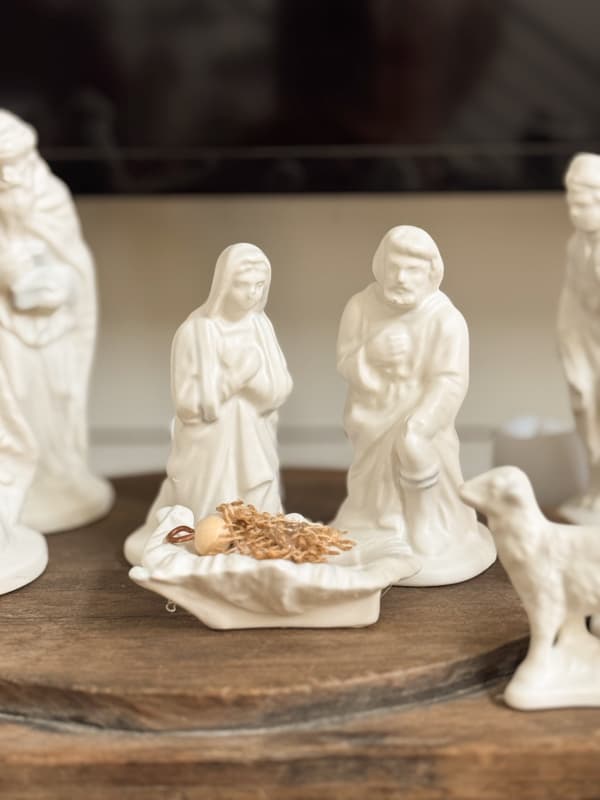
How To Make a Baby Jesus For The Manger
Since the manager is small, I pulled these supplies I had on hand.
- Small wood bead
- Copper wire
- Scrap of Burlap Fabric
- Small Piece of Paper
- Hot Glue Gun
- Needle nose pliers
First, create a halo from the copper wire by bending a tiny circle at one end. I used needle nose plier to bend the wire.
Next, fold the paper into a tiny bundle and wrap it with a piece of burlap fabric. Use hot glue to secure the wrapping.
Add the bead to the top of the burlap-wrapped paper with hot glue. Ensure that the hole is located at the top of the bead.
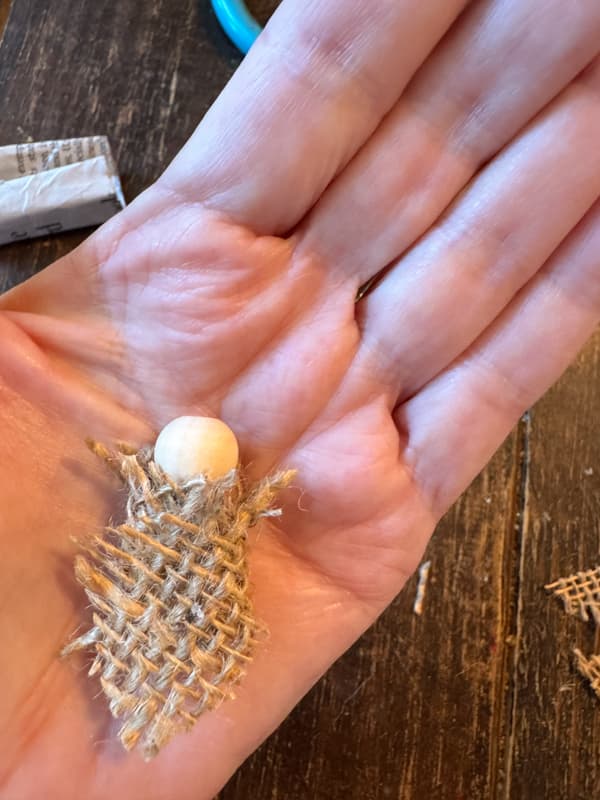
Finally, add a drop of hot glue to the hole at the top of the bead and insert the wire halo. Ta-da, a new baby Jesus to complete the Nativity Set.
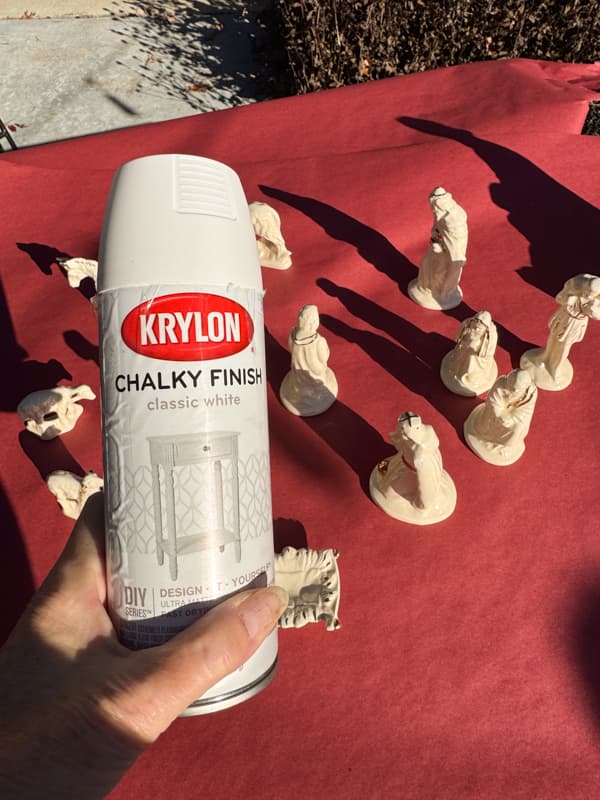
Paint the Nativity Set
As I mentioned, the gold details on the nativity set were less than desirable, so I decided to paint the set white with Chalky Classic White Spray Paint. It only took a few minutes to completely transform this inexpensive nativity scene.
Updated 13 Piece Thrifted Nativity Set
The matte white finish gives the updated nativity scene a fresh and on-trend style.
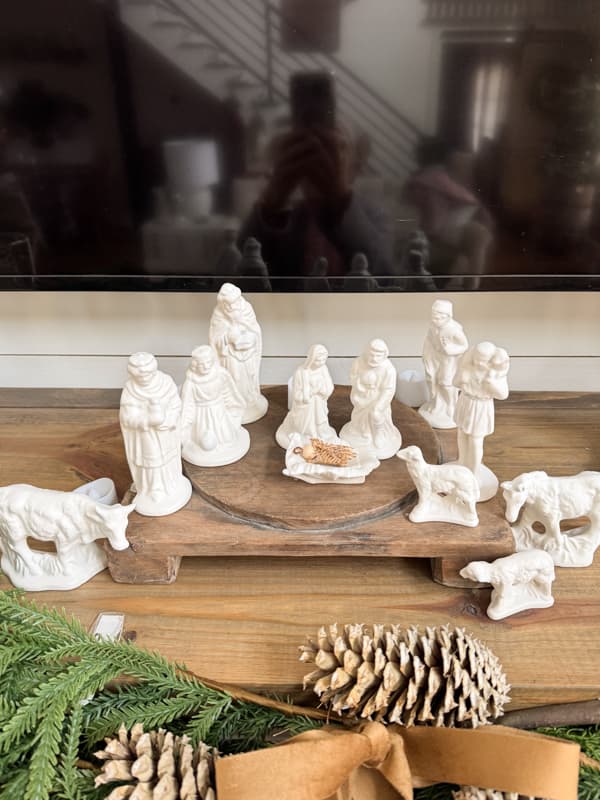
I’ve added the 13-piece updated scene to a wooden riser, and it’s the centerpiece of this year’s Christmas mantel.
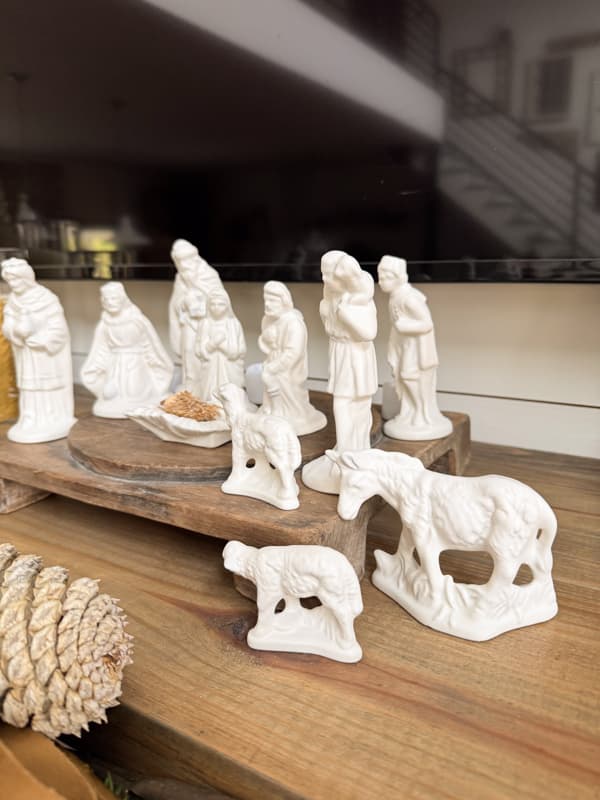
The DIY baby Jesus adds a rustic element to the neutral nativity scene.
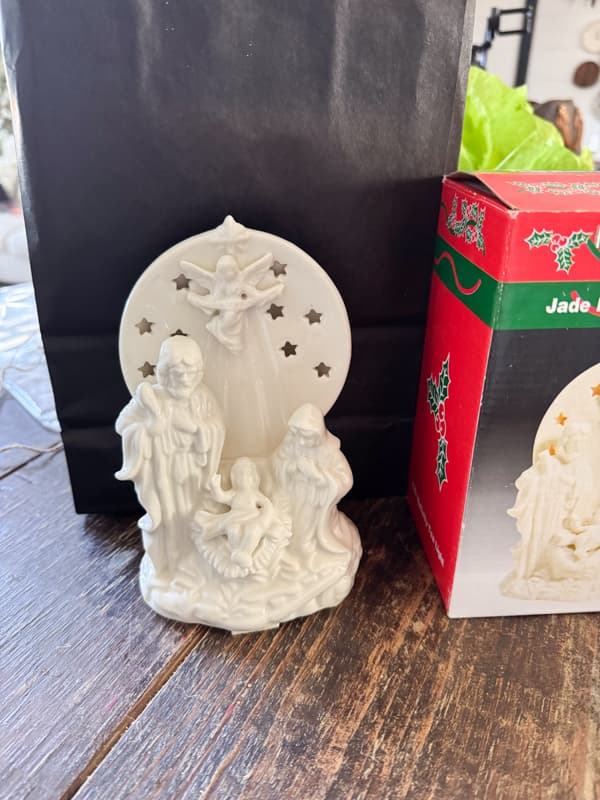
#3 – Tea Light Holder Nativity Scene
My final thrift store find was this Tea Light Holder Nativity Scene for only $2.50. It was in perfect condition and still in the original box. However, the creamy, shiny finish wasn’t what I was looking for. So here’s what I did.
Paint the Tea Light Holder
First, I decided to paint the tea holder Nativity scene with Graphite Chalk Paint because I had it on hand, and it will stick to almost any surface. With the shiny finish, I used two coats of paint. It would have been easier to use spray paint, but I didn’t want to make another purchase or go to the store.
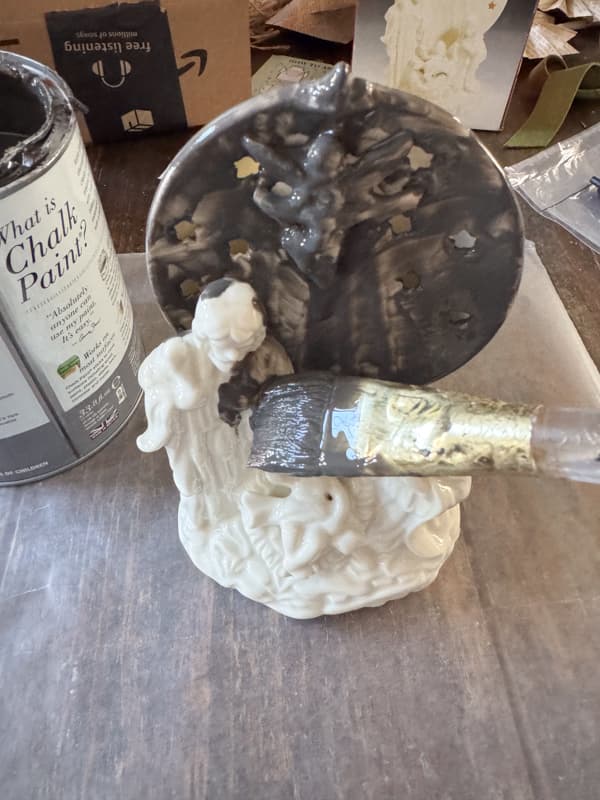
Add Gold Leaf Rub N Buff
Once the paint was dry, I applied Rub N Buff Gold Leaf to cover the piece. I used a paper towel and a small brush for this step. Due to the intricate detail, the brush was necessary to get into all the nooks and crannies.
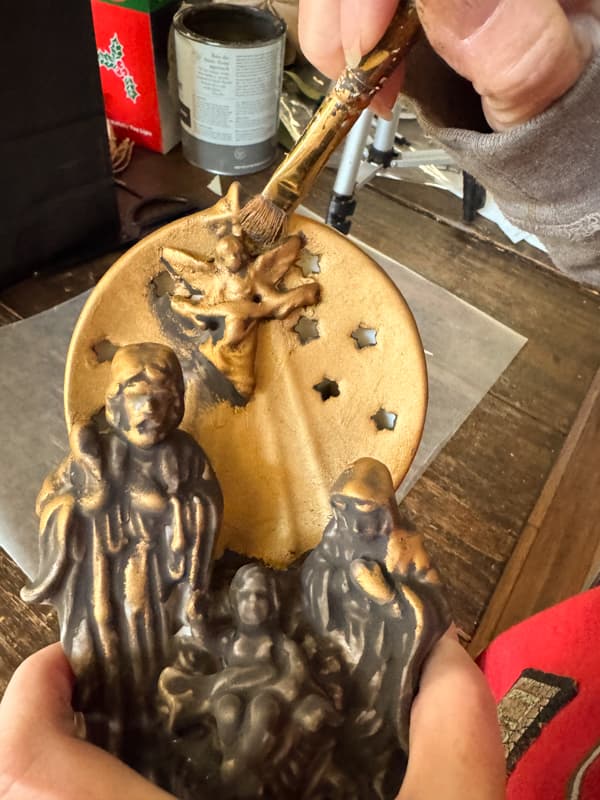
Continue adding Rub N Buff until everything is covered, then buff off any excess for a smooth finish.
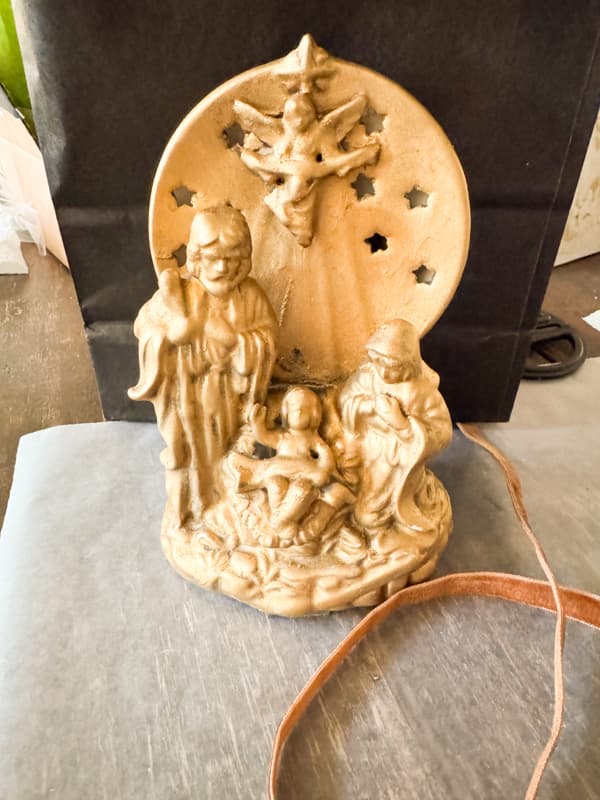
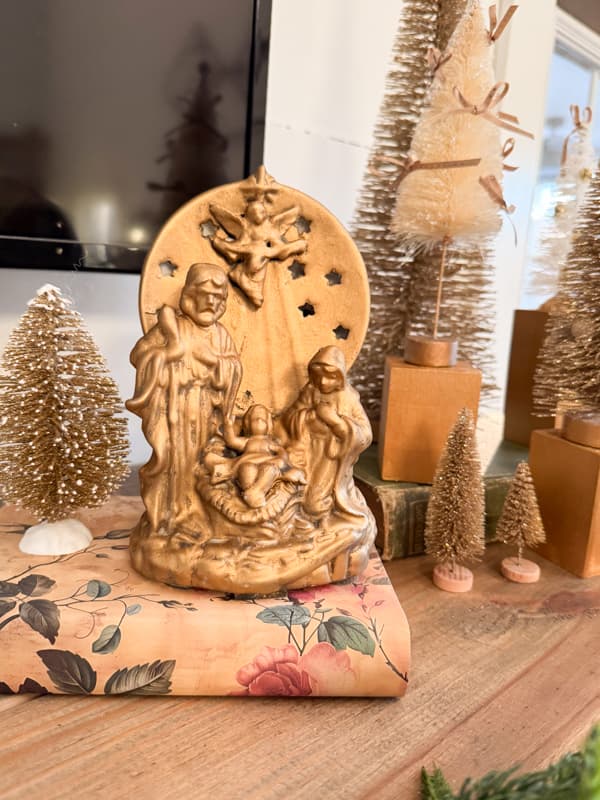
Inexpensive Thrift Store Transformation
I love the new look of the Navitity scene. The details are much more visible with the gold leaf transformation, and so much more on trend. It really looks amazing mixed with the transformed bottle brush trees on my mantel.

Thrifting with the Gals
Today’s post is part of our monthly series, Thrifting with the Gals. If you are new to our series, we are friends who share a love for vintage and thrifted decorating. We all live in different parts of the country, but we come together once a month to share thrift store shopping ideas and tips on decorating with your treasures.
Here are the Gals:
- Ann from Dabbling and Decorating finds her treasures as she travels between Vermont and Maine. She decorates both homes with so many vintage treasures.
- Robyn from Robyn’s French Nest loves to travel and bring her vintage treasure to her lovely Florida Home.
- Lora from Lora Bloomquist Create and Ponder is thrifting and picking up amazing roadside finds to decorate her home in Minnesota.
- I am from North Carolina and love filling my farmhouse and beach cottage with thrift store finds. I focus on budget-friendly decorating and DIY projects.
Robyn’s – Coastal Grandma Christmas Decor / Lora’s – Vintage Christmas Decor Finds / Ann’s – Vintage Christmas Decorations Mother’s Attic

These are beautiful. I always find nativity sets and wonder if they could be fixed up a little, now I know. Thanks thanks for sharing this!
Susan,
I’m so glad this was helpful for you. It’s amazing what a little paint can do. Good luck finding inexpensive sets this year. Have a blessed week.
Love all your nativity ideas, Rachel, and yes, yours is so similar to the one we have too. Such fun ideas, happy holidays to you and Brad!
Ann,
Thank you for your kind words. Have blessed week.
Rachel, you did a beautiful job rescuing all three Nativity sets. I really like how you created a new baby Jesus.
Angie,
Thank you sweet friend. I’m glad you like them. Have a blessed week.
I literally laughed out loud when I read “ugly”. OUT LOUD! And I can see your point. But goodness me, you outdid yourself with the baby Jesus in the second one. That’s the deal of the year! I bet they wish they had thought of that! Great transformations.
Cindy,
Thank you! Yes, it was a steal. Thank you for your comments.
I love finding old nativities and giving them new life. Yours are lovely!
Amber,
Thank you for your sweet comments. I’m so thrilled with how they turned out and you con’t beat the price. Have a wonderful holiday.
I spray painted my old set white years ago and have loved using it in my decor. Love these other great ideas, Rachel. There’s always plenty of nativities to be found thrifting, especially out of season;) Great ideas!
Lora,
Thank you! Yes, I’m not seeing as many now. I guess everyone read my post. LOL