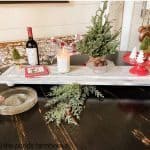
How To Build A Wooden Table Riser
Easy to make DIY Table Riser
Equipment
- Table Saw
- Cordless Drill
- Mouse Sander
- Clamps
Materials
- 1 - Select Pine Board - 1 x 10 x 4
- 1- Select Pine Board - 1/4 x 6 x 3
- 4 - Unfinished Ball Knob - 2 1/2"
- 1 - Dowel Road 3/16 x 36"
- Wood Glue
- Stain
- White Chalk Paint
Instructions
- Begin by cutting your 4' board down to 40" long.
- Begin by placing the smaller board in the exact center of the larger board and use a pencil to mark the placement. Then turn the board over and apply a very thin layer of glue over the surface of the backside.
- Next, clamp the two boards together until the glue is dry. Place a protective layer between the top board and the clamp to prevent bruising of the delicate pine wood.
- Determine the location of the feet. Then drill a 3/16" hole, using a cordless drill, approx. 1" deep, allowing the hole to go through the 1" board and slightly into the 1/4" board.
- Cut the dowel rod into 4 - 1 1/2 inch pieces.
- Add a drop of wood glue to both ends of the dowel rod and insert the ball knob and the drilled hole in the bottom of the riser.
- In order to allow the glue to dry, I placed the riser on a level surface and put heavy books on top. This will ensure that the ball knobs don't shift and become uneven.
- To make the edges less sharp, use a mouse sander to round all the edges, including the top board edges. Distress more, if desired, with a hammer, screws, and nails to dent the wood.
- Next, stain the entire piece. I used Antique Walnut Gel Stain, which can be applied with a clean cloth.
- Next, I chose a dry brush technique using Old White Chalk Paint to create an aged look.
- Seal with Clear Wax.