How to Make Nonslip Rugs
Do y’all have trouble keeping your rugs from slipping? Would you like an easy, inexpensive solution?
Here is an easy, inexpensive solution to make your own nonslip rugs without those pesky mats that are supposed to make your rug nonslip.
I have struggled with keeping rugs from slipping and sliding for years. I’m so excited about this latest solution, and I’m sure you will be as well.
Let’s take a look at our options first, and then I’ll share my DIY Solution.
(Posts on The Ponds Farmhouse may contain affiliate links. As an Amazon Associate, I earn from qualifying purchases. See the full disclosure details here.)
Large Non-Slip Rugs Solutions
First, most large rugs are anchored with furniture. You may want to add a rug pad to provide extra cushion and to prolong the life of your rug. You most likely don’t need my DIY solution for rugs that furniture anchors.
There are a variety of options, and if your rug is really thin, a thick rug pad like this one may be a good solution. It’s great to make the rug non slip and provide cushion.
If your large rug needs a lightweight solution and you don’t want to invest in a rug pad, this simple pad will work great.
Examples of Large Rug Pads
(Click to Shop)
Thick Gripper Pad / Felt Pad / Protective Cushion Pad / Washable Gripper Pads
Small Rug Solutions
Small rug nonslip solutions have been harder to work with.
You have the same rug pad solutions but without the anchor of furniture to keep them in place.
Most of my smaller rugs are at the door, beside the bed, or in front of a sink.
I’ve purchased rugs with a built-in grip, such as bathroom rugs and sink rugs.
However, I love a beautiful rug, and many of the ones I want to use don’t have the grip backing.
Options to make your rug nonslip
Here are the traditional nonslip rug options that I’ve employed in the past.
No great solutions
I’ve used all these solutions without great success. The pads are either too thick or want to wad up under the rug.
The tape sticks to the floor instead of the rug and attracts all types of debris. The corner grips leave the center of the rug loose, and it will still slip if you’re not careful.
So, I decided to try this DIY Solution.
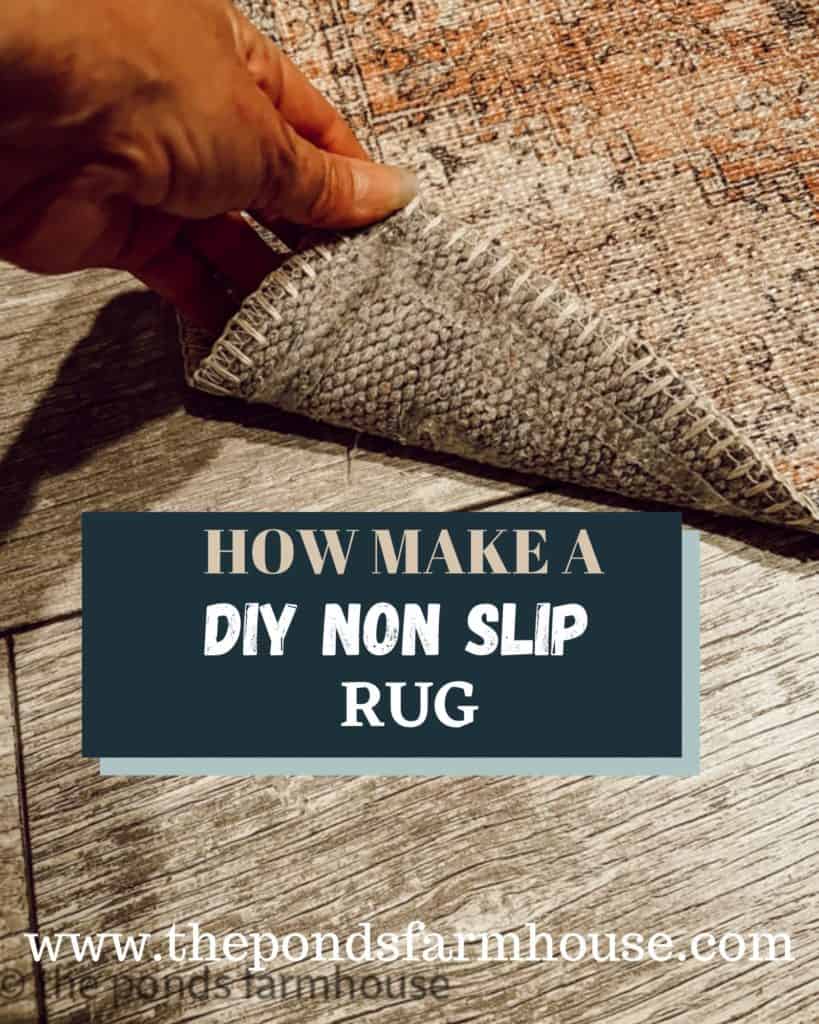
How To Make A DIY Non-Slip Rug
First, you will want to test this technique on an inexpensive rug to ensure that you are happy with the results.
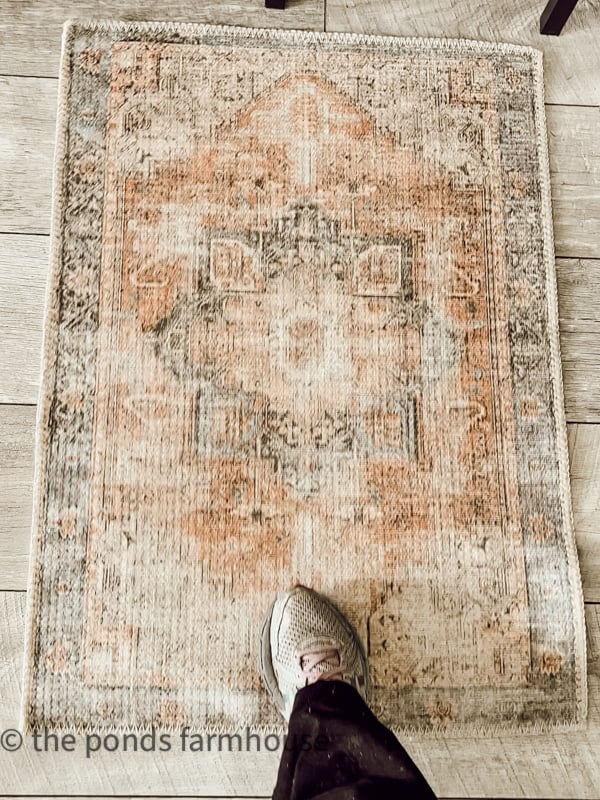
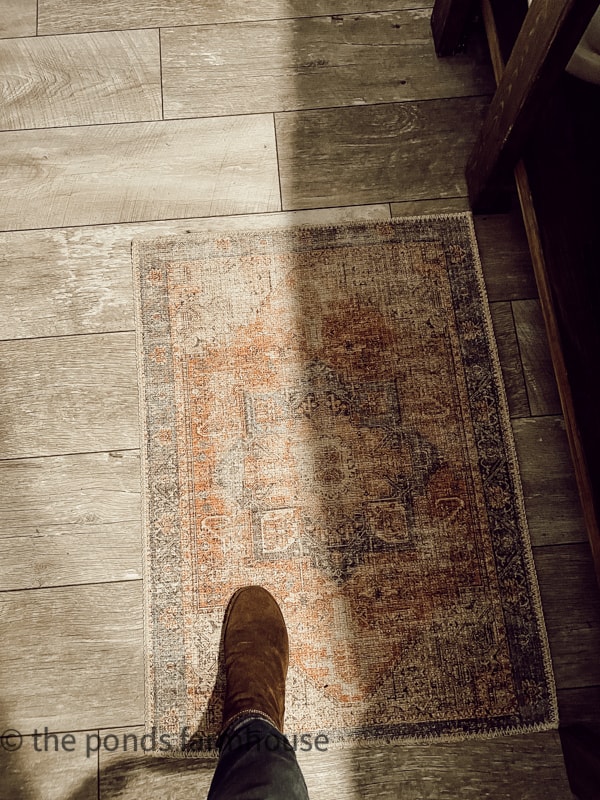
I was very happy with my first rug, so I decided to make this new rug from Boutique Rugs a nonslip rug.
The rug is for our beach cottage, and with the new laminate flooring, it was slipping all over the place.
Also, it was curling around the corners, which was making it a trip hazard.
Creative Answer For DIY Nonslip Rug
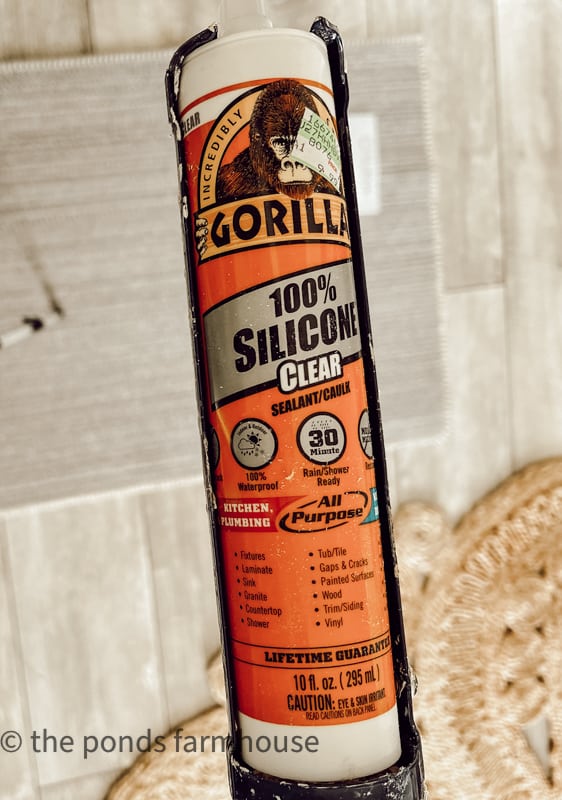
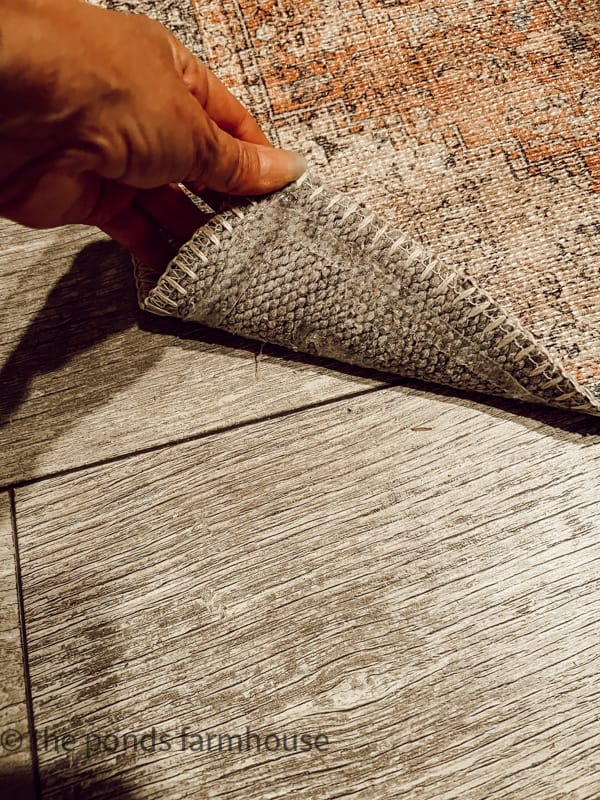
You will need 100% Silicone Sealant and a caulk gun. If you are only making one rug nonslip, you can purchase a smaller tube and avoid the caulk gun.
One of the larger tubes will cover several rugs.
It’s just a simple process of applying the silicone around the edges of your rug and then crisscrossing the middle of the rug.
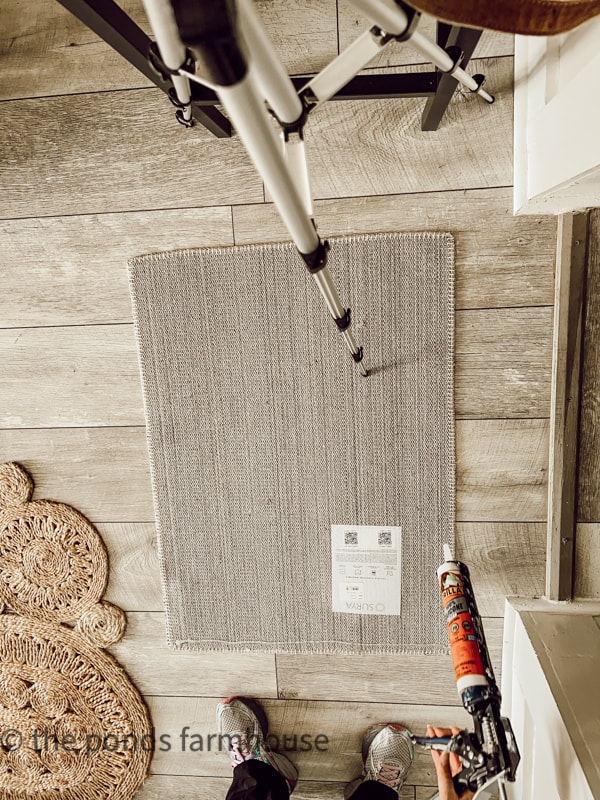
It’s difficult to see the sealant because I used a clear, but hopefully, you can see coverage.
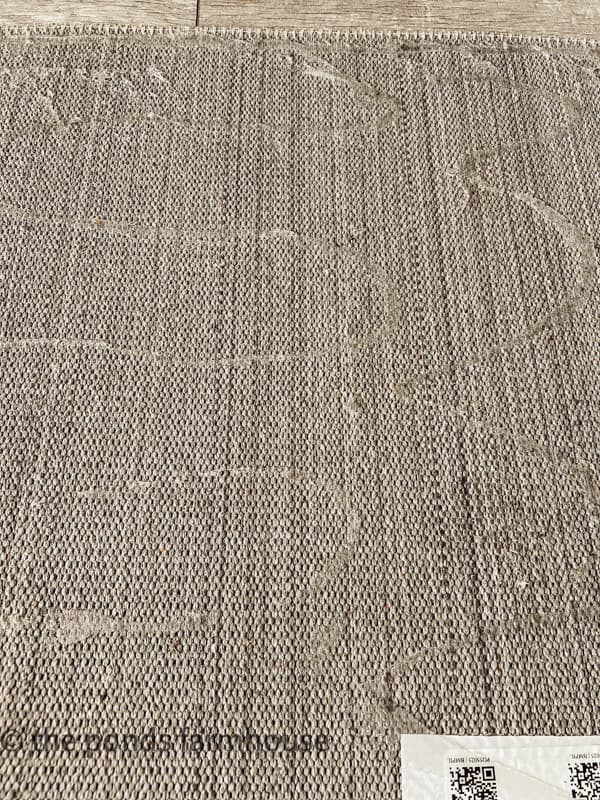
Finally, use a spatula or paint scraper to smooth out the sealant and press it into the back of the rug. Allow the rug to dry with the sealant side up for 12-24 hours.

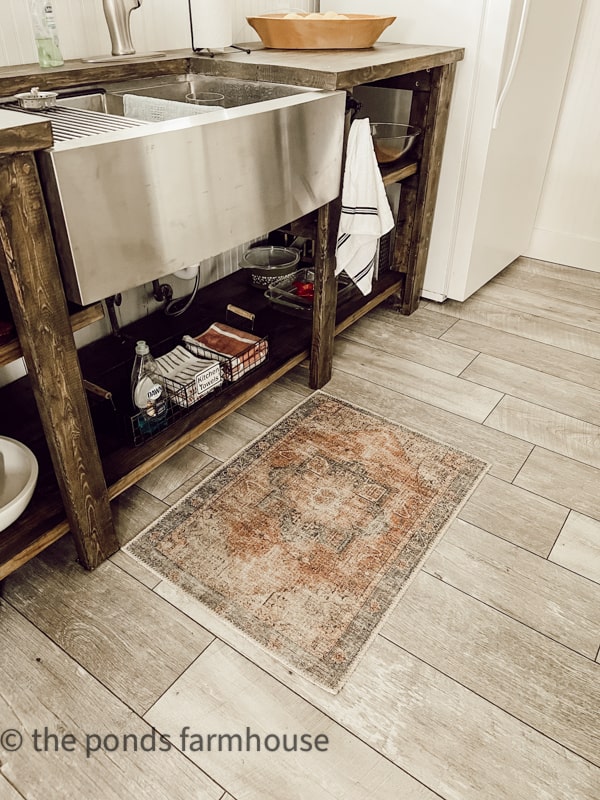
Place your rug
Place your rug on the floor and press down in all areas. I walked over the rug several times to set.
When I tried to slide the rug, it was secure in all areas.
In addition, the corners were no longer curling as they previously did.
Although the rug was very secure and didn’t slide at all, I was able to lift the rug and move it easily.
Both rugs are in our beach cottage, and I’ve only had them down for a week, so I can’t attest to this method long-term. However, I will post an update.
I do plan to add sealant to rugs that I have in the farmhouse as well, so I’ll keep you posted.
Update on DIY Nonslip Rug Technique
I have now had my rugs in place for over a year, and the heavier bedroom rug is still nonslip and works perfectly.
However, the rug in the kitchen is very lightweight and gets lots of traffic in front of the sink. It is still nonslip; however, the corners began to curl after a few months. So, although the rug is sliding around, it’s still a trip hazard.
I added washable gripper pads to the corners that were rolling, and now the rug stays in place and isn’t rolling on the corners.
Final Word
Would I still recommend this option to make a rug nonslip? Yes, although the small kitchen rug wasn’t a 100% success story, the rug is much safer than any of the previous options I tried. It’s still nonslip, and the grippers keep the corners from rolling.
The heavier-weight rug, located beside the bed, is still working perfectly after a year.
I hope you found this helpful.
Thanks so much for stopping by today!

Pin It To Remember It
Did you find some great ideas you’d like to save for future reference? Hover over the images you’d like to save and pin to your favorite Pinterest Boards when you see the PIN button.


Fabulous idea!!
Jane,
I’m so glad you like it.
What a great idea Rachel!!!
Stacy,
Thanks so much.
Sounds great. I have used rug tape and, unfortunately, it has stuck to the floor and will take some work to get it up.
I like your idea. You knocked it out of the park with this simple idea.
Thank you so much.
Diana,
I’m so glad you like this simple tip.
Wow I hope that works. Thank you for posting. And I hope it doesn’t wash off when you wash the rugs. Many blessings from Willis, Texas at The Ponds’ Pond! (That’s how I found your blog, because of our name (Pond) and moving to property with a pond!)
Oh, wow! That’s so exciting. Thanks for stopping by Sherry.
Years ago I watched Martha Stewart do this same kind of thing, but with a hot glue gun and hot glue. I never tried it but I would be more comfortable with your idea. I could never let myself use hot glue on a rug I had spent so much money on.
Mary,
I’m hoping this continues to work. Thanks so much.
Oh my goodness, I have to try this. I have to admit, I was a bit concerned until you showed that the rug can be lifted. Hugs to you.
Renae,
You just want to let the sealant dry before placing the rugs.
Rachel, I totally need to do this. I have been looking for something as with all our wood floors Ella slides and moves our rugs alllllll the time. This looks perfect. Totally going to try this! Thanks.
Ann,
They are really secure, at least so far.
Oh, using the caulk gun and silicone is such a great idea. I have some small rugs that are starting to curl on the edges so might have to try this.
Teddee,
Thanks so much for stopping by. I hope this works for you.
I can’t wait to try this! Slipping rugs is an ongoing problem here. I have tried all of your other methods plus several others. None were really satisfactory. I have tried caulk and it worked fairly well. I hope that this sealant will be the answer to my problem too! I wonder how it will hold up to cleaning???? Thank you so much for sharing a great idea!
Frani
I hope this works for you as well. I’ll keep you informed about the cleaning part.
What a genius idea, Rachel! We have a rug in our kitchen that I totally need to try this on and I’m pretty sure once the laundry room is finished we’ll need a no-slip option in there as well. Thanks so much for sharing! Hugs, CoCo
I’m so glad you like this idea CoCo.
This is such a great idea!
Thanks so much
This is the best idea Rachel! I can’t wait to try this with my rugs. Thanks for the tip.
I hope it helps.
I enjoyed this post so much and I wanted you to know that this post will be featured in the next Tuesday Turn About Link Party! Thanks for sharing your tips and I hope to see you at next week’s party! 😊
Cindy,
Thanks so much. I’m so glad you liked this post.
Thanks so much for the feature.
It is a caulk gun not chalk which is white and used on chalk boards at school. Great idea though and one I am going to try tonight. My wife was ready to throw it out, now I’ll fix it. Thanks for the tip.
Tim
I’m so glad you found this helpful.
Can you do this method with cotton rugs for the bathroom?
Valerie,
I would give it a try. I believe as long as the adhesive sticks, it will work.
@Rachel, thank you so much 😊
You are welcome.
Does it make it through a cold water wash?
Delinda,
I’ve washed mine twice with no problems. Thanks for stopping by.