I’ve been making scrap fabric pillow covers for every season and I couldn’t let Christmas pass without a holiday Christmas Pillow Cover.
Here is an easy DIY Christmas Pillow Cover with a whimsical Christmas Tree using scrap fabrics. These simple instructions include a graphic for the Christmas Tree as well as a video tutorial.
You can see all the previous scrap pillow tutorials. Each one is slightly different but the same basic concept.
Previous DIY Scrap Fabric Pillows
DIY Christmas Pillow cover
There are so many options for making this DIY Christmas Pillow Cover. I used fabrics left over from this patchwork table cloth tutorial, I shared earlier this season.
This pillow cover has a vintage, whimsical feel.
In order to trace the design, I began with a template that I could slip inside the pillow cover.
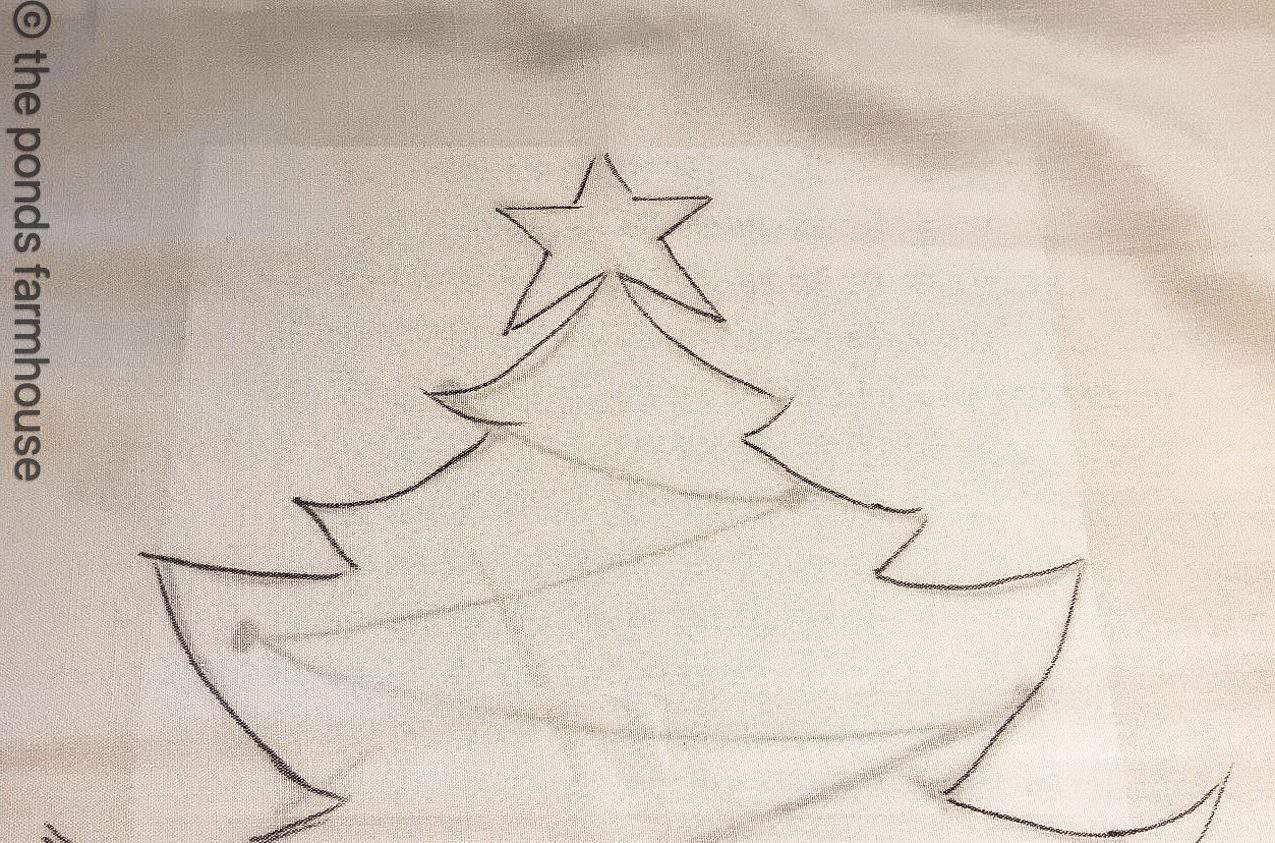
Be sure to align the template in the center of your pillow cover to trace.
Christmas Tree Template Graphic
Christmas Tree Graphic – Download Here
The graphic is two pages. Print out both graphics and overlap the two pages by lining up the design and tape together to place inside your pillow cover to trace.
Materials for DIY Pillow Cover
- Pillow Cover 20×20
- Fabric Glue
- Sharpie for tracing
- Christmas Tree Graphic
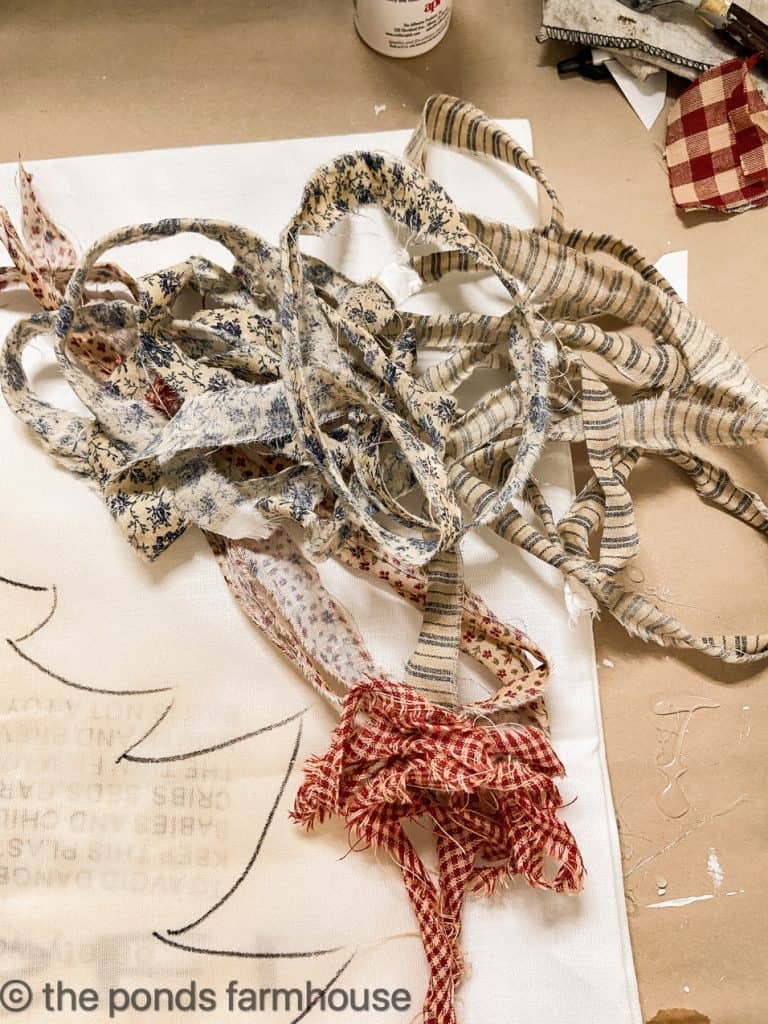
- Scrap Fabrics – I used 5 different fabrics
- Scissors
DIY Pillow cover
After you have traced your design, begin by adding a protective layer between the fabric of your pillow cover. I slipped a plastic bag inside to prevent to fabric from sticking together.
You are now ready to start your design.
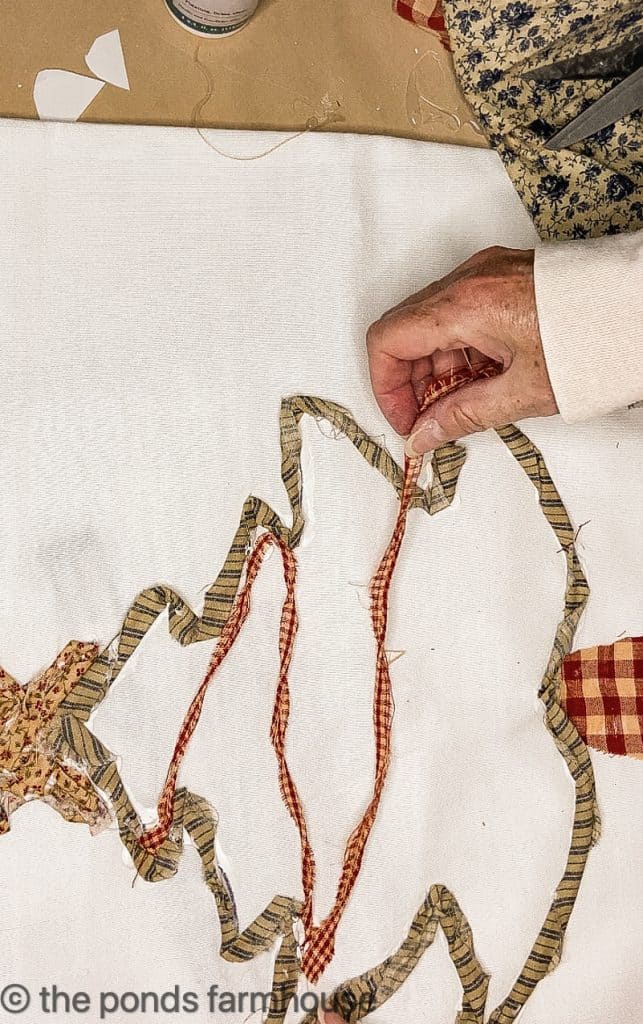
Rip your fabric into 1/2 inch wide strips. You only need a few strips of each color.
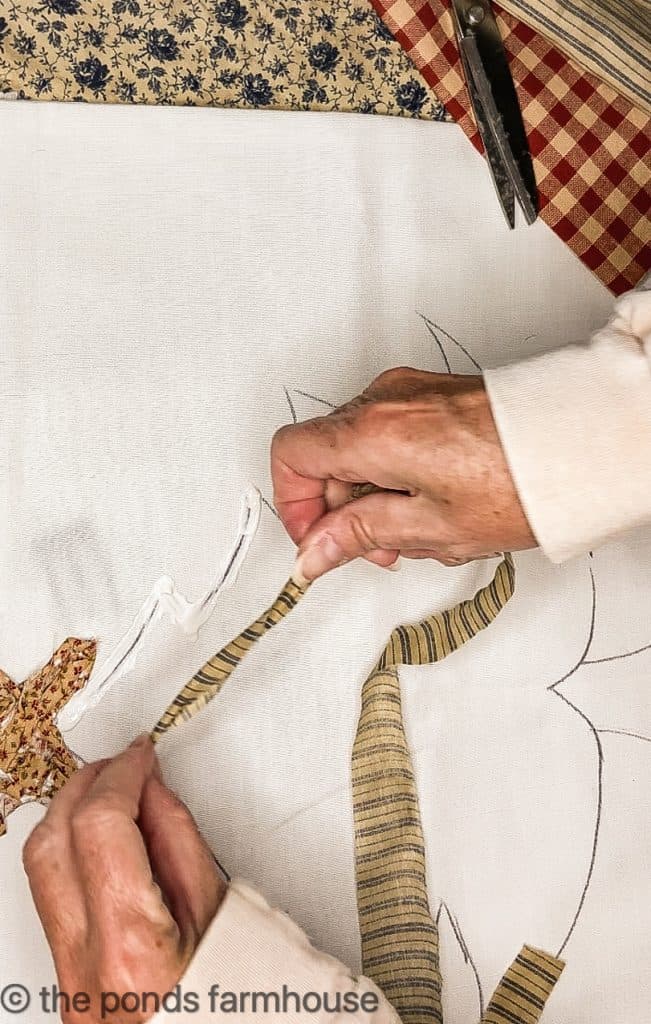
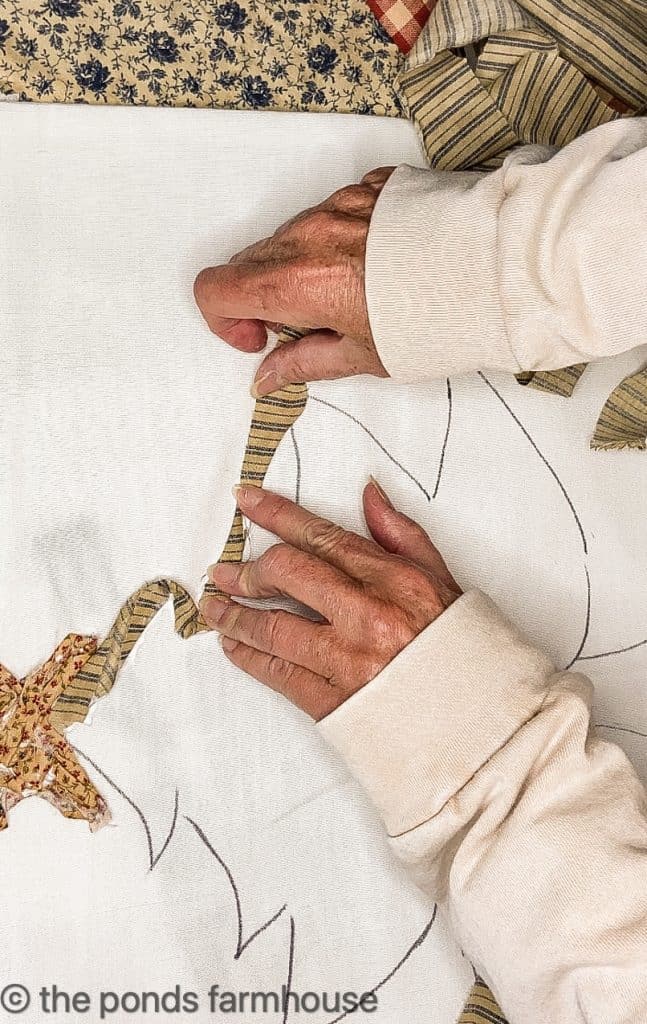
Start by applying a bead of glue along the design. Then twist the strip of fabric and begin to outline the design.
I completely filled the star with fabric, however the tree is just outlined.
Add the trim
Next, trim your tree with a zigzag of twisted fabric.
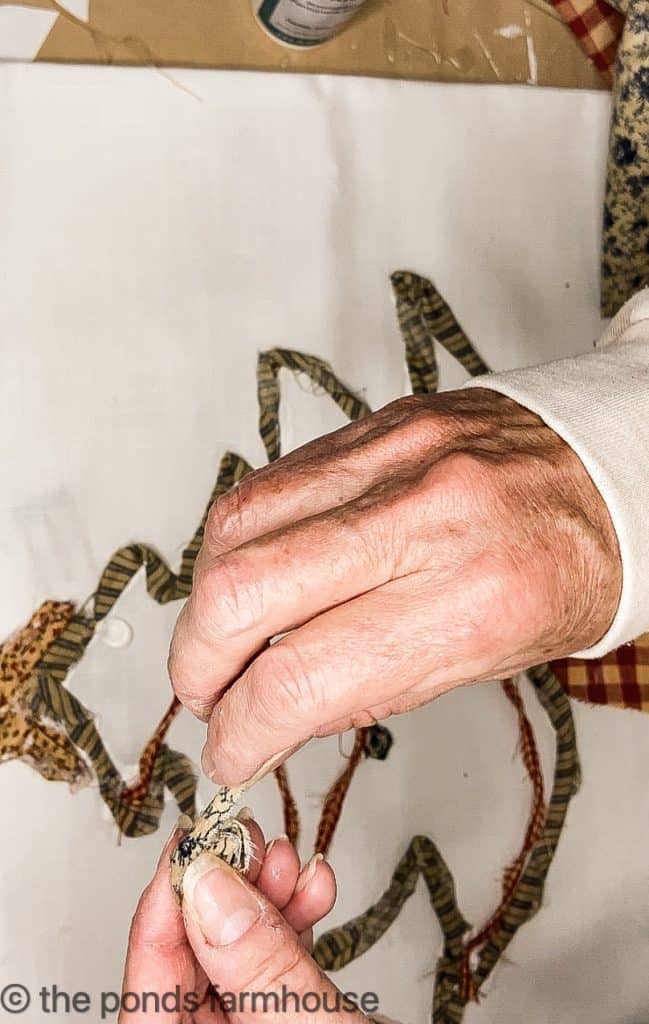
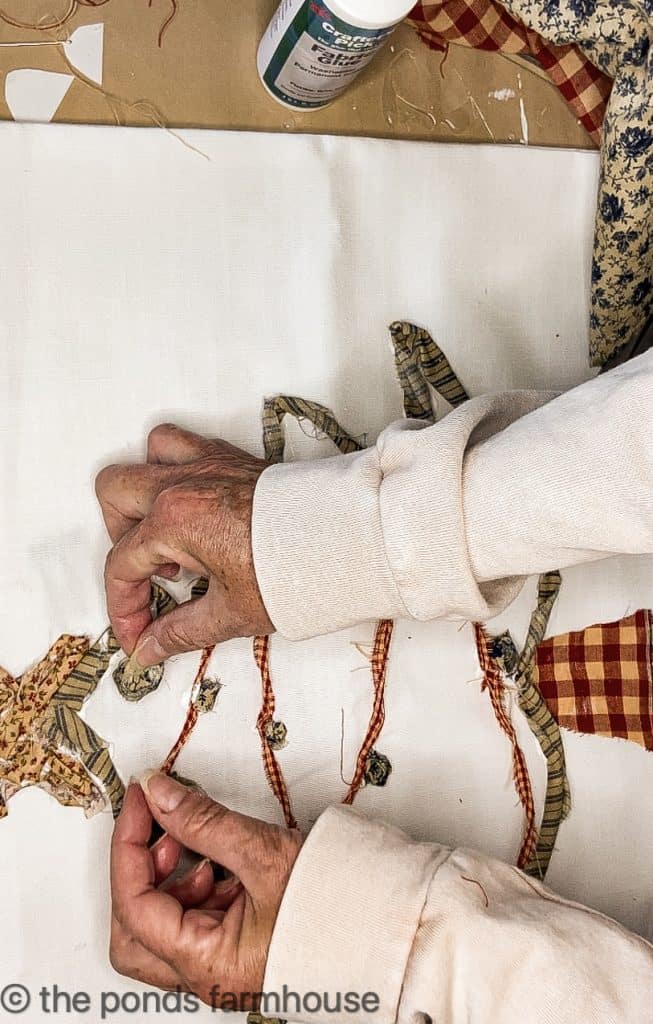
Next, to add Christmas balls, roll small sections of fabric into a circle and apply with a generous dab of fabric glue.
The tree trunk is a solid piece of fabric which is outlined with a contrasting strip of twisted check fabric.
In addition, I added a narrow piece of the tree fabric across the top and bottom of the pillow with glue.
After the pillow was dry, I added the pillow form but felt there was something missing.
Stain the DIY Pillow Cover
To give the tree some contrast, I decided to stain it with coffee.
I just dabbed a little onto the tree area with a paper towel.
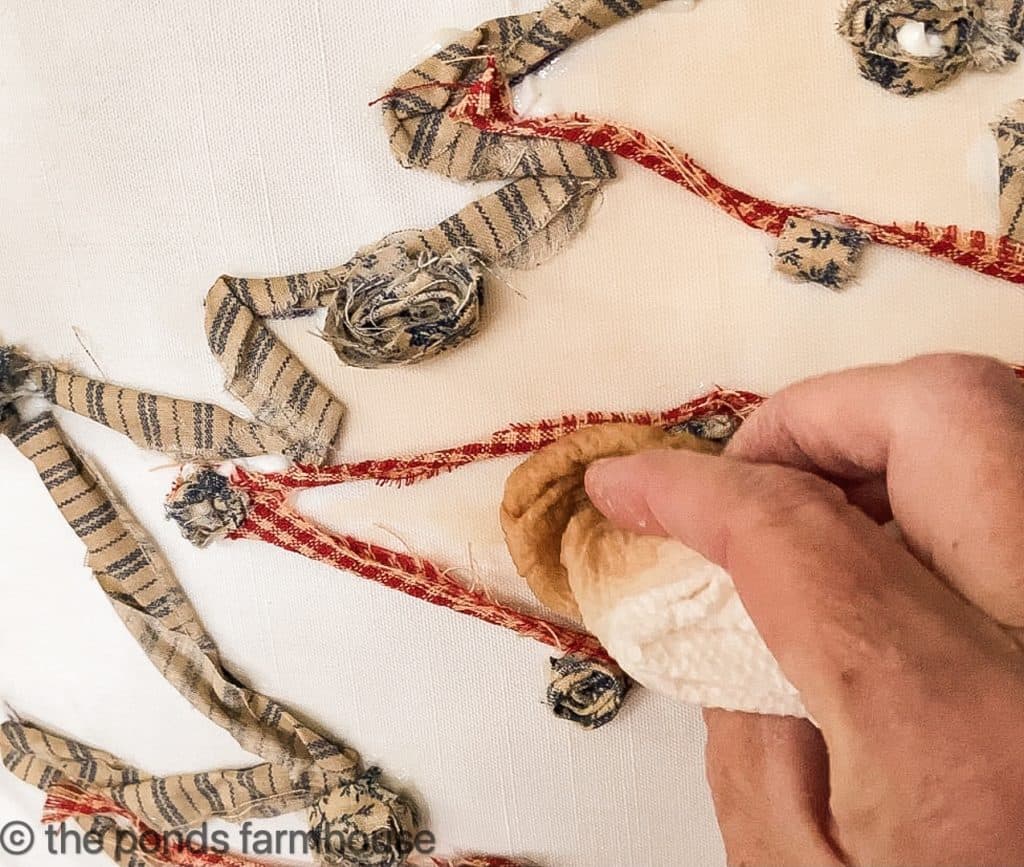
Caution
Be cautious to only add a small amount of coffee to your pillow cover. I was a little generous, which resulted is some bleeding out beyond the tree.
This was cleaned up with a little OxyClean and all is okay.
I’m loving the added contrast.
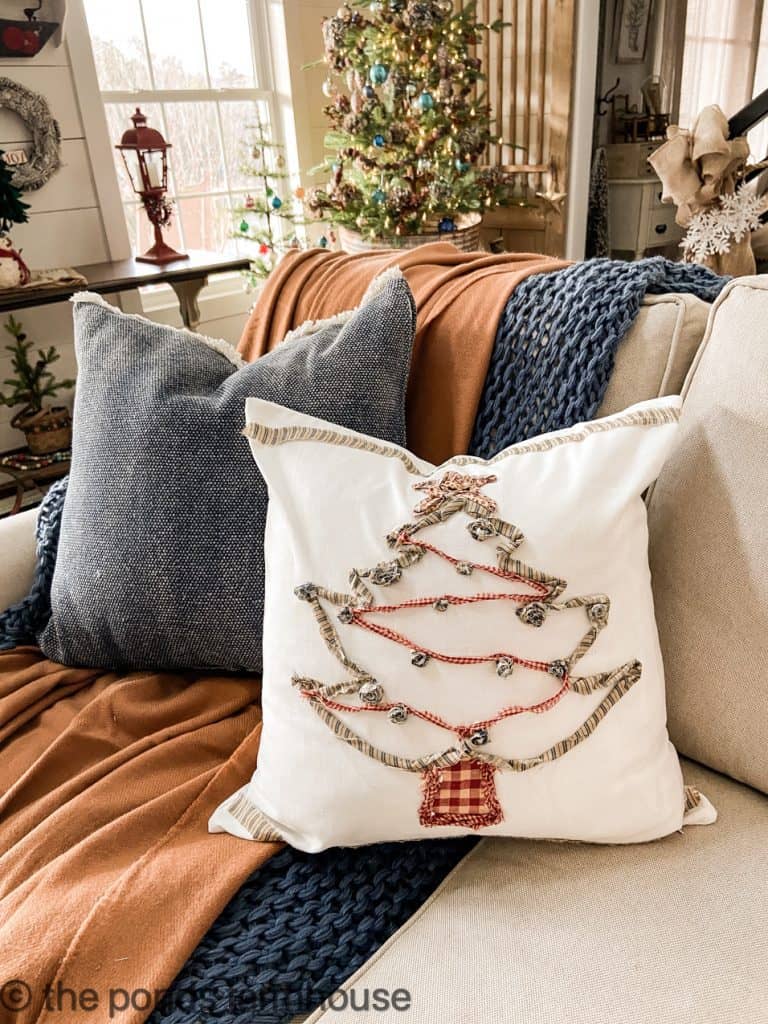
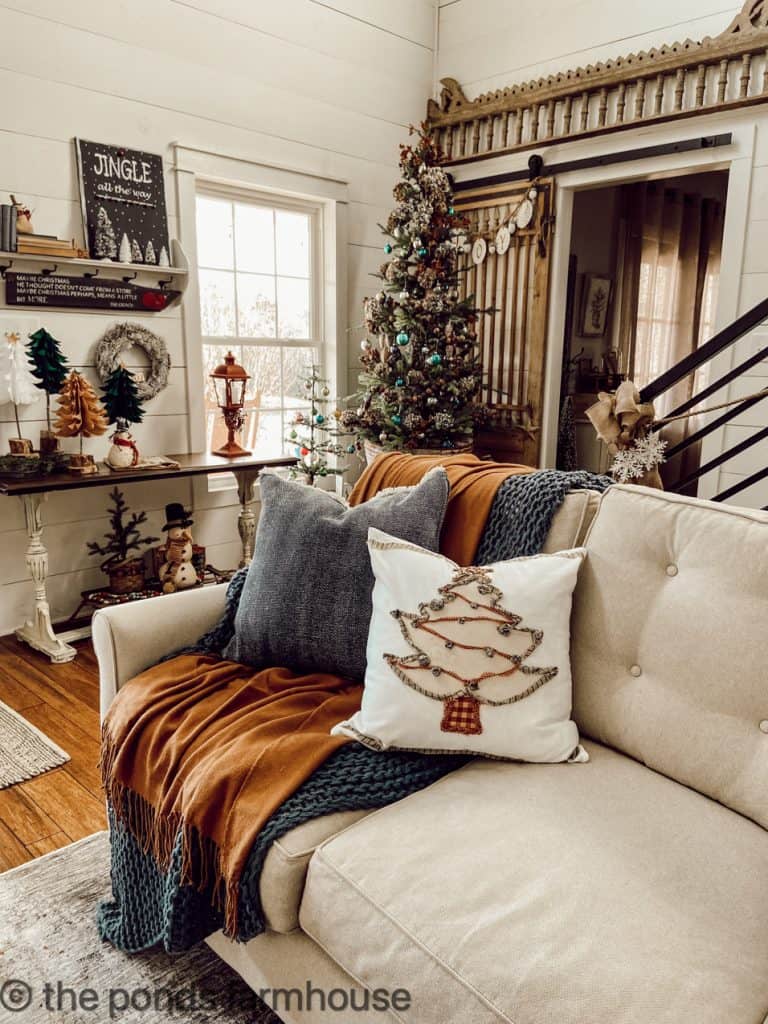
Christmas Tree Pillow Cover
The pillow cover now has a vintage feel and the colors really enhance the overall feel of my Christmas theme this year.
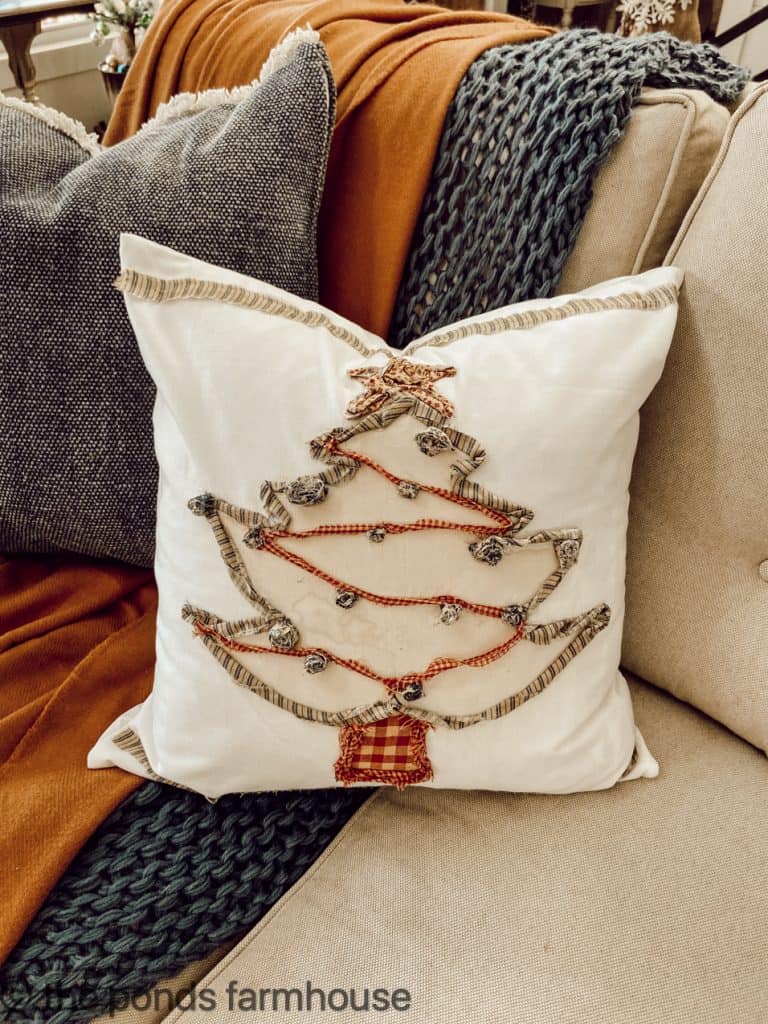
Rusty reds and blues were inspired by the dried hydrangeas I used on my Christmas Tree. You can see How to Decorate a Christmas Tree with Dried Hydrangeas here.
I hope you enjoyed this tutorial.
Thanks so much for stopping by today. I look forward to sharing my next adventure with you.

Pin It to Remember it
Kim | Shiplap and Shells
Sunday 12th of December 2021
This is one of my favorite pillows of your Rachel! It's wonderful!
Rachel
Tuesday 14th of December 2021
Thanks so much Kim.
Stacy
Tuesday 7th of December 2021
I love this one!!! So cool!!!!
Rachel
Wednesday 8th of December 2021
Stacy, Thanks so much.