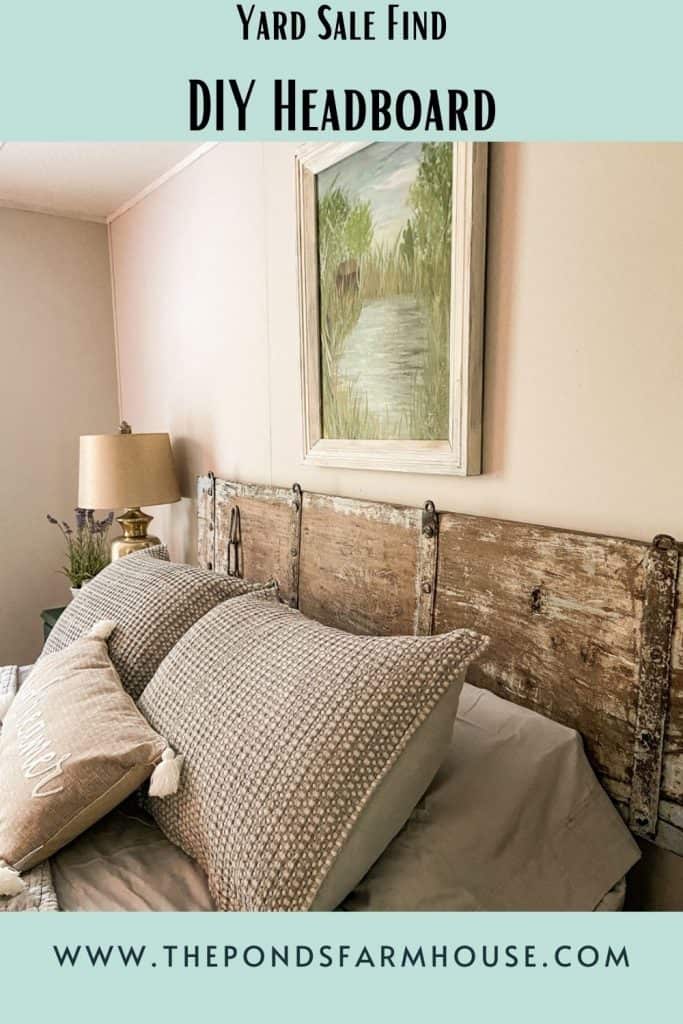
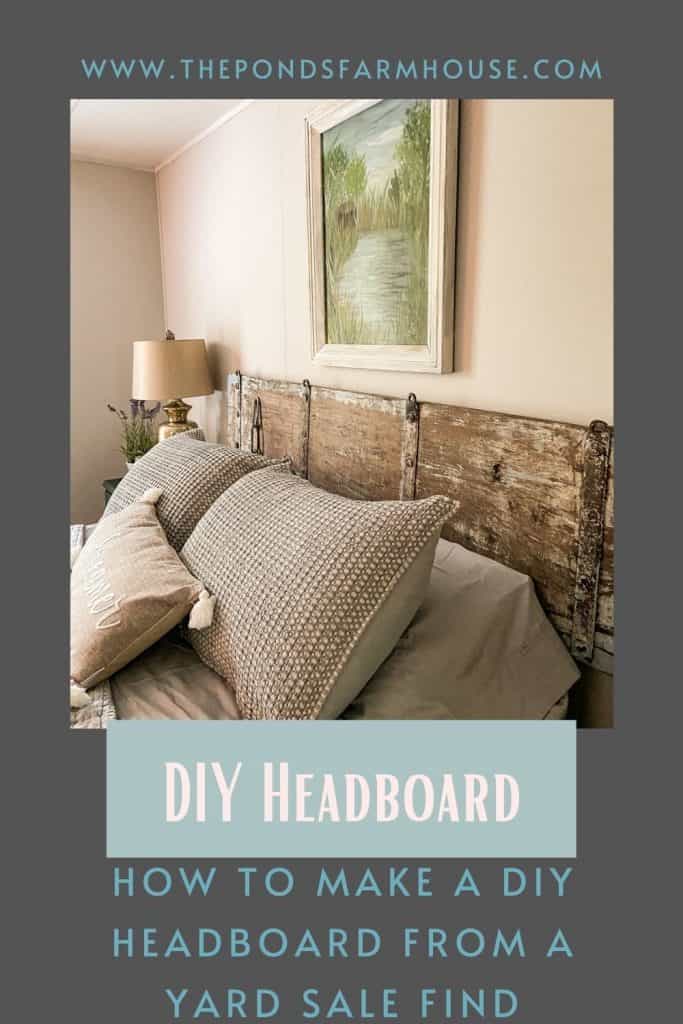
Today I’m sharing how to make a DIY Headboard from a recent Yard Sale Find. This includes how to secure a heavy headboard to the wall for safety.
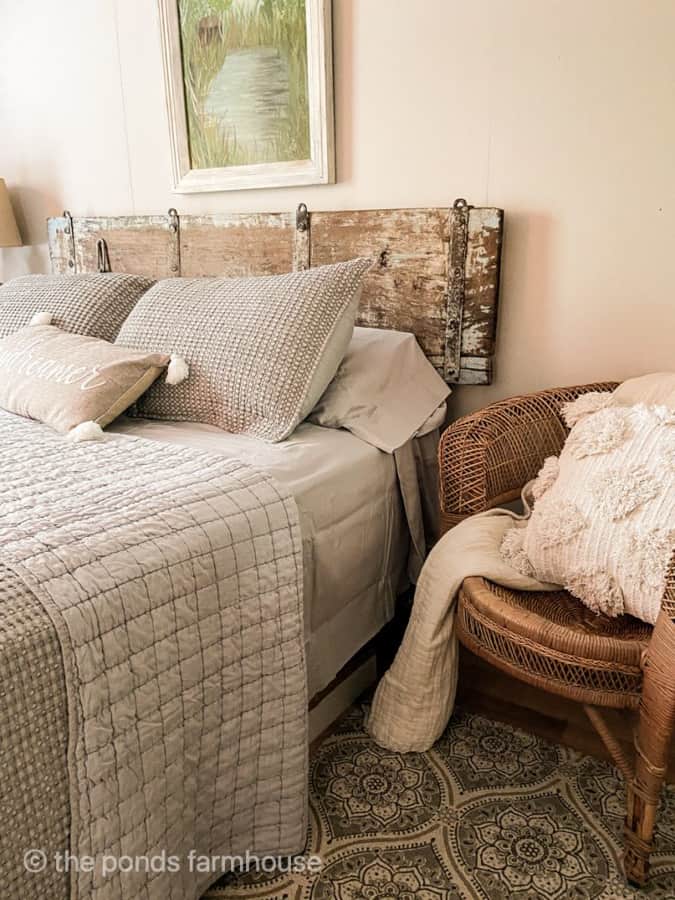
We are renovating our guest cottage here at The Ponds. This is the original home we used before building our farmhouse and moving here full-time. Many updates were needed, and the master bedroom needed a new headboard. We found the perfect piece at a recent yard sale.
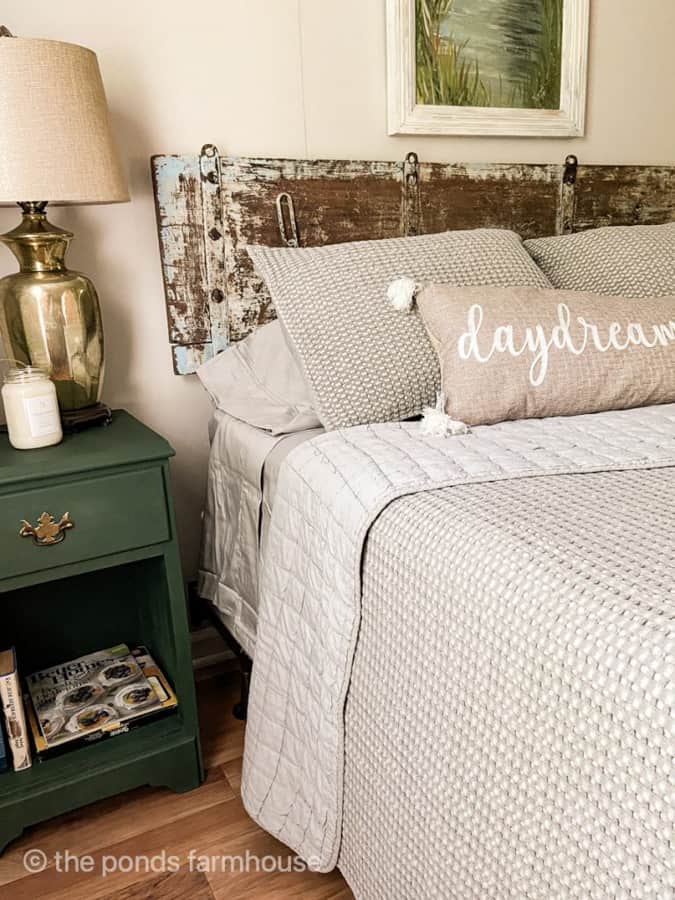
In addition, to create a cozy, welcoming guest cottage, we’ve updated the master bedroom with new bedding and new paint and painted the old nightstand for a fresh update.
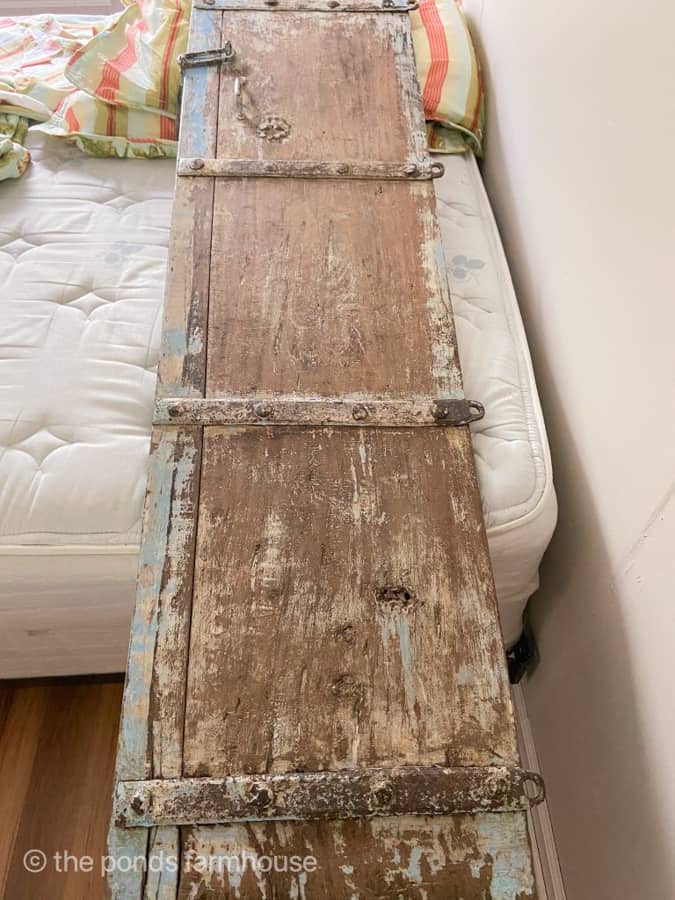
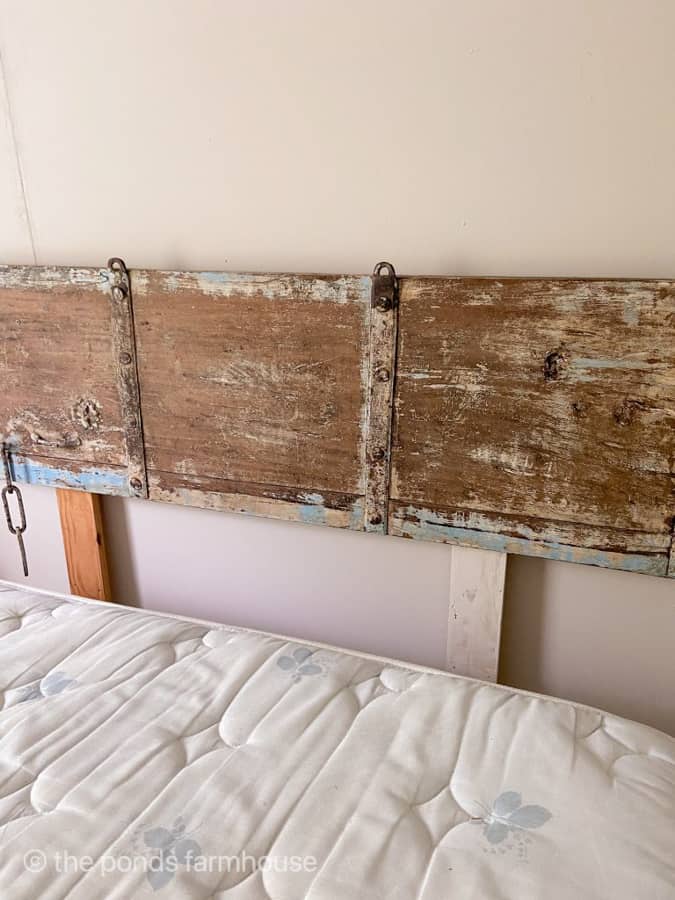
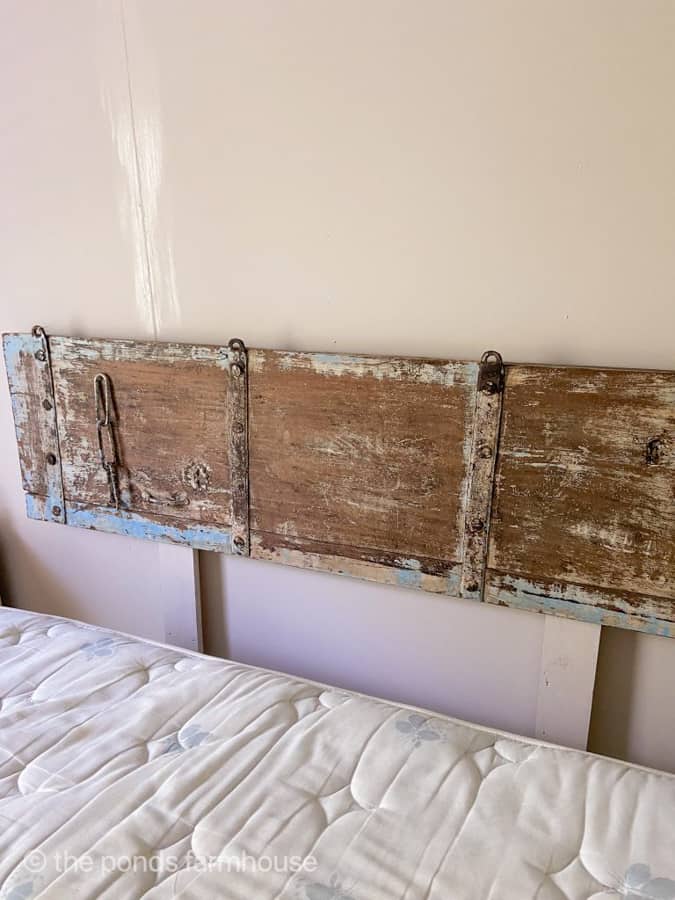
We recently found a great deal on an old shutter at a friend’s yard sale. I knew immediately that it would make a great headboard for the guest cottage. However, it was cumbersome, and I was concerned about it falling on someone’s head. Yikes!
So here’s what we did.
Materials for DIY Headboard
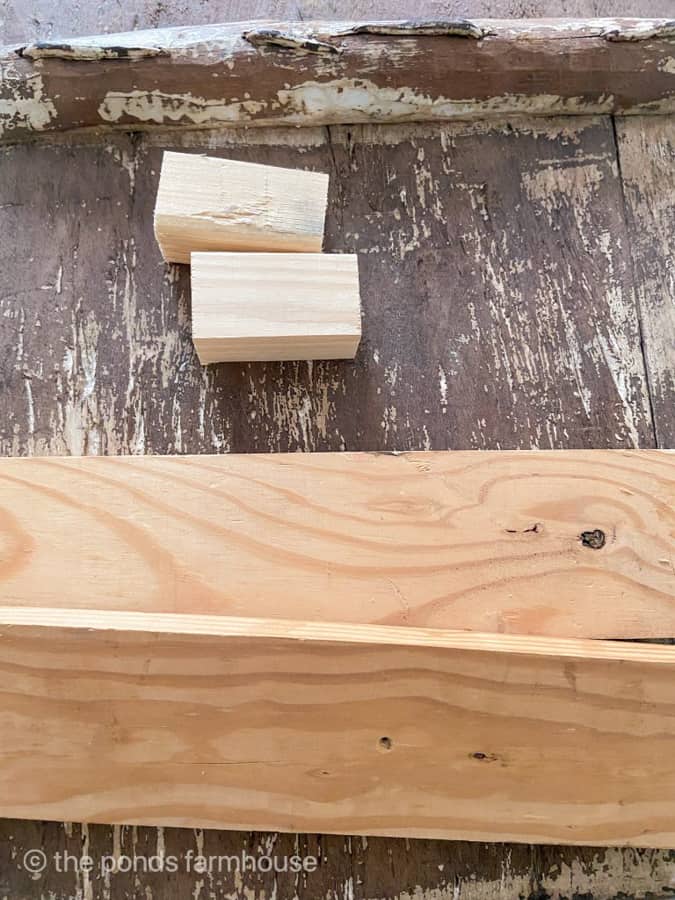
We had some 1″ by 4″ lumber left over from a previous project, and it was exactly what we needed to make two legs for the shutter.
Because of the shutter’s design, it was necessary to add some spacers. We used leftover 2-inch thick boards and a few screws to secure the spacers.
Begin by deciding where you want the headboard to rest on the wall above the bed.
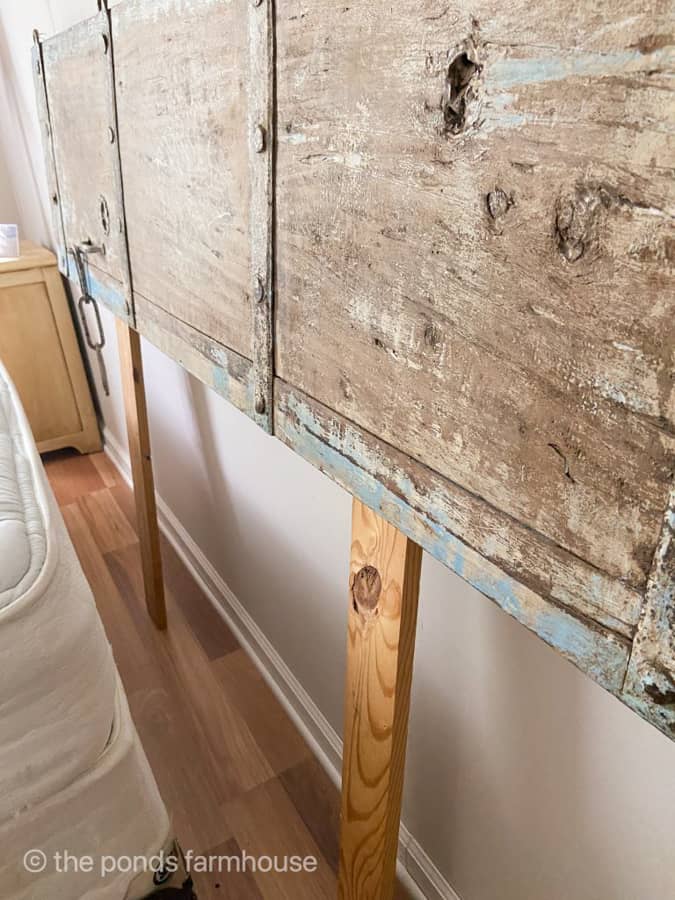
Next, measure from the floor upward to a position approximately in the center of the headboard once it’s attached to the wall. Then cut the 1″ by 4″ boards to the correct length.
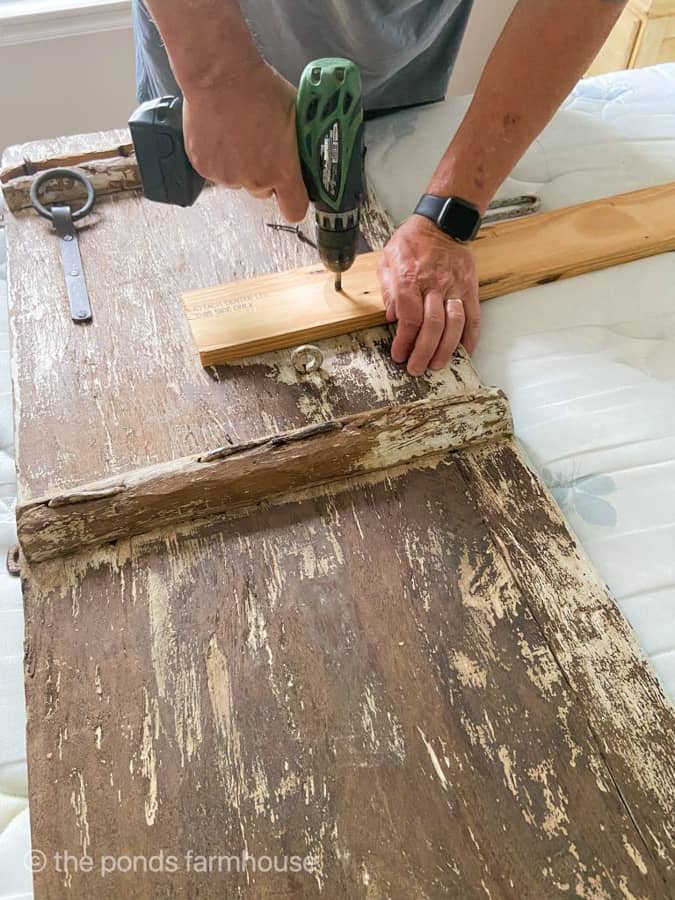
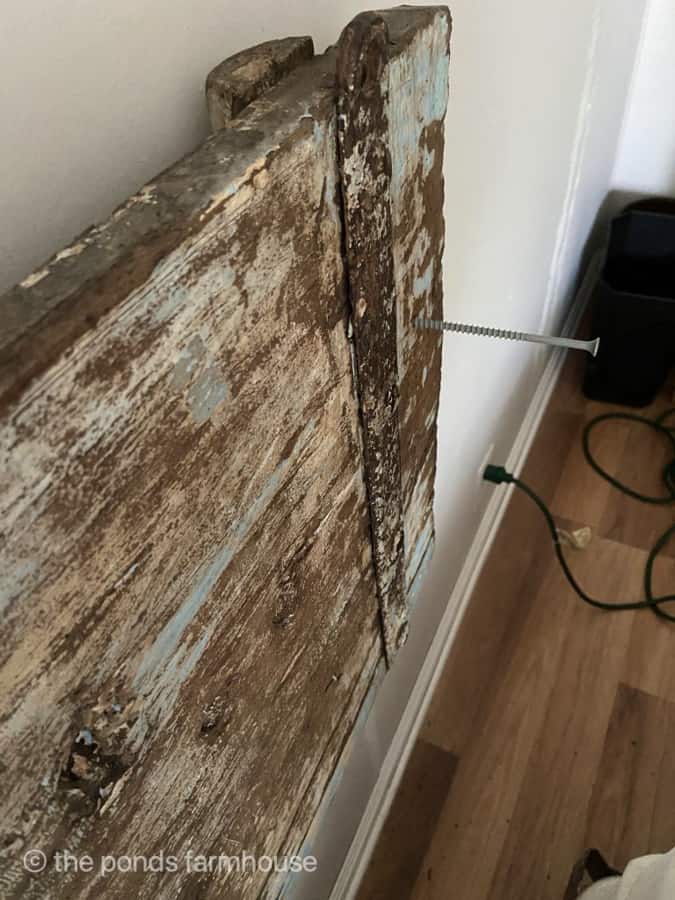
Using a cordless drill and wood screws, secure the legs to the headboard from the backside.
Note: Be sure the screws are the correct length to avoid them coming through the front of the headboard when attaching the legs.
We used some of these techniques when making the DIY Address Sign for our front porch.
Secure DIY Headboard to the Wall
Now attach the spacers to the wall to align with the wooden legs attached to the shutter. Secure with a minimum of two screws reaching into a wall stud.
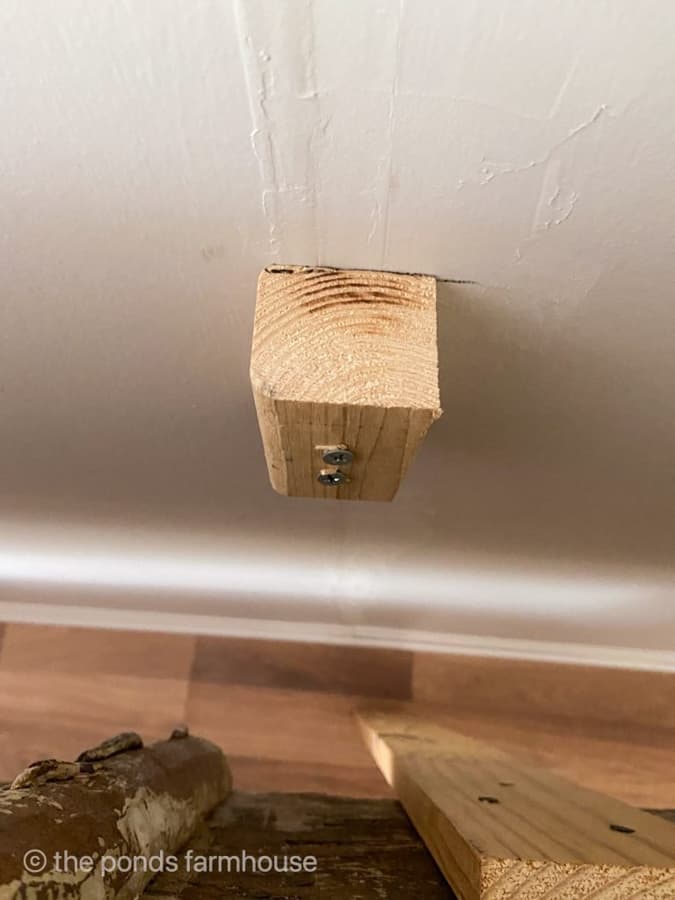

To attach the headboard, use a screw that will be long enough to go through the headboard, the leg, and the spacer and, if possible, into the wall stud itself.
Disclaimer: Please note that extra security should be taken to assure that the headboard is firmly attached to avoid it falling onto the bed. You may need additional attachments if your headboard is heavy or doesn’t have legs. Since the shutter is heavy, we used extra precautions by attaching the legs that rest on the floor. All of our attachment screws are imbedded in secure wall studs. If that is not the situation, you will need to use proper wall anchors that are recommended for the weight of your headboard.
Paint and touch up Headboard
Finally, paint the legs to match your wall paint color, so they are less visible. You should only see them when the bed isn’t fully made.
Because of the rustic nature of our head broad, we did not try to disguise the screw heads. However, if your design is less rustic, you may desire to counter-sink the screw and fill it with wood putty and paint.
The Remodeled Master Bedroom
I’m loving the look of the master bedroom since all the renovations. The headboard is so fun and unique.
The carpet has been removed and new laminate flooring installed. The walls are painted Balboa Mist by Benjamin Moore and we have new bedding.
The new bedding is by Lev Tex Home and the comfortable quilt is the perfect color for the updated bedroom.
If you like yard sales and thrift stores, be sure to check out these Thrift Store Decor Ideas.


Simple Chalk Paint Makeover
Painting the existing furniture in the guest cottage is a simple way to update without spending a fortune.
See the video of the nightstand’s simple makeover.
You can also learn more about chalk painting on How To Use Chalk Paint.
Making the guest bedrooms cozy and inviting has been a priority since we began renovating. The new headboard and bedding changed the appearance of the room.
We continue updating the furniture and adding cozy touches like a fresh candle from Antique Candle Co. to the bedside.
I hope you enjoyed the DIY Headboard Tutorial and all the other updates made to the master bedroom. Stay tuned for more renovations and updates being made to the guest cottage.
Thanks so much for stopping by today. I look forward to sharing my next adventure with you.

Pin it to remember it
Wendy McMonigle
Monday 18th of July 2022
What a fabulous find Rachel and I love how you used it. The bedding looks great and gives the room a very cozy feel.
Rachel
Tuesday 19th of July 2022
Wendy, Thanks for stopping by.
Cheryl Atkinson
Saturday 16th of July 2022
Very cool shutter!! I love how you made it into a headboard. Brilliant!
Rachel
Monday 18th of July 2022
Cheryl, I'm so glad you liked this project.
Week In Rewind With Midwest Life And Style - Midwest Life and Style Blog
Saturday 16th of July 2022
[…] DIY Headboard […]
Kim
Saturday 16th of July 2022
Love the look- you have a great eye for your DIY's. Amazing bedding - however Lev Tex Home is for wholesale only. Any suggestions re: purchase? Thank you. I enjoy reading your posts
Rachel
Saturday 16th of July 2022
Kim, Let me see if I can find some shopping links.
Jen
Saturday 16th of July 2022
I love this idea, Rachel! We've been talking about updating my daughter's bedroom and this give me all sorts of inspiration for what we can do.
Rachel
Saturday 16th of July 2022
Jen, I'm so glad you found this helpful. thanks for stopping by.